Web
Analytics

New script – Shattered

cass-Shattered

How long would it take you to cut an image in random pieces, separate them in individual layers, resize them, rotate them, move them and then add shadows to each of them? With your Paintshop Pro and this script, it will only take you a few seconds and a few clicks. And if you dont like the result, no problem; run the script again. You will NEVER get the same result twice because of the random features incorporated into the code.

You can stop the script right after the pieces are cut and separated in layers, or you can keep going and get each piece slightly resized, rotated and moved randomly.

You can stop the script here too, or choose to add a drop shadow. In this case, you will decide on all the settings for the shadow and the script will apply the exact same settings on all the pieces, no matter how many there are. Since the script ends with unmerged layers, you can keep manipulating all the pieces as you wish, deleting some, moving others, etc.

You can get this script in either of my stores: Creation Cassel or DigiScrapWarehouse.

cass-Shattered-sampleHow about a chance to win this script for free? You can, by simply adding your name to this thread in the DST Forum, telling me of one creative use you can think of for this script, and Monday, i will announce a winner.

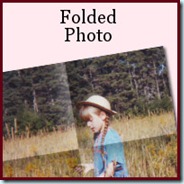
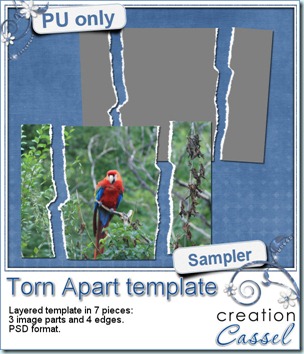
And now, as usual, you are expecting a freebie, right? Well, since this script applies on a photos, i could hardly give you a cut up picture. I am sure you would not care to get one of MY pictures! So, i figured i could make a layered template with the pieces still in place, not resized, rotated or moved. That way, you can apply that template to any picture of YOURS and create a similar effect.

You need to be logged in to download this sample. You can either login, or register on the top of this page.

Paintshop Pro X4 is out.

Paintshop Pro X4 came out Wednesday this week. I have been part of the beta testing team for a few months. If you want to know about the improvements or additions, and if it is not too late for you, you can join their live demonstration tonight (there is one left, and you can register here). One thing i can say is that it is more stable than X3 was, so it might interest you!

News about the Campus

Did you add your suggestions for which type of elements you would like to learn to create yourself? If not, it is still time. Just hop over to this page and add your name and suggestion. And then, be sure to check your emails or check the Campus again very soon as the Element Creation Tutorials section should go live within a few days. And you will have a chance for some GREAT bonuses. And i mean GRRRRREAT. Subscribe to the mailing list on that page, follow us on Twitter, or like us on Facebook to be sure you know when the section goes live because you dont want to miss the time limited bonuses!

See you around the Campus.

New script – Waterwork

cass-Waterwork

How about some fresh water added onto your layout? This script will convert the text or design of your choice into clear water, complete with shine and refraction from the bottom surface.

You can get the script to use smaller droplets to fill in the design, or use the shape as is. Use any color if you want to simulate juice drops!

Exceptionally, this script will only work with PaintShop Pro 9 and up (sorry for PSP8 users).

All the designs will be slightly distorted, so straight lines wont stay perfectly straight, and corners will be rounded off. Use the simple round brush and hand write or hand draw something. Draw random blobs to create droplets, or draw letters in an uneven manner for best result.

You can get this script in my stores: CreationCassel and DigiScrapWarehouse.

And how about winning this script? Check out this thread in the DST Happy Place. Simply give me ONE splashy word you can think of and add your name.

cass-Wet-Digits As usual, i have a little freebie for you. This is a set of wet digits on a tag. Each tag was made using handwritten digits run through the script. You get all 10 digits and one blank tag for you to add your own.

You need to be logged in to download this sample. You can either login, or register on the top of this page.

Each tag is pretty large so you can resize it as you need.


News from the Campus

Did you follow the newsletter from the Campus? Did you know that the second section should be released soon? Yes, the second section is all about creating elements yourself instead of solely relying on purchased supplies. You would then be able to either create your own elements yourself, from scratch with the shapes and colors you need, or you can learn to modify the elements you already have and personalize them to fit the layout you want to create. This should be open to registration soon. If you want to be among the first ones to register, you can add your name to this mailing list, and tell me which type of element/technique you want to learn about first. I have dozens and dozens of tutorials planned, but which ones will i release first? You tell me what YOU want! If you dont want to add your name to a list, you can just email me or even add a comment below. I will see it all.

Remember to keep an eye on the Campus and your emails as there will be some time limited special offers so, watch out.

Although most of you might be scrappers, i am sure you can find other uses for your scrapbooking supplies. Whether it is invitation cards, wishing cards, calendars, and more. Check out the article here.

New Script – FLower Power

cass-FlowerPower

This little script for Paintshop Pro might not seem like much but how often did you want to get a flower shape and had to do all the duplicating and rotating manually? This script will do just that for you. With a random feature integrated, you might get between 6 and 15 petals, and each petal will be slightly different in size and shape, so you will always get a new shape.

In addition to creating a different shape, you can generate it as a vector shape to be exported as a custom shape, so you can use it at any time, later on. You can choose to have it in layered raster with your choice of color, gradient or pattern, or you can ask for a plain basic flat sample, again in the color of your choice (perfect for layering).

Once the script is run, you can keep adding details, modify the individual petals, add glitters on the edge, re-arrange the petal order, remove one petal, etc. So many things you could do!

You can get this script in my stores: CreationCassel and DigiScrapWarehouse.

If you want a chance to win this script, simply go over to the DST forum, and add your name to this thread. I will be back on Monday with the name of a winner.

cass-FlowerPower-sample I am sure you are also looking for a freebie sample for this script. That is exactly what i did. I ran the script and got a few random shapes and i played with them. On one layered shape, i added a glittered edge with the Glittered Edge script on each individual petal, then i slipped the last petal under the first one for the  gold color flower. Then, i played with the Felt script to add a felt texture on 3 coloured copies of the same flower, and layered them. You get one PNG sample and the matching PSD format flower. Finally, i ran the Inked Edge script on a purple flower, petal by petal, and then, i removed the petals themselves, leaving only the inked border. I think it does give a really fun result that i didn’t even expect! What can you do with that script?

You want to play with those? You need to be logged in to download this sample. You can either login, or register on the top of this page.


For the fun of it, this week i took the time to create a scrap page about one day of geogaching with my husband. It was a fun day, and since i have been meaning to make a whole album on our geocaching adventures, which started 3 years ago with my sons, i think i just found a style that might work for this. What do you think? I might just post the other pages as i create them. Do you do geocaching? Tell me about it!

2011-08-21-600


From the Campus:

This is getting more and more exciting. Several people emailed me saying they would like to learn how to create this and that element with their Paintshop Pro, and i kept smiling because that is exactly what i am preparing! Many tutorials are in the making to create papers, elements, textures, fasteners, text effects, and more. So keep an eye on the Element Creation Tutorials of the Campus, subscribe to the mailing list if you want to be first to learn when registrations open so you can take advantage of the special price.

New Font – Cross-Stitches

cass-CrossStitches

This week, i am bringing you a different kind of product. Instead of a script, like i usually do, i created a font. This font includes 26 different X-stitches that are uneven. If you wanted even X-stitching, you probably could use the letter X multiple times, but here, these stitching could be associated with messy work, beginner’s work, etc. To use it, simply randomly type letters (a to z) and you will get different stitches.

Does your program allow text on path? If so, you can also do “stitch on path” in the exact same way since, as you remember, these are fonts, so they will behave like text. And you can treat them like fonts too, by changing the color, the size, the kerning, etc. Since this is a font, it also means it is a vector, so you can enlarge it if you want, without loosing the quality.

Use those stitches to hold photos, ribbons, etc. or you can “write” with them (remember you can draw a vector path and add the stitches along that path). What else can you think? And most important: since it is a FONT, it will work with ANY graphic program that can use fonts, so whether you are using Paintshop Pro, Photoshop, Photoshop Element, Gimp, or any other, this font would work.

You can grab this font in my store exclusively: CreationCassel.cass-StitchedDigits

And you have a chance to win this font, by adding your name to the RAK thread i put in the Happy Place. Simply tell me what program you are using and i will be back Monday with a winner.

For a free sample, i thought of the back to school, and decided to make something kind of fun with these stitched ruled paper digits. The stitching is made from primary colors so hopefully, it will match some back to school or kids theme layout. The lifted paper is accented with the included shadows.

You need to be logged in to download this sample. You can either login, or register on the top of this page.

If you like stitching, did you know that i have several other stitching FONTS? Check them out:

cass-basic-stitches-font  cass-deco-stitches-font

cass-messy-stitch1  cass-messy-zigzag

And remember that all these fonts are NOT software specific. If your software can use fonts, it can use those!

Unlike the usual commercial pitch in this blog, today, i would also like to tell you about a FANTASTIC customer service i experienced yesterday. A couple of years ago, i purchased Acronis True Image Home, a backup software. I set it up to create my regular full backups, on weekly basis and a daily incremental backup. A few months ago, i get an error message saying that there was not enough room for the backup and when i checked, sure enough my EHD (which is exclusively dedicated to backups) was just about full. Of course, i needed to make some room so i deleted the older backups and only kept those from the previous month or so. I thought it was a smart move. I found out yesterday that it was not!

True_Image_Home_2011_ATI_2011_250x250In the past few months, i would often get up in the morning (the backup was scheduled overnight) and when i checked my computer, i would regularly have an error message from Acronis saying the backup failed, and i had to do something within the next 10 minutes or the backup would stop for the day. When trying to do what it was asking me to do, it would freeze my program. Upon checking, i still had SOME backups so i was in no hurry to fix that problem.

This week, i am on holidays, so i am home and thought it would be a good time to address this. I checked the Acronis site for support and found chat support. Some of you might know, i LOVE chat support. It is faster than emailing back and forth for a week or so! I get this agent named Jijo and after asking me a few questions to check on the Acronis software, i could only say that it would give me a popup window that i could not close. So he asked me permission for a remote session where he would work on my computer while i would be able to watch everything (that is so cool to see!). He tried the same thing he had asked me to do and sure enough, the program would behave exactly the same way. After a lot of other trials, he found out i had deleted one key backup in the backup chain (meaning, the incremental backups have to rely on a “base” full backup and that one was gone) and that the only way to get Acronis to work again, was to uninstall it and reinstall it. No other option so i said ok. He proceeded to uninstall and it was taking a long time “thinking”. I could see he was trying to click on something but it was not working so i took control and clicked the same thing, and sure enough, it was frozen. Everything was frozen, and the chat window could not even be brought up either so he could not tell me what to do. I had to turn the computer off “cold turkey” and restart it. Of course, i had lost that chat support conversation by that time. 🙁

Just within minutes, the phone rang. Yes, it was Jijo calling back, apologizing for the problem (which was NOT his fault at all if my computer froze!) and asked me to log back in the chat support and ask for him. So, a few minutes later, Jijo was there again, helping me. Once uninstalled, he redownloaded a fresh version of Acronis 2011 (i had a full 2010 version and a 2011 upgrade), installed it and registered it. That took quite a while. Then, he proceeded to reset the backup tasks as i wanted them (schedule and location), and set a few more things for optimal use.

All in all, this might sound like normal customer service, right? Probably so, except for one thing: this whole “session” (which included a few re-logging in when the un-installation and re-installation prompted me to reboot) took a whole FOUR HOURS!!!! That is service at its best! I just hope he didn’t start the session only 10 minutes before the end of his working day!!! Although i had an affiliate link for Acronis before, and i LOVED their software, well, i now love the customer service even more!!!!! So if you are still looking for a backup software, why not give this one a try? You can try it for 30 days. Don’t just take my word for it, check it out yourself.

New Script – torn Edge

cass-TornEdge

Do you ever want to have a look of a torn piece of paper on your layout? Maybe for a freestyle look or a wilder look. I am sure you could achieve the same look by manually trimming the edge randomly, then adding an edge, also randomly. I have done the same and it is not too hard, but, after a while, I find it is hard to be “original” in the line design. All my edges looked kind of the same. With this script, this will never happen again. The line design is created with a random feature integrated so no matter how often you run this script, you will always get a different edge. And if you don’t like the edge you got, easy: undo and run the script again. It will only take a few seconds!

As you can see on the preview, you can get a torn edge that is fairly straight, but you can also get a wildly torn paper.

You will get the actual edge on a separate layer than the paper itself so you can add your favourite texture, or just add some noise to it. And you can have it any color you want, whether it is matching the paper or contrasting, or just plan white. Once you have the torn edge, it is perfect to make tags, frames, journaling pieces, etc.

You can find this script in my stores: Creation Cassel and DigiScrapWarehouse.

cass-TornEdge-SamplersI am sure you would like to win this script, so just go over this thread in the DST forum and add your name telling me how you do torn edge look. I will be back on Monday night with a winner.

As a sampler, this week, i made 5 torn edges in PSD layered formats. I ran the script once with each of the “amplitude” option.  They are in greyscale and you can use them as templates to create a torn edge on your own papers.

You need to be logged in to download this sample. You can either login, or register on the top of this page.


New script – Palette Maker

cass-PaletteMaker

This script will create a color palette based on any photo you have. This will be a quick process: open an image on your Paintshop Pro workspace, and run the script. How much easier can it be? You do not have to download any program, you do not have to host any image online or upload it anywhere.

You can generate 5 to 12 colors, which will be picked depending on the frequency of that color in the image. If you have a photo with a large “plain” area (like a sky), you can crop the image and get a better sample. The initial image will be left untouched, so no worry. Also, all the hex values for each swatch will be automatically displayed underneath.

And just for the fun of it, you can have each swatch as a perfect square, or a rounded square.

You can get this script at my stores: CreationCassel and DigiScrapWarehouse.

cass-PaletteMaker-samplesIf you want a chance to win this script, go add your name to the RAK thread here. I will be back on Monday with the name of a winner.

How about a few samples? I ran the script on three photos of mine, to generate three color palettes. You can use them to create a kit, or a mini-kit, or even just a page from scratch if you want.

You need to be logged in to download this sample. You can either login, or register on the top of this page.


Now, i have some more news this week. I was looking for one more CT member and i found Bren. She is a CT member for other designers who will see their products used, but also, Bren creates her own products so at times, she might just create a layout from scratch. You will see her stuff in the newsletter. Keep an eye out for it.

New script – Quick Tiles 2

cass-QuickTiles2

Last week, i promised to have a new script that would be a perfect companion to the Quick Tiles script. Well, this is it. This time, the script will create tone-on-tone seamless tiles from your image. Just like the other script, this one offers you options. The tiles you will get will have only subtle patterns that might not even show if you only look at the tile, but floodfill any larger surface and you will see that design appear. You can run both scripts on the same image and get perfectly matching papers. How neat is that? Again, this script is only for Paintshop Pro users (sorry Photoshop gals!)

You can get this script in either one of my stores: Creation Cassel and DigiScrapWarehouse.

Do you want a chance to win it? I started a thread in the Happy Place of the DST forum where you can go and add your name. Just answer the question “how do you create tone-on-tone papers?”cass-QuickTiles2-samples

Last week, i let you have 10 seamless patterned tiles created when i was making the preview. This week, i will do the same. Since i am starting with the same image, this week’s tiles will match last week’s. They are all 400x400 jpg tiles. Use them with various scale and angle settings for very different results. I would LOVE to see how you would use all those tiles in a layout. Can you do that? Show it to me.

You need to be logged in to download this sample. You can either login, or register on the top of this page.


New script – Quick tiles

cass-QuickTiles

Do you sometimes run out of ideas to create patterned papers? This script will help you pass that designer’s block. Open any photo, image or colored doodle, and run the script. You can generate up to 25 tiles in one run. Every run will give you a different set of tiles as there are several random functions integrated: a random area will be picked in the image, random settings to create the pattern, and random settings for the seamless feature if you choose it.

This tool will help Paintshop Pro users create a ton of interesting patterns, very quickly. In fact, you can get those 25 tiles in less than one minute! With all those tiles generated, keep the ones you like, delete the others. If you dont have enough, run the script again. Simple!

Due to a technical glitch, the script is not yet available in the stores, but it will be soon. I will update this post as soon as the script is available.

cass-QuickTiles-samplesAlthough it is not available for purchase, it is available to win! Check out this thread in the DST forum and simply go add your name to it with a comment about the script. Just that. No hoops to jump through, no long math problem. Just add a comment. I will be back on Monday with the name of a winner.

As for a sample, this week, i am giving you 10 tiles that were generated from the photo in the script preview. Use those tiles to create your own papers. Adjust the scale and the angle to get different effects. Add a texture, an overlay, etc. What will you do with them? Show me your layouts!

You need to be logged in to download this sample. You can either login, or register on the top of this page.


New Script – Woven Ribbon #2

cass-WovenRibbon2

Did you see last weeks script where you could weave any ribbon, lace or other element? This week, i am releasing another weaving script but this time, it works differently and really gives a fun result. You can weave any combination of TWO different ribbons, laces or elements. You can have the similar ribbons running parallel to each other or at an angle. The script ends with unmerged but linked layers. The segments are slightly shadowed for realism, and you can add your own shadow once the area is filled with the tile.

So, now, you don’t need to weave elements manually since you can create a seamless tile with your Paintshop Pro, to simulate a whole area of woven pattern, and you are not limited to only pick a color or gradient or pattern since you will be using actual elements you already have. Perfect tool to match the weaving to your layout or kit.

You can get this script at my stores: Creation Cassel and DigiScapWarehouse.

And for a chance to win this script, check the giveaway in the DST forum at this thread.

cass-WovenRibbon2-sampleAs a sample of what can be done with this script, i played around with some of Rachael’s ribbons (they are great by the way!) and a rope from my set of Rope tubes. I think the result is going to be pretty fun to play with. I am giving you two seamless tiles for you to create elements or backgrounds. To me, those colors would be very suitable for your summer layouts. Since the ribbons are not mine, these tiles can only be used for Personal use.

You need to be logged in to download this sample. You can either login, or register on the top of this page.


Do you want to see other things that can be done with the weaving scripts? Last week, i was able to weave a braid too and a rose stem. What do you think of how they are used? I have to say i was pretty pleased with how it came out. As you can see, you can weave just about anything that is long and somewhat thin. What else could you think of weaving?

cass-WovenRibbon1-sampleNL1     cass-WovenRibbon1-sampleNL2-preview

I will give out the link to those two free samples in my newsletter this Sunday. If you are already a subscriber, simply wait and it will be in your mailbox early Sunday. You are not subscribed yet? Well, you better hop over here to give me your email so i can deliver you those goodies! (if you are not interested, afterward, you can unsubscribe, no questions asked).

****************************

While you are around, did you know that Paintshop Pro X3 is on special for the month of July? Yes, instead of $99.99, you can get it for only $29.99. This is NOT the upgrade, but the FULL version. If you only need the upgrade, it is $24.99. Talk about a deal! If you never had Paintshop Pro and would like to use all those wonderful scripts and tubes in my store, this might be the perfect opportunity to add this program to your graphic arsenal!

New script – Woven Ribbon #1

cass-WovenRibbon1

I had written a tutorial a few years ago on how to create a woven pattern in Paintshop Pro, without using any outside plugin. As i was looking at the steps, I challenged myself to find a way to do it with a script. Let’s remember that a script does not “see” the work and requires numbers for just about any command. Well, I am pleased to say I made it. This script will take any ribbon (you can also use lace, string, chain, braid, etc.) and make it into a simple woven pattern using four segments of the ribbon (so all segments are not exactly the same for a more realistic look).

The script will create a seamless tile that you can then use to floodfill any larger surface, and since you can vary the scale and the angle of the tile when you set the material.

Not only can you use the same exact ribbon four times, but you also have also the option to do some adjustments to each segment, like changing the brightness or colorizing. What can you weave? Just about anything that is kind of straight!

You can get this script in my stores: Creation Cassel and DigiScrapWarehouse.cass-WovenRibbon1-sample

And if you want a chance to win this script, check out this thread at the DST forum and just add your name to the thread.

How about a couple of samples to see what YOU can do with such seamless tiles. I created these two tiles using the script. The green one is using one ribbon from KimericKreations. The rope tile was made using a rope tube. What would you do with those?

You need to be logged in to download this sample. You can either login, or register on the top of this page.


fb-image


How about the Campus? Did you hear about the big launch of theBasic Scrap Course with Paintshop Pro? It happened last Monday and there is a great promotion that will last until July 11th only. In addition to a special price, you will get YOUR CHOICE of products from three participating designers, 24 sketches to help jumpstart your inspiration, but also $10 coupon to my store, AND a chance to win a $25 coupon for Persnickety Prints. But the coupons for my store and the chance for Persnickety Prints are ONLY for those registering up to July 11th.

Not sure yet? Check out the first 9 lessons for free and the project tutorials in the Beginner Scrap section.