The first Gimp trims were released 13 years ago! But these are slightly different.
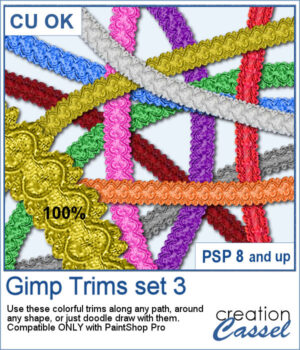
You can create delicate ribbons in any length and any shape you want. Use your cursor to draw your ribbons freely, or you can use the VectorTube script to place them along a precise path. Since these ribbons are a little wide, make sure you use a large enough shape and avoid tiny corners and curves.
In order to win this script, add a comment on this Facebook post telling us what kind of trim you would like to see as picture tubes (remember, add a comment, not just a Like!) The winner will be announced in the newsletter, next week. Not a subscriber yet? Not a problem. You can register here and it is free (and you only get one email per week).
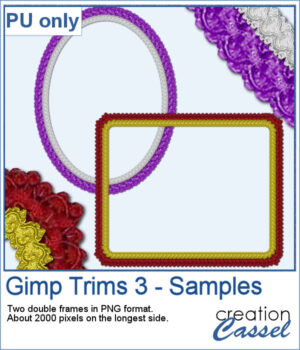
For samplers, I created two frames for you. Each one is made from running the VectorTube script twice on a simple shape. One trim is full size while the inside trim is half-size for an interesting effect.
You need to be logged in to download this sample. You can either login, or register on the top of this page.
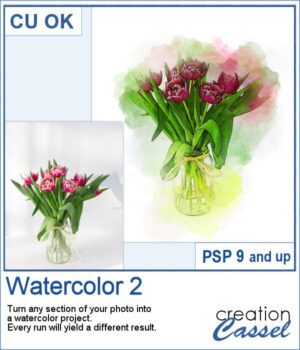
If you like the watercolor look, you could convert most photos into a piece of art.
With this script, you can select any area of the photo and it will create a watercolor project for you. Every run of the script will yield a slightly different result. At the end, you can tweak the different layers if you want.
You can also use the included brushes for various other projects.
In order to win this script, add a comment on this Facebook post telling if you have ever used a watercolor effect on a photo (remember, add a comment, not just a Like!) The winner will be announced in the newsletter, next week. Not a subscriber yet? Not a problem. You can register here and it is free (and you only get one email per week).
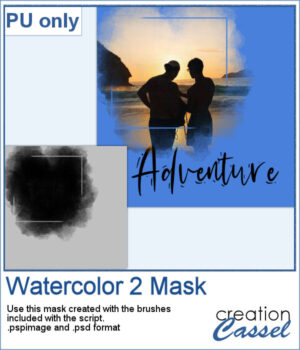
For a sampler, I used the brushes included in the zip file to create a mask that you can use to showcase a photo of your choice. The file is available in .pspimage and .psd formats.
You need to be logged in to download this sample. You can either login, or register on the top of this page.
If you had some traditional papers, you might want to cut out some circles and layer them to create a "flower" in the color of your kit or project. Doing that is tedious with paper, but also very tedious with digital ones.
With this script, it only takes you a few seconds to generate up to 10 different flowers from a series of papers of your choice. This is the perfect way to add an element that is a perfect match to your project. Add a staple, a button or any other decorative element in the center to "fasten" your flower to your project.
In order to win this script, add a comment on this Facebook post telling us what you would use these "flowers" for (remember, add a comment, not just a Like!) The winner will be announced in the newsletter, next week. Not a subscriber yet? Not a problem. You can register here and it is free (and you only get one email per week).
For a sampler, I ran the script with a few papers from a kit, Happy Birthday, from Marisa Lerin. You can get the whole kit for free, HERE.
Each flower is about 400 pixels wide and has 4 or 5 layers.
Since I used mostly basic color papers, these flowers can be quite versatile and usable in many projects.
You need to be logged in to download this sample. You can either login, or register on the top of this page.
If you want to use a stitched font, you might be quite limited in finding some ready made alpha, that has one style, one color, and you can maybe colorize it.
Another option is to find a font that has those stitches, but it will not give you the overlapping effect that real stitching would have.
Yet, another option is to do it yourself; NOT convenient, and quite tedious.
Finally, this font is what you were looking for. In fact, you get TWO fonts, and each one will be a layer of stitching, so you can have that exact overlap that you are looking for.
Since it is a font, it can work in most graphic programs, like Paintshop Pro, Photoshop, Photoshop Element, GIMP and more.
And as a font, you can choose the color, the size, the kerning, and if your program allows it, you can even put the text along a path! That would not be easy if you had just a regular ready-made alpha, would it?
Do you want a chance to win this font? Add a comment below, telling me what program you would likely use this font with. I’ll be announcing the winner in next week’s newsletter. Not subscribed to the newsletter yet? Not a problem, you can register here.
As a sample, i figured i could do a little combination of the font and something else. I used the font for the letters in this one, but for the heart, i used a regular preset shape and ran the VectorPaint script on it, using a narrow rectangular brush tip.
It is really simple to do, and you can do the same thing. It would be fun to use in creating wordart too.
You need to be logged in to download this sample. You can either login, or register on the top of this page.
News from the Campus
Did you have a look at the new version of Paintshop Pro? Did you see the Magic Fill feature that was added? That is much better than the Smart Carver and the Clone tool.
Now and then, i would find some layouts where scrappers had a fun series of stripes on the side of their page. Some have used those stripes to add words, some added a whole text of journaling, others only had those stripes as decorative elements for their project.
Doing that manually, surely takes time for a scrapper to do, or, if the scrapper used a template, then the template designer must have worked a while to get all those stripes.
This script is designed to be used either by the scrappers or the designers.
As a scrapper, one can have a series of rectangular or triangular stripes, in the colors of their choice, based on the kit they are working with or the photo they want to use.
As a designer, you can create those series in greyscale, and since each stripe is on a separate layer, it is perfect for layered templates.
You can get this script in the store: Edge Stripes.
For a chance to win this script, add a comment below, telling me of how you can think of using this script and the resulting stripes. I’ll announce the winner in the newsletter next week.
As a sample, i am offering you a layered set of stripes. Each of them is on a separate layer so you can use the whole series together as is or you can play with the individual stripes and move them around, rotate them, etc. You can colorize them, or use them with the Clip to it script to replace them by various papers you might want to use.
On the preview, i am showing an example of colorizing all the stripes and adding words on the lighter pieces. Maybe this could be for a layout about my mom? or another significant female in my life?
What would you do with these stripes? Remember to show us your finished project!
You need to be logged in to download this sample. You can either login, or register on the top of this page.
Sometimes, you might want to add a little texture to a paper without making it too bold. In those cases, you might want just something to give a slightly variegated look but you don’t want to use the same overlays over and over again.
This script will actually create a brand new overlay for you, in seconds, and it will always be different, from one run to the other. The script will adjust to the size of your paper, so you can work with a small, tagger-size paper, or a full size 3600x3600 pixels paper.
The overlay will be left on a separate layer so you can adjust the opacity or the blend mode (or both) depending on the color of the paper and its pattern, and the overall effect you want to achieve.
You can grab this script FORFREE, in the store as Smooth Overlay.
This week, there is obviously no need to do a giveaway since the script is already free anyways. Don’t you think?
For a free sample (and this is mostly for our non-PSP-using friends), i made one overlay in PNG format that can be used the way you want: adjust the blend mode, or the opacity. Apply it to a paper, or use part of it to add variations on a ribbon, a tag, a frame, etc.
What else could you use it for?
You need to be logged in to download this sample. You can either login, or register on the top of this page.
Marbles are common in games for the young and not so young. Although i never played marbles, as in the formal game, i have played with them as in lining them up, making them roll on various paths, etc.
If you want to create a “digital marble” for a kit, or a layout, where will you find it? And if you find it, will it be the right color for your project?
Maybe you can find a template where you can choose your own colors? That is good for the color, but you will be limited in the design.
This script will ask you to choose between 1 and 6 colors, so you can start with a photo, a paper, or a palette for those chosen colors. From there, it will combine those colors randomly, and create a different swirl for each of them. You will never have two identical marbles, even if you are using the same colors.
Create between 5 and 25 marbles in one run. If some of them don’t look good to you, just discard them.
You can have the script generate the marbles in size ranging from 100 to 300 pixels. And once they are done, you can also size them down if you want to use them as glass pearls.
Grab this script HERE (before you lose your marbles!)
Do you want a chance to win this script? IN THE COMMENTS BELOW, tell me what is your favorite color for marbles. Since this script is so easy to run, i will create marbles for EVERYONE who will post a comment below with their color (whether you are a PSP user or not).
Do you want to know who won the Puzzle script from last week? Check out the newsletter!
Since i didn’t have a way to determine what color would be best for anyone’s project, i decided to create a set of marbles based on basic primary colors: yellow, red and blue. It is interesting to see how those bright and vivid colors are sometimes combined into not-so-flashy swirls, don’t you think?
The set includes 20 marbles, so you have a lot of choices.
Each marble is 300 pixels wide, so they are big enough to be… marbles, but you can also resize them down if you prefer to use them as glass beads, to decorate frames, jewellery, etc. You can also export them as picture tubes if you want a quick way to put them onto a project.
You need to be logged in to download this sample. You can either login, or register on the top of this page.
Camouflage patterns are not only used for… camouflage anymore. I remember having a nice pink pair of jeans in a camo pattern years ago. Now, you can find those in any color, but what if you want to use or create something with a very specific color palette?
You can surely find templates to add the colors you want, however, those patterns are always going to be the same one you will use. How about getting something totally new and unique?
This script will create a camo pattern based on ANY size image. You can create a small tile, like 200x200 if you want, or work on a full size 3600x3600 paper. Every run of the script will give a different pattern due to the random feature integrated in the code.
Once the basic pattern is created, you get prompted to choose the colors. In all, depending on the random pattern created, you might need to provide between 4 and 9 colors. Traditionally, you should provide colors starting with the darkest one and gradually move toward lighter ones.
You can also choose 2 colors to be use alternatively (like blue and pink and blue and pink). You can choose 2 colors, alternatively, and also change the brightness every time. Or you can go really crazy and use several different colors. Be warned that this will make your head spin, but if that is the look you want, go for it.
Each paper or tile will be KIND OF seamless. This means that it will not be 100% seamless, and if you look closely, you will see some seams, but because of the nature of the random pattern, that seam might not be obvious from a distance in a busy paper. However, it is recommended that you create the pattern on the larger image size, instead of using a repeated pattern.
You can grab this script in the store now: Camo Pattern.
How about a chance to win this script for free? Check out this thread in the DST forum and tell me what color (or colors) you would love to have a camo pattern done in, but cannot find it. I’ll be back next week with the name of a winner.
For this week’s sample, i created a full size 3600x3600 paper in beige tones. I applied a Denim texture to one copy and a Corduroy texture to the other, so you get, in fact, 3 full size papers with the same beige pattern, but different textures.
You can use those as a background paper, or you can cut up sections to use as a frame, a ribbon, an alpha, etc.
What will you do with that?
To get this set of papers, simply click HERE.
You need to be logged in to download this sample. You can either login, or register on the top of this page.
Did you ever spill all those little pieces of paper from a three-hole puncher? Those nasty little pieces are a dream for kids and crafters. But what about digital artists?
To cut out little circles out of papers can be ok if you are only doing a few, but if you want to recreate the look of a bunch of them randomly spilled (or skilfully arranged!), that will take you forever and a day.
This is a script that will do everything for you and will turn those tiny bits of papers into a tube (check out this article for more information on what can be done with Picture tubes in PSP) . This will then allow you to “spill” those pieces wherever you want, on a project.
You can embellish your pages by adding confetti as an accent in a corner, have some gold and silver confetti for a celebration project, create a border of confetti or add to a flower cluster. You can use a little confetti or a lot.
And this script will not ask you to choose a color; that would be cheating! It will ask you for PAPERS. That is what confetti are from, right? And the pieces will come from randomly selected sections of the papers, they can be rotated and even sized slightly differently if you want (but that is optional). You can work with a single paper, or a series of papers. You can just create a paper with a gradient too, if you want the colors from that gradient (or you can create a gradient from the color palette you are working on).
See other examples of confetti created with a single patterned paper and a gradient paper.
There is so much you could do. Grab this time saving script now: Punched Confetti.
And for a chance to win this script, head over to the DST forum in THIS THREAD and tell me what you would do with those confetti. I’ll be back next week with the name of a winner, which will be announced in the newsletter.
Do you want to see those confetti up close (and personal)?
Here is a set of 3 confetti spills in simple blue, white and red colors. They can be used to embellish a celebration layout (the 4th of July is around the corner and so is the 14th of July). But you can also use them for any other type of layout. Those simple colors can also go very well with a kid themed layout.
They are proportionally spilled based on a 3600x3600 pixels layout, which means that the tallest one is close to the 3600 pixels height.
You need to be logged in to download this sample. You can either login, or register on the top of this page.
What will you do with these? Show us your masterpiece.
What do you think of Pocket Scrapping? Do you think it is only for “traditional paper scrappers”? How about giving it a try?
Here is a 3000x3000 page, made with 6 individual pockets, and matching card templates.
You can replace any card by a paper (or clip a paper or a photo to it), or remove it and place an element in the pocket instead, or you can remove the plastic layers to create a simple blocking look on your page, with room around it for other details you might want to add.
Interested in giving it a try? This is a PSD layered file so most graphic programs can use it.
You need to be logged in to download this sample. You can either login, or register on the top of this page.
 The first Gimp trims were released 13 years ago! But these are slightly different.