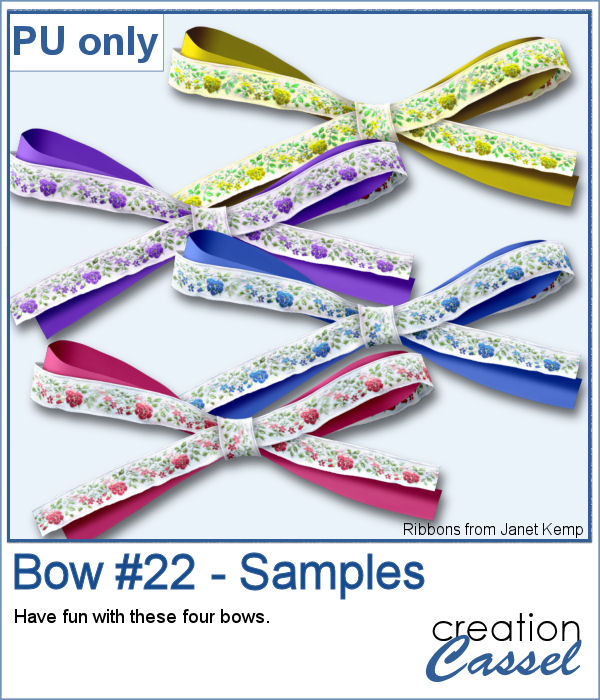
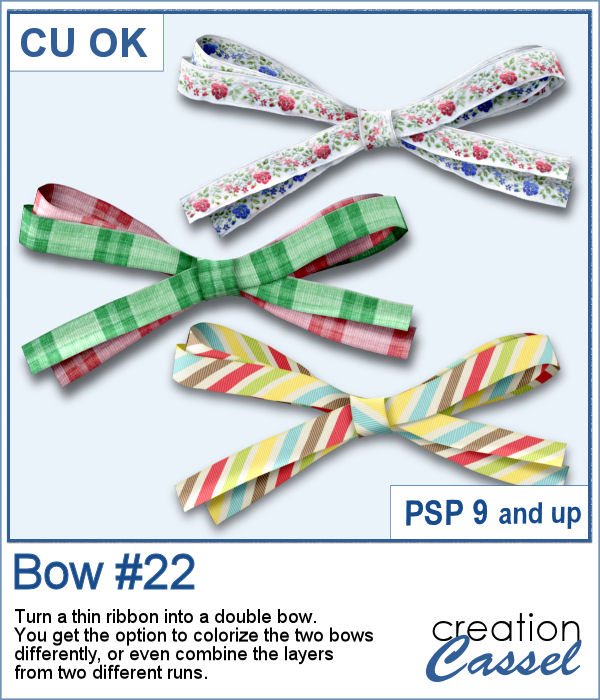
This script will create a double bow out of a single thin ribbon. Although you can have the same ribbon for all the loops, you can also colorize the inside loops and tails to give the impression of using different ribbons.
Even more, you can let the script group the layers for the inside bow, and then copy and paste the whole group into another bow made with the same script, and you would end up with completely different ribbons in your bow.
In order to win this script, add a comment on this Facebook post telling us how many bow scripts you already have (remember, add a comment, not just a Like!) The winner will be announced in the newsletter, next week. Not a subscriber yet? Not a problem. You can register here and it is free (and you only get one email per week).
For a sample, I used two ribbons from Janet Kemp (you can get them HERE) and colorized them three times. I then combined the inside loops from the solid-colored bows and inserted them into the floral bows.
You need to be logged in to download this sample. You can either login, or register on the top of this page.
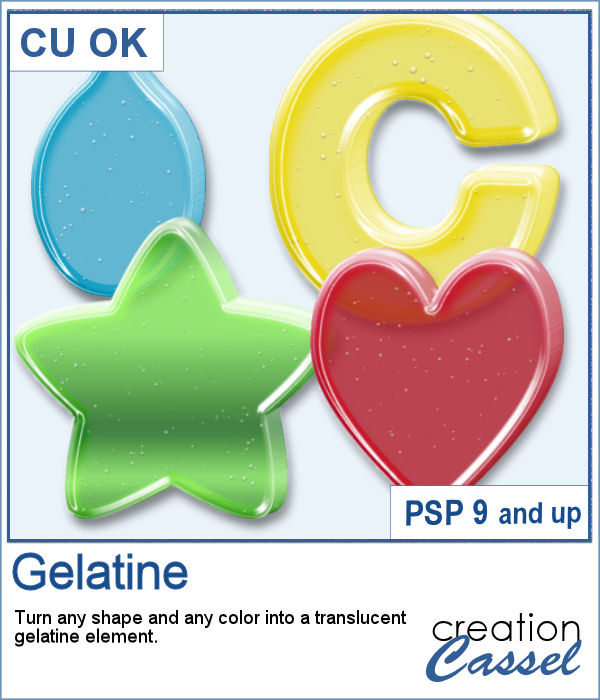
Jell-O (R) has been around for many decades and has often been associated with fun, parties, and kids.
You can now turn any shape into a gelatine element to accompany your projects, whether it is a simple shape, a letter, a frame, or just colorful cubes all over.
You have the option to tweak the transparency of the shape at the end.
In order to win this script, add a comment on this Facebook post telling us what is your favorite flavor for Jell-O (remember, add a comment, not just a Like!) The winner will be announced in the newsletter, next week. Not a subscriber yet? Not a problem. You can register here and it is free (and you only get one email per week).
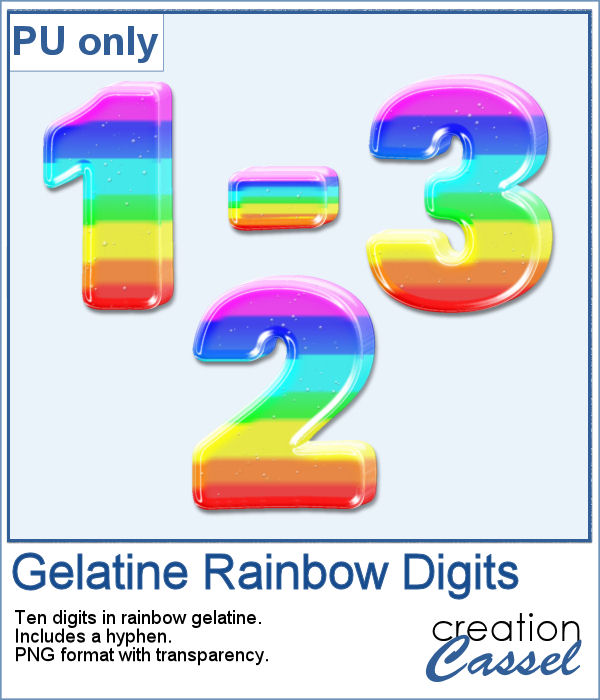
For a sample, I created a set of digits starting with a rainbow gradient. This seems cheery enough to be used in just about any project. Each digit is about 600 pixels high so you can resize them as needed. The set also includes a hyphen so you might be able to write a date.
You need to be logged in to download this sample. You can either login, or register on the top of this page.
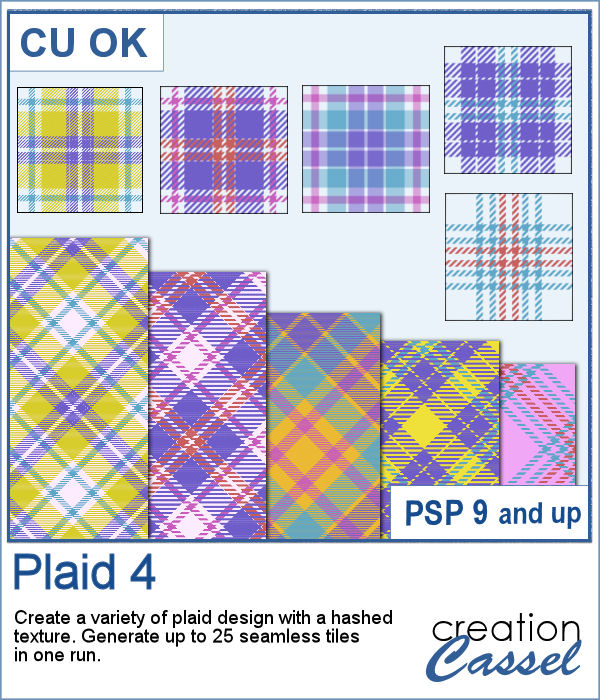
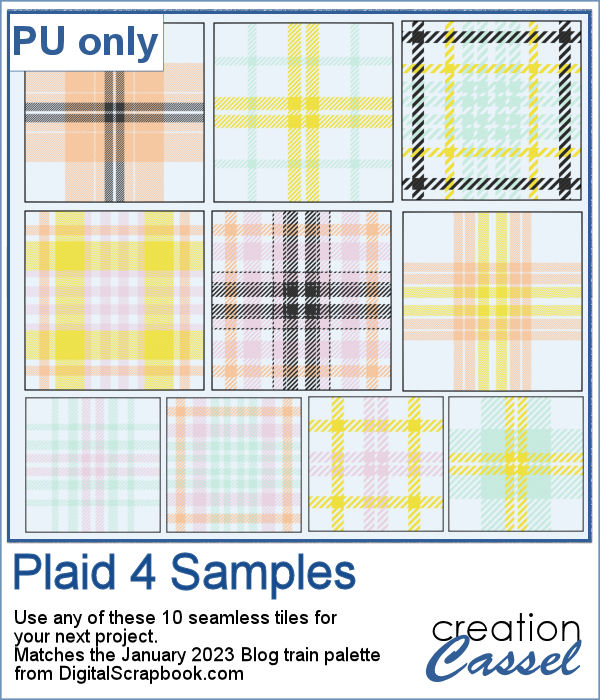
Plaids are versatile and since you can use a wide variety of colors, the possibilities are endless. Some plaids are simple, some are intricate. This particular design includes a hashed texture that will let you show any background color through.
You can choose from 3 to 10 colors to be used and the script will randomly select them and use them. You can generate up to 25 different tiles that will also be totally seamless. Keep the tiles you like, and discard the others.
In order to win this script, add a comment on this Facebook post telling us if you are using plaids in your designs (remember, add a comment, not just a Like!) The winner will be announced in the newsletter, next week. Not a subscriber yet? Not a problem. You can register here and it is free (and you only get one email per week).
For a sample, I used the color palette from the January 2023 blog train at DigitalScrapbook.com and created 10 tiles for you. They are in png format so you can add any color background behind them. And if you want to download various matching kits and elements, check out their blog train thread HERE.
You need to be logged in to download this sample. You can either login, or register on the top of this page.
Last week, i released a set of brushes to be used like corner punches are used in the traditional paper crafting world. Those brushes are really brush tips that can be used with the Eraser tool to punch out the design but they can also be used with the Brush tool to add a corner “stamp” to the projects.
These brushes were so well received that i thought of making a second set, using mostly circles (the first ones were using mostly squares). They work exactly in the same way.
Each set includes 12 different designs, in two sizes: 500 pixels if you are using PSPX and older and a 999 pixels if you are using a newer PSP version. Of course, you can always size them down when you use them to match your particular project. Add a rotation and you can punch all four corners.
There is still another thread in the DST forum where you can add your name and have a chance to win this Set B. Check out this thread, and tell me what graphic program you are using. I’ll be back next week with the name of a winner.
Are you unsure how to install brushes in PSP? No worries. I uploaded a short video tutorial just for you. You might also want to subscribe to this new channel so you can see the newest videos i will upload as i do.
If you are not yet subscribed to the newsletter, get on that list now! It is free to register and you get advanced notice of sales, and exclusive tips and tricks to make you more efficient with your PSP.
Are you a designer struggling to create previews? Are you a scrapper who loves to emphasize on details of photos? Either way, you will love this script. I have often seen designers add a close-up of their products to show the quality of the extractions, the texture of the paper or the details in a design. I have done it myself too. However, I found that often, i wanted a consistent look from preview to preview and that was not as easy as it seemed. This script will help you make those close-ups very quickly, and consistently. You can choose between 3 preset shapes, but you can also use your own (why not try with a star shape? or an arrow?). You can also choose the size of your close-up. Some designers like to have the whole thumbnail on the preview, while others are using quarter circles only. Depending on your own preferences, you can set the close-up thumbnail to be always the exact same size. And furthermore, you can decide on the color of the outline, so you can match your own preview, or the kit swatch. And it will work on a single layer or a multiple layer element without the need to merge anything. In fact, the original file will not even be touched.
Are you a scrapper? Think of those little details you might want to show in your layout, while maybe making a kind of mosaic of it. Have your Christmas tree photo and close-ups of the special decorations hanging in it. Or how about a close up of the tiny fingers and toes of your child (or grandchild)? Those can be soooooo cute!
And you can surely add your name to this thread in the forum for a chance to win this script. I would certainly love to see how creatively you can use it.
Obviously, this week, i cannot give you a sample of the end result from this script since it is really just a tool script, so since i got a great response for the samples of last week, i decided to offer you another ribbon tab flower. They are so fun to make!
You need to be logged in to download this sample. You can either login, or register on the top of this page.
Last week, i tried the Pay-with-a-Tweet function and it didn’t work very well as it said it could connect you to Facebook while it didn’t. I have now edited last week’s post and the Pay-with-a-Tweet button has been changed. From what i have seen, it does work better than the previous one so if you want to grab those other three ribbon tag flowers, just go ahead and pay with a Tweet or a Facebook post.
News from the Campus
Last week, the added tutorial was the Tulle Lace. Can you think of any such delicate elements you can create with this technique?
Last week, we repeated the webinar on “Be the Master of Time” and it was well received again. The recording has been edited, and uploaded to the Campus along with a cheat sheet with the various steps and settings used to achieve those time changes. You can view the webinarHERE (remember, you need to be logged in to access that page).
Following that past webinar, another presentation is planned for December 4th, and this time, we will look at some additional details to include in your “day turned to night” photos, including lilt windows, street lights, Christmas decorations and more. Come and join us. Register now.
As the holidays approach, you might want to make some fun calendars as a present to family members, colleagues, friends. Check out what you can download for free in the Campus: a 2012 Calendar Bookmark. Yes, it is absolutely FREE
This week, i am bringing you a different kind of product. Instead of a script, like i usually do, i created a font. This font includes 26 different X-stitches that are uneven. If you wanted even X-stitching, you probably could use the letter X multiple times, but here, these stitching could be associated with messy work, beginner’s work, etc. To use it, simply randomly type letters (a to z) and you will get different stitches.
Does your program allow text on path? If so, you can also do “stitch on path” in the exact same way since, as you remember, these are fonts, so they will behave like text. And you can treat them like fonts too, by changing the color, the size, the kerning, etc. Since this is a font, it also means it is a vector, so you can enlarge it if you want, without loosing the quality.
Use those stitches to hold photos, ribbons, etc. or you can “write” with them (remember you can draw a vector path and add the stitches along that path). What else can you think? And most important: since it is a FONT, it will work with ANY graphic program that can use fonts, so whether you are using Paintshop Pro, Photoshop, Photoshop Element, Gimp, or any other, this font would work.
You can grab this font in my store exclusively: CreationCassel.
And you have a chance to win this font, by adding your name to the RAK thread i put in the Happy Place. Simply tell me what program you are using and i will be back Monday with a winner.
For a free sample, i thought of the back to school, and decided to make something kind of fun with these stitched ruled paper digits. The stitching is made from primary colors so hopefully, it will match some back to school or kids theme layout. The lifted paper is accented with the included shadows.
You need to be logged in to download this sample. You can either login, or register on the top of this page.
If you like stitching, did you know that i have several other stitching FONTS? Check them out:
And remember that all these fonts are NOT software specific. If your software can use fonts, it can use those!
Unlike the usual commercial pitch in this blog, today, i would also like to tell you about a FANTASTIC customer service i experienced yesterday. A couple of years ago, i purchased Acronis True Image Home, a backup software. I set it up to create my regular full backups, on weekly basis and a daily incremental backup. A few months ago, i get an error message saying that there was not enough room for the backup and when i checked, sure enough my EHD (which is exclusively dedicated to backups) was just about full. Of course, i needed to make some room so i deleted the older backups and only kept those from the previous month or so. I thought it was a smart move. I found out yesterday that it was not!
In the past few months, i would often get up in the morning (the backup was scheduled overnight) and when i checked my computer, i would regularly have an error message from Acronis saying the backup failed, and i had to do something within the next 10 minutes or the backup would stop for the day. When trying to do what it was asking me to do, it would freeze my program. Upon checking, i still had SOME backups so i was in no hurry to fix that problem.
This week, i am on holidays, so i am home and thought it would be a good time to address this. I checked the Acronis site for support and found chat support. Some of you might know, i LOVE chat support. It is faster than emailing back and forth for a week or so! I get this agent named Jijo and after asking me a few questions to check on the Acronis software, i could only say that it would give me a popup window that i could not close. So he asked me permission for a remote session where he would work on my computer while i would be able to watch everything (that is so cool to see!). He tried the same thing he had asked me to do and sure enough, the program would behave exactly the same way. After a lot of other trials, he found out i had deleted one key backup in the backup chain (meaning, the incremental backups have to rely on a “base” full backup and that one was gone) and that the only way to get Acronis to work again, was to uninstall it and reinstall it. No other option so i said ok. He proceeded to uninstall and it was taking a long time “thinking”. I could see he was trying to click on something but it was not working so i took control and clicked the same thing, and sure enough, it was frozen. Everything was frozen, and the chat window could not even be brought up either so he could not tell me what to do. I had to turn the computer off “cold turkey” and restart it. Of course, i had lost that chat support conversation by that time. 🙁
Just within minutes, the phone rang. Yes, it was Jijo calling back, apologizing for the problem (which was NOT his fault at all if my computer froze!) and asked me to log back in the chat support and ask for him. So, a few minutes later, Jijo was there again, helping me. Once uninstalled, he redownloaded a fresh version of Acronis 2011 (i had a full 2010 version and a 2011 upgrade), installed it and registered it. That took quite a while. Then, he proceeded to reset the backup tasks as i wanted them (schedule and location), and set a few more things for optimal use.
All in all, this might sound like normal customer service, right? Probably so, except for one thing: this whole “session” (which included a few re-logging in when the un-installation and re-installation prompted me to reboot) took a whole FOUR HOURS!!!! That is service at its best! I just hope he didn’t start the session only 10 minutes before the end of his working day!!! Although i had an affiliate link for Acronis before, and i LOVED their software, well, i now love the customer service even more!!!!! So if you are still looking for a backup software, why not give this one a try? You can try it for 30 days. Don’t just take my word for it, check it out yourself.
Do you ever want to have a look of a torn piece of paper on your layout? Maybe for a freestyle look or a wilder look. I am sure you could achieve the same look by manually trimming the edge randomly, then adding an edge, also randomly. I have done the same and it is not too hard, but, after a while, I find it is hard to be “original” in the line design. All my edges looked kind of the same. With this script, this will never happen again. The line design is created with a random feature integrated so no matter how often you run this script, you will always get a different edge. And if you don’t like the edge you got, easy: undo and run the script again. It will only take a few seconds!
As you can see on the preview, you can get a torn edge that is fairly straight, but you can also get a wildly torn paper.
You will get the actual edge on a separate layer than the paper itself so you can add your favourite texture, or just add some noise to it. And you can have it any color you want, whether it is matching the paper or contrasting, or just plan white. Once you have the torn edge, it is perfect to make tags, frames, journaling pieces, etc.
You can find this script in my stores: Creation Cassel and DigiScrapWarehouse.
I am sure you would like to win this script, so just go over this thread in the DST forum and add your name telling me how you do torn edge look. I will be back on Monday night with a winner.
As a sampler, this week, i made 5 torn edges in PSD layered formats. I ran the script once with each of the “amplitude” option. They are in greyscale and you can use them as templates to create a torn edge on your own papers.
You need to be logged in to download this sample. You can either login, or register on the top of this page.
Did you see last weeks script where you could weave any ribbon, lace or other element? This week, i am releasing another weaving script but this time, it works differently and really gives a fun result. You can weave any combination of TWO different ribbons, laces or elements. You can have the similar ribbons running parallel to each other or at an angle. The script ends with unmerged but linked layers. The segments are slightly shadowed for realism, and you can add your own shadow once the area is filled with the tile.
So, now, you don’t need to weave elements manually since you can create a seamless tile with your Paintshop Pro, to simulate a whole area of woven pattern, and you are not limited to only pick a color or gradient or pattern since you will be using actual elements you already have. Perfect tool to match the weaving to your layout or kit.
You can get this script at my stores: Creation Cassel and DigiScapWarehouse.
And for a chance to win this script, check the giveaway in the DST forum at this thread.
As a sample of what can be done with this script, i played around with some of Rachael’s ribbons (they are great by the way!) and a rope from my set of Rope tubes. I think the result is going to be pretty fun to play with. I am giving you two seamless tiles for you to create elements or backgrounds. To me, those colors would be very suitable for your summer layouts. Since the ribbons are not mine, these tiles can only be used for Personal use.
You need to be logged in to download this sample. You can either login, or register on the top of this page.
Do you want to see other things that can be done with the weaving scripts? Last week, i was able to weave a braid too and a rose stem. What do you think of how they are used? I have to say i was pretty pleased with how it came out. As you can see, you can weave just about anything that is long and somewhat thin. What else could you think of weaving?
I will give out the link to those two free samples in my newsletter this Sunday. If you are already a subscriber, simply wait and it will be in your mailbox early Sunday. You are not subscribed yet? Well, you better hop over here to give me your email so i can deliver you those goodies! (if you are not interested, afterward, you can unsubscribe, no questions asked).
****************************
While you are around, did you know that Paintshop Pro X3 is on special for the month of July? Yes, instead of $99.99, you can get it for only $29.99. This is NOT the upgrade, but the FULL version. If you only need the upgrade, it is $24.99. Talk about a deal! If you never had Paintshop Pro and would like to use all those wonderful scripts and tubes in my store, this might be the perfect opportunity to add this program to your graphic arsenal!
 This script will create a double bow out of a single thin ribbon. Although you can have the same ribbon for all the loops, you can also colorize the inside loops and tails to give the impression of using different ribbons.