Web
Analytics

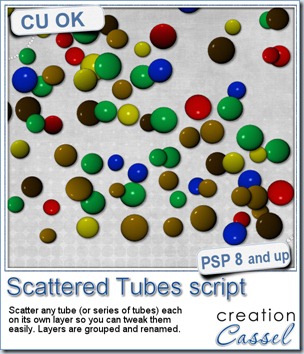
New script–Scattered tubes

cass-ScatteredTubes

I am sure you have used the picture tubes in Paintshop Pro and loved how easy it is to add 10, 20, 50 flowers just by clicking on your project. Click, one flower, click, one flower, and so on. However, did you ever clicked happily for dozens of times only to realize that a few flowers are too close to the edge, or you ended up with too many pink flowers grouped together and find yourself having to restart from the beginning since all the flowers were on a single layer and you could not move one separately? I have! I always wished the tubes were on individual layers, but to do that, it would become cumbersome and not as quick anymore.

That is where this script comes in. You choose the tube you want to use, and the script will scatter multiple instances of the tube (or from a series of tubes) and add them on individual layers. And to avoid having to work further with 50 layers, they are also grouped so you can collapse the group and have a manageable layer palette where all those 50 layers only look like one, while still letting you move individual tubes, remove some, resize others, rotate a few, and more.

You can grab this time saving script in my store at Creation Cassel.

And as usual, you have a chance to get this script free if you win the RAK in this thread. What kind of tube would you like to scatter yet still have the option to move them around individually or edit them one by one? The winner will be announced on Monday night.
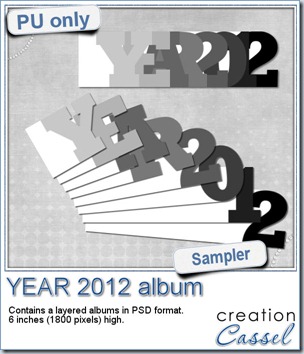
cass-WordAlbum-2012


As the new year is here, do you want to make a great conversation starter at home? Gather your 2012 photos and use this word album to place them. Add only photos or some anecdotes too. Use the same pages and flip them so you can get a reverse too. Print them. Collate them. Bind them. It can also be a great gift.


You need to be logged in to download this sample. You can either login, or register on the top of this page.


cass-DoubleToSingle-PS

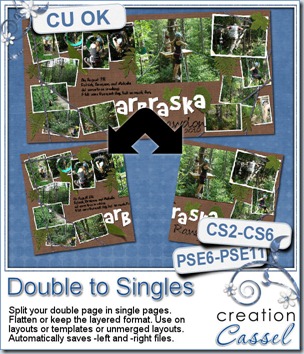
Photoshop and Photoshop Element user, i didn’t forget you. I had a script for PSP a while ago that would automatically split double pages into single pages. Well, after popular demand, i got this script for you too.

This is a SCRIPT but for PS and PSE. It will either split perfectly in the center, OR it will cut the page with an extra 3/8 of an inch. This gives a total of 3/4 inch that you can play with when you print your page in a book so that the center will not eat up some of your page. This amount of overlap is not necessarily a standard “bleed” but a space for you to manoeuvre depending on the printer’s specs.

The fun part about this script is that it cuts the pages but also saves them without you having to type in anything! That is called automation!

You can grab this time-saving script in my store : Creation Cassel.

New script–Merge Group

cass-MergeGroupRename

You probably want to complete your scrapbook project as fast as possible. You probably have more than one page to finish and are running a bit out of time. This new script is just a wonderful time-saving tool to help you achieve your goal of finishing faster and more efficiently.

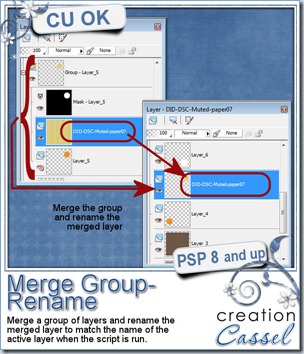
By default, when you merge a group of layers, it will keep the name of the top “layer” but that name is most often, not very meaningful. This script will remember the name of the active layer when you run the script and will rename the merged layer to that name. No fuss. No typing. No copying and pasting.

Without this script, you would require a total of 11 clicks to get the same thing (assuming you are copying and pasting instead of retyping), but with this script, if you bind it and place it in a convenient place, it will require ONE SINGLE click. Talk about saving time! that means that the process will be TEN TIMES faster than the old manual way.

This script can be purchased in my store: Creation Cassel.

This script is a perfect companion to a few others to speed up the scrapping process for any user. You can start by using the free script, Open As Layer – Rename, which will allow you to open one or more papers or elements just the way you would normally do, but it will take care of copying them and pasting them onto your current project in addition to renaming each layer based on the filename of those papers or elements. This allows you to remember what kit this element was from (assuming the initial file is named properly).

Once you have your papers or photos onto your work, if you are using a template, you will want the flexibility of adjusting their placement, rotation, and size without fuss. That is when the Clip To It script becomes another time saver in addition to making the process simpler and non destructive as it will “convert” the template shape into a mask from which you can see how the photo or the paper will look like before “cutting” anything.

Then, once you have your mask group, created by the Clip To It script, and you have adjusted the paper or the photo to your liking, it is time to merge it all in a single layer (if you want) using the Merge Group – Rename script.

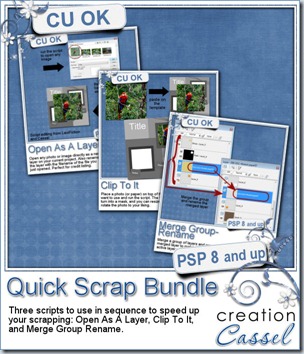
cass-QuickScrapBundleSince those three scripts are so useful in your toolbox to complete your scrapbook project faster, we also have the combo available for you. It is called Quick Scrap Bundle as it will do just that: make you scrap quickly.

This combo will include:

Open as Layer Rename

Clip To It

Merge Group Rename


Do you have plans to finish more projects in the coming year?

Are you rushed to finish those layouts before the end of the year?

Do you have a complete album project in mind and feel overwhelmed by all the work that will take?

These tools will save you a LOT of time, and make the process simpler.

You can also add your name to this thread in the Happy Place so you might win this combo of 3 scripts.


News from the Campus


Did you want more tips on scrapbooking faster? We had a presentation a couple of weeks ago called Scrapbooking on a Deadline where we looked at many tips, tricks and tools to achieve it.

ScrapbookingOnADeadline

The edited recording is currently available for online viewing for FREE.

Check it out here.

New script – Double to Single

cass-DoubleToSingles

I like the idea of working on double pages as it gives more room to work, more room to add multiple photos, and lots of journaling if i want to, but when get to print my work, i have to manually cut my double layout in two single layouts. That is tedious, especially when i have more than one to prepare!

I coded this script for that purpose. It can save individual single pages in jpg format (perfect if you want to print) but it can also keep the layered version of your work. That means that if you need to tweak something, correct a typo, and so on, you don’t have to work on the large layout and split the pages once more.

The script can also be used if you are doing layered templates and want to offer a double page version AND two matching single pages, still in layered format. And if you need to, it can save in both format also.

If you think this is a time saver, did you know you can also run this script in batch mode, and split dozens of double page layouts or templates in seconds? No typing needed to rename the files, no browsing to find the path. Everything is done automatically for you.

You can get this script in my store: Creation Cassel.

And as usual, I have one copy of this script to give away to a lucky winner. Check out this thread in the Happy Place and add your name to it. Not too hard is it? I will be back Monday night with the name of a winner.

cass-AlphaBeads-Halloween-DigitsUsually, i do create a sampler based on the new released product, but really, it is pretty hard to make a sampler out of this one, so i decided to create some plastic beads out of the Alpha-Beads script. That is a very popular script and i think you might see a lot of those in kits in the future. Don’t worry, with all the options available, they will not all look the same.
So, here is my set of digits for you in the Halloween colors. I decided on those colors for obvious reasons. I also chose to create the beads with very uneven characters to be a little different.

Will you be using this set? Remember to show me what you make with them. I love to see how creative you can be. I often see layouts where my products are used in a way i never thought of. That is great to see!

You need to be logged in to download this sample. You can either login, or register on the top of this page.


News from the Campus


ExtractionOfFuzzyObjectsDo you know how to extract a fuzzy object from its background?

Do you know how to select very smooth curved edges on an object?

Do you know how to remove the sky from between the branches of a tree?

The FREE recording of the presentation on Basic Extractions is now available on the Campus. You can view it HERE. It is free. You just have to be logged in. (and remember to LIKE it if you … like it!)


The Calendar Making Class has seen many new members this week! I think the printer will be flooded with orders (especially since you get a discount when you register for the class). Did you start on your own calendar? Do you want to share a page?


There are many things in the making in the background. You will surely be pleased when they are ready for you. It is so exciting for me, and it will be fantastic for you too! Stay tuned.

New script – Close-up

cass-CloseUp

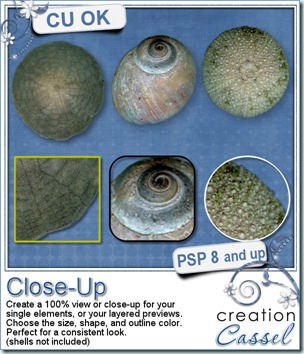
Are you a designer struggling to create previews? Are you a scrapper who loves to emphasize on details of photos? Either way, you will love this script. I have often seen designers add a close-up of their products to show the quality of the extractions, the texture of the paper or the details in a design. I have done it myself too. However, I found that often, i wanted a consistent look from preview to preview and that was not as easy as it seemed. This script will help you make those close-ups very quickly, and consistently. You can choose between 3 preset shapes, but you can also use your own (why not try with a star shape? or an arrow?). You can also choose the size of your close-up. Some designers like to have the whole thumbnail on the preview, while others are using quarter circles only. Depending on your own preferences, you can set the close-up thumbnail to be always the exact same size. And furthermore, you can decide on the color of the outline, so you can match your own preview, or the kit swatch. And it will work on a single layer or a multiple layer element without the need to merge anything. In fact, the original file will not even be touched.

Are you a scrapper? Think of those little details you might want to show in your layout, while maybe making a kind of mosaic of it. Have your Christmas tree photo and close-ups of the special decorations hanging in it. Or how about a close up of the tiny fingers and toes of your child (or grandchild)? Those can be soooooo cute!

You can get this great tool in my store: Creation Cassel.

And you can surely add your name to this thread in the forum for a chance to win this script. I would certainly love to see how creatively you can use it.

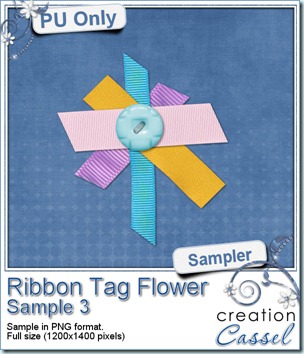
cass-RibbonTagFlower-Sampler3 Obviously, this week, i cannot give you a sample of the end result from this script since it is really just a tool script, so since i got a great response for the samples of last week, i decided to offer you another ribbon tab flower. They are so fun to make!
You need to be logged in to download this sample. You can either login, or register on the top of this page.


Last week, i tried the Pay-with-a-Tweet function and it didn’t work very well as it said it could connect you to Facebook while it didn’t. I have now edited last week’s post and the Pay-with-a-Tweet button has been changed. From what i have seen, it does work better than the previous one so if you want to grab those other three ribbon tag flowers, just go ahead and pay with a Tweet or a Facebook post.


News from the Campus

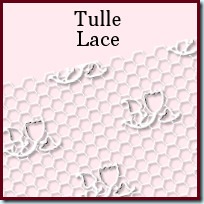
Last week, the added tutorial was the Tulle Lace. Can you think of any such delicate elements you can create with this technique?

TulleLace


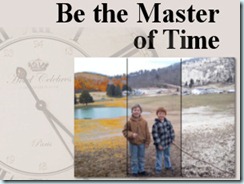
Last week, we repeated the webinar on “Be the Master of Time” and it was well received again. The recording has been edited, and uploaded to the Campus along with a cheat sheet with the various steps and settings used to achieve those time changes. You can view the webinarHERE (remember, you need to be logged in to access that page).


MasterofTime


Following that past webinar, another presentation is planned for December 4th, and this time, we will look at some additional details to include in your “day turned to night” photos, including lilt windows, street lights, Christmas decorations and more. Come and join us. Register now.


button-register-150


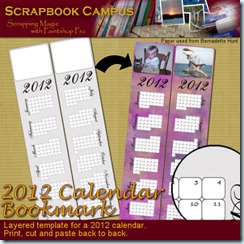
As the holidays approach, you might want to make some fun calendars as a present to family members, colleagues, friends. Check out what you can download for free in the Campus: a 2012 Calendar Bookmark. Yes, it is absolutely FREE


cass-2012CalendarBookmark

New script – Mirror and Flip – FREE

cass-Mirror&Flip

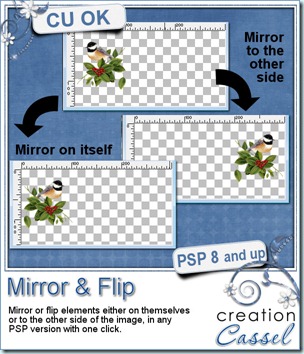
If you have been a Paintshop Pro user for any time, you surely remember the first time you used the Mirror command: the element you mirrored went all the way over to the other end of the canvas. You might have been wondering why it was not mirroring right there, where the element was in the first place. Then, over time, you found some great uses of that particular way it worked: you could easily duplicate and place elements in all four corners without measuring; you could place a decorative border evenly on opposite sides of the image, etc. However, when Paintshop Pro X4 was released, in September, the Mirror and Flip commands behaved differently. I can only guess that some users wished they could mirror and flip elements on themselves instead of across the canvas and I guess, Corel answered by changing that. Well, that might have been a great new feature, but it changed the way previous users were using those commands. So now, PSP versions X3 and before, worked one way, and PSP X4 works another way. Which way is best? It probably depends on what you want to do. In my opinion, they are BOTH equally useful. The problem is that none of the versions has BOTH options. That is… until now.

I started with the plan to create 4 scripts: 2 for X4 users to have their Mirror and Flip commands work like previous versions, and 2 for users of previous versions to have it work like PSP X4. All 4 scripts worked fine, but Suz Shook had a look at two of them and found an even faster way to get the same result. So, the set of 4 scripts include 2 from me, and 2 from Suz.

The zip file includes the scripts and instructions for binding the scripts. This means that, although you can run those scripts like other scripts (through the Script menu), you can ALSO have them directly in the Image menu, right with the default Mirror and Flip commands are. They will then run with ONE click, just like the default commands work. Isn’t that neat?

Best of all, this script is totally FREE. To me, it is a simple utility tool that should have been included with PSP and was forgotten so it is a gift to you. It is free now, and it will stay free in my store. You can go and grab it HERE.

Digital Scrapbooking Day

Yes, you heard about it. You have been stalking a few stores or designers to get the best deal. And you are waiting to see if i am having a sale too. You are right. I am having a sale through the whole store.

DSD-2011

News from the Campus

It is Digital Scrapbooking Day in the Campus too. There is a big promotion going on now, and only for 3 days.

 Two-for-One-ad-500

Did you find a friend you can share the registration with? Do you have 2 CT members who might benefit from the Basic Scrap Course? Hurry because this promotion is only for a limited time. It will end Sunday, at midnight! Choose your course now:

Basic Scrap Course

Element Creation Tutorials

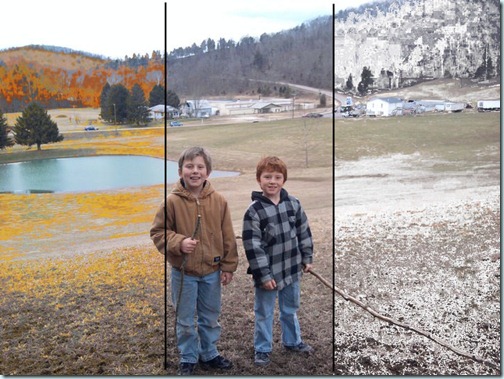
Finally, this Sunday, we will have our Webinar on photo editing: “Be the master of time”.

See some changes in seasons that we can achieve with a few clicks.

Seasons

Original photo from Bernice

Do you want to see more? Simple: click below to register!

If there are too many registrants for one webinar, i might consider presenting it a second time, so even if you are not 100% sure you can attend, REGISTER! And if you have some photos to offer, email them to me at [email protected] . I might or might not use them in the webinar, depending on the type and number of images i get, but would love to have several choices.

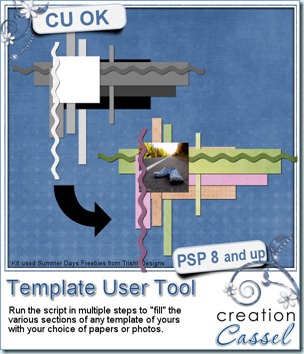
New script – Template User Tool

cass-TemplateUserTool

Once you created some fun templates with the Cluster Template Maker script, now you want to fill in all those shapes, either with papers or with photos. This can be a pretty tedious task of copying, pasting, adjusting, resizing, changing layer, selecting, deleting excess paper, deleting original layers, renaming layer. Now, this script will help you use any template even faster with your Paintshop Pro. This script will take care of those tedious tasks that are repeated layer after layer after layer. You will simply have to pick the paper or photo you want to use on each layer, resize, rotate, adjust them to fit the shape and the script will do the rest. How cool is that?

You can get this script in my stores now: Creation Cassel and DigiScrapWarehouse.

If you want a chance to win it (even if you already purchased it), you can simply add your name to this thread in the Happy Place of the DST forum. I will be back Monday night to announce a winner.

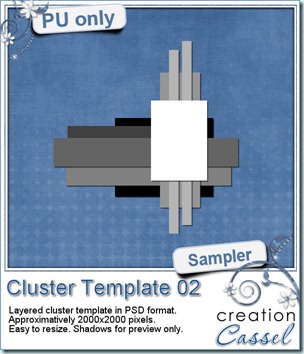
cass-ClusterTemplate-02 As usual, i have a free sample for you. Since this script is a tool to use with your own templates, i could not run it and give you the end result, but i could run the script from last week, and let you have another clustered template in PSD format.
You need to be logged in to download this sample. You can either login, or register on the top of this page.


News from the Campus

The registrations for the Element Creation tutorials section are still going but the deadline for the super duper bonus draw was last Sunday. The winners are:

Sue Turner: Paintshop Pro X4 Ultimate

Dianne Parham : $10 coupon the Scrapping Wright’s store

In addition, there was one draw in the Happy Place at DST and the winner was Limequilla. Let’s hope you all enjoy your treats. If you are a registered student to the Element Creation Tutorials section, remember to send me the suggestions for the next tutorials you would want to see.

Did you attend our Webinar 2 weeks ago about the Text tool in Paintshop Pro? If you did not, you can view the annotated recording, and download a handout in the Webinar section of the Campus. It is free to access but you have to be a registered member of the Campus (and the registration is free so there is absolutely no cost to you). If you are interested in attending the next Webinar, it will be held on October 2nd and will be about Shadows. You can register to the webinar now, and get reminders ahead of time, in case you are like me and tend to forget your “appointments” easily. Again, it is free to attend, so come on over and see me work live, directly from the comfort of your own home.

Register Now

If you have considered joining a course at the Campus, stay tuned for any upcoming promotion. Make sure you check your emails and obviously, have your name on my mailing list otherwise you will miss anything big!

Subscribe to Mailing List

New script – Cluster Template Maker

cass-ClusterTemplateMaker

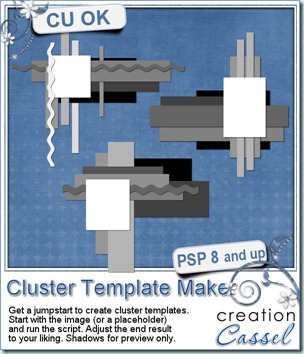
Some people love to create clusters, but feel they just can’t make anything reasonable. Someone asked me if i could make a script to do clusters for her. Well, I know for sure that a script in Paintshop Pro is a set of commands with mathematical values, so there is no way i can code what looks good and what does not, so i studied some clusters that looked good and tried to extract some mathematical similarities and that is what got into this script. It turned out to be quite good and the results are generally interesting.

The script will generate a random number of rectangles, horizontally and vertically, of different size and shape, all layered under an image or a placeholder. Once in a while, you will see a wavy line in the cluster. That is just added for fun. Once the script is done, if you REALLY don’t like the result, simply undo and run the script again. It is that easy. Once you are kind of happy with the result, you can still adjust and customize the layers, and the rectangles. Add more shapes, remove some layers, rotate others, rearrange the layer order, add some fancy edges on some rectangles, etc. Make it your own. And if you want more layers, just run the script a second time starting with the image layer, then you’ll have more layers and shapes to play with!

You can grab that script in either of my stores: Creation Cassel and DigiScrapWarehouse.

And for a chance to win this script, simply add your name to this thread in the Happy Place of the DST forum, and tell me how you go about to create your clusters. I will be back on Monday with the name of a winner.

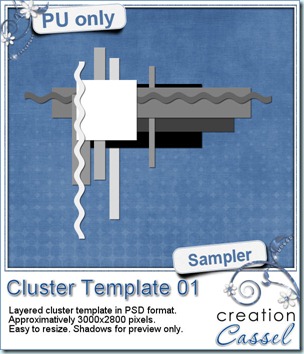
cass-ClusterTemplate-01 As usual, you want to get a freebie, right? Fair enough. I created this layered cluster template with the script. I added shadows to the preview only, since there is a chance you might want to change some layers and then, the shadows might not work. It is a PSD format, so most of you should be able to open it, and use it. If you DO use it, would you mind showing me how it turns out? I would love to see how different scrappers will turn this ONE template into many unique results.

You need to be logged in to download this sample. You can either login, or register on the top of this page.


News from the Campus

The Element Creation Tutorials with Paintshop Pro section has open and we are taking registrations. If you register on or before September 17th, your name will be put into a draw to win one copy of Paintshop Pro X4 Ultimate (freshly released last week).

But you have only a couple of days left!

I added a thread in the DST forum where you can win ONE membership to the Element Creation tutorials, and the draw will be on Sunday morning, just in time for the winner to have his/her name added to the draw for the PSPX4. Would you be lucky enough to win both? Maybe. Who knows?

Sunday, Sept 11th, we held a webinar on using the Text tool in Paintshop Pro. An edited recording of this webinar is currently posted in the Scrapbook Campus under the Webinars tab. A written handout will be added shortly. (you only have to be logged in to access it, but registration is totally free if you are not yet a member)

Do you want to register to our next webinar? It will be held on Oct 2nd at 3pm Eastern. You can register here so  you will be getting reminders ahead of time. The topic? Shadows!

New script – Palette Maker

cass-PaletteMaker

This script will create a color palette based on any photo you have. This will be a quick process: open an image on your Paintshop Pro workspace, and run the script. How much easier can it be? You do not have to download any program, you do not have to host any image online or upload it anywhere.

You can generate 5 to 12 colors, which will be picked depending on the frequency of that color in the image. If you have a photo with a large “plain” area (like a sky), you can crop the image and get a better sample. The initial image will be left untouched, so no worry. Also, all the hex values for each swatch will be automatically displayed underneath.

And just for the fun of it, you can have each swatch as a perfect square, or a rounded square.

You can get this script at my stores: CreationCassel and DigiScrapWarehouse.

cass-PaletteMaker-samplesIf you want a chance to win this script, go add your name to the RAK thread here. I will be back on Monday with the name of a winner.
How about a few samples? I ran the script on three photos of mine, to generate three color palettes. You can use them to create a kit, or a mini-kit, or even just a page from scratch if you want.

You need to be logged in to download this sample. You can either login, or register on the top of this page.


Now, i have some more news this week. I was looking for one more CT member and i found Bren. She is a CT member for other designers who will see their products used, but also, Bren creates her own products so at times, she might just create a layout from scratch. You will see her stuff in the newsletter. Keep an eye out for it.

FREE script for Paintshop – Punched

cass-Punched

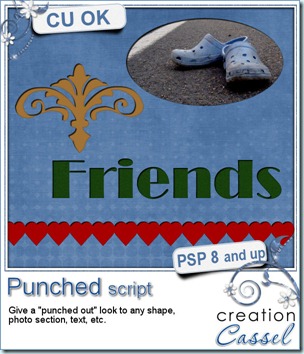
As i was looking at some paper scrap pages, i noticed that several of them used punched designs and it was giving that 3D look since the top paper was cut and you could see the other paper underneath through the hole. I figured i could replicate it in digital form using Paintshop Pro. It was easy. It might be something you can do manually, but i coded this script simply to make the process faster.

It is available exclusively in my personal store here.

As i was playing with the script, i used it on a single pattern, on a series of patterns to simulate a border, on a section of a photo, and on a word. I think it would look cool as a big title or even if you use it only on the first letter of the title. And what about using it on concentric circles (a smaller circle inside a larger one)?

The way the script is coded, it is somewhat of a “cheat” since the paper is not really punched as it looks. In fact, the punched look is attached to the shape itself, meaning that you can move the “hole” wherever you want. That means that you can change your mind as you are working on a layout, move the “hole” or even remove it completely and start over with a different shape or design. How neat is that?

Image10 I also tried it on a photo and simply selected various rectangular shapes, and deleted the rest. I ran the script and it looked fun. I just added a plain color under the holes (yeah, as if you could do that in paper scrapping!) and i really like the effect. This was just me playing around, without any particular plan to use that on an actual layout, but i might do that on my next scrap page. What do you think?

Remember, this script is FREE, so go grab it in the store and tell your friends to come and grab it too!