Web
Analytics

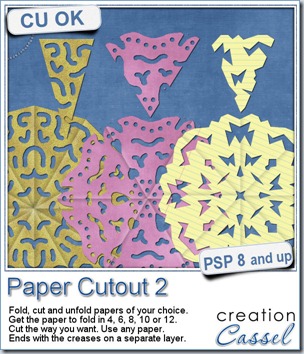
new script – Paper Cutout 2

cass-PaperCutout2

When i was a kid, i used to take papers of different size and fold them to then cut out along the folds. I was making “snowflakes”, even though they were usually not folded in 6. We had that activity in arts and crafts class pretty well every year. I learned that regular writing papers were not square so i always had to cut off a piece to make my craft (what a waste).

Whether you want to use lined paper to simulate those school projects (not done in art classes) or really plain colored construction papers, or using a patterned paper from a kit, there is no limit.

Start with any paper, and run the script It will take care of the not-so-square papers, it will fold it (or pretend) according to what you ask, and you will have the chance to cut out any design you want, with any tool you like. Use the eraser tool or the selection tool. That is up to you.

Cut sections along the “folds” or the outer edge, or snip the center (you surely did that when you made your “snowflakes”). Once you are done, the script will unfold your piece and reveal the whole design (you might be surprised too). And furthermore, it will add creases to your masterpiece exactly where it WAS folded for a more realistic look. The creases are on a separate layer so you can tweak their opacity depending on the color or pattern of your paper.

You can get this script in my store: Creation Cassel.
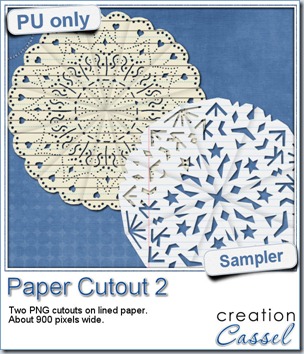
cass-PaperCutout2-sampleAnd if you want a chance to win it, check out this thread, and tell me what theme would work well with this script. I will be back on Monday to announce a winner.


I used a couple of “school” papers to cut some more “snowflakes”. But in fact, they dont look like snowflakes at all. If you are crafty, you can surely create some very intricate designs and turn those “snowflakes” into doilies! These two elements are about 900 pixels wide in png format. They don’t match only “kid” kits!


You need to be logged in to download this sample. You can either login, or register on the top of this page.

News from the Campus
 

scraphappierWe had the draw on Sunday night for a free registration to LOAD213. Andrea was our winner, and she already started her month-long challenge. She said she loved the idea of a challenge as it will give her a little more incentive to scrap. Even more, i asked her to keep us updated on her activities and she already did her first layout, and we are the first of the month! I guess she is right on track!

Did you register for LOAD213? How are you doing with it?


Photo-Graphic with PSP

We will have our monthly live presentation on Sunday (it should be right before the SuperBowl for those of you who are fans). There is still time to register. We will look at how we can turn a regular photo into something else: a watercolor piece, a cartoon, a sketch, and maybe more (time permitting).

Sunday, Feb 3rd, at 5pm Eastern Time zone.
New script–Merge Group

cass-MergeGroupRename

You probably want to complete your scrapbook project as fast as possible. You probably have more than one page to finish and are running a bit out of time. This new script is just a wonderful time-saving tool to help you achieve your goal of finishing faster and more efficiently.
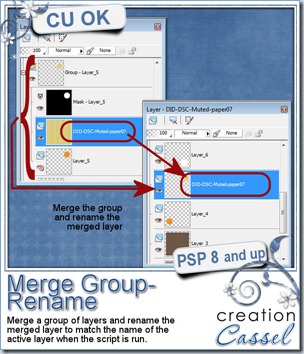
By default, when you merge a group of layers, it will keep the name of the top “layer” but that name is most often, not very meaningful. This script will remember the name of the active layer when you run the script and will rename the merged layer to that name. No fuss. No typing. No copying and pasting.

Without this script, you would require a total of 11 clicks to get the same thing (assuming you are copying and pasting instead of retyping), but with this script, if you bind it and place it in a convenient place, it will require ONE SINGLE click. Talk about saving time! that means that the process will be TEN TIMES faster than the old manual way.

This script can be purchased in my store: Creation Cassel.

This script is a perfect companion to a few others to speed up the scrapping process for any user. You can start by using the free script, Open As Layer – Rename, which will allow you to open one or more papers or elements just the way you would normally do, but it will take care of copying them and pasting them onto your current project in addition to renaming each layer based on the filename of those papers or elements. This allows you to remember what kit this element was from (assuming the initial file is named properly).

Once you have your papers or photos onto your work, if you are using a template, you will want the flexibility of adjusting their placement, rotation, and size without fuss. That is when the Clip To It script becomes another time saver in addition to making the process simpler and non destructive as it will “convert” the template shape into a mask from which you can see how the photo or the paper will look like before “cutting” anything.

Then, once you have your mask group, created by the Clip To It script, and you have adjusted the paper or the photo to your liking, it is time to merge it all in a single layer (if you want) using the Merge Group – Rename script.

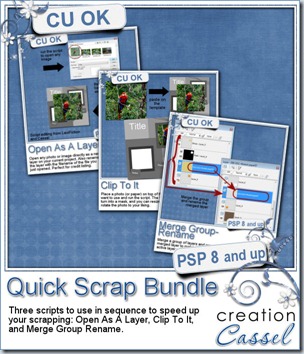
cass-QuickScrapBundleSince those three scripts are so useful in your toolbox to complete your scrapbook project faster, we also have the combo available for you. It is called Quick Scrap Bundle as it will do just that: make you scrap quickly.

This combo will include:

Open as Layer Rename

Clip To It

Merge Group Rename


Do you have plans to finish more projects in the coming year?

Are you rushed to finish those layouts before the end of the year?

Do you have a complete album project in mind and feel overwhelmed by all the work that will take?

These tools will save you a LOT of time, and make the process simpler.

You can also add your name to this thread in the Happy Place so you might win this combo of 3 scripts.


News from the Campus


Did you want more tips on scrapbooking faster? We had a presentation a couple of weeks ago called Scrapbooking on a Deadline where we looked at many tips, tricks and tools to achieve it.

ScrapbookingOnADeadline

The edited recording is currently available for online viewing for FREE.

Check it out here.

News from the Campus–Advanced shadowing

AdvancedShadowing

Did you register to for the Advanced Shadowing with PSP presentation yet? It will be held next week. You dont want to miss that!

Date: October 7th

Time: 5pm Eastern time

RegisterNow-01-200


While you are looking at the various Master Classes in the Campus, remember that the Basic Extraction video is still available for FREE in the Campus, but that is only for a limited time as it will no longer be free after the new video is uploaded.


Did you see the latest tutorials in the Campus?

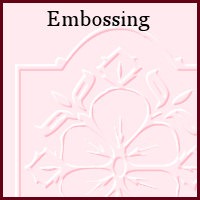
Embossing Paperclip Wood

These and many others are available if you register for the Element Creation tutorials. Are you interested in joining the Campus but are still hesitant? Stay tuned for a special offer in the next few days.


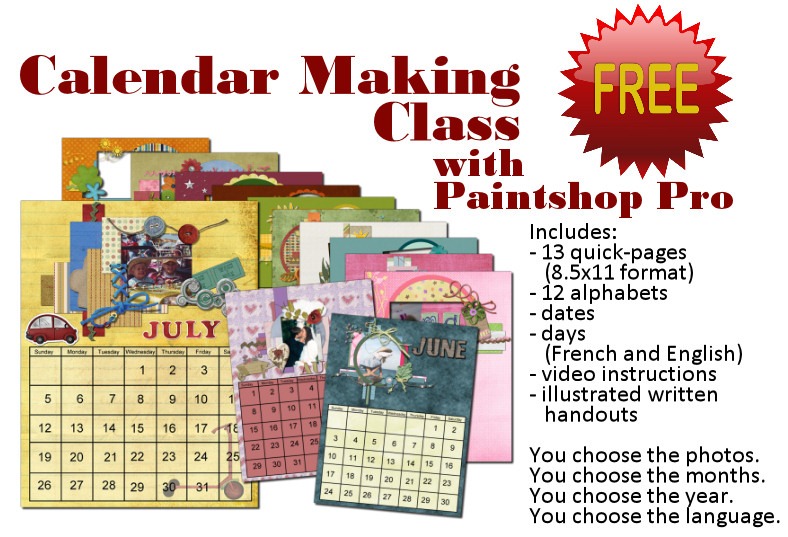
Finally, remember that the holiday season is coming (always faster than we want). Get yourself a custom calendar to print with our FREE Calendar Making Class. Are you new to digital scrapbooking? Or new to using Paintshop Pro? Or do you just want a cool present to offer to your friends or relatives? Check out the Calendar Making Class. Everything is free. FREE instructions. FREE supplies (but you have to pay to get it printed).

CalendarPreview-free

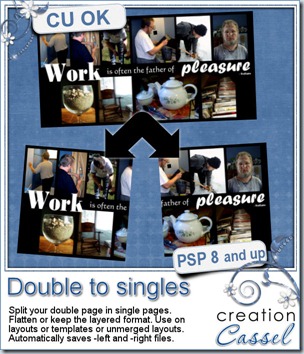
New script – Double to Single

cass-DoubleToSingles

I like the idea of working on double pages as it gives more room to work, more room to add multiple photos, and lots of journaling if i want to, but when get to print my work, i have to manually cut my double layout in two single layouts. That is tedious, especially when i have more than one to prepare!

I coded this script for that purpose. It can save individual single pages in jpg format (perfect if you want to print) but it can also keep the layered version of your work. That means that if you need to tweak something, correct a typo, and so on, you don’t have to work on the large layout and split the pages once more.

The script can also be used if you are doing layered templates and want to offer a double page version AND two matching single pages, still in layered format. And if you need to, it can save in both format also.

If you think this is a time saver, did you know you can also run this script in batch mode, and split dozens of double page layouts or templates in seconds? No typing needed to rename the files, no browsing to find the path. Everything is done automatically for you.

You can get this script in my store: Creation Cassel.

And as usual, I have one copy of this script to give away to a lucky winner. Check out this thread in the Happy Place and add your name to it. Not too hard is it? I will be back Monday night with the name of a winner.

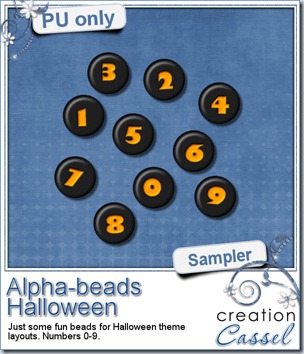
cass-AlphaBeads-Halloween-DigitsUsually, i do create a sampler based on the new released product, but really, it is pretty hard to make a sampler out of this one, so i decided to create some plastic beads out of the Alpha-Beads script. That is a very popular script and i think you might see a lot of those in kits in the future. Don’t worry, with all the options available, they will not all look the same.

So, here is my set of digits for you in the Halloween colors. I decided on those colors for obvious reasons. I also chose to create the beads with very uneven characters to be a little different.

Will you be using this set? Remember to show me what you make with them. I love to see how creative you can be. I often see layouts where my products are used in a way i never thought of. That is great to see!

You need to be logged in to download this sample. You can either login, or register on the top of this page.


News from the Campus


ExtractionOfFuzzyObjectsDo you know how to extract a fuzzy object from its background?

Do you know how to select very smooth curved edges on an object?

Do you know how to remove the sky from between the branches of a tree?

The FREE recording of the presentation on Basic Extractions is now available on the Campus. You can view it HERE. It is free. You just have to be logged in. (and remember to LIKE it if you … like it!)


The Calendar Making Class has seen many new members this week! I think the printer will be flooded with orders (especially since you get a discount when you register for the class). Did you start on your own calendar? Do you want to share a page?


There are many things in the making in the background. You will surely be pleased when they are ready for you. It is so exciting for me, and it will be fantastic for you too! Stay tuned.

New product–Glitters B

cass-Glitters-B

Do you like glitters? Do you like all those “styles” available for Photoshop and wonder if you could ever find something like that for Paintshop Pro? Now you have your answer.

A while ago, i released a script that made a glitter tile, but i have to admit, it needed some upgrade: the tile was small, it used the seamless function in PSP which gave that diagonal fading effect. All in all, it was outdated. So i decided to create a totally new script to make seamless tiles (REALLY seamless, as there is no fading, no blending).

With more advanced coding, you even have options of colors and color combinations too. You can get a monochrome colored tile, which will varie between the chosen color and white. You can have a bicolored tile where you choose the two colors that the script will blend together, and finally, you can get a cass-Glitters-B-01multicolored tile where you choose one color and the script will vary the hue to the point of creating many colors, all around that base one you picked.

As if getting a seamless tile is not enough, you also get the brush presets to create the matching glitters, in a scattered format. Use it to draw lines, doodles, frames, edges, fill in shapes, etc. You get one preset for each type of glitters.

You can grab this product in my store : Creation Cassel


Do you want to win this set? You can just add your name to the Happy Place thread HERE and tell me if you would more likely use the script to create seamless tiles, or the presets to create scattered glitters. And on Monday night, i will draw for a winner who will get this amazing set.cass-GlittersB-holiday


Do you want to see these glitters up close? I created 3 seamless tiles using basic colors and also some elements made out of scattered glitters with the brush presets. They are Christmas-y colors, and of course, the tree might be pretty seasonal but the heart and the star can be used as frames if you want to place them on, or around a photo, or even some journaling.

You need to be logged in to download this sample. You can either login, or register on the top of this page.


What will you do with those? Show us and we might post it in here or in the newsletter.


News from the Campus

Motorcycle-06


The recording for last week’s presentation on basic extraction techniques should be available later today. Those who purchased the Master Class should get the whole package ready today or tomorrow at the latest. Did you see what we did in that presentation?

Check out the Campus, later today, to view everything.


Did you start the Calendar Making Class yet? We have had many new members in the Campus who registered for that class. After all, it is free, so why not start on your Christmas presents?

New script–Alpha-beads

cass-Alpha-beads

Did you ever play with those little plastic beads with letters, making bracelets with your name or your friend’s name?

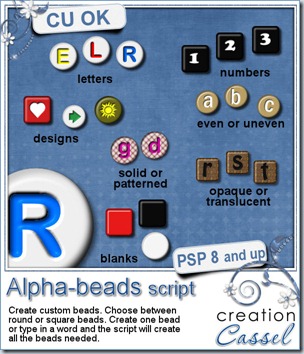
Now, you can create your own set of beads, in any color, using any font, and adding any character, digit, symbol, etc. And not only you can create individual beads, but you can get a whole word, phrase, or even the alphabet. This is a script that Paintshop Pro users will love; it is so versatile and easy to use.

With this script, you can always have the perfectly matched beads: use the colors from your photo, your kit, or your palette. If you want to be a little wild, you can choose more than one color for the letters (you can pick them from your palette) and the script will randomly use them. This is cool if you want to write a word or a phrase and want some variety in the colors used: you don’t even need to create 3 alphabets to use 3 colors. You don’t even need to run the script 3 times either! All done in one run.

cass-Alpha-Beads-extraAnother great advantage of this script is that you can use any font, and also any character. If you want math symbols you can create them (honestly, how many alphas include those?), you can add accented characters in your language (providing that the font supports those characters), and you can even create some beads with designs that are not in fonts: just draw them by hand or use a preset shape.

What can you do with those beads? Just about anything you want. Use them for dates, for names, for fun phrases, even for titles. Attach them to a string, a ring, a ribbon, a staple, a pin and more. Place them side by side, or vertically. After all, there is no hole in those so you can pretend they are in any direction.

If you want to create your own thin string, check out the Rope Tubes here and here. Use them at a small scale and you can have a string as long or as short as you want, in any shape you want.

Now is the time to go grab this superb script and start adding unique alpha elements on your projects. You can get it in my store: Creation Cassel.

This week, not only i will have a random draw for someone to win this script, like i do every week, but you are asked to “place your order” for a complete alpha. Check out this thread, tell me what shape, and colors you would want for a bead alpha and after drawing for one person to win the script, i will draw a second time and this person’s order will be filled AND EVERYONE who posted will get it. This means that you don’t even have to have a copy of PSP: just post and you are sure to get a free alpha, and if you are lucky, it will be made from YOUR specifications.

cass-AlphaBeads-sample


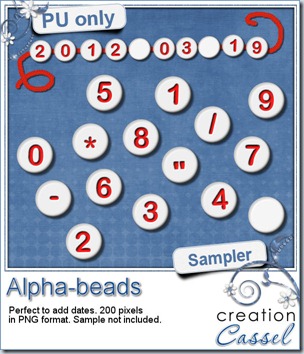
Do you want to play with some of the beads created with this script? Here. I made a set of digits with various symbols so you can create dates in various format. Attach them any way you want, vertically, horizontally, on a string, a pin, or maybe just “glued” on something. Simply click on the preview to start the direct download.


If you use these beads in a layout, i would love to see it. With your permission, i can even post it in here or in the newsletter. Show us your creativity! Don’t be shy!

You need to be logged in to download this sample. You can either login, or register on the top of this page.


News in the Campus


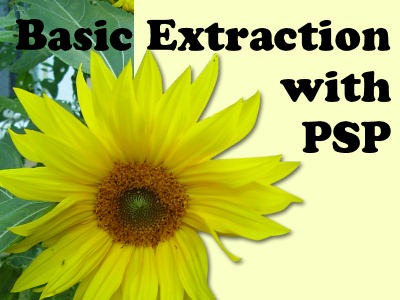
BasicExtractionOur next workshop will be held this coming Sunday, and we will look at the basic, most common tools and techniques to do extraction. Someone asked me what an “extraction” is. Extraction is removing a particular element from its background using different methods. Once the element is “extracted”, it can be used on a different background, or used in totally different ways.

We will look at the basic techniques this time. Another workshop will address more advanced techniques, later on.

There is still time to register. If you are new to those online workshops, you will not just hear me, but you will see me work directly on my Paintshop Pro at the same time. If i make a mistake (and it does happen), you will see it live (and you can laugh).

RegisterNow-01-200


Workshop-DVD-Case-Shadows

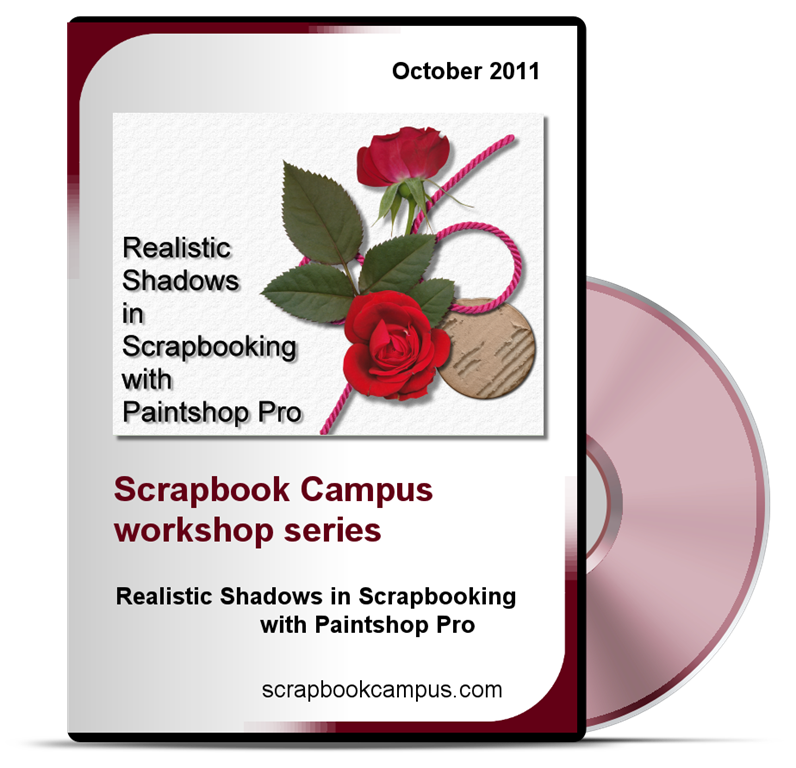
Today, August 31st is the last day to get the most popular Master Class of the Campus, “Realistic Shadows in Scrapbooking with Paintshop Pro”. You can get it for $8 instead of $19.99.

You need to use this code:

GRAB-0824-492

You can checkout directly from this page, but if you want to read more about shadows, you can check THIS PAGE. But the code will self destruct on Sept 1st so you better hurry!

Our new special offer will go live tomorrow (September 1st) in the Campus.

CalendarPreview-600

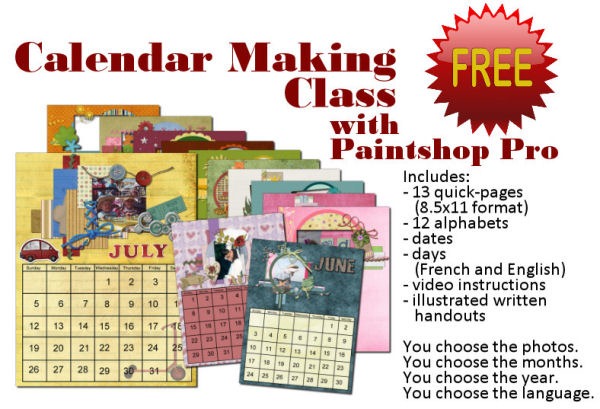
Yes. TOTALLY FREE. EVERYTHING is included (except the graphic program and your photos!). Supplies are included. Video instructions are included. Written handouts are included. Even a discount coupon to get it printed. And here is what Teejay has to say about this class:

I put 2 hours aside to view and play with this class… Now it is 4 hours later... lol. Your videos are really really good, easy to follow, even the hard stuff like separating the dates was made VERY easy to understand… the selection and cutting was made easy too. I think its because you ‘speak ‘ what you are doing when you do it, and you have given lots of stuff do make these calendars so special. That’s why it’s taken more hours of playing,… no cooking, cleaning or shopping!

So, check back in the Campus tomorrow (or later today, depending on your part of the world).

New script–Clothes Labels

cass-ClothesLabels

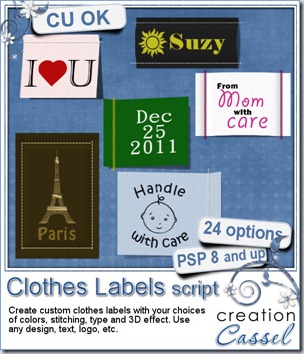
Have you ever seen some original kinds of labels? Although you would usually expect washing instructions, you can also get company logos on them. You can also buy, custom labels to put on kids clothes with their name (I used that when my three kids were in daycare) or some special labels to place on sewing projects that were handmade that read “Made by Mom”.

These kinds of custom labels can also be used in digital scrapbooking with just about any design, shape or text you want. How about using these to create a date element? Or a special phrase? or a name? or even a particular event with a symbol for it? Just about anything is possible with this script.

The way the script is coded, you just have to start with a design of any kind, of any size. From that, the script will measure a proportionally sized “excess” of fabric for the stitching, depending on the type of stitching you want and will prompt you for various custom details, like the color of the fabric, the color of the thread, the straight/zigzag stitching, and if you want to add a 3D effect with either bevel or lifting of the label. And if you want to add a shadow, it will be left on its own layer so you can tweak it more if you want.

You can get this very creative script in my store: Creation Cassel.

And as usual, there is a thread in the Happy Place of DST forum where you can add your name for a chance to win. But even better, suggest something you would like to see on a clothes label, and after the draw (Monday night), i will create a set of labels with all the suggestions given, and everyone who posted will get the set, even if you don’t use PSP. What are you waiting for?

cass-ClothesLabels-samples

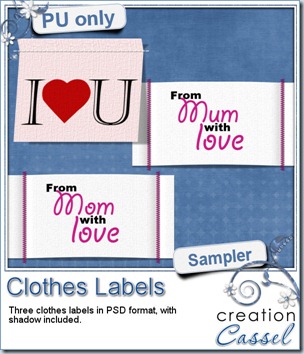
I created 3 labels with this script (2 of them have different spelling for our Mom/Mum). They are in PSD layered format so you can still tweak them. The shadow is separate and so is the stitching (although the shadow of the stitching is attached).

Where will you use those label?

You need to be logged in to download this sample. You can either login, or register on the top of this page.

And if you like this why not tell your friends on Facebook and on Twitter. Send them over so they can also download them.

.

.

.

.

News from the Campus

BasicExtraction

This is the last week to register for our next workshop on Basic Extraction techniques. Did you sign up? the workshop will be held on September 2nd, at 5pm Eastern.

Sign up now

.

.

.

.

Workshop-DVD-Case-ShadowsLast week, the Realistic Shadows in Digital Scrapbooking Master Class was offered at a really great deal through Digigrab. But that deal ended Thursday and i got emails asking me if i could extend the deal. Unfortunately, that deal was outside of the Campus site so it could not be extended just with the snap of a finger. BUT, i managed to make it available directly ON THE CAMPUS SITE until August 31st. To take advantage of the 60% off deal and get this master class for only $8, you need to use this code:

GRAB-0824-492

You can checkout directly from this page, but if you want to read more about shadows, you can check THIS PAGE. But the code will self destruct on Sept 1st so you better hurry!

Do you like the idea of creating a “scrapbooking” present for Christmas for relatives? Do you like the idea of a totally FREE digiscrap project? Do you want to get started in digital scrapbooking but you feel you need very basic and step by step instructions? If you answered “yes” to even ONE of those questions, stay tuned as there will be a great new offer in the Campus. But best of all, it will be available to all current and future members. Even better than that, it will be FREE. How can you beat that?

SneakPeak

Here is just a little sneak peak of what it will be. Although it might give you a general idea, you don’t know how BIG it is!

If you have not yet joined the Campus, just register. It is free too! And bring in your friends too!

New Script – Word Frame 2 Round

cass-WordFrame2Round

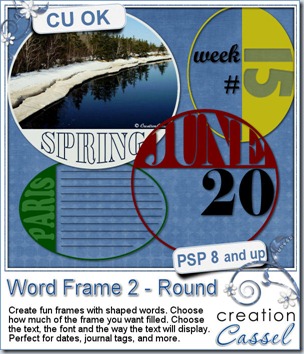
Last week, I brought you a script to create a square or rectangular frame around a photo, an element, or on its own. However, i thought it would be great to have some round (or oval) ones, so you could simulate postmarks but create your own. Of course, this required some shaping of the text in the area since it was no longer a simple rectangular area. This is done with the Warp Mesh.

Although this script will work with a photo, I find that you might be loosing a bit more of the photo with a round frame, so if you use that option, just be careful what photo you are using.

Unlike the previous script, this time, you are able to choose whether you want to have 25%, 40% or 50% of the space filled with the material you choose. This allows you even more flexibility and creativity.

Use this script on any size image so you can create a journaling area, or make it small to create a date stamp. Add your own word, date, name, to the frame to make something truly unique.

And as a bonus, you can still use the Warp Mesh on your own, maybe to add another shaped word on the “open” side? Why not. The Warp Mesh is included in the zip file and you can surely reuse it.

You can grab this script in my store: Creation Cassel.

cass-WordFrame2Round-samplersAnd as usual, i have a giveaway for you. Just go add your name to this thread in the forum, and i will pick a winner on Monday night. It is that easy.


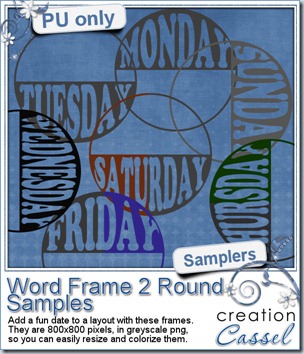
If you want to have a closer look at these frames, i created a set of round ones with the days of the week. They are 800x800 pixels in greyscale png format. This allows you to resize them if you want, and colorize them to match whatever project you are making.

You need to be logged in to download this sample. You can either login, or register on the top of this page.


News from the Campus

Last week was our workshop on Masks. This surely was a topic a lot of people wanted to learn more about because we had the largest attendance EVER! The recording should be available this weekend, probably Sunday.

Our next workshop, scheduled on September 2nd, will be on Basic Extraction Techniques. Do you want to join?

RegisterNow-01-200

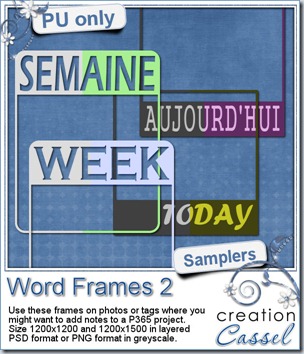
New script – Word Frame 2

cass-WordFrame2

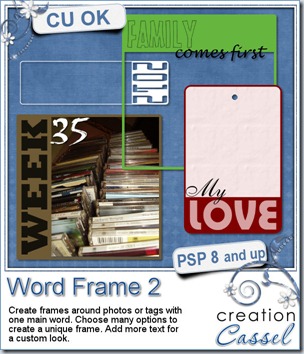
A while ago, i released a script that made an inside frame, with text. It was a delicate result, using the Word Frame script. However, at times, one might want something a bit more obvious or something that can be turned into a wordart. This script will do just that.

You can start with a photo from your P365 stash, and add a border OUTSIDE the photo. You can add the word WEEK in plain view and add the number in a contrasting color and font. Depending on whether your photo format is portrait or landscape, you can choose to have the word on top or on the bottom, or on one side.

You can choose any word you want. However, be careful as longer words will be made to fit in the space so if you are trying to write BEAUTIFULLY in a small space, the text will be kind of squished!

The font will be whatever you choose and unlike many other scripts, you will NOT have to type the name and risk a typo; the script will stop and let you choose the font from the text tool toolbar so you will have no problem with typing.

Once the word and the font are chosen, you will get four options to display that word: colored, outlined, cutout, or translucent. Except for the cutout (obviously), the word is on a separate layer so you can still apply your own personal touch.

What can you do with this script? Whatever you want. With all the options available, you are sure to get a frame that will be perfectly matching your layout or your kit.

You can find this script in my store: Creation Cassel.

cass-WordFrame2-samplers And as usual, i am giving you the chance to win this script by posting in this thread. And as usual, if you choose to purchase the script this weekend to take advantage of the new release price, you can still participate: if you win, you will get a coupon for a future new release of your choice! So go for it. What do you have to loose?

This week, i created four frames for you. Two in French and two in English. They would be perfect for a P365, or any “ordinary” photo (is any photo really ordinary?). You can add a date or a number in another font. Each frame is in greyscale so you can colorize them to match your project. Two frames are in PNG format, as they have only one layer, but two are in PSD format so you can actually move the words if you want, add a shadow, some brushwork, and also colorize them too.

You need to be logged in to download this sample. You can either login, or register on the top of this page.

News from the Campus

Our July Anniversary Celebration ended, well… on July 31st! But although the big noisy promotions are over, some quiet ones will still take place. For example, you can still get some of our monograms, if you are receiving our newsletter. You are not getting it? No problem, it is free to join, and as a member, you can get some goodies, once in a while and this week, another part of the monogram alphabet will be given.

RegisterNow-01-200

And this Sunday, August 5th, we will have our monthly workshop, this time, on Masks. Are you registered yet? That is free too! You still have time to join. And don’t hesitate to post on your FB or tweet about it. Any PSP user can find some use in masks, whether they are scrapbookers, card makers or even photographers! How many people can you bring?

RegisterNow-03-200

Write Finally, whether you are a member of the Campus or not, i posted a little survey about scrapbooking (and it is not specific to PSP). Can you go an have a peak at it? It only has 5 questions so it will only take you one minute or so. Click HERE to go.

New script – Photo Blocks

cass-PhotoBlocks

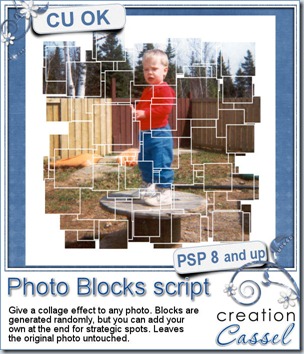
Last week, someone told me she wanted to find scripts to add some photo effects. She had seen all those fancy actions for Photoshop, but she was using Paintshop Pro. She asked me if i could do some. Without a specific effect in mind, i just browsed the net for interesting photo effects, photo frames, and such. I ended up on a collage effect, and sure enough, there was a tutorial for achieving it in Photoshop. I started reading the instructions, trying to see if it could be done in Paintshop Pro too, but i got discouraged with the amount of work it involved. I had no intention of working on 60 individual layers, even in PSP, so i thought of a different way to achieve it and it was also easy to turn into a script. Although doing it manually is not hard, it still takes time, so the script will allow you to  get a great result in no time.

The script will generate small, medium or large squares, depending on what you choose. It will generate many blocks. Maybe you will find that some spots are not covered, or maybe you won’t like the arrangement. No problem. Ask the script to add more blocks. In fact, they are “full” blocks with an outline, so even if you were to add 200 blocks, you will not see a ton of outlines.

If you end up with something that is almost perfect, but you still want to tweak it, no problem: you can add more blocks with the tool that will be already set for you. And you can also add a rectangular block for a real focus on a part of the photo.

This script is available in the store: Creation Cassel

cass-PhotoBlocks-samplesAs usual, you can add your name to the RAK thread in the DST forum for a chance to win this script. Just tell me how you would do this manually. I will be back on Monday night to draw for a winner.

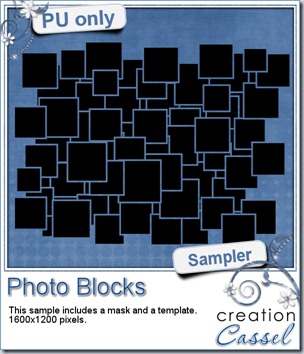
As a freebie, this week, i created a mask and a matching png template. You can use either one, depending on your program or the technique you want to use. It is suitable for a 6x4 photo, but as a mask, you can use it with a larger image. Not only you can use it on a photo, but maybe you can also use it with a paper. That would make a fun background, don’t you think? And it will be great to use with the upcoming workshop on Masks!

You need to be logged in to download this sample. You can either login, or register on the top of this page.


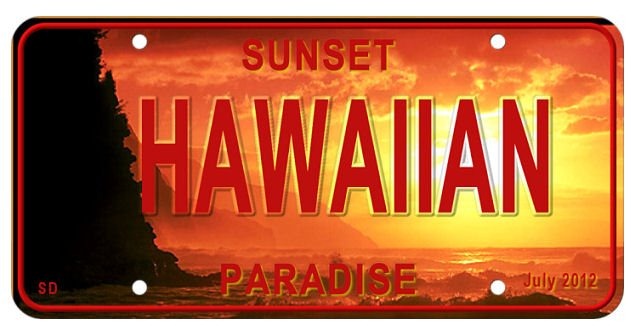
Sarah had fun with the License Plate script last week. She posted her dream plate. Isn’t that gorgeous?

Sarah-dream-plate

I would love this as a dream plate too, since i have never been in Hawaii. That would be great!


New from the Campus

T-Teejay Last week, we held two totally new activities. They were both called Video Speed Scrap, but really, they should be renamed. One was on templates and one was on monograms. It was really fun to all work on our own project yet be able to see what others were doing. That is the beauty of the set up we had. The participants all created templates and monograms. You can see one monogram that Teejay did. They will be distributed to all the Campus members as soon as i get all the pieces together. Here are some comments sent by the participants:

“Amazing” – Rachel

“I really liked being able to see your screen” – Susie

“It was fun. Lets do it again.” – Elaine

“i thought it was fantastic... what a great way this would be ..to learn of each other..this was what the net is meant for” – Teejay

Are we going to have another one of those? Probably. When? That, i don’t know. I am thinking of repeating the event with similar themes but i also have other ones in mind. When that will be scheduled, i will post it for you.

Finally, both the Basic Scrap course and the Element Creation tutorials course are still on sale. This will only be available for a few more days as it will end at midnight on July 31st. Check them out.

slashed79

 for

$49

Basic Scrap Course        Element Creation Tutorials


MaskingInPSP


On August 5th, we will have our next live workshop. The theme will be Masking in PSP. We often see masks as individual products in stores, but how do you use them? Can they have other purpose than just making a nice shape around a photo?

We’ll be looking into that. Of course, if you have any particular question you would like us to address during the workshop, just drop us an email, or include the question in your registration form.