Web
Analytics

New script – Corduroy texture

cass-Corduroy

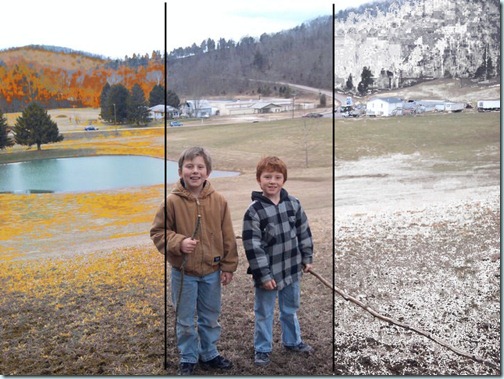
Remember those pants you had in corduroy? or maybe some furniture upholstered with corduroy fabric? This script will let you recreate those textures using any color, gradient, pattern, or even photos. Maybe you never saw a corduroy-ed photo, but you can do it with Paintshop Pro and this script now!

This is a simple script that lets you choose the design, and the width of the “wales”. So in the end, you have 12 different options for texture, but since you can apply it to just about anything, the possibilities are endless.

You can find this script in my stores: Creation Cassel and DigiScrapWarehouse.

And for a chance to win this script, go add your name to the RAK thread, here, and tell me of one thing you have that is made of corduroy.

Holiday Sample – Wreath

cass-HolidayWreath-preview

Following the two articles on tubes, i thought it would be appropriate to show you how tubes CAN be used to create an item. So i made this holiday wreath for you.

The green part is actually made from my green garland tubes simply drawn by hand. I  made little branches, and overlapped them. That garland tube is one multiple image tube.

Then, i used Bernadette Hunt’s Bubble blobs to decorate. Those are multiple images so clicking here and there would place randomly chosen balls.

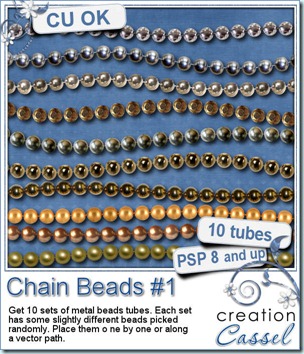
I used the gold chain tubes to add… the decorative chain. It is a directional tube which gives this appearance of being a continuous chain.

And to add more festive look, i added a bow made using the Bow #3 script that created a large organza ribbon and tied it into a fluffy bow.

It is yours to enjoy, but for personal use only.

You need to be logged in to download this sample. You can either login, or register on the top of this page.

New products – Fancy Text paths and script

cass-FancyTextWrapping    cass-FancyTextPaths

A few weeks ago, i coded a script to write text inside a specific shape, using special types of path and matching script coding. This made up for one missing feature of Paintshop. At that point, you could write text inside a simple shape (like a rectangle, or a circle), or a more fancy shape (like the alphabet shapes, school theme shapes). Then, my script mentor, Suz Shook, told me it would be great if the script could work on non-horizontal or wavy, but that meant a whole lot of different type of coding. But, this became a challenge for me. And this challenge led me to code this script for you. Now, this set includes two products: one script and one set of 12 paths.

The script will let you write out your own text, in your own font. You can use the path to give you an idea of how much space you will be using. Once you have all your text typed, you run the script. Depending on the paths, you can still align left, right or center (not all paths can be center aligned). The text stays as vectors so if you notice a typo, it is still easy to edit. If you want to edit your text, change it, add or remove more than just a letter, you can simply undo the script and rerun it. The path will stay untouched, so you can also reuse it.

The set of paths include various types of curves or angles. Some paths are doubled so you can have a left and right version when applicable (never mirror a path unless you want the text to write from right to left!). One little trick to use these paths (or any other paths): copy the path on your layout and run the script from there. That will save you the headache of copying and pasting the many layers that will be created by the script. In addition, it will make it easier for you to edit the text if needed.

You can find both those products in my stores: Creation Cassel and DigiScrapWarehouse.

This week, i have a RAK at the DST forum where you can with BOTH products as a set. So, go over there, add your name, and tell me if you have ever done text on a layout in this manner, and if you did, how you did it (of course, a link to the layout would be great too).

What do you do with tubes anyways?

Last week, I explained what “tubes” were and what types of tubes you can find. Now that you know what it is, you probably want to know what you can do with those.

Of course, what you do with a tube depends on what type of tube you have so let’s go back to the types we mentioned last week and we will see some specific uses for each of them.

1- Single image tubes

Although you can have just about anything converted into a single image tube, not all of them are really that useful to be converted. If you have an image that you likely will use only just a few times per layout, it might not be necessary to convert them to tubes. For those, you can just as well use a png format and it will be enough for your needs. However, among the great single image tubes you can have, let’s mention images like beads or pearls, stars that you can place all over a page, kind of randomly, flares to add to glitters.

Here is a random placement of a single flower (the grass background is another tube, but a different kind). With a single image tube, you simply have to randomly click wherever you want and get that kind of look:

Image161

You can also prefer to have the same tube repeated at regular interval. Here is a basic ribbon where i added a single eyelet. One nice thing about placing tubes  is that you can click where you want the first one, then, holding the SHIFT key, click where you want the last one to go and they will all be placed evenly.

Image164

But you do not have to use them always in a straight line. In fact, you can hand draw with them and they will go wherever you write. Here is a little doodle made using some star tubes.

Image162

And of course, you can also follow a vector path if you want using Gary Barton’s Vector Tube script. You can use any path or preset shape you want. Perfect if you want to create a frame to place a photo, or even place beads or other elements around letters, since letters are also vectors!

Image166


2a- Tubes as series of images placed randomly

As mentioned before, those types of tubes include various images, usually of the same type and are best used in a fairly random manner. Yup, this is the same image as above, but this time it is to illustrate the use of tubes to create the grass. This set of tube includes a total of 10 individual images that are chosen randomly as you move your mouse along your work. This is great to create a background without having to draw images one by one.

Image161

Choose the step to have your elements closer together or spread widely around. Another example of using these kinds of tubes, is using them as confetti (if you want to create your own confetti, there is a script to do that, here). Those are great to create an overlay or border, or to accent a section of your page.

Image165

2b- Tubes as series of images placed in a continuous manner

These types of tubes can give you a great deal of effects and let you follow various path, and still look like it is supposed to. Here is sample of tube that came with PSP. With freehand drawing, you can create a fun chain. Create more than one, on different layers for an intricate look. You can make it a neat look or a messy look. It all depends on your drawing.

Image171

You can use the rope tube to make strings attached to whatever you want:

Image170


3- Tubes as directional images

Directional tubes are also very versatile as you can use them in the same way as the previous ones, meaning, hand drawn, or along a path, but the difference i that you can use images that are not always facing the same direction, like stitching, foot steps, chain links, zipper teeth. What can you achieve with these? You can hand draw or hand write elements. Yes, you can write with those tubes just like you would write with a pen. Check this (this letter is part of a whole alphabet posted as a freebie on June 11, 2010 in this blog):

cass-Rope1-B 

Just like all the other types of tubes, you can hand draw but also place along a vector path. This method is often used when you want a perfect placement of the individual images since hand drawing can be a little less precise, but again, it depends on what look you want to achieve.


Now, what will YOU do with tubes? Show us what you do. Add a comment and link us to a layout or a kit you created using tubes in a creative way.

If you have questions about PSP, about the tools and effects, just drop me a note and i will look into writing a little article on my blog.

New script – Stacked up

cass-StackedUp

I have seen on some layouts, this kind of effect of using a single photo and stack several duplicate of the same image. I guess it is a good idea to use the same photo as opposed to different photos, since the viewer would get annoyed at not being able to see what is peeking out from under the main one. Thinking of all the steps required to accomplish this, I figured that a script would probably make this easier and much faster than manually do all the step: duplicating, rotating, displacing, bevelling, shadowing and possibly linking. This script will do it in less than a minute (i timed 32 seconds to duplicate 10 times, and add a bevel and a shadow to each and then linking everything).

And you know, you do not have to keep all the images placed where the script put them. The end result will be different every time since there is a random feature coded in the script. Also, all the layers can be linked but always left unmerged so any layer can be moved further. You can even use all the layers to scatter the pictures around your layout instead of keeping them stacked in one place. Or,  how about stacking two sets of pictures and kind of mix them as if you were shuffling two decks of cards? Or how about adding some extra elements, like tickets, stickit notes, or scrap paper between some of the layers? Talk about easy to personalize!

You can get this script in my stores: Creation Cassel and DigiScrapWarehouse.

cass-StackedUp-samplerAnd for a chance to win this script for free, check out this RAK thread in the DST forum. This week, even non-PSP users will have a chance to win something so even if you do not have access to a Paintshop Pro version, head over there.

And now, i know you were waiting for a free sample. Since this script runs on your own photo, i could not run it the same way, but i created a layered template for you. It includes 11 layers of the polaroid type of frame. It is up to you to insert one photo (or more, if you want). The sampler is in psd format so just about anyone can use it.

You need to be logged in to download this sample. You can either login, or register on the top of this page.

Will you show me what you can do with these?

What is a tube anyways?

The word “tube” is pretty specific to Paintshop Pro. We can hear PSPers use this word and even some derivatives, like “tubing”, which has nothing to do with going down the river on an inflated tube! All in all a tube is a bit like a sticker that you place with a click of the mouse. That is an '”easy” description and does not cover the full potential of this tool.

Tubes can be used in three main ways: 1- as single image to place as often as you want  2- as a series of images that can be placed in randomly  3- a series of images placed directionally. Let’s see them all in a bit more detail.

1- Tubes that are single images

These kinds of images are doing exactly the same thing as if you had a png image, with a transparent background and you placed various copies of it on your work. It can be a star, an angel, a handprint, a toy locomotive, a flower, etc. There is no limit to what can be used as a single image. If you can extract it, you can use it as a tube. Here is an example of several repetitions of a single image tube.500

Image54

One thing you can do with tubes that is a bit different than with regular single images is that you can set the step and have the single image repeated and placed evenly along the way, either in a straight line, or when you draw freehand, like this:

Image56

and you can also overlap them if you set a smaller step:

Image57


2a- Tubes as series of images placed randomly

Another characteristic of tubes is the possibility of having several of them together. Some of them can have all different images and get placed, one by one, randomly on each click. Jasc and Corel have included several such tubes with the program. They are often grouped by types, since it makes more sense to have several autumn leaves, or pink buttons, or grass blades when you place them. Here is an example of randomly picked images (each item is placed where i click but they are randomly picked):

Image55

The randomness of this type of tube, combined with the adjustable step lets you create elements like this garland (available in my store):

Image58


2b- Tubes as series of images placed in a continuous manner

The previous uses of tubes are pretty simple and could be done with any set of png images, however, the “tube” tool has more potential when the images are created to be used in a continuous manner. In this case, they tend to create something very different. The individual images are often just part of something and their continuous placement will create something. As an example, here is a rope tube (very versatile tool!). Each of the

Image59

The top rope is the “finished” product with the default settings of a step of 1. On the bottom, i changed the step to 35 so you can see how each individual image is slightly different from the previous one so their sequential placement will create something else. Isn’t that neat? That is one of the most powerful characteristics of the PSP tubes.


3- Tubes as directional images

Well, this type of tube is my favorite and is, in my opinion, THE most powerful feature of the tubes. How good they will look depends on how many different pictures you have. The tool will place the images according to the angle of movement of the mouse. And the tube file will include many different images, oriented differently. One image will be oriented straight up, the next one will be angled at 5 degree, and the next one at 10 degree and so on. This will allow the pictures to seemingly follow the expected direction for it. Here is an example of a directional tube used:

Image53

And that is how all my directional tubes are created to make ropes, chains, tire tracks and zipper teeth!

So, if you didn’t know what tubes were all about, this must help you a bit. If you are a PSP user, play with them. As you can see, tubes are much much more than just transparent png images with a different name! Tubes are fun to use, and so versatile, especially since the tool comes directly with your PSP, and no need to purchase an outside plugin or such.

Have fun with them!!!

New tubes – Old chains

cass-OldChains1

If you like my chain tubes, you might want to look into these. Unlike the previous chains, these are old, rusty, worn. They contrast a fair bit with the shinny gold and silver chains i released before. These would be perfect for vintage kits or layouts, or even if you are into Steampunk style of kits/layout.


The set includes 10 different tubes to create chains in just about any shape you can think. Draw with them freehand, or place them along a path for a more regular appearance.


You can get it in my stores: Creation Cassel and DigiScrapWarehouse (always 25% off until Sunday night).


cass-OldChains-sample


Now, for a close look at these chains, i created a braided chains frame. It is about 2000 pixels wide and is in png format so anyone can use it.

You need to be logged in to download this sample. You can either login, or register on the top of this page.

And if you want a chance to win the whole set, hop over to the Happy Place at the DST forum and add your name to this thread, telling me what “old chains” reminds you of. I will draw for a winner on Monday night.

FREE script – Switch it all

cass-SwitchItAll

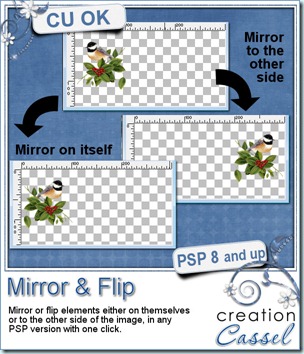
Here is a little utility script for you. Although, in Paintshop Pro, you can rotate all the layers in one operation, you cannot do the same if you want to flip or mirror an image with several layers. So, this script will solve that. Now, you will not have to flip or mirror layer after layer, which can be tedious if you are using a template with 20 layers or more.

There are surely other use for this script, but i think that template makers and template users will find it the most useful.

Best of all, this script is FREE. So just check out my store and grab it!

New tubes – Garlands

cass-GarlandTubes-Set1

This week, you can either start ahead on this Christmas kits, or catch up with last year’s pictures to scrap. You get a total of 15 garland tubes in Christmas-y colors. You will get different basic colors (gold, red, green and silver) in various color “intensity”. You can use them to hand draw lines in any length or path, or you can fill a surface as you wish too. Choose the size to create thin or thick garlands. Dress up a tree, make a frame, add a border to any page.

Those elements will work only with Paintshop Pro (version 8 and up).

You can find them in my store: Creation Cassel.

For a chance to win this whole set, check out this thread at the DST forum and add your name to it. Mr Random will pick a winner on Monday.


cass-Garlands1-Samplers And if you want to look at those, a bit closer, here is a freebie for  you. I Made 2 basic Christmas decorations using these tubes freehand. As you can see, you can outline, draw or even fill a surface with these tubes, just as you would do with a crayon.

You need to be logged in to download this sample. You can either login, or register on the top of this page.


New product – Tire Tracks

cass-TireTrackBrushesSet1  cass-TireTrackTubesSet1

Do you own a motorbike? a four-wheeler? a dune buggy? or any other vehicle on wheels? This is a perfect tool to help you add some accents to any layout featuring a vehicle or its owner! It could be about your passing your driver’s licence, your child’s first car (be it a full size or a toy one), or it could also be around your long road trip, your camping vacations, etc. You can use those to create a random background, to circle around some featured photos, create frames, or even a ribbon (why not?).

This week, i released two matching products. Which one to choose is a matter of preference. I would recommend the brush set as it is the most versatile. You can change the color, and even use some texture in your material palette to create that grungy worn look. However, if you use PSP8, the way the program uses the brush does not give a very smooth line if you have some sharper “corners”, so the tubes set will work better in those cases. However, if you are not using any such sharp angles, the brush works fine.

You can find both products in my stores: Creation Cassel and DigiScrapWarehouse.

As usual, i have a little draw for you at the DST forum, so if you want a chance to win one of these, just add your name to this thread.

cass-TireTracks-Frame-Sampler

I know, you are waiting to see things upclose aren’t you? Well, this week, i created a wooden frame with tire tracks on it. Pretty simple and i think it looks like a fun frame to use but it is yours to download for free.

You need to be logged in to download this sample. You can either login, or register on the top of this page.

I would love to see how you would use this frame so if you create a layout, how about showing it to me?