Web
Analytics

New script – Plastic Pocket

cass-PlasticPocket

I noticed, in the digital scrapbooking forum, that  member was looking for something that simulates those plastic pocket protectors and several designers replied with their own versions. Very interesting products, and varied, but as a script coder I was wondering how one could get a real custom sized pocket for their special element that might not be standard size.

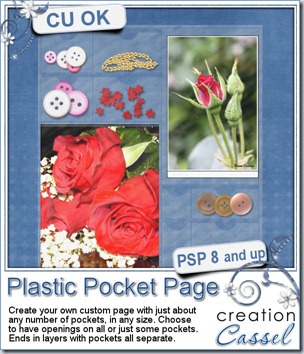
Now, this script will let any Paintshop Pro user create single or multiple plastic pockets. Do you have a large or a tiny element to store? No problem. You can also make multiple pockets (up to 8 compartments), in vertical or horizontal strip. You can have the pockets open or closed, and with different types of cutout for the open pockets (you know, to help you get things in and out easier).

What would you put in those pockets? Just about anything you want. You can place photos, buttons, beads, chains, leaves, stickers, tickets, tags, even alphas to create a title! Yes, why not make a title with those multiple pockets? That is a cool idea!

You can get this script in my store: Creation Cassel.

As usual, you have a chance to win this script simply by participating in the RAK in the DST forum. Check out this thread and tell me what you can think of inserting into those pockets. I will come back on Monday with the name of a winner.

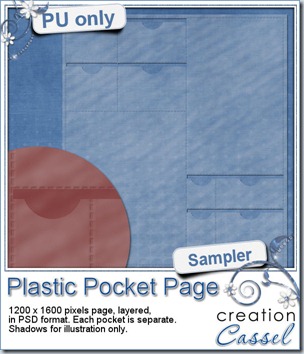
cass-PlasticPocket-sample I know you would like to see one of those pockets on your layout and play with it. You are lucky because i created this multiple pocket for you. It consists of two separate layers, in PSD format, so anyone can use it, even if you don’t have Paintshop Pro.

You need to be logged in to download this sample. You can either login, or register on the top of this page.

You will get a set of 6 open pockets, with that typical cutout on the top layer allowing you to get your elements to slightly stick out. For best results if you want elements to stick out, I would strongly recommend you watch the video on Interlacing element in PSP (even if you are not using Paintshop Pro, I am sure you can do something similar with Photoshop).


News from the Campus

Our next webinar is scheduled for next week. Will you join? We will be tackling Vectors as they tend to scare a lot of people (i have to admit, i was intimidated by vectors myself at first). Do you have specific questions for us? Just email me your questions ahead so i can plan to address those during the webinar. This is what we plan to address (but your suggestions might be added to those points)

  • basic vector shapes
  • create your own vectors
  • using vectors for other purposes

Are you having a hard time with the time zone issues? You are not alone, so here is a little list to help you:

Greenwich Mean Time: 10 PM (you cannot be in bed already!)

Atlantic time: 6 PM (this is where i am)

Eastern time: 5 PM

Pacific time: 2 PM

Eastern Daylight Time: 8 AM (for our Australian friends)


Click this button to register and be sent reminders by email


Last week, we added the Dymo tape tutorial for our Element Creation section.

DymoTape

Last weekend, i wanted to do more recording for the Element section but guess what? I got a little ill, and … i lost my voice! Yup, for 6 days, i either had a really bad voice, or no voice AT ALL! I should be able to record more tutorials this weekend to continue the series.


Last but not least, you only have a few days to refer friends to join the Campus (even for a free membership), and have a chance to win the access to one course of your choice in the Campus. Send your friends to THIS LINK so they can put your name as a referrer, and i will announce the winner in an email soon after the end of the month.


See you in the Campus!

New script – Acrylic “Styles” for Paintshop Pro

cass-AcrylicStylesA

Do you see all those styles available for Photoshop and wish you could use them in Paintshop Pro? Although this is not the case, this script will create a similar LOOK as some of the styles you could see to create acrylic. You get 6 options: dark edge, white edge, ridged edge, angled edge, flat border and colored acrylic.

Not only you can choose the type of edge, but you can also choose the thickness of the acrylic, meaning that the white reflection will be placed somewhat differently if you want a thicker or thinner element. Or in the case of the flat border and the angled edge, it will make it wider or narrower. The whole element will also be filled with a 5% opacity white so you will get that appearance of something to slightly change the color of the element or shape underneath. Another advantage of this fill is that you can grab and move the element without struggling to grab exactly the edge or so. No problem: grab it anywhere you want.

The script will use any solid shape to create the acrylic element on a totally separate layer so it will not affect the project you are currently working on.

You can get this script in my store: Creation Cassel .

Do you want a chance to win this script? Think of one element you can envision being turned into acrylic, and tell me in this thread. I will be back on Monday with a winner.

cass-AcrylicStylesA-Samples

What do those styles look like up close? Here is a set of simple arrows made using 5 of the 6 styles. They are pretty large so you can resize them to match your project. They are all in PNG format so anyone can use them, in just about any program.

You need to be logged in to download this sample. You can either login, or register on the top of this page.

Since i have been able to recreate something similar to some common “styles”, can you think of other styles you would like to see for Paintshop Pro? Send me an email with samples or previews of styles you would like to see. Notice that this is Acrylic “styles” A, so i am hoping to get also a B and a C, and so on. Send me an email, send me a visual so i can work on that.


email


News from the Campus

This week there is a special 2 for 1 promotion on either course of the Campus (the Basic Scrap course or the Element Creation course). Find a friend, and join together.

Two-for-One-B

It is THAT simple! Now you can enjoy the course you wanted to take, and it will cost you only HALF the price. This promotion is only valid until Sunday, Feb 19th, so hurry!

Choose the course you want!

basic    element-300

If you don’t know of any friend wanting to join with you, just post on our Facebook page looking for a “partner” and you might just find that person who was to shy to ask around! If you are a member of the DST forum, you can also post in the Scrap Talk section (someone did that last fall and found a partner very quickly). I guess you could also post a request in a comment to this post!


Did you get a chance to view the webinar recording on Using Layered Templates in Paintshop Pro? The video is available for FREE to anyone who has registered to the Campus. Dont worry, the registration is absolutely free.

LayeredTemplates

After you view the webinar, there is a little survey you can fill and once it is sent, you will get access to some goodies provided by the contributing designers, but we don’t want to abuse their generosity, do we?  So i make those goodies only available until Sunday, Feb 19th, which will be giving everyone 2 weeks to grab from the day of the webinar (which was held on Feb 5th). After that period, although the webinar will still be available, the goodies will be gone.


Speaking of webinars, they are currently ALL free, but starting in March, only ONE webinar will be accessible at the time to registered members, however, while changes are underway, all the recordings WILL be made available for download. Yes, you read it right, you will be able to purchase the downloadable versions of the webinars, view them whenever you want, even offline. This will be great for anyone with slow connection: no more choppy playing of the video; one (slow) download, but speedy playing afterward!


To benefit all the advantages of the Campus life, simply join us! Click the Subscribe button and you will be admitted immediately (no admission exam to fill out!)

button-register See you in the Campus!

New script – Pyrography

cass-Pyrography

When i was a kid, i got a pyrography kit. It was neat, but also dangerous. I have burnt my fingers a couple of time with the metal tip so i didn’t have a chance to use it that much. I loved the smell of the burning wood, and i thought the examples they were giving in the instruction manual were so great. But i was never able to do anything close to what they were showing. But now, with Paintshop Pro and this script, i could do pyrography as often as i want, without any risk of burning myself!

This script will allow you to create a burnt design of your choice. You can either let the script cut out a piece of wood for you in the shape of your design, or you can create a custom shape (as plain or intricate as you want) under it. You have 5 types of wood you can use (the seamless tiles are included in the zip file).

You can get this script in my store: Creation Cassel

And of course, you can add your name to this thread in the Happy Place for a chance to win it. What would you do with that script? What element would you create? Just tell me in the thread and i will be back on Monday with the name of a winner.

cass-Pyrography-samples Valentine Day is getting close, so how about a free sample of what this script can do, but in the shape of hearts? This is your freebie for this week. Each piece is about 900 pixels wide so you can (and definitely should) resize them to fit your projects. After all, you would not want to stick such a huge piece of wood on a layout, would you?

You need to be logged in to download this sample. You can either login, or register on the top of this page.


Remember how i keep telling you that if you use one of my samples, to please show it to me? Well, this week, Marj did just that. She used last week’s freebie and created this in honor of Carol King's 70th birthday and she sent me her project, so i am sharing it with you. Thanks Marj for sharing.

Echo sample friend

News from the Campus

Last week, we held our monthly webinar. It was about using various types of layered templates. It was a great session. And the participants even saw me struggle a little bit since the PSPX3 is not behaving like the previous versions for one very specific function and it tricked me. But in the end, we figured out how to color some interesting flares! The video editing should take place this weekend, so i expect it will be up to view by Sunday at the latest. KEEP AN EYE on that page because this recording will be free to watch with registration to the Campus, but starting in March, it will be packaged as a downloadable video with the written handout, and sold. This will be the case of most of the webinars, so if you have not yet registered to the Campus, now is the time so you can at least view all the current webinars, AND download the written documentation. What are you waiting for? Here is theindex page for the webinars.

February 2012 - Using Layered Templates with Paintshop Pro

January 2012 - Seamless Design with Paintshop Pro

December 2011 - Details in the night

November 2011 - Be the master of time

October 2011 - Realistic Shadows in Paintshop Pro

September 2011- Playing with the Text tool


Last week’s newest tutorial for the Element Creation section was the Glitters. Yes, you can create glitters with Paintshop Pro, without the need of any outside plugin.

Glitters

Do you want to register for one of the Campus courses but you are low on cash? Listen to this super opportunity: you can win one course of your choice in the Campus (either the Basic Scrap course, or the Element Creation course for 6 months) simply be referring people to register in the Campus. No selling (although if they purchase one course, you earn more points). Tell people among your Facebook friends, your Twitter followers, your blog readers, your newsletter subscribers, etc. But wait! you have to send them to THIS LINK only, so they can put your name as a referrer. The regular registration in the Campus does not have that field, but THIS LINK does. If you are not yet a member, what are you waiting for? You join, and then you send friends over. So you still can accumulate points. They will be tallied at the end of the month.

Go ahead, and tell everyone around!


And finally, as Valentine Day is getting close, i will have a TWO FOR ONE special on Campus courses. Look for a friend who will want to share the cost of one course. You don’t know anyone who wants to join? No problem. Just post on your FB or Twitter. Even better, post on the Campus Facebook page looking for someone. Maybe someone is already looking for you! The special is not starting YET, but you have a few days to get ready for it!

Oh yeah, you will have to LIKE it first, so go ahead.

See you around!

New script – Quick Page Photo Cutout

cass-QPPhotoCutter

Cut out your photos from layered projects and create quick pages in just a few seconds. I know, cutting out those shape is not that hard, but it can be long if you have many many layers to cut through. The script will cut all the layers below the image, but will leave the ones on top intact. This will allow you to have any decorative element covering the edges or the corners of the photos.

Run the script for every photo you have to cut. It is that simple! It will take less than 10 seconds per photo, i promise!

Do you have CT members who make gorgeous layouts? Do you want to turn those fantastic pages into QP for your newsletter subscribers, Facebook fan freebies, blog freebies, etc.

You can get this script in my store: Creation Cassel.

As usual, there is a chance to win this script if you answer the question in the thread in the Happy Place. Checkthis thread and a winner will be announced on Monday night.

cass-QPPhotoCutout-sample To create the preview, i used a layout made with the kit Floreala Arrossisca by Silver Fox Studio. With her permission, i am making the full size QP available to you. It is a very simple design because it is also the Project #3 in the Beginner Scrap section of the Scrapbook Campus.

Unlike most of my freebies, this one is a larger file so be patient.

You need to be logged in to download this sample. You can either login, or register on the top of this page.


News from the Campus


Did you register for our next webinar yet? It will be held on Sunday February 5th, at 5pm Eastern time. We will look at using Layered templates with Paintshop Pro. Register below.


button-register-150

I will have the pleasure to use some really fun templates from different designers. And those designers have also agreed to let YOU have some goodies, so you don’t want to miss that. We will be looking at the common layout templates, but also some element templates, some paper templates, and even another type of templates that i will keep secret. You will have to be there to see!


February is coming, and it means there will be a special promotion. What is it about? I will only give you a single word hint: FRIEND. You will have to wait until next week to find out the whole details about it. You can also subscribe to the mailing list if you want to learn as soon as it comes up (I know you want to be first to know, don’t you?).


button-yellow-subscribe


New script – Beads

cass-Beads

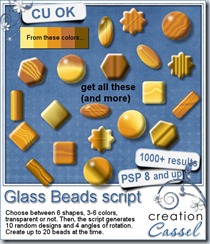
Do you sometimes wish you could have more beads to add to your projects? Maybe you have one or two but you want to have more and you cannot find any more? This script will let you create an infinity of beads based on anything you want. You can start the script with a photo, a paper, a texture, or simply a color palette (with up to 6 colors).  The script will generate up to 25 different beads from that source. And yes, they will be different because of the random feature integrated in the script. The part of the image used will be different every time. You can also choose to have the definite pattern of a paper or a photo show on the bead, or have the colors more blended together for a softer look. And even if you run the script with the same source, and the same settings, you will never get the same result twice. Talk about having resources!

Once the beads are generated, you can delete those you dont want, save the ones you like (and if you have PSP9, you can even export them as a tube with the Auto-Tuber script that is included) so you can place them along a vector path or draw with them.

You can get this creative script in my store: Creation Cassel .

And why not try to win it. I have a draw in the Happy Place of the DST forum. Just check this thread and add your name to it. Everyone will get something, even if you are not a PSP user so do not hesitate.

cass-Beads-Gold-Samples How about a little Freebie now? I created these TWENTY beads for you. They are all in PNG format for all to use, but there is also a psptube file for Paintshop Pro users so they can “draw” with it.

You need to be logged in to download this sample. You can either login, or register on the top of this page.

Each bead is 60 pixels wide and you can resize them down. With 20 different beads, it will surely look more “realistic” than the exact same bead repeated over and over again. Place them in the center for a flower, along the edge of a frame, in line to make some kind of “string”. What else could you do with that?


News from the Campus


SeamlessDesign

The recording for the “Seamless Design in Paintshop Pro” webinar is now uploaded in the Campus. You can find it in the Webinars section. The written handout should be available soon.

Our next webinar will be held on Sunday February 5th, at 5pm Eastern time. We will look at using Layered templates with Paintshop Pro. Register below.


button-register-150

Since we have had several registrants in the past who got confused with the time of the presentation (due to the wide time zone differences), please check with this Time Zone Converter to figure out the time for YOUR zone. You can also follow the Campus on Twitter. I will make sure to tweet a countdown, like an hour before, 30 minutes before and so on. That way, it might help you pinpoint the actual time of the start of the presentation.


Twitter_logo2

I know it is frustrating when one arrives one hour too late! We definitely don’t want you to miss it.

New script – Embossing Tape

cass-EmbossingTape

Are you old enough to remember those embossed plastic tapes commonly called Dymo Tapes? I used to use those on my covered books in school. I have also seen them used in storage, for inventories, on shelves, etc.

You can create your own with this script. Any text, any color for the tape, and even any font you want. And if you want it a little more realistic, you can get the characters slightly off-line.

You can get this script in either one of my store: Creation Cassel .

There is also a thread at DST forum where you can add your name (and answer the little question) for a chance to win it. Go right away and I’ll draw for a winner on Monday night.


cass-EmbossingTape-samples I am sure you wanted a freebie, right? You will be able to see a full size of three embossed tapes you can use on your layouts. What kind of layout will you do with that?

You need to be logged in to download this sample. You can either login, or register on the top of this page.


News from the Campus


Last week, we had the live presentation on Seamless Tiling with Paintshop Pro. Did you attend? We looked at ways to create a seamless design, either from a paper, from a png element, or even from a photo. If not, the recording should be up on the Campus this weekend, so keep an eye on it. Next webinar is expected to be on Sunday, February 5th, 2012. Do you have some topics you would like to see presented? Just email us.


The last tutorial that was added was the Zipper. We had one student who took that tutorial and made something so realistic that, at first, i thought it was a scanned zipper. See for yourself.

pn685-zippertut


See you around in the Campus.

New script – Embossed

cass-Embossed

Although there is an Embossing effect in PSP, i always felt it was not right. First off, it has light coming from a different angle from what i use and it usually was too bold so i decided to create a script to make different types of embossing.

This script will start with any design, pattern, image or text (choose black for best result). Then, simply run the script. Whether you have a paper beneath or not, it will not matter as the script will create an embossed “layer” that is separate from the paper, meaning you can modify it afterward, or even save it and use it on a different paper. How neat is that? You can use it for embossing a whole paper, a border, a tag, a strip of paper, etc.

In addition, the script offers you 3 types of embossing, from the bold one to the delicate one.

You can get this script in my store: Creation Cassel .

And of course, you have a chance to win this script in the Happy Place of the DST forum. Check out this thread where you can give me ideas on how embossing could be used in digital scrapbooking. Can you think of something innovative?

cass-Embossed-Samples And what about a little sampler of an embossed layer? Here are two samples. They will fit a photo or a mat about 7 x 5 inches. They are in PNG format, so you can use them in just about any graphic programs. And you can adjust them, blend them with a paper of a different color,  resize them, etc.

You need to be logged in to download this sample. You can either login, or register on the top of this page.


**********************


This week, i received a very nice email from Linda who had just purchased the ClipToIt script (released last week). She sent me a sample of her work (but i cannot share it here because we don’t have the credits). Here is her email:

Hi Cassel - I attached a template that I have never been able to use correctly until your new script "Clip To It",  and my layout includes the bright yellow glow under the template using your Colored Edge Script and the blue tab is from your felt presets -

You have made scrapbooking so enjoyable - I just can't tell you enough how much I enjoy all your tools.


News from the Campus


I hope you had a great start of 2012. Some of you did take advantage of our Ready Set Go promotion for January and are now enjoying one of the two courses of the Campus. Glad to see you on board.


This Sunday, we will have our live presentation on Seamless patterns. Although there is a “tiling” effect in PSP, there are times when that effect does not do what you really want. Here is a section made seamless, and from scratch.

Seamless-Cassel

Date: January 8th, 2012

Time: 5PM Eastern time (GMT-5)

(notice that it is 2 hours later than usual;

hopefully our Australian colleagues will be able to attend)

Click this button to register and be sent reminders by email


Are you doing a Project 365 (or 366) this year? Do you want to know a little bit more about it? Check out last week’s article in the Campus Scrapping in the New Year – Project 365. There should be another article this weekend, along with a list of resources for you if you decide to take on that project. Are you starting one?

New script – Clip To It (and another script)

cass-ClipToIt

If you have lots of photos you want to use in your scrapping, you will definitely love this script, as it will save you a TON of time. Usually, if you are using a template, you have to place the photo on your work, resize, move and rotate the photo approximately to match the space you want to use in the template. You might play with the opacity to give you an idea of how to center Aunt Lucy’s face in the space, and then, you have to select, change layer, trim, and maybe you end up not happy with the result. Did that ever happen to you? This script will save you all that trouble. Once you add the photo on the template, run the script and magically, the template layer changes to a mask layer, and the photo gets slipped underneath, so you can actually SEE through the mask. Not only that, but you can still move, resize, rotate the image while you clearly see what it will look like. No more guessing, no more undoing. And once you are happy with the result, simply merge the group and that is it!

If you are using PSP9 or above, you can even bind this script so the whole process will be literally ONE CLICK. What do you think of that?? You can grab this script in my store: Creation Cassel .

If you want a chance to win this script, go add your name to this thread in the Happy Place and tell me what is your biggest challenge when using templates for layouts. I will be back on Monday with the name of a winner.

cass-OpenAsLayer Last week, i was discussing with another PSP user, who can code scripts. He showed me that he had tweaked and combined a couple of scripts from Corel so that you can open an image (or photo, element or paper), copy it, paste it as a new layer on your project, and close the initial file, all that in one run of a script. I thought it was a super idea. I then decided to tweak it myself too, so that the new layer will be renamed according to the filename of the image that was opened. And again, if you bind the script, you can do that as easily as choosing Open… command. Since this is NOT my script, i asked LeviFiction for the permission to distribute it in my store (until he has his own site up and running). Can you imagine the time you will save using this FREE script (calledOpenAsLayer) and theClipToIt script? You can create layouts using templates in a fraction of the time it would take you to do it the usual way.

But that is not all. Remember when you wanted to take note of all the products you used to list the credits? I have a script called Credit List Compilation. It will assume that you renamed all the layers according to the element you used. And it assumed that you did that manually. Now, you don’t have to do anything manually as this script will just do that for you! WOW!!!!

This script is only available in my personal store: Creation Cassel.

cass-WordAlbum-2011 I am sure some non-PSP users are anxious to grab a free sample from here, and the free script is really no use for them, so i decided, since it is the end of the 2011 year, that you might want to create another album to combine some photos from this last year. I had a similar album last year and i have to say that it was very popular!

You need to be logged in to download this sample. You can either login, or register on the top of this page.

I didn’t set up a pay-with-a-tweet or such, but i sure would appreciate it if you did tweet or post on FB about this.

Why not make a summary of your kids’ year, and repeat the same tradition every year. Imagine the nice collection they will have in the future!


News from the Campus


2012

Did you take lots of pictures during the holiday season? Do you plan on making lots of layouts in 2012? Do you want to start digital scrapbooking with PSP? or maybe, in 2012, you want to start creating some elements yourself, or at least add a little touch of YOURSELF instead of only relying on the kits made by others? You are in luck. If you keep an eye on the Campus, you will hear of a special promotion that will start on January 1st. Don’t blink because this promotion will ONLY last for 5 days (from January 1st to 5th). You will have a special price for the Basic Scrap course, and a special price for the Element Creation tutorials section.

TopSecret

Do you wonder what you can find in the Element Creation Tutorials? Keep your eyes open as there will be a super special secret sneak peak (that is a tongue twister, isn’t it?). What will it be? Well, if i told you, it would not be a secret, would it? So you will have to keep checking the Campus pages or even better, join the mailing list so you can get the news as soon as it is out!


button-yellow-subscribe

The next webinar will be held on January 8th, but this time, it will be 2 hours later than usual. Why? so we can offer a more reasonable time to our Aussie friends. I hope they will be able to make it. This month, we will look at different ways to create seamless designs, whether you want to use a particular paper or image on your blog and make it seamless as you scroll down, or if you want to create a paper pattern from scratch (and there is more to come too).

Seamless

Register now so you can get reminders ahead of time.

New script – Subway Art

cass-SubwayArt

Did you ever see those posters or other types of wordart using that kind of varied fonts and even width? Did you ever try to do it yourself? It is fairly easy, but tedious. And choosing random fonts yourself is never that simple. So this script will help you do it in just a few seconds. Once the script is edited to include the fonts YOU have on your computer, you simply have to type in your text, run the script and follow the prompts.

You can include ANY font you have on your computer, and once you have edited the script with them, you don’t have to do it again. You can list as many fonts as you want, and the script will randomly pick them for you. This also means that you can run the script 10 times, and get 10 different results.

Then, you can choose any solid color, gradient, or pattern or any combination of the three. Try with a single gradient, or two opposite ones, or combine a gradient with a matching or contrasting solid color. Just about anything goes. And once the script is done, you have UNMERGED vector layers. That means that you have all the liberty to do any type of edition, whether it is changing a color, changing a font, changing the text or even resizing the text to insert different elements to the design.

You can get this script in either of my store: Creation Cassel .

And this week, there is a RAK thread in the Happy Place, but there is a difference: EVERYONE who will post in the thread with a phrase about Christmas will get a present, whether you are a PSP user or not, so don’t be shy. Go post and add your name.

cass-SubwayArt-sample-Christmas As a sample, this week, i will give you this Merry Christmas wordart where i picked various ways to say “Merry Christmas” in different languages and ran the script on it (i do not know all those languages, so i relied on Google to help me; i hope there is not mistake).

You need to be logged in to download this sample. You can either login, or register on the top of this page.

This is a PNG format, 3600 pixels high. You can resize it to make a Christmas bookmark, or “stamp” it on the edge of a holiday layout. Your choice.


News from the Campus


Last week, we added the simple polka dot tutorial, but although it is a simple one, it is also very versatile as you can do more than dots!

Polkadot

Did you have a chance to view the recording of the webinar on details added to a night time photo? Some of the participants seemed to have enjoyed it a LOT. See what Misty did following that webinar.

Misty-1

What do you think? Isn’t this great? You can view the recording in this section, HERE. What would you like to see as our January webinar? I have a couple of ideas, but i would like it to be what YOU want to see. Just let us know.

See you in the Campus.

New script – Word Edge Half Cut

cass-WordEdgeHalfCut

Although you might be able to cut out text along the edge of your photos, the script will make the whole process much faster, easier and more accurate every time. And you have so many options to choose from that you can run the script many, many times and get different result every time. You get to choose the text, the font, the edge to cut from, the alignment, and you even have the option to rotate, change size, skew, stretch the text to your liking.

You can run this script directly on your photo and the script will automatically create a duplicate so the initial photo will be left totally intact. You can also run the script on a paper to create a journaling mat, or turn this into a frame. This might be especially good if you have a photo where no edge can really be cut out from.

You can grab this script in my store: Creation Cassel .

And if you want a chance to win this script, check out this thread in the Happy Place and add your name to it, giving me suggestions on what set of words you can envision for a template pack.

cass-WordEdgeHalfCut-samples Of course, you surely will want to see the end result up close. So i made these 2 templates. Use them to trim a photo, or to journal about this year, or to frame fun photos.

You need to be logged in to download this sample. You can either login, or register on the top of this page.

And if you use those for a project of yours, i would LOVE to see it. Who knows? It might get displayed in this blog or in my newsletter.


Although i am not using the Pay-with-a-Tweet, i would really appreciate it if you did tweet about it anyways!


News from the Campus


Before you forget, there are still places available for our webinar on Details in the night, which is a repeat of last week. This time, i hope the schedule will allow our Aussie friends to attend (other people around their time zone are also invited!). It will take place Saturday, Dec 10th at 10h45PM Eastern time.

Register HERE

(it is FREE)

Check what we’ll show:

Sky-before-after

Subject-before-After

Windows-before-after

Christmas-before-after

Free Products: for everyone visiting the Campus, you can grab this Gift Card Wrap box and if you are registered, you can also download the set of 6 templates that you can customize as you wish.

cass-GiftCardBox-Poinsettia  cass-GiftCardBox-Set1

As we are already planning for more webinars for 2012, what would you like to see? Post a comment with your suggestions.


This week, a new student registered to theElement Creation tutorials section and here is what she posted in her intro, the very  first day:

I found out about this through the DST forums. I am looking forward to trying these out during the Christmas break. I do not usually like video instructions, but i must say yours are nice, clear and easy to watch. love being able to download the instructions - nothing better than having a prompt sitting next to you as you go! - Marion