Web
Analytics

New script – Photo Splitter

cass-PhotoSplitter

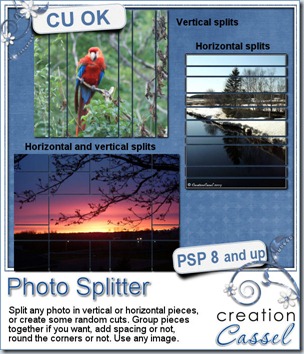
A while ago, i saw a nice layout where a single photo was displayed in three sections. I remember, in the past, trying to find templates that i could use to do something similar but always seemed to end up with a template where the splits were in very annoying spots, like across a face. So that is what led to the creation of this script. You get many options to choose from and the flexibility to customize what the script gives you. You can have horizontal or vertical splits only, or get them in both directions for smaller areas. You can choose to have the pieces with some space in between and even choose how much. You can have square or rounded corners. You can also have the splits evenly distributed or randomly created.

Once the script creates the “grid”, you have the additional option to group some pieces to make sure no face is cut in half or that the focus of the photo is really, the focus. But that is not all. All the pieces will end up on a separate layer so you can further customize the result, by adding effects to some pieces, by moving them, rotating them, even deleting them (in case you want to get rid of Uncle Tom!). See some samples of additional effect you can get with this script:

cass-PhotoSplitter2 cass-PhotoSplitter3


You can grab this script in my store: Creation Cassel

And of course, there is always a chance for you to win this script. Add your name to this thread in the Happy Place and i will be back on Monday night with the name of a lucky winner.
cass-PhotoSplitter-sample

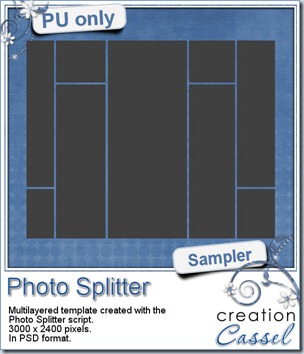
As usual, i have a freebie for you. Since this script runs on an image, i could not run it for you, but i used a blank grey image and created this template for you. It is 3000 x 2400 pixels, so you can resize it to match your own photo. You can use it vertically or horizontally. Each piece is on a separate layer and the whole template is in PSD format. Show me how you will be using it creatively!

You need to be logged in to download this sample. You can either login, or register on the top of this page.

 

New script – Gift Card Box

cass-GiftCardBox

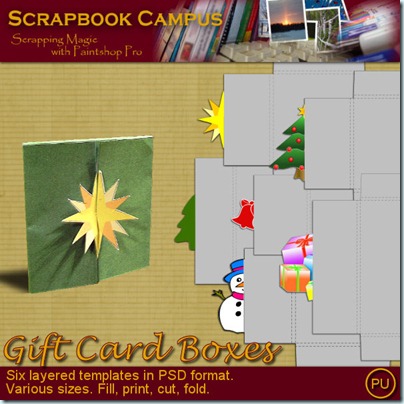
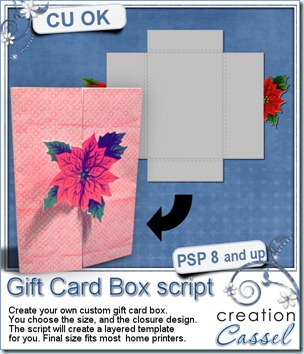
Last week, i downloaded a box template from one of those craft sites, and i printed it out, cut the piece and folded it. I realized that although it was a nice box, it would not fit something i had on my desk: a gift card. So that got me thinking that i would need a different format. And while checking out the measurements, i also noticed that all gift cards were not the same size so why not make a script that would take the needed dimensions and create the template of the correct size. Then, why not add a fun closure but something for the user to choose: ANY design! And that is how this script came to be. For this holiday season, you can create a seasonal design, use your favorite papers, and have fun. Since the script is totally customizable, you can decorate the box to your liking with whatever digital supplies you have and even with paper scrapping supplies. Add glitters, stamps, inking, alphas, anything you have on hand. Use a simple closure design, like a heart or a diamond, or something more intricate, like a  detailed flower. It is your choice. The script will create a template in three layers: the outline that you can use on the reverse of patterned papers, the shape template that you can use to fill with your digital papers, and the closure in case you want to cut it separately to glue on your patterned paper. You can print one or all the layers. The maximum size will fit a printing area of 8 x 10 inches, so it should allow you to print right at home!

You can grab this script and make many different gift boxes, in my store: Creation Cassel .

cass-GiftCardBox-sampleAnd how about a chance to win it? There is a thread in the DST forum where you can tell me how you wrap gift cards. I will come back on Monday night with a winner.

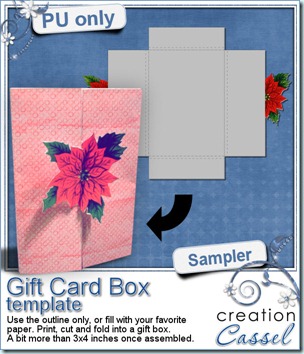
And of course, i am sure you would love to get your hand on this poinsettia gift card box. It is a layered template in PSD format so you can use it in just about any program.

You need to be logged in to download this sample. You can either login, or register on the top of this page.

News from the Campus


COREL PROMOTION - Did you take advantage of the super duper Black Friday/Cyber Monday price for the PSP X4? I hope so. If not, all is not lost as it is still somewhat on special, but not as low. Right now, you can get it at $59.99 instead of $79.99 (and free ground shipping).

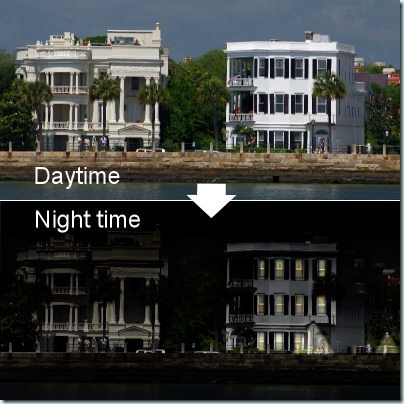
WEBINAR - This Sunday, December 4th, at 3pm Eastern time, we’ll have a follow-up on last month’s webinar. This time, we’ll look at additional details in a “day converted to night” photo.

  • Add lit windows
  • Add street lighting
  • Add holiday lights
  • Emphasize a subject in the night


DetailsInTheNight Original photo from Vicki (TravlynWomyn)

If you have photos you would like me to use, you can email me with a link to your photo (you can upload them on Photobucket, or somewhere else). Sending me a link instead of the actual photos will make it lighter in a message! This previous example is using a photo from Vicki. Come on, you have less than 2 days to register (and if there are enough people requesting this webinar who cannot attend due to time zone or others, i would consider repeating it, but you HAVE to register first).

FREE PRODUCTS - Did you like the free Gift Card Box template from above? In the Campus, there will be a set of SIX templates for you to grab.

cass-GiftCardBox-Set1

They will be uploaded this weekend so come back to the Campus (in the Free products section).

See you around.


New script – Torn Apart

cass-TornApart

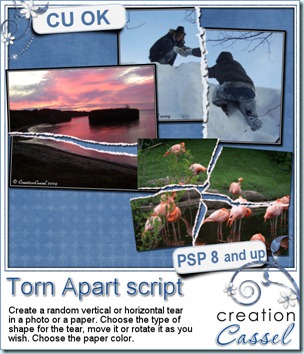
Following the great success of the Torn Edge script, i thought it would be great to have the option to tear in the center of an image or a paper instead of only the edge and so this idea came up. This script for Paintshop Pro will create a rip in the middle of any image, photo or paper, of any size. You can leave the tear in the center or you can move it around, and even rotate it, especially if you want to place it in a strategic place of the image. The torn edges will be left on separate layers so you can add a texture if you want. The layers will be unmerged but linked to the matching torn edge.

You can tear a paper once, or more than once, providing that you either merge the piece and the tear together before running the script a second time, of by copying and pasting the paper piece (without the torn edge) as a new image.

Decide if you want a vertical or horizontal tear.Choose if you want it to be kind of straight, slightly uneven, or more. Many interesting effects can be achieved with this script, tearing photos, papers, or even paper pieces like note papers, heart shapes, etc. This could be a fun way to get some journaling pieces.

You can get this script in my stores: Creation Cassel and DigiScrapWarehouse.

And as usual, you have a chance to win this script by adding your name to the RAK thread in the Happy Place. Unlike usually, the winner will be announced on TUESDAY night instead of Monday, since i will be out of town on Monday. Just tell me what you think you could use this script for.

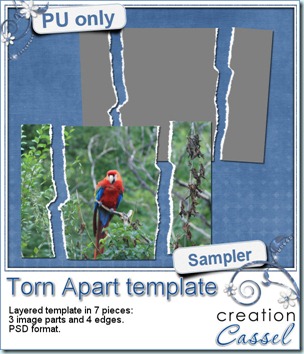
cass-TornApart-sample And here is your free sample. This is a layered template in PSD format. It consists of 3 “paper” pieces that will match perfectly, and 4 “edge” pieces. You can adjust the “edge” pieces to match any paper color, and the “paper” pieces are just like a puzzle and you can cut out your paper or photo using the magic wand. The “paper” piece layers are linked to the matching “edge” piece layers so you can move them around together, however, to help you with the “photo” part, all the “edge” pieces are below the “paper” pieces so you will have to rearrange the layers order when you decide to merge them.

You need to be logged in to download this sample. You can either login, or register on the top of this page.


News from the Campus

Not too much new YET, but i am working to bring you some super interesting bonus for the next registration period for the Basic Scrap Campus. So keep a close eye. This promotion will not last very long so you might want to register to the mailing list so you stay informed as soon as the registration re-open. The current students seem to really enjoy the lessons as i have seen some samples of their work. Seeing those, i am sure they are having a blast!

This weekend, we’ll have the FREE webinar on shadows in digital scrapbooking using Paintshop Pro. We’ll look at the regular basic shadows on a flat surface, shadows to make those ribbons look all curled up, shadows for your clusters, and then, shadows for the fantasy layouts.

Register here 

If you don’t register and decide to join Sunday, October 2nd, as it will be starting at 3pm Eastern, you can click HERE.

See you around!

New script – Template User Tool

cass-TemplateUserTool

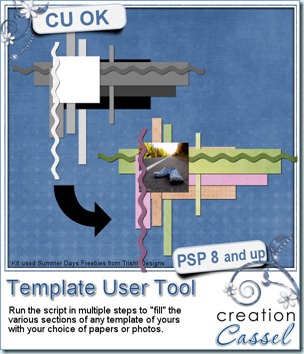
Once you created some fun templates with the Cluster Template Maker script, now you want to fill in all those shapes, either with papers or with photos. This can be a pretty tedious task of copying, pasting, adjusting, resizing, changing layer, selecting, deleting excess paper, deleting original layers, renaming layer. Now, this script will help you use any template even faster with your Paintshop Pro. This script will take care of those tedious tasks that are repeated layer after layer after layer. You will simply have to pick the paper or photo you want to use on each layer, resize, rotate, adjust them to fit the shape and the script will do the rest. How cool is that?

You can get this script in my stores now: Creation Cassel and DigiScrapWarehouse.

If you want a chance to win it (even if you already purchased it), you can simply add your name to this thread in the Happy Place of the DST forum. I will be back Monday night to announce a winner.

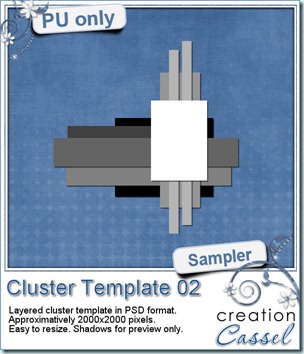
cass-ClusterTemplate-02 As usual, i have a free sample for you. Since this script is a tool to use with your own templates, i could not run it and give you the end result, but i could run the script from last week, and let you have another clustered template in PSD format.

You need to be logged in to download this sample. You can either login, or register on the top of this page.


News from the Campus

The registrations for the Element Creation tutorials section are still going but the deadline for the super duper bonus draw was last Sunday. The winners are:

Sue Turner: Paintshop Pro X4 Ultimate

Dianne Parham : $10 coupon the Scrapping Wright’s store

In addition, there was one draw in the Happy Place at DST and the winner was Limequilla. Let’s hope you all enjoy your treats. If you are a registered student to the Element Creation Tutorials section, remember to send me the suggestions for the next tutorials you would want to see.

Did you attend our Webinar 2 weeks ago about the Text tool in Paintshop Pro? If you did not, you can view the annotated recording, and download a handout in the Webinar section of the Campus. It is free to access but you have to be a registered member of the Campus (and the registration is free so there is absolutely no cost to you). If you are interested in attending the next Webinar, it will be held on October 2nd and will be about Shadows. You can register to the webinar now, and get reminders ahead of time, in case you are like me and tend to forget your “appointments” easily. Again, it is free to attend, so come on over and see me work live, directly from the comfort of your own home.

Register Now

If you have considered joining a course at the Campus, stay tuned for any upcoming promotion. Make sure you check your emails and obviously, have your name on my mailing list otherwise you will miss anything big!

Subscribe to Mailing List

New script – Cluster Template Maker

cass-ClusterTemplateMaker

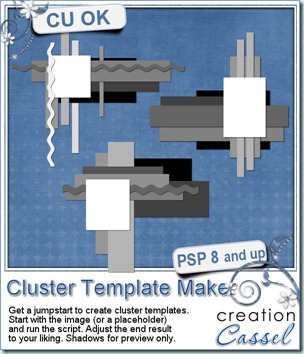
Some people love to create clusters, but feel they just can’t make anything reasonable. Someone asked me if i could make a script to do clusters for her. Well, I know for sure that a script in Paintshop Pro is a set of commands with mathematical values, so there is no way i can code what looks good and what does not, so i studied some clusters that looked good and tried to extract some mathematical similarities and that is what got into this script. It turned out to be quite good and the results are generally interesting.

The script will generate a random number of rectangles, horizontally and vertically, of different size and shape, all layered under an image or a placeholder. Once in a while, you will see a wavy line in the cluster. That is just added for fun. Once the script is done, if you REALLY don’t like the result, simply undo and run the script again. It is that easy. Once you are kind of happy with the result, you can still adjust and customize the layers, and the rectangles. Add more shapes, remove some layers, rotate others, rearrange the layer order, add some fancy edges on some rectangles, etc. Make it your own. And if you want more layers, just run the script a second time starting with the image layer, then you’ll have more layers and shapes to play with!

You can grab that script in either of my stores: Creation Cassel and DigiScrapWarehouse.

And for a chance to win this script, simply add your name to this thread in the Happy Place of the DST forum, and tell me how you go about to create your clusters. I will be back on Monday with the name of a winner.

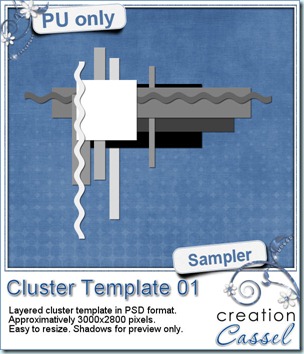
cass-ClusterTemplate-01 As usual, you want to get a freebie, right? Fair enough. I created this layered cluster template with the script. I added shadows to the preview only, since there is a chance you might want to change some layers and then, the shadows might not work. It is a PSD format, so most of you should be able to open it, and use it. If you DO use it, would you mind showing me how it turns out? I would love to see how different scrappers will turn this ONE template into many unique results.

You need to be logged in to download this sample. You can either login, or register on the top of this page.


News from the Campus

The Element Creation Tutorials with Paintshop Pro section has open and we are taking registrations. If you register on or before September 17th, your name will be put into a draw to win one copy of Paintshop Pro X4 Ultimate (freshly released last week).

But you have only a couple of days left!

I added a thread in the DST forum where you can win ONE membership to the Element Creation tutorials, and the draw will be on Sunday morning, just in time for the winner to have his/her name added to the draw for the PSPX4. Would you be lucky enough to win both? Maybe. Who knows?

Sunday, Sept 11th, we held a webinar on using the Text tool in Paintshop Pro. An edited recording of this webinar is currently posted in the Scrapbook Campus under the Webinars tab. A written handout will be added shortly. (you only have to be logged in to access it, but registration is totally free if you are not yet a member)

Do you want to register to our next webinar? It will be held on Oct 2nd at 3pm Eastern. You can register here so  you will be getting reminders ahead of time. The topic? Shadows!

New script – Shattered

cass-Shattered

How long would it take you to cut an image in random pieces, separate them in individual layers, resize them, rotate them, move them and then add shadows to each of them? With your Paintshop Pro and this script, it will only take you a few seconds and a few clicks. And if you dont like the result, no problem; run the script again. You will NEVER get the same result twice because of the random features incorporated into the code.

You can stop the script right after the pieces are cut and separated in layers, or you can keep going and get each piece slightly resized, rotated and moved randomly.

You can stop the script here too, or choose to add a drop shadow. In this case, you will decide on all the settings for the shadow and the script will apply the exact same settings on all the pieces, no matter how many there are. Since the script ends with unmerged layers, you can keep manipulating all the pieces as you wish, deleting some, moving others, etc.

You can get this script in either of my stores: Creation Cassel or DigiScrapWarehouse.

cass-Shattered-sampleHow about a chance to win this script for free? You can, by simply adding your name to this thread in the DST Forum, telling me of one creative use you can think of for this script, and Monday, i will announce a winner.
And now, as usual, you are expecting a freebie, right? Well, since this script applies on a photos, i could hardly give you a cut up picture. I am sure you would not care to get one of MY pictures! So, i figured i could make a layered template with the pieces still in place, not resized, rotated or moved. That way, you can apply that template to any picture of YOURS and create a similar effect.

You need to be logged in to download this sample. You can either login, or register on the top of this page.

Paintshop Pro X4 is out.

Paintshop Pro X4 came out Wednesday this week. I have been part of the beta testing team for a few months. If you want to know about the improvements or additions, and if it is not too late for you, you can join their live demonstration tonight (there is one left, and you can register here). One thing i can say is that it is more stable than X3 was, so it might interest you!

News about the Campus

Did you add your suggestions for which type of elements you would like to learn to create yourself? If not, it is still time. Just hop over to this page and add your name and suggestion. And then, be sure to check your emails or check the Campus again very soon as the Element Creation Tutorials section should go live within a few days. And you will have a chance for some GREAT bonuses. And i mean GRRRRREAT. Subscribe to the mailing list on that page, follow us on Twitter, or like us on Facebook to be sure you know when the section goes live because you dont want to miss the time limited bonuses!

See you around the Campus.

New script – Layered Pyramid

cass-Pyramid

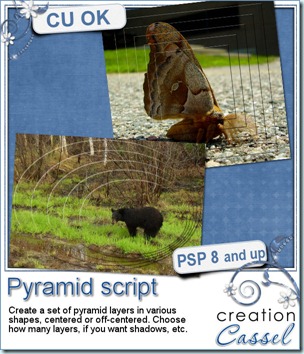
Are you into hybrid projects? This script will be perfect for you to speed up the process. It will create a various number of layers in the shape you want, and centered or off-centered, focussing on an element of your photo.

You will have many options to choose from: the number of layers, the shape, the centering, the shadow, the placement of the off-centered layer. You can use the script on any photo and use it on a digital layout, like any other scrapbooking project, or print the layers separately and then cut them one by one to create a hybrid montage.

You can get this script in either one of my stores: Creation Cassel and DigiScrapWarehouse.


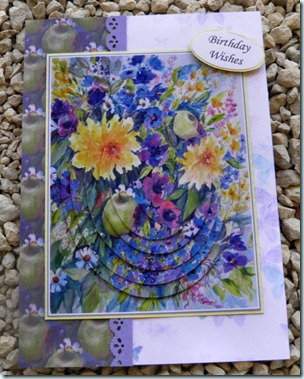
Here is a card that was made by ooh-la-la-creation using this script. Isn’t this great?

cass-Pyramid-04


cass-Pyramid-TemplateIf you want a chance to win this script, check out this thread in the DST forum, and tell me if you ever made a hybrid project with your digi supplies.
 

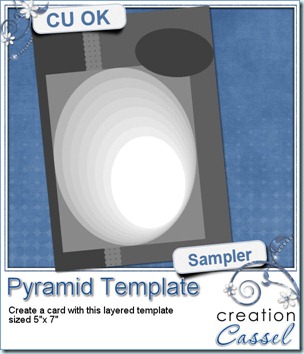
And how about a little freebie? I created this layered template loosely based on the card made above. It is a layered template in PSD format so most graphic program can open it. It is 5x7 in size.

You need to be logged in to download this sample. You can either login, or register on the top of this page.


New script – Twister

cass-Twister

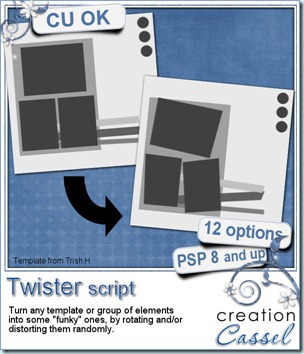
Do you sometimes find a template and would like to give it a funky look? Or have the various letters in a title placed not exactly even? Then you are in luck. This script for Paintshop Pro will let you do just that. You will be able to look at any template and add a “funky” version to your digital scrapbooking supplies.

If you want to keep some layers untouched, you simply have to hide that layer and the script will skip it. You get to choose if you want a little bit of rotation or more, and if you want a little distortion or more.

You can find this script in my stores: Creation Cassel and DigiScapWarehouse.

And if you want a chance to win this script, check this thread at the DST forum. Tell me if you ever used a “funky” looking template or if you would like to use one some day. I will come back on Monday to announce the winner.

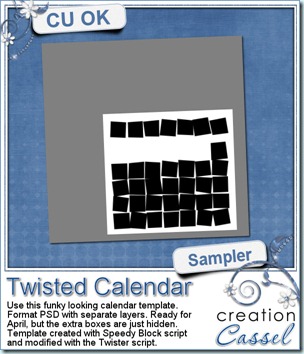
cass-Twisted-calendar And as a sample of what this script can do, you can grab this free layered template. It is a funky looking template for the month of April. All the boxes are still there (some are hidden so you can use the template for other months). The boxes on the top row, that would be used for the days initial, are linked together so you can move them separately from the others, and all the 35 other boxes are also linked so you can move the whole set of boxes somewhere else on the page.
You need to be logged in to download this sample. You can either login, or register on the top of this page.


New paths – Alphabet shapes

cass-PathAlpha

Did you ever try to use some shapes to place text inside the border in Paintshop Pro? I am sure you noticed how tedious it is: write a bit, check where to stop the line, go to the next one, adding spaces at the start if the margin is not straight, vertically. Then, even worse if you needed to edit your text and everything gets moved and you have to reset every line.

Now, with these special text path made just for Paintshop Pro, you can get that text inside the borders MUCH easier than line by line. Even more if you use the Text Wrapping script.

So what are you waiting for? this set includes a whole alphabet of templates with text paths. That is TWENTY-SIX files in one set.

You can find that complete set in my stores: Creation Cassel and Digi Scrap Warehouse.

And even better, go check out the RAK thread in the DST forum here, and add your name to the thread. Tell me what letter you would use first, and why. On Monday night, i will ask Mr Random to pick a winner for the whole set. Do not hesitate to post. There MIGHT be something for all who post!

Sampler – Halloween templates

cass-HalloweenTemplates

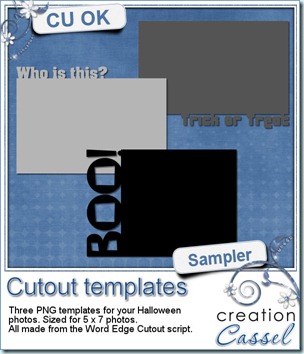
Since i cannot do any sampler using this week new released script, i figured you might want to get ready for Halloween with those templates. You get 3 templates that can be used with a 5 x 7 photo. Just a fun way to display some pictures. They were made from the Word Edge Cutout script, so if you want to create other types of templates for yourself, with different words, you can check it out (it also works directly on the pictures).

They are in PNG format so anyone can use them. How about showing me what you do with them? You might see your layout displayed in my newsletter!

And while you are here, why not subscribe to my newsletter (on the left)? You will be informed of all the new release and new freebies, right in your mailbox. What are you waiting for?

You need to be logged in to download this sample. You can either login, or register on the top of this page.