You can simulate the old method of fastening photos in albums but without actually cutting the background.
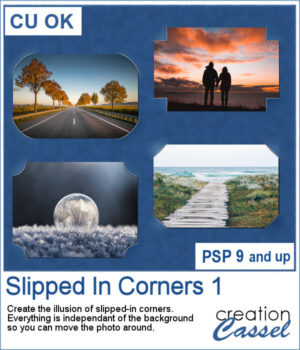
This script will use a duplicate of the active layer (where you have your photo) and will create an effect similar to slipped-in corners. You get four options for the shape of the cutout. The end result will not cut anything from the background so you will be able to move the photo wherever you want on your project.
Get it in the store: Slipped In Corners 1
To win this script, add a comment on this Facebook post telling us if you ever created that effect, manually, on your photos (remember, add a comment, not just a Like!) The winner will be announced in the newsletter, next week. Not a subscriber yet? Not a problem. You can register here and it is free (and you only get one email per week).
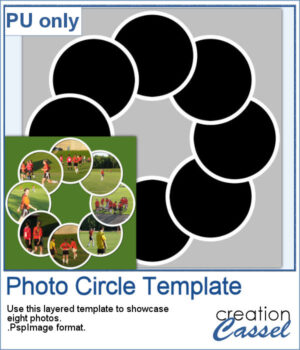
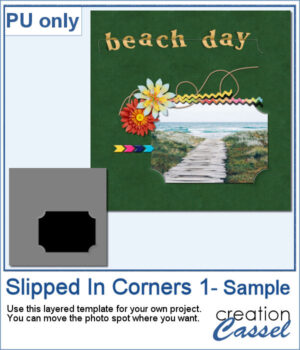
As a sampler, I used the dimensions of a standard 7x5 photo, and ran the script on a black rectangle. The script treated the rectangle as a photo, and now, you can replace the rectangle by your own photo. Convert it to a mask if you want, but you can also just trim it. More interesting for you, you can move the linked layers to place the photo somewhere else on the page. Build the rest of the page as you wish with papers under it and elements on top.
You need to be logged in to download this sample. You can either login, or register on the top of this page.

I have seen someone wear one of those t-shirts where individual tiles spelled out a meaningful word. I was wondering how to create those tiles for any word a user would want. And I did manage to code a script that will use any word you give to generate individual tiles.
For a sampler, I created the tiles to spell out the words ADORABLE and TECHNICAL. Each tile has a transparent background so you can add your own, and customize them further.
You might be able to get some ready-made templates to showcase your photos but how about creating some that will perfectly match what you need?
For a sampler, I am sharing the basic template created to make the preview. It includes eight circular areas for you to showcase your photos, or something else.
Yes, this is another bow script, but honestly, who can have too many different bows in their stash? This script will generate a bow that will be kind of droopy.
For a sample, I created three bows that would be suitable for Valentine Day's projects. I used various straight ribbons and colorized them to get that traditional red color for the occasion. Each bow is in PNG format.
If you want to convert a part of your photo into a "technical" pencil sketch drawing, this script will help you with it. You can use any image and any section to convert.
o, sketch, As a sample, I used pictures of isolated flower clusters and ran the script. I added a separate frame and removed the "technical" drawings as they didn't seem to fit with the theme. Each card is 4x6 and has enough space for you to write a sentiment, a quote, or a message.
You can now add some painted frames around any photo, element, or even just a selection. This means that you can even work directly on your work in progress.
As a sample, I created two frames for 4x6-inch photos. I left the layers unmerged so you can use the Lock Transparency to change the colors of the different layers.
Whether you are doing a "Project 52" or just want to showcase your photos, sometimes, it can be fun to have an overlay to show the week and year of that particular photo.
As a sampler, I created a whole set of raster overlays for you to showcase the year 2023. All the layers are in white, but you know that you can change that easily, right? The format is 6x4, which is fairly standard for printing, but also if you are doing pocket scrapbooking.
Whatever theme you are using for your next graphic project, you might want to add some light to it. I mean, literally. With this script, you will be able to turn any vector object into a lit lightbulb, with your choice of color.
For a sampler, I created a simple set of digits for you to add any date you want. I used basic colors so they will be as versatile as possible. Each one is in png format so you can add them onto any background. They are in png format so you can use them with most graphic programs and they have some transparency so you will be able to see through them.
It might be a design of the past, but sometimes, the past comes back into fashion. You can create this design manually, but it is tedious. You can use a template, but it is still tedious to change the colors especially if you want more variety.
For a sample, I chose the color palette from the Digital Scrapbook November blog train and generated six fun designs that you can use as seamless patterns. They are in png format, and have no background so you can add whatever color you want behind it.
You can surely create stacks of wooden characters, but it is quite tedious. You have to duplicate each character, and then rotate and move them one by one, then add some thickness AND if you want to add the proper inside shadows, you have to do that on each individual layer.
For a sampler, I created a set of 10 digits, using cherry wood. Each digit is about 500 pixels high in png format.