Looking for a bold and stylish way to frame your words or photos? The Datestamp #14 script gives you a fun design that’s perfect for highlighting a name, a message, or even a full photo!
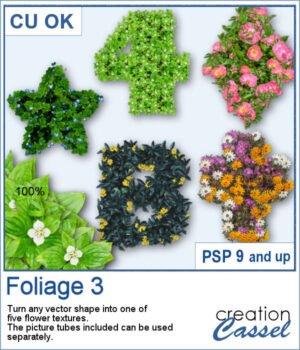
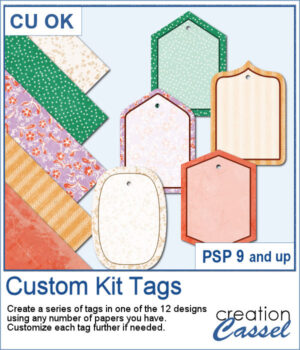
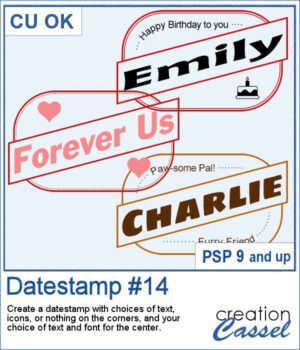
This script creates a classic rectangular frame with a slanted banner across the middle, letting you showcase your main text front and center. You get to pick the font, color, and wording for that banner — so it’s fully customized to your project.
Want to dress up the corners too? You’ll have plenty of options! Choose to add icons (like hearts, planes, or graduation caps), short messages, or even fill the corners with a color or pattern. You can leave them empty as well, or use your own brushes or photos to personalize it even further.
This design works beautifully for cards, titles, tags, or photo labels. Use it to create custom greetings, mark a special trip or event, or label a pet or loved one in a layout. It’s super flexible — and super fun!
Get this script in the store: Datestamp #14
Want a chance to get this script for free? Head over to this Facebook post and let us know: What would you write in the diagonal banner? A name? A destination? A fun phrase? (Remember — only comments count. Likes and shares are always appreciated, but won’t count as entries.) A winner will be picked and announced in next week’s newsletter. If you’re not subscribed yet, you can join right here. It’s free and we only email once a week!
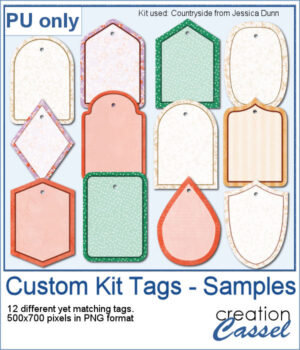
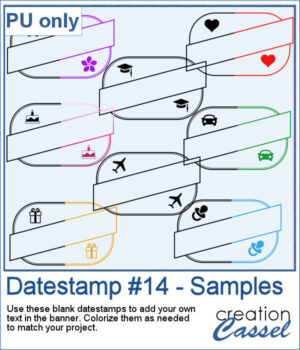
To give you a sample of what this script can create, here’s a set of 8 datestamps — one for each shape available in the script. The banners are left blank so you can add your own text, and the corner icons range from birthdays and love to travel and graduation. Each one is in black so you can easily colorize them to match your project.
You need to be logged in to download this sample. Please log in or register using the links at the top of this page.


This freebie includes a coffee-themed word art (made using the ground coffee option) and a decorative frame (created with the included picture tubes).

You can add an envelope with various papers you have. You can add some stains, distressing, or scribbles on those envelope and use them in clusters, or as elements for your project.
For a sample, I created an open envelope and added a little card. The envelope is in layered PSD format, so you can open it in most programs. You can add designs or messages on the card, but you can also add some details to the envelope itself if you want.
If you have any project around a "cleaning" theme, you might want to add various sponges in different shapes and colors.
For a sampler, I created 10 sponges with the individual digits, and the cellulose texture. Every sponge is meant to be filthy. That would be perfect for any spring cleaning theme project.
Looking to add a modern, tech-inspired twist to your text or shapes in PaintShop Pro? The new Glitches script offers a fun and creative way to simulate digital distortion effects. Whether you're going for a retro screen error or an edgy design element, this script gives you multiple options to customize the look.
For a sample, I created a 404 message using all of those types of glitches. They are in png format so you can use them in any project, and you can resize them as they are fairly large to start with.
You can turn any vector shape into a fun and colorful flower-filled element with this script. Whether it’s a number, a letter, or a custom shape, you’ll get a unique result with one of five different floral textures.
For a sampler, I created a full alphabet using a nice script font and the pink flowers. Each letter is about 900 pixels high so you would have the opportunity to resize them to fit your project.
You can use admission tickets to add a name, a date, a location, and you can even have a single one or a whole strip of them. These can be included as part of a cluster, sneaking out of a photo, or a full strip can be used as a divider.
For a sample, I created two sets of 6 tickets for you to use in your project. You can use the whole strip or cut them apart to use them separately.
If you want some variety in tags but you want them to match the kit you are creating or using, this script will give you plenty of them. You can create up to 25 tags to choose from. Each tag will be created based on any papers you open.
For a sample, I generated 12 different tags using papers from the mini-kit Countryside from Jessica Dunn. Each tag is 500x700 pixels in PNG format so you can use them with any program. Each tag also has a hole that you can use to thread a string, a chain, or a ribbon.
Although you can create uneven lines manually, it can be tedious to repeat the process for many lines on a page.
For a sample, I created two full-size pages of uneven lines. One will be using pastel colors, perfect for spring or Easter, and one has bold colors, perfect for a crafty of kid theme. They are in PNG format, so you can duplicate them and create different variations.