Web
Analytics

New script – Card & Envelope

cass-Card&Envelope

This week, i decided to offer something for our hybrid crafters friends. A while ago, i coded a script that would allow the user to create a custom size/shape gift card box and it was very popular for the holiday season when people often give away gift cards. That is when some users asked me to create other scripts to make hybrid projects. So here is one for you.

This script will NOT create the cards but will create the template for a card AND an envelope that you can then personalize. You choose the size and the flap design and the script will create what you need. Everything is left in separate layers so you can colorize or customize each section separately if you want, whether it is the flap for the envelope, or the front of the card only.

You can create tiny cards as small as 300 x 300 pixels (perfect for little notes, Advent calendars or other) or regular size ones up to 1800 x 1200 pixels. One neat feature of this script is that the maximum size template can still be printed on a regular home printer: no need for extra wide (and costly) printer or having to go to a print shop for it.

This script allows you to create a perfectly sized envelope if you crafted a custom card with your scrapbooking supplies or other. And of course, you can still add traditional 3d decorations to the printed card! Or you can just create blank templates and use them as base for your traditional card making.

Since this is really a TOOL script, you can use it to create CU products.

You can get this convenient script in my store: Creation Cassel

You can also win this script by adding your name and tell me for which occasion you are most likely to use this script in this thread in the DST forum. I will be back on Monday with the name of a winner.

cass-Card&Envelope-sampleAs a sample of what this week’s script can do, i created a card for you. It has no text so you can include your own personal note and wish, in any language you want, on the computer or by hand.

It has one folding card and a matching envelope that are 1200 x 900 pixels. Not a big card, but just something you can give a friend, your mom, your colleague, etc.

I used a FREE kit called “Doux Bruisssements”. This is only one of a series of free kits that are offered on that blog. They have one every month. It is definitely worth checking out that French site!

Once you download the files, you can just add something on top of the card and print both the card and the envelope, cut them, fold them and add something inside the card for whoever you want to give the card to.

And voilà, you have a perfectly matching card and envelope.

You need to be logged in to download this sample. You can either login, or register on the top of this page.


April Birthday Promo

Did you remember to shop this month? Did you accumulate enough purchase to give you a nice coupon for May? You still have just a few days to reach whatever goal you set for yourself. This weekend, i should be sending you a note with how much you have accumulated so far for your May coupon so you might want to start another wishlist to use it!


News from the Campus

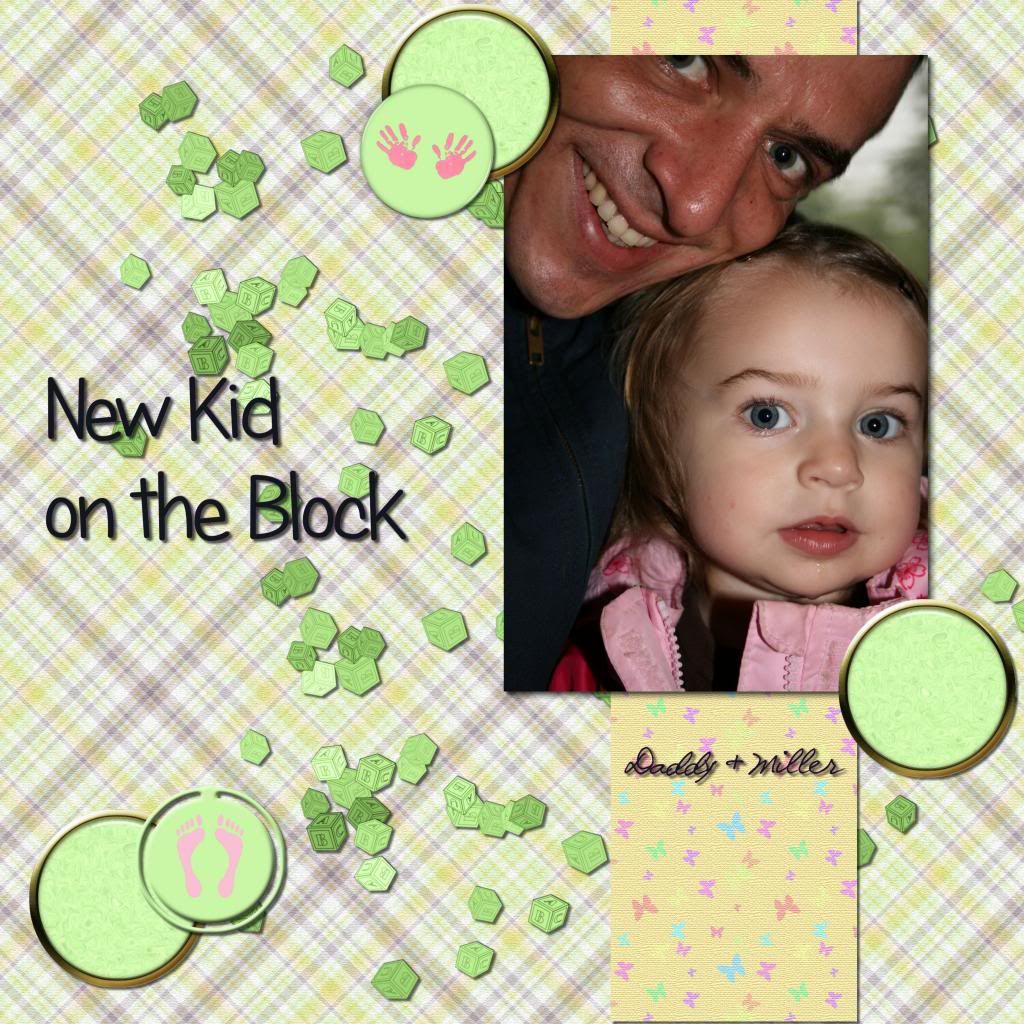
The BIG Show Off is also coming down to the last few days. Did you see all the projects members are showing off? Did you leave some comments for them? See what Nadine posted:
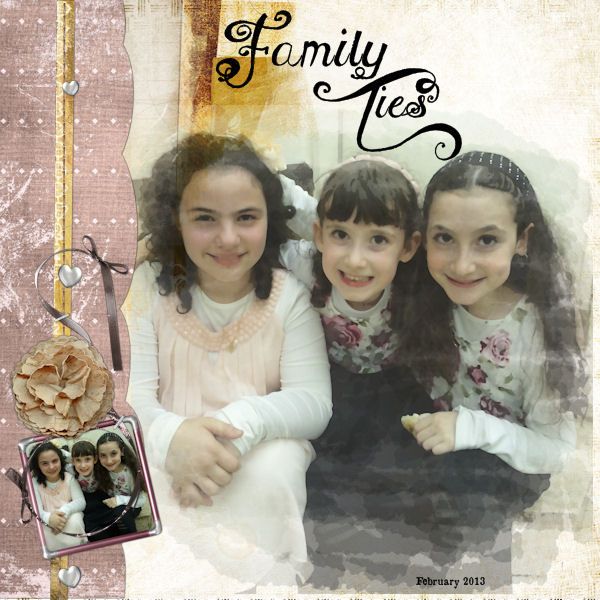
Isn’t that lovely?


The Extraction Master Classes bundle is still available for a few days, so you better hurry before it is removed. If you use the code EXTRACT5, you get an extra $5 off the already reduced price for the two classes.

Get it NOW

(remember that any purchase in the Campus will also be added to what you might have spent in the store to increase your May coupon!)


If the Extraction Master Classes bundle offer expires on Monday, another deal will be offered but since the month of April is only a few days away, that deal will ONLY last for Monday and Tuesday. You don’t want to miss it so keep a very close eye on the Campus or even better, register in the Campus so you can get an email notification for it.

WARNING: it will ONLY BE FOR 48 HOURS!

New script – Fill’n Match

cass-FillnMatch

More and more designers like to incorporate matching tags, or cards or other elements into their kit. More and more scrappers like to have something matching the kit they purchased or the layout they are making but might be missing those elements. To do them by hand is ok if you only have a couple to do, but what if you need a whole set? That can quickly become a long task.

With this script, you can start with any simple template (simple works best), choose any number of papers to pick from, select colors from your color palette and let it do its magic. You can generate up to 10 copies of the basic template, using a randomly picked paper and randomly picked color.

And all that can take you less than one minute to accomplish. Of course, the script does not have a good eye for color combinations so you might very well end up with ugly matches, but it is not a big deal: just delete those and keep the ones that ended up as great combos.

You will determine which layers will be replaced by papers, which ones will be replaced by a color and the script will leave all the other layers untouched. Since all the resulting elements will be left in layers just like the starting template, you can still tweak any one of them as you want.

You can grab this time saving script in my store: Creation Cassel

cass-FillnMatch-sample-tagsDo you want a chance to win this script? You can do so by adding your name to this thread in the DST forum and give me more ideas on how you could use such a script. I will come back on Monday night with the name of a winner. Remember that even if you purchase the script, you can still enter the draw and if your name comes up, you will be able to get a coupon for a future new release.

For a free sample, i prepared a set of 9 tags (900x600) all made using the same kit from Karenheckyeah called “A summer Place”. You can use those tags for a “Project Life” type of layout since it makes those tags 3x2 inches, or you can use them in other traditional types of layout. It is really up to you.

You need to be logged in to download this sample. You can either login, or register on the top of this page.


It is still April!

Workshop-DVD-Case-Time-Bundle


The Time Master Bundle is still available for a short time. Monday is the last day this bundle will be available at this price. And Monday, is also the last day you can use the coupon code : TIME5 to get another $5 off the reduced price.

Don’t wait. Get it NOW.


Spend now, Save later

Are you still building your coupon code for May? You still have a couple of weeks to do so. Some of you have already built a nice 50% coupon for next month. I am sure you will be shopping some more! Go for it. Time to shop!

(and remember that what you spend in the Campus is ALSO added to the total)


The BIG Show Off

Did you have a look at the newer projects that members have been showing off? See what Mizfit and Val posted on this thread.


So what will YOU show off today?

And also, i promised you that i would tell you when there would be more prizes to be won. I will now have a SECOND copy of PSPX5 to win, so you have 2 chances to upgrade to X5! And i am still waiting on other partners and prizes.

Go check the BIG Show Off in the Campus

New script – Repeat

cass-Repeat

If you want to create a long border with a specific design, how do you achieve that? Probably with a lot of copy and paste and move, and copy again, paste again and move again. This can be pretty tedious if you want to create a long strip of repeated pattern. And how do you make sure the spacing is perfectly even? That is another challenge.

This script does all the hard work for you and will take just a few seconds. In addition, you get many options in the type of repeats you can get AND you are the one deciding how the spacing should be.

You can have a simple straightforward repeat, but you can also have the design alternating up and down, or have it mirrored, or flipped, or both. You can even have the design overlap if you prefer.

You can use just about anything you want to repeat, whether it is a vector shape, a dingbat, a hand drawn design, an element, even an extracted element from your stash (just beware of any shadowing though).

cass-Repeat-01And since the elements can be left unmerged (if you prefer), you can still tweak them individually, colorizing them, replacing one of two of them, and more.

You can get this very versatile script in my store: Creation Cassel

What could you do with this script? Give us some ideas in this thread in the forum, for a chance to win it.


cass-RepeatFor this week’s free sample, I made this simple frame out of a dingbat that i colored. I used the mirrored repeat and slightly overlapped the first repeat with the original design, then, as the script offered me to merge the first two, i chose a different spacing for the following repeats.

Once a long strip of repeats was done, i selected a smaller portion of the strip to create the sides, and just with duplicates, and mirror and flip, i adjusted each side to create a frame. Very simple to do once you have the basic strip!

You need to be logged in to download this sample. You can either login, or register on the top of this page.


April Promotion

Yes, it is here now. The BIG April Promo is in full swing and you can participate in several different ways.

Spend now, Save later

Every dollar you spend in the store AND the Campus during the whole month will be compiled and will earn you a coupon you can use in a purchase in May. It is simple:

Spend $20 in the whole month, you’ll get a 20% off coupon

Spend $30 in the whole month, you’ll get a 30% off coupon

Spend $40 in the whole month, you’ll get a 40% off coupon

Spend $50 in the whole month, you’ll get a 50% off coupon

Spend $60+ in the whole month, you’ll get a 50% off coupon AND an additional entry into the Big Show Off draw


The Big Show Off

This is where you can show off anything you did (layout, kit, hybrid project, etc.) based on something you learned in the Campus. You link to your project AND to the tutorial, class or tip. You can win one of the fantastic prizes (including one copy of Filter Forge plugin, which DOES work with PSP even if they say it is a Photoshop plugin).

We already have a few great projects posted in the Campus. Check these, from Val, Yobeth and Mireille:

And there are more.

Check out the Big Show Off


Bundle of the week

Until Monday, you can also grab a great deal in the Campus: the Photo-Graphics with PSP bundle is available for $24.99 (instead of $39.99 if you bought them separately).

Even better, if you are using the coupon code: PHOTOGR5 you get an additional $5 off meaning that you end up with TWO Master Classes for $19.99, which is, in fact, the price of one!

Hurry, it is only available until Monday, April 8th. After that, the bundle will go back to the regular “bundle” price of $29.99, and the coupon will have also expired.

Get that Bundle NOW!

New script – Letter Tiles

cass-LetterTiles

Do you like a game of Scrabble®? This script will let you create letter tiles as if you were playing the game, but with more variety than what you would get by scanning and extracting the actual letter tiles.

You can create wooden tiles, in 5 different types of wood, but you can also use other support, whether it is a solid color, or a pattern.

The script is coded to offer you the option of creating the letter tiles with values based on the French, English, Spanish or German version of the Scrabble® game, since the values are slightly different from one version to the other.

You can also choose any font you want, and any color you want too. Unlike the traditional Scrabble® game, you can also have numbers, punctuation symbols or any other design by choosing the custom option. In that option, you can decide yourself the value of the tile. Of course, you can also create blank tiles if you want.

The script is coded in a way to generate slightly different background for every tile (except for the solid color ones), so it is more realistic. You can create one letter at the time, or type in a word, a phrase or the whole alphabet and the script will generate one tile per letter, including any blank for spaces.

You can grab this fun script in the store: Creation Cassel.

In addition, there is a thread in the Happy Place where you can tell me what language you would use to base the value of the tiles. And i will be back on Monday night with the name of a winner.


cass-LetterTiles-sampleOf course, you can use those letter tiles to create a title on a layout, or maybe a wordart too, but for a sample, i created a frame for you. It is a PNG format so you don’t have to have PSP as a graphic program. It is about 2100 pixels high. Of course, you can always resize it down if needed. the shadows are already placed on the whole montage.

You need to be logged in to download this sample. You can either login, or register on the top of this page.

What will you do with this frame? Will you show us your masterpiece?


News from the Campus

Did you get a chance to view the video from the last presentation on Photo-graphics with PSP? It is available in the Campus for free for one more week. Check it out:


PhotoGraphicsWithPSP


This Sunday we will have another FREE live presentation on Photo-graphics with PSP – Part 2. Did you register yet?


New products – Lined Papers

cass-LinedPapers

Do you see those Photoshop styles everywhere and wish you could use them in Paintshop Pro? This time, I created a set of 9 lined paper seamless tiles that you can use as you wish from the Material palette, but it also has 9 sculpture presets that you can use to apply to a solid color shape (any shape) with predetermined settings (that is why they are preset, right?)

Since the tiles are seamless, you can use them to floodfill any shape of any size. Of course, you can manipulate them further by adding some writing, doodling, stains, creases, tears, and more. You can colorize them to tint them in a color to match your photo, your layout or your kit.

The patterns and the presets are inside folders and if you save the whole folders (instead of the individual files), you will have them all neatly sorted and available inside a Category you can pick in the Presets or the Material. No more need to scroll endlessly, especially if you have lots of those in your resources.

Although they are not in .asl format, Photoshop users can easily convert the patterns which are simply in jpg format.

You can get this set of 9 patterns and presets in my store: Creation Cassel.

If you want a chance to get this set for free, hop over to the Happy Place in this thread and tell me what else than writing on, would you use lined papers in a layout. I will pick a winner on Monday night.

cass-LinedPaper-SampleThis week, as a sample for this product, i am offering you one tile with one preset (for PSP) and one full size page for everyone else (of course, PSP users can still use it). Do you remember that time when dark papers were popular and kids would use gel pens in neon colors to write on them? Now you can do the same. The tile and the presets work exactly as the lined paper tiles above.

Jennifer had fun playing with this paper sample and added some doodling.

If you are curious to know how the ripped edge was made, i can tell you my secret: it is a font. I used the RippedEdge font that you can use to create any paper edge that will look ripped from a spiral binding, whether it is from the top or the side. You can find that font in my store HERE.

Do you want to do the same? Simply click on the preview to start downloading the tile, the preset and the full page.

You need to be logged in to download this sample. You can either login, or register on the top of this page.


cass-OpenACopyDid you miss my post last week? Probably, because i skipped last week. Why? Because i felt bad not to have a freebie for you to download. Last week, i released a tool-script that will open, duplicate, save the duplicate with a new name (adding –copy to its name) and closing the original. All that, so that the Auto-save function can actually save your work and spare your original from accidental auto-save. It is still available in the store and it is FREE.

Of course, you can do the same steps manually, but you want to do something else than those tedious technical tasks, don’t you? In addition, if you bind the script and add the icon on your menu bar, you can get the whole process in ONE click. That beats doing it manually doesn’t it?

New script – Lined Border

cass-LinedBorder

A lined border around the edge or slightly inside the edge of an element can add a touch of definition or elegance. It is fairly easy to do manually if you have only one or two to do, but if you are in love with borders, or if you want to create an outline on several elements of your layout or kit, you will want to get this script to speed up the process and let you play around more.

This script for Paintshop Pro allows you to add a variety of outlines, with different thickness, with different spacing from the edge, with sharp or rounded corners, in single and double too.

Each line is added based on the size of the element, so you dont have to calculate anything. But of course, if you need a precise measure, you can always use the custom value.

Even better, if you plan on using this script on a series of elements, like an alpha, or a set of tags, cards, strips, and more, you can edit the script itself and run it while skipping most of the dialogue windows. That makes the whole process so much faster.

Each line is left on a separate layer, so you can play with the end result even more. Add a bevel and shadow and you can turn that outline into icing on a cookie. Change the blend mode and you get a subtle outline on an element. Run the script several times on the same shape with different settings and move the outlines slightly off center for a dynamic look. The sky is the limit.

You can get this script in my store: Creation Cassel.

As usual, there is a random draw in the DST forum where you can add your name, tell me what elements you could use this script with and i will pick a winner on Monday night. Check out this thread now and post. Even if you already bought the script, you can still win! And if you already bought it, tell us how you like it and even better, show us something you did. We always love to see how creatively different people can use the same script.

cass-LinedBorder-samplesThis script was a suggestion from Kimeric Kreations. Kim often uses borders on her elements. It adds a great finishing touch and sometimes, that border is barely visible, yet it is there! Since she was the one who suggested this script idea, she also was the first one to “play” with it. She ended up creating several fun elements using various options of the script and customized the end result for a great look.

This set of samples includes various elements and trust me, they ALL have a lined border (even the hearts!). All the elements are in PNG format and range in size from 400 pixels (for the heart) to a 3600 pixels wide border.

You need to be logged in to download this sample. You can either login, or register on the top of this page.

Thanks Kim for this great freebie.

(shh… this freebie will match a future kit from Kimeric Kreations. Keep an eye on her store in the next weeks).

new script – Paper Cutout 2

cass-PaperCutout2

When i was a kid, i used to take papers of different size and fold them to then cut out along the folds. I was making “snowflakes”, even though they were usually not folded in 6. We had that activity in arts and crafts class pretty well every year. I learned that regular writing papers were not square so i always had to cut off a piece to make my craft (what a waste).

Whether you want to use lined paper to simulate those school projects (not done in art classes) or really plain colored construction papers, or using a patterned paper from a kit, there is no limit.

Start with any paper, and run the script It will take care of the not-so-square papers, it will fold it (or pretend) according to what you ask, and you will have the chance to cut out any design you want, with any tool you like. Use the eraser tool or the selection tool. That is up to you.

Cut sections along the “folds” or the outer edge, or snip the center (you surely did that when you made your “snowflakes”). Once you are done, the script will unfold your piece and reveal the whole design (you might be surprised too). And furthermore, it will add creases to your masterpiece exactly where it WAS folded for a more realistic look. The creases are on a separate layer so you can tweak their opacity depending on the color or pattern of your paper.

You can get this script in my store: Creation Cassel.

cass-PaperCutout2-sampleAnd if you want a chance to win it, check out this thread, and tell me what theme would work well with this script. I will be back on Monday to announce a winner.


I used a couple of “school” papers to cut some more “snowflakes”. But in fact, they dont look like snowflakes at all. If you are crafty, you can surely create some very intricate designs and turn those “snowflakes” into doilies! These two elements are about 900 pixels wide in png format. They don’t match only “kid” kits!


You need to be logged in to download this sample. You can either login, or register on the top of this page.

News from the Campus


scraphappierWe had the draw on Sunday night for a free registration to LOAD213. Andrea was our winner, and she already started her month-long challenge. She said she loved the idea of a challenge as it will give her a little more incentive to scrap. Even more, i asked her to keep us updated on her activities and she already did her first layout, and we are the first of the month! I guess she is right on track!

Did you register for LOAD213? How are you doing with it?


Photo-Graphic with PSP

We will have our monthly live presentation on Sunday (it should be right before the SuperBowl for those of you who are fans). There is still time to register. We will look at how we can turn a regular photo into something else: a watercolor piece, a cartoon, a sketch, and maybe more (time permitting).

Sunday, Feb 3rd, at 5pm Eastern Time zone.

Plastic Pocket Pages

cass-PlasticPocketPages-PL-Set1d

Whether you are into a Project Life mood, or doing a Project 365, or even just trying to add many photos to layouts, these plastic pocket pages can be a very versatile way of presenting your creations.

These 4 pages are FULL size so you can use one of those pages and cover the whole standard layout, or you can resize it down to cover only part of your page or you can crop it to use only one or two rows of pockets.

These pages have that simulated “stitching” between the pockets, and a cutout at the top of each pocket. The plastic is made to look like thick texture.

This set also includes a template for the cards or photos that would fit in the basic pockets. Use that template to create your own journaling cards, to cut decorative papers or trim your photos to size.

You can get this set of 4 pages in my store at Creation Cassel.

As usual, i have also a giveaway for you. Hop over to the DST Happy Place thread HERE and add your name to the thread telling me what you would be using those pages for. Are you into a Project Life group? A P365? Anything else? I will be back on Monday night with the name of a winner.

cass-PlasticPocketCards-sampleAs a sampler, i created a set of template cards with the days of the week cut out of the small base card. I also added a set of colored cards too. You can use them just like that or add the date on the card or even some journaling. That is all up to you. These cards are a perfect match to the Plastic Pocket Pages available in the store, but you can also use them on their own if you prefer.

You need to be logged in to download this sample. You can either login, or register on the top of this page.

Remember to show me what you do with those!

New script–Merge Group

cass-MergeGroupRename

You probably want to complete your scrapbook project as fast as possible. You probably have more than one page to finish and are running a bit out of time. This new script is just a wonderful time-saving tool to help you achieve your goal of finishing faster and more efficiently.

By default, when you merge a group of layers, it will keep the name of the top “layer” but that name is most often, not very meaningful. This script will remember the name of the active layer when you run the script and will rename the merged layer to that name. No fuss. No typing. No copying and pasting.

Without this script, you would require a total of 11 clicks to get the same thing (assuming you are copying and pasting instead of retyping), but with this script, if you bind it and place it in a convenient place, it will require ONE SINGLE click. Talk about saving time! that means that the process will be TEN TIMES faster than the old manual way.

This script can be purchased in my store: Creation Cassel.

This script is a perfect companion to a few others to speed up the scrapping process for any user. You can start by using the free script, Open As Layer – Rename, which will allow you to open one or more papers or elements just the way you would normally do, but it will take care of copying them and pasting them onto your current project in addition to renaming each layer based on the filename of those papers or elements. This allows you to remember what kit this element was from (assuming the initial file is named properly).

Once you have your papers or photos onto your work, if you are using a template, you will want the flexibility of adjusting their placement, rotation, and size without fuss. That is when the Clip To It script becomes another time saver in addition to making the process simpler and non destructive as it will “convert” the template shape into a mask from which you can see how the photo or the paper will look like before “cutting” anything.

Then, once you have your mask group, created by the Clip To It script, and you have adjusted the paper or the photo to your liking, it is time to merge it all in a single layer (if you want) using the Merge Group – Rename script.

cass-QuickScrapBundleSince those three scripts are so useful in your toolbox to complete your scrapbook project faster, we also have the combo available for you. It is called Quick Scrap Bundle as it will do just that: make you scrap quickly.

This combo will include:

Open as Layer Rename

Clip To It

Merge Group Rename


Do you have plans to finish more projects in the coming year?

Are you rushed to finish those layouts before the end of the year?

Do you have a complete album project in mind and feel overwhelmed by all the work that will take?

These tools will save you a LOT of time, and make the process simpler.

You can also add your name to this thread in the Happy Place so you might win this combo of 3 scripts.


News from the Campus


Did you want more tips on scrapbooking faster? We had a presentation a couple of weeks ago called Scrapbooking on a Deadline where we looked at many tips, tricks and tools to achieve it.

ScrapbookingOnADeadline

The edited recording is currently available for online viewing for FREE.

Check it out here.

New font – Petals

cass-Petals

Your program probably has some kind of vector flower shapes. How many? It depends on your program. But with this new font (yes, it is a FONT), you can create so many more designs.

This font includes 50 different petal shapes: some are similar but in different width so they make a great match to use in combination. Since they are fonts, you can use them around a vector circle as they will go just like a “text on path”.

Use any size you want since they are vector and they wont pixelate; you will always have smooth edges no matter how big you create the flowers.

But flowers are not the only thing you can use these for: create frames and borders. Repeat the same shape or alternate two or more. Choose any color or gradient or pattern, or “clip” a paper on them for a really matching element to your project.

That is not all. Do you own a cutting machine? you can create some gorgeous quilled flowers using a straight line of petals, cut them with the machine and then tightly roll them. Look at the fantastic result Connie got with this:

IMG_20121129_195951

In fact, it was Connie who gave me the idea of this petal font. She initially used the Lace Edge font to create some quilled flowers. The number of designs was much more limited for this purpose so when she sent me the first sample, she said “it would be nice if you had other shapes”. And here we are now with a full set of 50 different petal shapes. Of course, not all the shapes are suitable for quilling, but they can be used to create vector flowers.

And But this is not all: since this is a FONT, it is not program specific. This means that, unlike most products in my store, you don’t have to have Paintshop Pro to use this font. You can use just about any graphic program including Photoshop and Photoshop Element. I didn’t try other programs, but i assume they would also work fine.

You can grab this FONT in my store: Creation Cassel.

cass-Petals1-sampleAnd as usual, i have a random draw where you can win this product. Head over to this thread in the DST forum, and tell me what program you are using (since this font works in most of them). I will be back on Monday with the name of a winner.

As a way for you to see this font “at work”, i created three layered flowers using it. They are PSD files so you can use them in PSP or PS or PSE.

For the white petals, i used the letter “d”. For the purple petals, i used the letters “u” and “v” on different layers. And for the yellow petals, i used alternatively the “U” and “W”. You can surely create many many more designs.

You need to be logged in to download this sample. You can either login, or register on the top of this page.

Remember to show us what you do with them.