Web
Analytics

New font – Lace Edge #4

cass-LaceEdge4

Adding edges with a brush or a picture tube is kind of great for Paintshop Pro users, but then, other program users can’t take advantage of the same tool. This is a FONT, so it can be used by most graphic programs, whether it is PSP, or Photoshop, or Photoshop Element, or Gimp, or other programs that can use outside fonts.

Since these are fonts, they can be used and manipulated just like text: change color, size, kerning, follow a path, reverse a path, etc.

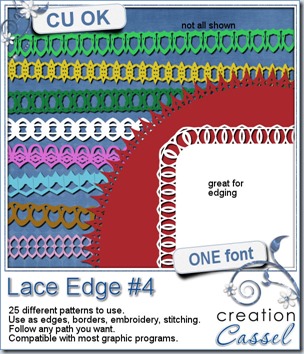
With this font, you get 25 different designs that you can use for edging, stitching, or various designs. Use them on papers, frames, mats, ribbons. Why not even trim photos as if they were laser cut. That would look awesome, wouldn’t it?

You can get this Lace Edge #4 FONT, in my store.

And if you want a chance to win this font, hop over to the DST forum HERE, and tell me what program you would use this font with (maybe you are using a program that is new to me?). I’ll be back next week with the name of a winner.
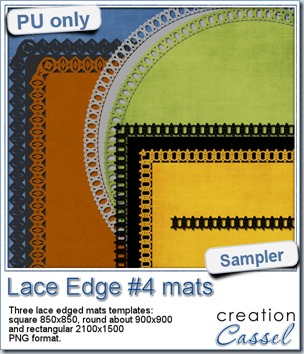
cass-LaceEdge4-samplesThis week, i created 3 decorated mat templates. You can use them to cut out your favourite paper, or simply to color. You can also layer them with other simple shapes since those are very simple to start with.

I just made the rectangle and round mats (the brown and the green) starting with a vector shape and added the font like text on path.

For the square one (the yellow), i simply created a long strip of one character (the letter b) for about 900 pixels long, then ran the Mitered Corner Frame script to get a perfect corner (and it looks great, don’t you think?). I am also including the straight row of “lace” so you can use it to create any matching element you want, whether it is a frame, a ribbon, or to make a stitching row.

Available for FREE when you register to our mailing list HERE.


News from the Campus
ScrappersDozen-250x250The Scrapper’s Dozen is now adding more ingredients to the recipe! We have more contributing designers who will bring you goodies. And the tutorials you will get are among the best in the Campus! And you’ll get it all when you join.

Registration is not yet open, but you can subscribe to the special mailing list to be first to hear about all the new stuff that will be included.

Tell me more

New Script – Alpha Sheet Separator

cass-AlphaSheetSeparator

Last week, Kim emailed me about the Element Separator script. She was using it to separate the individual letters of her alpha sheet and usually ended up having the letters saved in the wrong order, because of the way the script was working. That meant that for the renaming part (which the script could not do), she had to do it manually since a renamer utility would not work in the order the files were saved, so she asked if there was a way to separate the characters in a different way, so they could at least be saved in the correct (or mostly correct) order.

Such a request is always a fun challenge for me so i looked at different ways a script could work in order to select the characters in order. I really think it paid off because this script will separate your alpha sheet in no time. Not only it will separate the letters, digits or symbols in order, but if they are simple alpha-numerical characters, the script will ALSO name them correctly, while saving them directly in the same folder the alpha sheet is saved. That means:

- no editing of the script each time you run it to indicate the folder to save the files to

- no renaming needed after the script is done

- no grid to work with

- no lengthy preparation needed in order to use a “time-saving” tool

How long do you think it could take to split, save and name all the characters of an alpha sheet? Check out this video to see for yourself (maybe take a guess before watching it?). Could you work that fast?


After Kim got to play with this script, she posted this review in the store: “I wrote to Cassel to ask if there was a way to modify the element separator script so that it could be used to separate alpha's on a sheet from left to right, as the element separator took elements in the row from the highest point. She not only came up with a modification for the script to work on alpha's, she also coded it to NAME them!!! Talk about a HUGE timesaver! Thank you Cassel, and I HIGHLY recommend this fantastic script!!” What will YOU say?

Now it is your time to grab this fantastic time saver script in my store:Creation Cassel

And if you want a chance to get this script for free, just go add your name to the thread in the Happy Place HERE and tell me what you will do with the time you save using this tool! I’ll be back next week with the name of a winner.

cass-PlasticPocketPage-small-2x2

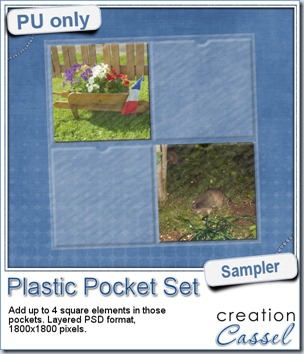
Are you taking pictures with your phone? Are you often using square photos in your layouts? I created this small set of plastic pockets to display up to 4 square elements, whether they are photos,  cards or other elements. It is a layered file in PSD format, so you can actually insert your elements between the layers, and even have elements stick out of one pocket and show up on top of the pocket above it. It is just that easy to make it look as real as possible.

This set of pockets is 1800x1800 so it will not take over the whole page, and you will still have room to add other elements, photos, journaling, etc.

You need to be logged in to download this sample. You can either login, or register on the top of this page.

(if the link is not active, just login or register on the top of the page)


News from the Campus

Are you wasting time looking through your digital stash to find the perfect kit with the perfect color to match your photo? You don’t need to.

Check out the Creative Scrap Course in the Campus.

The course will give you the means to create your own elements in the perfectly matching colors, size, shape, etc. You will never find, in a ready-made kit, the papers, designs and elements you could create yourself.

Yes, you CAN do it.

Check it out and invite your friends too!

New script – Card & Envelope

cass-Card&Envelope

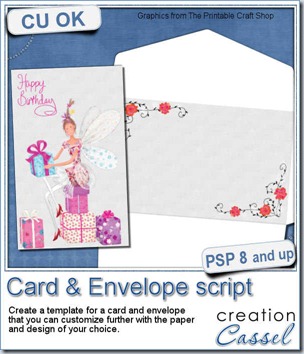
This week, i decided to offer something for our hybrid crafters friends. A while ago, i coded a script that would allow the user to create a custom size/shape gift card box and it was very popular for the holiday season when people often give away gift cards. That is when some users asked me to create other scripts to make hybrid projects. So here is one for you.

This script will NOT create the cards but will create the template for a card AND an envelope that you can then personalize. You choose the size and the flap design and the script will create what you need. Everything is left in separate layers so you can colorize or customize each section separately if you want, whether it is the flap for the envelope, or the front of the card only.

You can create tiny cards as small as 300 x 300 pixels (perfect for little notes, Advent calendars or other) or regular size ones up to 1800 x 1200 pixels. One neat feature of this script is that the maximum size template can still be printed on a regular home printer: no need for extra wide (and costly) printer or having to go to a print shop for it.

This script allows you to create a perfectly sized envelope if you crafted a custom card with your scrapbooking supplies or other. And of course, you can still add traditional 3d decorations to the printed card! Or you can just create blank templates and use them as base for your traditional card making.

Since this is really a TOOL script, you can use it to create CU products.

You can get this convenient script in my store: Creation Cassel

You can also win this script by adding your name and tell me for which occasion you are most likely to use this script in this thread in the DST forum. I will be back on Monday with the name of a winner.

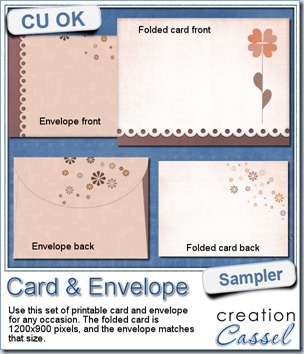
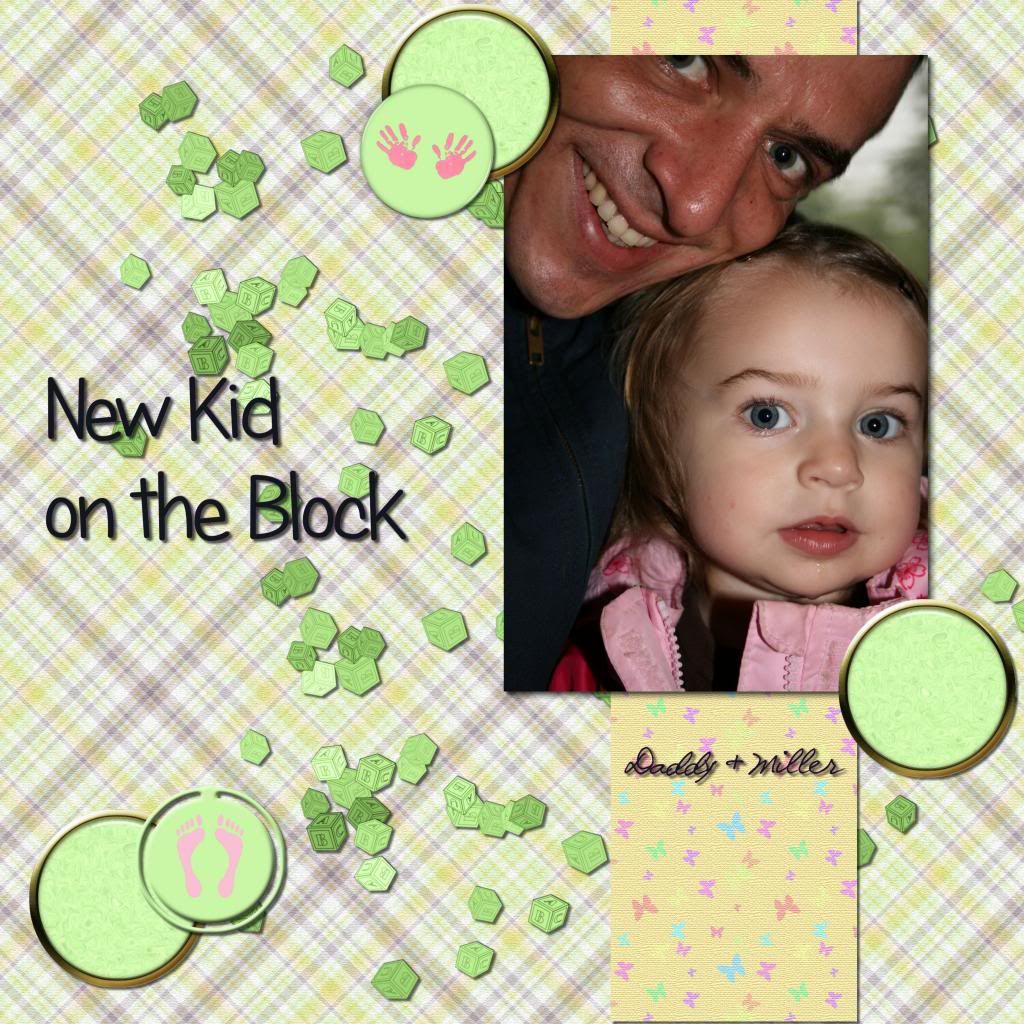
cass-Card&Envelope-sampleAs a sample of what this week’s script can do, i created a card for you. It has no text so you can include your own personal note and wish, in any language you want, on the computer or by hand.
It has one folding card and a matching envelope that are 1200 x 900 pixels. Not a big card, but just something you can give a friend, your mom, your colleague, etc.

I used a FREE kit called “Doux Bruisssements”. This is only one of a series of free kits that are offered on that blog. They have one every month. It is definitely worth checking out that French site!

Once you download the files, you can just add something on top of the card and print both the card and the envelope, cut them, fold them and add something inside the card for whoever you want to give the card to.

And voilà, you have a perfectly matching card and envelope.

You need to be logged in to download this sample. You can either login, or register on the top of this page.


April Birthday Promo

Did you remember to shop this month? Did you accumulate enough purchase to give you a nice coupon for May? You still have just a few days to reach whatever goal you set for yourself. This weekend, i should be sending you a note with how much you have accumulated so far for your May coupon so you might want to start another wishlist to use it!


News from the Campus

The BIG Show Off is also coming down to the last few days. Did you see all the projects members are showing off? Did you leave some comments for them? See what Nadine posted:

Isn’t that lovely?


The Extraction Master Classes bundle is still available for a few days, so you better hurry before it is removed. If you use the code EXTRACT5, you get an extra $5 off the already reduced price for the two classes.

Get it NOW

(remember that any purchase in the Campus will also be added to what you might have spent in the store to increase your May coupon!)


If the Extraction Master Classes bundle offer expires on Monday, another deal will be offered but since the month of April is only a few days away, that deal will ONLY last for Monday and Tuesday. You don’t want to miss it so keep a very close eye on the Campus or even better, register in the Campus so you can get an email notification for it.

WARNING: it will ONLY BE FOR 48 HOURS!

New script – Repeat

cass-Repeat

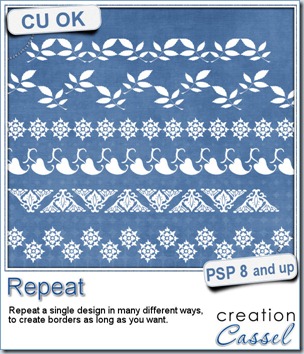
If you want to create a long border with a specific design, how do you achieve that? Probably with a lot of copy and paste and move, and copy again, paste again and move again. This can be pretty tedious if you want to create a long strip of repeated pattern. And how do you make sure the spacing is perfectly even? That is another challenge.

This script does all the hard work for you and will take just a few seconds. In addition, you get many options in the type of repeats you can get AND you are the one deciding how the spacing should be.

You can have a simple straightforward repeat, but you can also have the design alternating up and down, or have it mirrored, or flipped, or both. You can even have the design overlap if you prefer.

You can use just about anything you want to repeat, whether it is a vector shape, a dingbat, a hand drawn design, an element, even an extracted element from your stash (just beware of any shadowing though).

cass-Repeat-01And since the elements can be left unmerged (if you prefer), you can still tweak them individually, colorizing them, replacing one of two of them, and more.

You can get this very versatile script in my store: Creation Cassel

What could you do with this script? Give us some ideas in this thread in the forum, for a chance to win it.


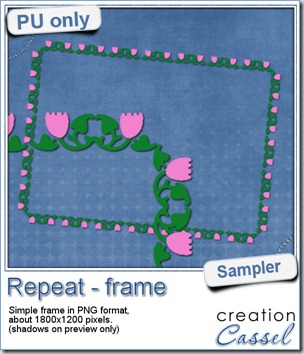
cass-RepeatFor this week’s free sample, I made this simple frame out of a dingbat that i colored. I used the mirrored repeat and slightly overlapped the first repeat with the original design, then, as the script offered me to merge the first two, i chose a different spacing for the following repeats.
Once a long strip of repeats was done, i selected a smaller portion of the strip to create the sides, and just with duplicates, and mirror and flip, i adjusted each side to create a frame. Very simple to do once you have the basic strip!

You need to be logged in to download this sample. You can either login, or register on the top of this page.


April Promotion

Yes, it is here now. The BIG April Promo is in full swing and you can participate in several different ways.

Spend now, Save later

Every dollar you spend in the store AND the Campus during the whole month will be compiled and will earn you a coupon you can use in a purchase in May. It is simple:

Spend $20 in the whole month, you’ll get a 20% off coupon

Spend $30 in the whole month, you’ll get a 30% off coupon

Spend $40 in the whole month, you’ll get a 40% off coupon

Spend $50 in the whole month, you’ll get a 50% off coupon

Spend $60+ in the whole month, you’ll get a 50% off coupon AND an additional entry into the Big Show Off draw


The Big Show Off

This is where you can show off anything you did (layout, kit, hybrid project, etc.) based on something you learned in the Campus. You link to your project AND to the tutorial, class or tip. You can win one of the fantastic prizes (including one copy of Filter Forge plugin, which DOES work with PSP even if they say it is a Photoshop plugin).

We already have a few great projects posted in the Campus. Check these, from Val, Yobeth and Mireille:

And there are more.

Check out the Big Show Off


Bundle of the week

Until Monday, you can also grab a great deal in the Campus: the Photo-Graphics with PSP bundle is available for $24.99 (instead of $39.99 if you bought them separately).

Even better, if you are using the coupon code: PHOTOGR5 you get an additional $5 off meaning that you end up with TWO Master Classes for $19.99, which is, in fact, the price of one!

Hurry, it is only available until Monday, April 8th. After that, the bundle will go back to the regular “bundle” price of $29.99, and the coupon will have also expired.

Get that Bundle NOW!

New script – Letter Tiles

cass-LetterTiles

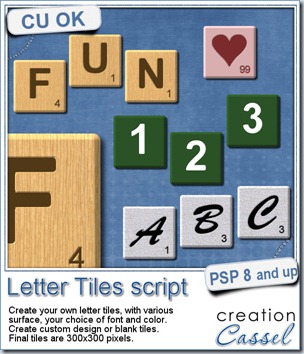
Do you like a game of Scrabble®? This script will let you create letter tiles as if you were playing the game, but with more variety than what you would get by scanning and extracting the actual letter tiles.

You can create wooden tiles, in 5 different types of wood, but you can also use other support, whether it is a solid color, or a pattern.

The script is coded to offer you the option of creating the letter tiles with values based on the French, English, Spanish or German version of the Scrabble® game, since the values are slightly different from one version to the other.

You can also choose any font you want, and any color you want too. Unlike the traditional Scrabble® game, you can also have numbers, punctuation symbols or any other design by choosing the custom option. In that option, you can decide yourself the value of the tile. Of course, you can also create blank tiles if you want.

The script is coded in a way to generate slightly different background for every tile (except for the solid color ones), so it is more realistic. You can create one letter at the time, or type in a word, a phrase or the whole alphabet and the script will generate one tile per letter, including any blank for spaces.

You can grab this fun script in the store: Creation Cassel.

In addition, there is a thread in the Happy Place where you can tell me what language you would use to base the value of the tiles. And i will be back on Monday night with the name of a winner.


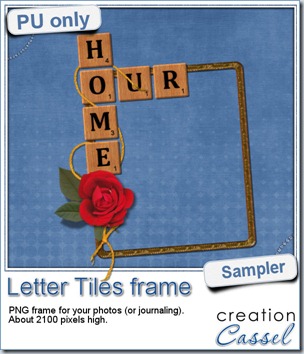
cass-LetterTiles-sampleOf course, you can use those letter tiles to create a title on a layout, or maybe a wordart too, but for a sample, i created a frame for you. It is a PNG format so you don’t have to have PSP as a graphic program. It is about 2100 pixels high. Of course, you can always resize it down if needed. the shadows are already placed on the whole montage.
You need to be logged in to download this sample. You can either login, or register on the top of this page.

What will you do with this frame? Will you show us your masterpiece?


News from the Campus

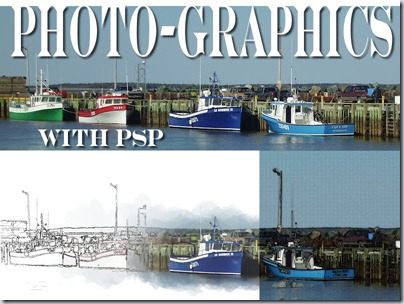
Did you get a chance to view the video from the last presentation on Photo-graphics with PSP? It is available in the Campus for free for one more week. Check it out:


PhotoGraphicsWithPSP


This Sunday we will have another FREE live presentation on Photo-graphics with PSP – Part 2. Did you register yet?


News from the Campus–Advanced shadowing

AdvancedShadowing

Did you register to for the Advanced Shadowing with PSP presentation yet? It will be held next week. You dont want to miss that!

Date: October 7th

Time: 5pm Eastern time

RegisterNow-01-200


While you are looking at the various Master Classes in the Campus, remember that the Basic Extraction video is still available for FREE in the Campus, but that is only for a limited time as it will no longer be free after the new video is uploaded.


Did you see the latest tutorials in the Campus?

Embossing Paperclip Wood

These and many others are available if you register for the Element Creation tutorials. Are you interested in joining the Campus but are still hesitant? Stay tuned for a special offer in the next few days.


Finally, remember that the holiday season is coming (always faster than we want). Get yourself a custom calendar to print with our FREE Calendar Making Class. Are you new to digital scrapbooking? Or new to using Paintshop Pro? Or do you just want a cool present to offer to your friends or relatives? Check out the Calendar Making Class. Everything is free. FREE instructions. FREE supplies (but you have to pay to get it printed).

CalendarPreview-free

New product–Glitters B

cass-Glitters-B

Do you like glitters? Do you like all those “styles” available for Photoshop and wonder if you could ever find something like that for Paintshop Pro? Now you have your answer.

A while ago, i released a script that made a glitter tile, but i have to admit, it needed some upgrade: the tile was small, it used the seamless function in PSP which gave that diagonal fading effect. All in all, it was outdated. So i decided to create a totally new script to make seamless tiles (REALLY seamless, as there is no fading, no blending).

With more advanced coding, you even have options of colors and color combinations too. You can get a monochrome colored tile, which will varie between the chosen color and white. You can have a bicolored tile where you choose the two colors that the script will blend together, and finally, you can get a cass-Glitters-B-01multicolored tile where you choose one color and the script will vary the hue to the point of creating many colors, all around that base one you picked.

As if getting a seamless tile is not enough, you also get the brush presets to create the matching glitters, in a scattered format. Use it to draw lines, doodles, frames, edges, fill in shapes, etc. You get one preset for each type of glitters.

You can grab this product in my store : Creation Cassel


Do you want to win this set? You can just add your name to the Happy Place thread HERE and tell me if you would more likely use the script to create seamless tiles, or the presets to create scattered glitters. And on Monday night, i will draw for a winner who will get this amazing set.cass-GlittersB-holiday


Do you want to see these glitters up close? I created 3 seamless tiles using basic colors and also some elements made out of scattered glitters with the brush presets. They are Christmas-y colors, and of course, the tree might be pretty seasonal but the heart and the star can be used as frames if you want to place them on, or around a photo, or even some journaling.

You need to be logged in to download this sample. You can either login, or register on the top of this page.


What will you do with those? Show us and we might post it in here or in the newsletter.


News from the Campus

Motorcycle-06


The recording for last week’s presentation on basic extraction techniques should be available later today. Those who purchased the Master Class should get the whole package ready today or tomorrow at the latest. Did you see what we did in that presentation?

Check out the Campus, later today, to view everything.


Did you start the Calendar Making Class yet? We have had many new members in the Campus who registered for that class. After all, it is free, so why not start on your Christmas presents?

New script–Clothes Labels

cass-ClothesLabels

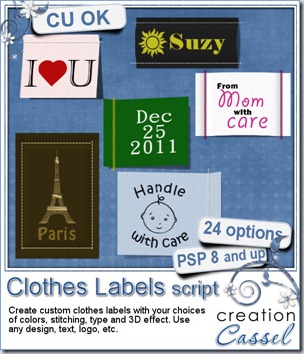
Have you ever seen some original kinds of labels? Although you would usually expect washing instructions, you can also get company logos on them. You can also buy, custom labels to put on kids clothes with their name (I used that when my three kids were in daycare) or some special labels to place on sewing projects that were handmade that read “Made by Mom”.

These kinds of custom labels can also be used in digital scrapbooking with just about any design, shape or text you want. How about using these to create a date element? Or a special phrase? or a name? or even a particular event with a symbol for it? Just about anything is possible with this script.

The way the script is coded, you just have to start with a design of any kind, of any size. From that, the script will measure a proportionally sized “excess” of fabric for the stitching, depending on the type of stitching you want and will prompt you for various custom details, like the color of the fabric, the color of the thread, the straight/zigzag stitching, and if you want to add a 3D effect with either bevel or lifting of the label. And if you want to add a shadow, it will be left on its own layer so you can tweak it more if you want.

You can get this very creative script in my store: Creation Cassel.

And as usual, there is a thread in the Happy Place of DST forum where you can add your name for a chance to win. But even better, suggest something you would like to see on a clothes label, and after the draw (Monday night), i will create a set of labels with all the suggestions given, and everyone who posted will get the set, even if you don’t use PSP. What are you waiting for?

cass-ClothesLabels-samples

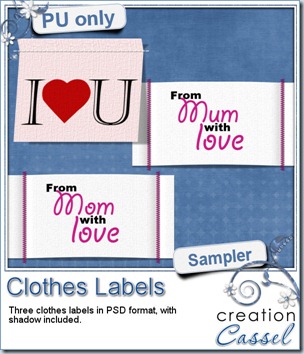
I created 3 labels with this script (2 of them have different spelling for our Mom/Mum). They are in PSD layered format so you can still tweak them. The shadow is separate and so is the stitching (although the shadow of the stitching is attached).

Where will you use those label?

You need to be logged in to download this sample. You can either login, or register on the top of this page.

And if you like this why not tell your friends on Facebook and on Twitter. Send them over so they can also download them.

.

.

.

.

News from the Campus

BasicExtraction

This is the last week to register for our next workshop on Basic Extraction techniques. Did you sign up? the workshop will be held on September 2nd, at 5pm Eastern.

Sign up now

.

.

.

.

Workshop-DVD-Case-ShadowsLast week, the Realistic Shadows in Digital Scrapbooking Master Class was offered at a really great deal through Digigrab. But that deal ended Thursday and i got emails asking me if i could extend the deal. Unfortunately, that deal was outside of the Campus site so it could not be extended just with the snap of a finger. BUT, i managed to make it available directly ON THE CAMPUS SITE until August 31st. To take advantage of the 60% off deal and get this master class for only $8, you need to use this code:

GRAB-0824-492

You can checkout directly from this page, but if you want to read more about shadows, you can check THIS PAGE. But the code will self destruct on Sept 1st so you better hurry!

Do you like the idea of creating a “scrapbooking” present for Christmas for relatives? Do you like the idea of a totally FREE digiscrap project? Do you want to get started in digital scrapbooking but you feel you need very basic and step by step instructions? If you answered “yes” to even ONE of those questions, stay tuned as there will be a great new offer in the Campus. But best of all, it will be available to all current and future members. Even better than that, it will be FREE. How can you beat that?

SneakPeak

Here is just a little sneak peak of what it will be. Although it might give you a general idea, you don’t know how BIG it is!

If you have not yet joined the Campus, just register. It is free too! And bring in your friends too!

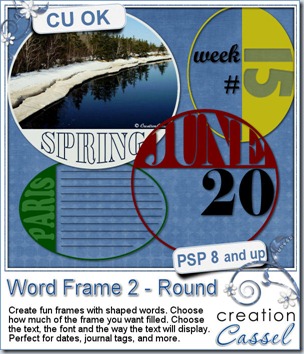
New Script – Word Frame 2 Round

cass-WordFrame2Round

Last week, I brought you a script to create a square or rectangular frame around a photo, an element, or on its own. However, i thought it would be great to have some round (or oval) ones, so you could simulate postmarks but create your own. Of course, this required some shaping of the text in the area since it was no longer a simple rectangular area. This is done with the Warp Mesh.

Although this script will work with a photo, I find that you might be loosing a bit more of the photo with a round frame, so if you use that option, just be careful what photo you are using.

Unlike the previous script, this time, you are able to choose whether you want to have 25%, 40% or 50% of the space filled with the material you choose. This allows you even more flexibility and creativity.

Use this script on any size image so you can create a journaling area, or make it small to create a date stamp. Add your own word, date, name, to the frame to make something truly unique.

And as a bonus, you can still use the Warp Mesh on your own, maybe to add another shaped word on the “open” side? Why not. The Warp Mesh is included in the zip file and you can surely reuse it.

You can grab this script in my store: Creation Cassel.

cass-WordFrame2Round-samplersAnd as usual, i have a giveaway for you. Just go add your name to this thread in the forum, and i will pick a winner on Monday night. It is that easy.


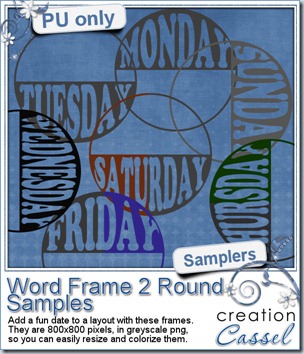
If you want to have a closer look at these frames, i created a set of round ones with the days of the week. They are 800x800 pixels in greyscale png format. This allows you to resize them if you want, and colorize them to match whatever project you are making.

You need to be logged in to download this sample. You can either login, or register on the top of this page.


News from the Campus

Last week was our workshop on Masks. This surely was a topic a lot of people wanted to learn more about because we had the largest attendance EVER! The recording should be available this weekend, probably Sunday.

Our next workshop, scheduled on September 2nd, will be on Basic Extraction Techniques. Do you want to join?

RegisterNow-01-200

New script – Word Frame 2

cass-WordFrame2

A while ago, i released a script that made an inside frame, with text. It was a delicate result, using the Word Frame script. However, at times, one might want something a bit more obvious or something that can be turned into a wordart. This script will do just that.

You can start with a photo from your P365 stash, and add a border OUTSIDE the photo. You can add the word WEEK in plain view and add the number in a contrasting color and font. Depending on whether your photo format is portrait or landscape, you can choose to have the word on top or on the bottom, or on one side.

You can choose any word you want. However, be careful as longer words will be made to fit in the space so if you are trying to write BEAUTIFULLY in a small space, the text will be kind of squished!

The font will be whatever you choose and unlike many other scripts, you will NOT have to type the name and risk a typo; the script will stop and let you choose the font from the text tool toolbar so you will have no problem with typing.

Once the word and the font are chosen, you will get four options to display that word: colored, outlined, cutout, or translucent. Except for the cutout (obviously), the word is on a separate layer so you can still apply your own personal touch.

What can you do with this script? Whatever you want. With all the options available, you are sure to get a frame that will be perfectly matching your layout or your kit.

You can find this script in my store: Creation Cassel.

cass-WordFrame2-samplers And as usual, i am giving you the chance to win this script by posting in this thread. And as usual, if you choose to purchase the script this weekend to take advantage of the new release price, you can still participate: if you win, you will get a coupon for a future new release of your choice! So go for it. What do you have to loose?

This week, i created four frames for you. Two in French and two in English. They would be perfect for a P365, or any “ordinary” photo (is any photo really ordinary?). You can add a date or a number in another font. Each frame is in greyscale so you can colorize them to match your project. Two frames are in PNG format, as they have only one layer, but two are in PSD format so you can actually move the words if you want, add a shadow, some brushwork, and also colorize them too.

You need to be logged in to download this sample. You can either login, or register on the top of this page.

News from the Campus

Our July Anniversary Celebration ended, well… on July 31st! But although the big noisy promotions are over, some quiet ones will still take place. For example, you can still get some of our monograms, if you are receiving our newsletter. You are not getting it? No problem, it is free to join, and as a member, you can get some goodies, once in a while and this week, another part of the monogram alphabet will be given.

RegisterNow-01-200

And this Sunday, August 5th, we will have our monthly workshop, this time, on Masks. Are you registered yet? That is free too! You still have time to join. And don’t hesitate to post on your FB or tweet about it. Any PSP user can find some use in masks, whether they are scrapbookers, card makers or even photographers! How many people can you bring?

RegisterNow-03-200

Write Finally, whether you are a member of the Campus or not, i posted a little survey about scrapbooking (and it is not specific to PSP). Can you go an have a peak at it? It only has 5 questions so it will only take you one minute or so. Click HERE to go.