Many years ago (at least 35), my mom got me a kit to do some quilling. I had no idea what it was and didn't even have the proper tools to do it, but I improvised and created a few fund designs by rolling those long strips of papers, and shaping them in specific ways. I loved that, and often wished I could find time (and tools) to do it again.
But, in digital scrapbooking, those tiny elements are not as easy to create, until now.
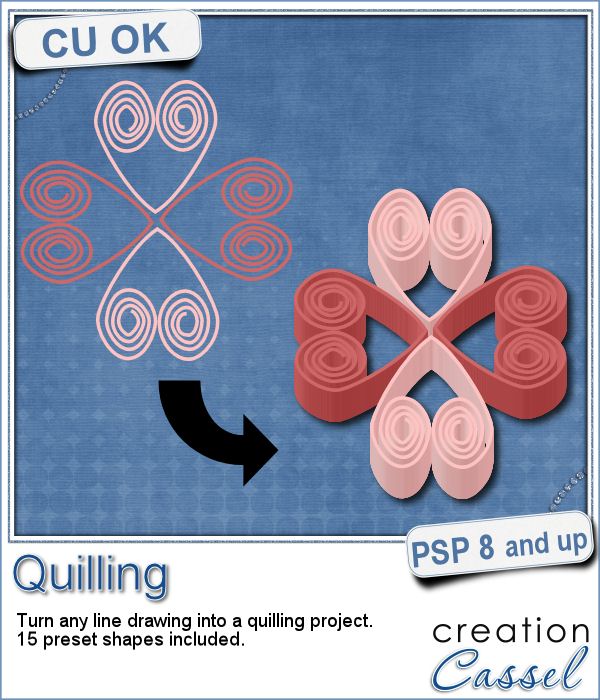
This script will turn any line drawing into strips of papers shaped like that drawing. As long as you can create even lines, using the Pen tool or the Brush tool, you can turn those lines into intricate designs.
In order to help you, the zip file also includes 15 preset shapes that you can use in the color of your choice. Resize them or distort them at will. Since they are vector, they will keep nice edges. Create your design in larger size, so it will be easier to draw, and then once it is converted into quilling, you can size it down. Super easy.
Get this script in the store: Quilling script.
Did you ever do any quilling? Tell me about your experience or what you know about this art in the comments below. I'll pick a winner next week to get this script for free (or another one, if you choose to buy it immediately). Not a subscriber yet? Not a problem. You can register here and it is free (and you only get one email per week).
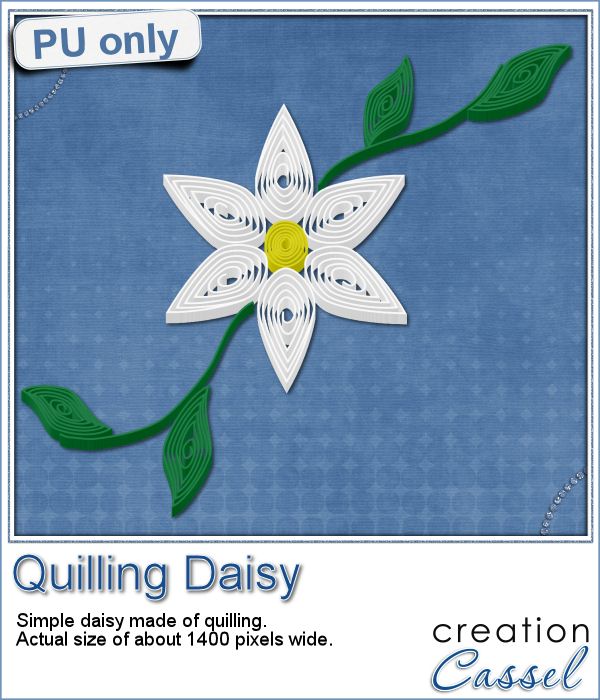
As a sampler of what can be done with this script, I made a little daisy. I used one of the preset shapes, in white. I duplicated and rotated that one petal 5 times and arrange those petals around another preset shape drawn in yellow for the center. Then, using the Pen tool, I drew a couple of free form lines. Finally, I used a third preset shape, in green, for the leaves and I placed them along those lines.
Before running the script, I merged all the layers together, and voilà! A quilled daisy, ready to be used on your projects. It is quite large so you can size it down to suit your needs.
You need to be logged in to download this sample. You can either login, or register on the top of this page.
Can you create more flowers to go with this one?
News from the Campus
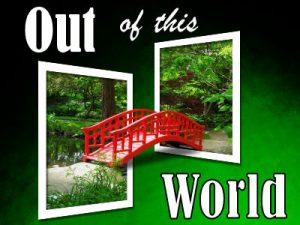
Did you have a look at the forum lately? After the live class on the Out of Bound techniques, viewers have posted FANTASTIC projects using that technique. And they are so creative!
Here are just a few examples:


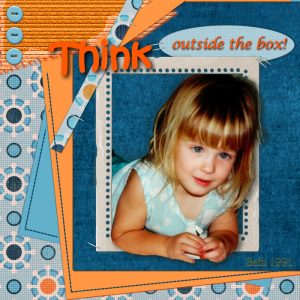
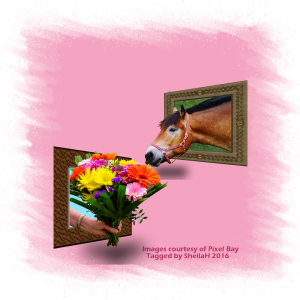
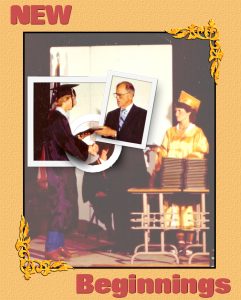
Do you want to see more? Check out the forum HERE.
And if you want to know how they created those masterpieces, check out the edited video. It is free to watch for a couple more weeks; you just have to be logged in. And yes, you will be able to create such projects.

You might have seen tutorials on how to turn a regular large photo into a mosaic using smaller photos. It might not be too hard, but you can create that exact effect in less than a minute with this script for Paintshop Pro.
Since it is impossible for me to give you a sample using a photo that would be of any interest for you, I decided to see what other sampler you seemed to have liked, and I found out that the Cluster Templates were a big hit, so I created three more for your own use.
Stickers are fun, versatile and can be used in many projects. You can now create your own starting with any element, shape or text, and add some pizzazz by converting an ordinary shape or image, into a glittered one, with a glitter outline and paper.
For this week's sampler, I created a set of digits with gold outline and plastic translucent backing. Each digit is about 450 pixels in height so you can resize it as needed.
Creating a geometric pattern can be easy if you have only one shape, but it can become tedious if you have multiple similar shapes, using different colors. Until now, you either had to do them by hand, or rely on layered templates, which only offer a limited number of color arrangement.
Although Easter is over for most people, the colors associated with Easter are still very appropriate for spring, so whether you want to showcase your Easter photos, or spring photos, these colors should be quite suitable.
Did you register to our live class, tomorrow? There is still time to do so.
This picture tube for Paintshop Pro is unique in that it lets you place fringes along the edge of any element. Use your cursor or a script to place those fringes.
As a sample of this tube, I created a long border with the white fringe, and I added also a sequin border. The whole fringe also has a template for the top part if you want to replace it by your own paper.
There are so many ways you can have a date on a project. That is why we are up to the fourth different datestamp script. But don't limit yourself to a date; this script allows you to add other messages, words or phrases.
As a sample of what this script can do, I created a set of datestamps using simply the days of the week with straight lines in the center. This should be versatile enough to let you customize them. Of course, you can also remove those lines in the middle if you want. I won't be offended!
The edited recording of our live presentation is now available for viewing.
Creating clusters can seem like a daunting task when you just end up staring at the screen, wondering what element to use, where to put them, resize them or not, etc.
If you are into clusters, you can get all three Cluster Template Maker scripts AND the Speed Scrap Scripts as a
For this week's sample, I am actually including THREE cluster template strips that were generated using this script.
Linda asked me recently if i could create a script that would generate a painted background from an image. Of course, one can always use the Brush Strokes effect in Paintshop Pro, but sometimes, we only want an abstract background based on the colors of a particular image we like. It can obviously be hard to find a perfect match unless we create it ourselves.
This week, i picked a few very colorful images on Morguefiles and turned 3 of them into full size papers. Do you have a fun, happy project you want to showcase? You can use those background papers as a base for showcasing your photos. You can also use those papers in other ways (or use them with other scripts!).
Can you create your own sticker out of any image you have? Sure you can. Use any png image (even if you extracted Uncle Jim from a photo) to turn them into custom stickers. And also, have a peek how you can make that sticker look like it is curling up a bit.
Whenever you work on a particular project, and create many layers, it is a real pain to copy and paste each individual layer onto the new project. Of course, you can group them, but if you have 20, 30 or 100 layers, it can be very time consuming.
As a sampler, i obviously can't sample this script as it would just need to be applied to your own projects. But since i had a very good response to the
Are you using keyboard shortcuts when working with PSP? Check out which are my top 10 shortcuts in
Creating designs for seamless tiles is not that hard, but creating many using the same palette without redoing the same one twice is a little be more challenging.
For a sample, i created 8 tiles in the green colors (for St-Patrick month). Each tile is 250x250 pixels and can be scaled up or down as a pattern. You can add a rotation. You can combine two tiles. You can duplicate a single tile and flip/mirror it to create a different pattern.
What do you know about Adjustment Layers in PSP?