Web
Analytics

New script – Loop #1

cass-Loop1

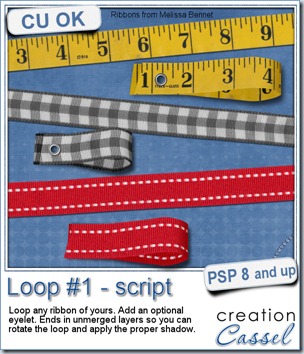
You can now create a simple loop from any ribbon that you already have. Use these loops as an accent, fasten them with a staple, a brad, stitching, or an eyelet. The script can actually create an eyelet for you  that will be proportional to the size of the ribbon.

You can tuck the loop under a photo or an element, you can use a particular ribbon with text message or shapes to match your project.

The script has a random feature integrated which means that even using the same ribbon, each run will yield a slightly different result. The length will differ and the segment of the ribbon used will be different.

The script will end in unmerged layers with NO shadows on the ribbon pieces. Why not add a shadow with the script? Because you might want to mirror the loop or have it vertical, or at an angle, and if the script was to add shadows, then they would become very odd looking after rotating the whole thing. You know how it is with shadows: if they are in the wrong direction, it can make your layout look totally weird, and you surely dont want that, do you?

This script is available in my store: Creation Cassel.

And if you want a chance to win this script for free, just post in this thread, in the forum and tell me what you could use this kind of loops for. Be creative. Think a bit outside the box so to speak and share some  great ideas. The winner will be announced on Monday night.
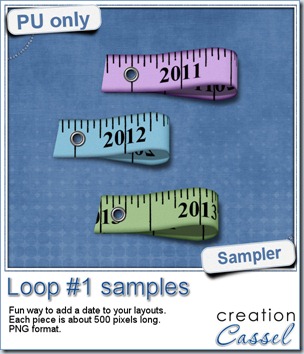
cass-Loop1-samples


As a free sample today, i thought of creating a ribbon with a date (in fact it is a year) and making a loop out of it. I repeated the process for 3 years. If you are patient, you might be able to create a ribbon for each month, or each day of the week or if you are REALLY brave, one for each date of a whole year! Why not?

You need to be logged in to download this sample. You can either login, or register on the top of this page.

What will  you do with those? Show us how creative you are.

New tubes – Zippers set#4

cass-ZipperSet4

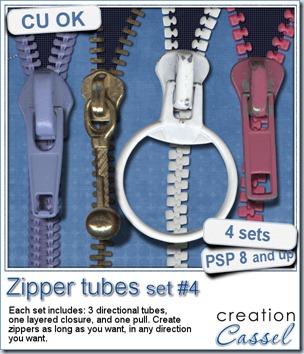
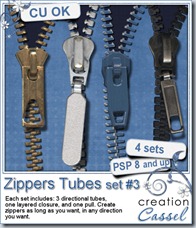
Zippers, zippers, zippers. We use zippers everywhere now. Of course, we see zippers on clothing, like coats, jackets, pants, dresses, but we also use zippers in upholstery (to wash those cushion covers), in purses, luggage, and more. Now, you can even add them to your scrapbook pages too.

These zippers are the 4th set. They are made of 3 directional tubes: one for the closed teeth, one for the left open teeth and one for the right open teeth. This means that you can “draw” your zipper as long as you want, and in any direction or shape you want. You can have it mostly open, or mostly closed, you can join two different “fabrics”, you can have a photo peek through, etc.

And the pulls are made in two files too: one is the layered base so you can slip a pull as realistically as you can. And of course, each zipper as its original pull to match. But you can surely mix and match, especially if you can recolor them. Play with the shadowing to get great looks. Add decorative elements to the pull, just like we can see in real zippers, whether it is a monogram, a string of beads, or other creative add-on. What would you do with those?

You can grab this set of zippers in my store: Creation Cassel.

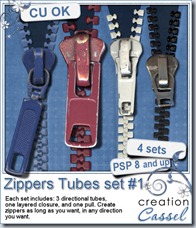
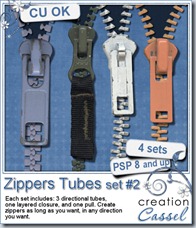
Have a look at the other three sets of zippers you can also grab.

cass-ZipperSet1 cass-ZippersSet2 cass-ZipperSet3

I have a giveaway in the DST forum where you can win the latest zipper set. Check out this thread, and tell me if you ever used a directional tube before, and if so, which one. I will be back on Monday night with the name of a winner.

cass-Zipper4-sample

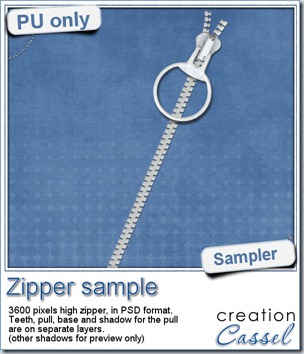
This week,  i just created a simple zipper for you using the white set. The various elements are in layered format so you can change the pull, move it, even shadow the elements differently. There is a separate shadow layer for the pull shadow, but you can surely modify it, or even replace it if you want.

With the hollow pull, you can surely add a design in the middle, fill in the hole and draw something, or attach a bunch of decorative elements, like beads, strings or ribbons. What will YOU do?

This is offered in PSD format so most non-PSP users can still use it. It is pretty large (3600 pixels high) so you can size it down to meet your need.

You need to be logged in to download this sample. You can either login, or register on the top of this page.

New script – Letter Tiles

cass-LetterTiles

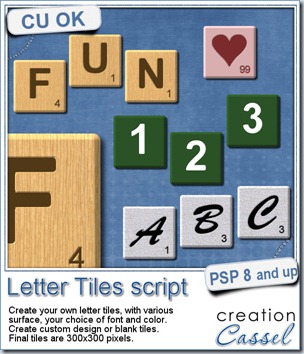
Do you like a game of Scrabble®? This script will let you create letter tiles as if you were playing the game, but with more variety than what you would get by scanning and extracting the actual letter tiles.

You can create wooden tiles, in 5 different types of wood, but you can also use other support, whether it is a solid color, or a pattern.

The script is coded to offer you the option of creating the letter tiles with values based on the French, English, Spanish or German version of the Scrabble® game, since the values are slightly different from one version to the other.

You can also choose any font you want, and any color you want too. Unlike the traditional Scrabble® game, you can also have numbers, punctuation symbols or any other design by choosing the custom option. In that option, you can decide yourself the value of the tile. Of course, you can also create blank tiles if you want.

The script is coded in a way to generate slightly different background for every tile (except for the solid color ones), so it is more realistic. You can create one letter at the time, or type in a word, a phrase or the whole alphabet and the script will generate one tile per letter, including any blank for spaces.

You can grab this fun script in the store: Creation Cassel.

In addition, there is a thread in the Happy Place where you can tell me what language you would use to base the value of the tiles. And i will be back on Monday night with the name of a winner.


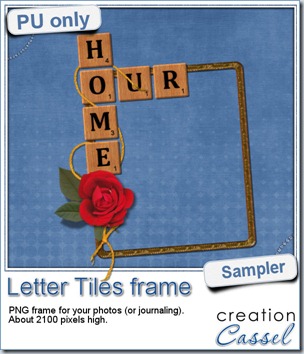
cass-LetterTiles-sampleOf course, you can use those letter tiles to create a title on a layout, or maybe a wordart too, but for a sample, i created a frame for you. It is a PNG format so you don’t have to have PSP as a graphic program. It is about 2100 pixels high. Of course, you can always resize it down if needed. the shadows are already placed on the whole montage.
You need to be logged in to download this sample. You can either login, or register on the top of this page.

What will you do with this frame? Will you show us your masterpiece?


News from the Campus

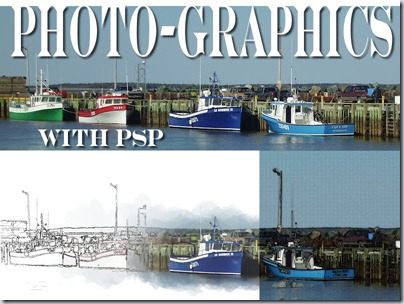
Did you get a chance to view the video from the last presentation on Photo-graphics with PSP? It is available in the Campus for free for one more week. Check it out:


PhotoGraphicsWithPSP


This Sunday we will have another FREE live presentation on Photo-graphics with PSP – Part 2. Did you register yet?


New products – Lined Papers

cass-LinedPapers

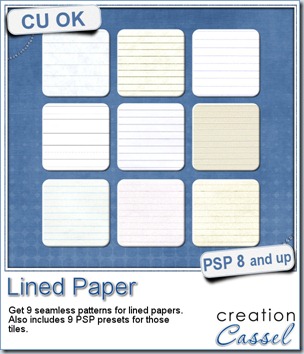
Do you see those Photoshop styles everywhere and wish you could use them in Paintshop Pro? This time, I created a set of 9 lined paper seamless tiles that you can use as you wish from the Material palette, but it also has 9 sculpture presets that you can use to apply to a solid color shape (any shape) with predetermined settings (that is why they are preset, right?)

Since the tiles are seamless, you can use them to floodfill any shape of any size. Of course, you can manipulate them further by adding some writing, doodling, stains, creases, tears, and more. You can colorize them to tint them in a color to match your photo, your layout or your kit.

The patterns and the presets are inside folders and if you save the whole folders (instead of the individual files), you will have them all neatly sorted and available inside a Category you can pick in the Presets or the Material. No more need to scroll endlessly, especially if you have lots of those in your resources.

Although they are not in .asl format, Photoshop users can easily convert the patterns which are simply in jpg format.

You can get this set of 9 patterns and presets in my store: Creation Cassel.

If you want a chance to get this set for free, hop over to the Happy Place in this thread and tell me what else than writing on, would you use lined papers in a layout. I will pick a winner on Monday night.

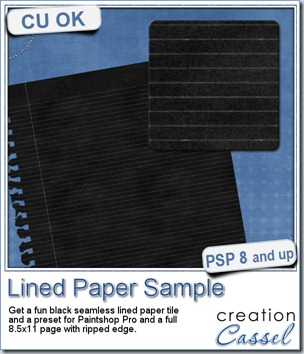
cass-LinedPaper-SampleThis week, as a sample for this product, i am offering you one tile with one preset (for PSP) and one full size page for everyone else (of course, PSP users can still use it). Do you remember that time when dark papers were popular and kids would use gel pens in neon colors to write on them? Now you can do the same. The tile and the presets work exactly as the lined paper tiles above.
Jennifer had fun playing with this paper sample and added some doodling.

If you are curious to know how the ripped edge was made, i can tell you my secret: it is a font. I used the RippedEdge font that you can use to create any paper edge that will look ripped from a spiral binding, whether it is from the top or the side. You can find that font in my store HERE.

Do you want to do the same? Simply click on the preview to start downloading the tile, the preset and the full page.

You need to be logged in to download this sample. You can either login, or register on the top of this page.


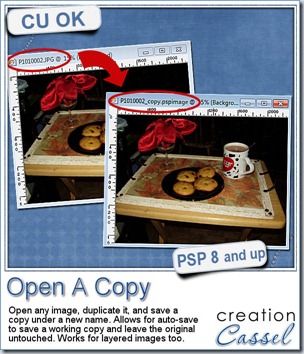
cass-OpenACopyDid you miss my post last week? Probably, because i skipped last week. Why? Because i felt bad not to have a freebie for you to download. Last week, i released a tool-script that will open, duplicate, save the duplicate with a new name (adding –copy to its name) and closing the original. All that, so that the Auto-save function can actually save your work and spare your original from accidental auto-save. It is still available in the store and it is FREE.

Of course, you can do the same steps manually, but you want to do something else than those tedious technical tasks, don’t you? In addition, if you bind the script and add the icon on your menu bar, you can get the whole process in ONE click. That beats doing it manually doesn’t it?

New script – Lined Border

cass-LinedBorder

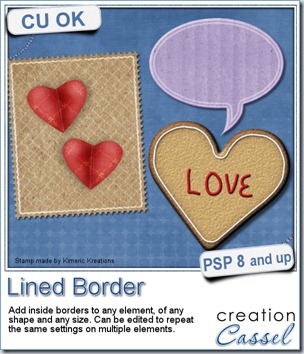
A lined border around the edge or slightly inside the edge of an element can add a touch of definition or elegance. It is fairly easy to do manually if you have only one or two to do, but if you are in love with borders, or if you want to create an outline on several elements of your layout or kit, you will want to get this script to speed up the process and let you play around more.

This script for Paintshop Pro allows you to add a variety of outlines, with different thickness, with different spacing from the edge, with sharp or rounded corners, in single and double too.

Each line is added based on the size of the element, so you dont have to calculate anything. But of course, if you need a precise measure, you can always use the custom value.

Even better, if you plan on using this script on a series of elements, like an alpha, or a set of tags, cards, strips, and more, you can edit the script itself and run it while skipping most of the dialogue windows. That makes the whole process so much faster.

Each line is left on a separate layer, so you can play with the end result even more. Add a bevel and shadow and you can turn that outline into icing on a cookie. Change the blend mode and you get a subtle outline on an element. Run the script several times on the same shape with different settings and move the outlines slightly off center for a dynamic look. The sky is the limit.

You can get this script in my store: Creation Cassel.

As usual, there is a random draw in the DST forum where you can add your name, tell me what elements you could use this script with and i will pick a winner on Monday night. Check out this thread now and post. Even if you already bought the script, you can still win! And if you already bought it, tell us how you like it and even better, show us something you did. We always love to see how creatively different people can use the same script.

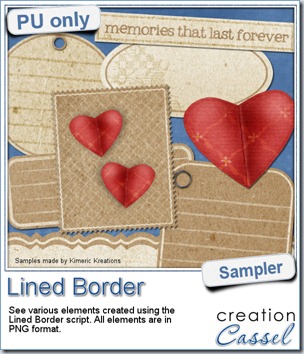
cass-LinedBorder-samplesThis script was a suggestion from Kimeric Kreations. Kim often uses borders on her elements. It adds a great finishing touch and sometimes, that border is barely visible, yet it is there! Since she was the one who suggested this script idea, she also was the first one to “play” with it. She ended up creating several fun elements using various options of the script and customized the end result for a great look.
This set of samples includes various elements and trust me, they ALL have a lined border (even the hearts!). All the elements are in PNG format and range in size from 400 pixels (for the heart) to a 3600 pixels wide border.

You need to be logged in to download this sample. You can either login, or register on the top of this page.

Thanks Kim for this great freebie.

(shh… this freebie will match a future kit from Kimeric Kreations. Keep an eye on her store in the next weeks).

new script – Paper Cutout 2

cass-PaperCutout2

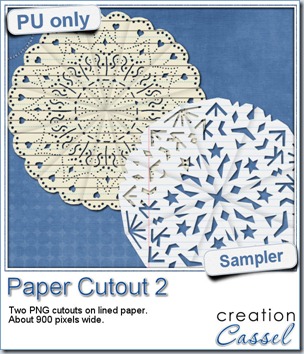
When i was a kid, i used to take papers of different size and fold them to then cut out along the folds. I was making “snowflakes”, even though they were usually not folded in 6. We had that activity in arts and crafts class pretty well every year. I learned that regular writing papers were not square so i always had to cut off a piece to make my craft (what a waste).

Whether you want to use lined paper to simulate those school projects (not done in art classes) or really plain colored construction papers, or using a patterned paper from a kit, there is no limit.

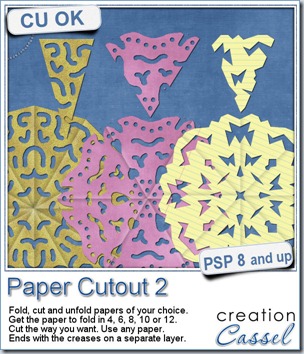
Start with any paper, and run the script It will take care of the not-so-square papers, it will fold it (or pretend) according to what you ask, and you will have the chance to cut out any design you want, with any tool you like. Use the eraser tool or the selection tool. That is up to you.

Cut sections along the “folds” or the outer edge, or snip the center (you surely did that when you made your “snowflakes”). Once you are done, the script will unfold your piece and reveal the whole design (you might be surprised too). And furthermore, it will add creases to your masterpiece exactly where it WAS folded for a more realistic look. The creases are on a separate layer so you can tweak their opacity depending on the color or pattern of your paper.

You can get this script in my store: Creation Cassel.

cass-PaperCutout2-sampleAnd if you want a chance to win it, check out this thread, and tell me what theme would work well with this script. I will be back on Monday to announce a winner.
 

I used a couple of “school” papers to cut some more “snowflakes”. But in fact, they dont look like snowflakes at all. If you are crafty, you can surely create some very intricate designs and turn those “snowflakes” into doilies! These two elements are about 900 pixels wide in png format. They don’t match only “kid” kits!


You need to be logged in to download this sample. You can either login, or register on the top of this page.

News from the Campus


scraphappierWe had the draw on Sunday night for a free registration to LOAD213. Andrea was our winner, and she already started her month-long challenge. She said she loved the idea of a challenge as it will give her a little more incentive to scrap. Even more, i asked her to keep us updated on her activities and she already did her first layout, and we are the first of the month! I guess she is right on track!

Did you register for LOAD213? How are you doing with it?


Photo-Graphic with PSP

We will have our monthly live presentation on Sunday (it should be right before the SuperBowl for those of you who are fans). There is still time to register. We will look at how we can turn a regular photo into something else: a watercolor piece, a cartoon, a sketch, and maybe more (time permitting).

Sunday, Feb 3rd, at 5pm Eastern Time zone.

New script – Sprayed

cass-Sprayed

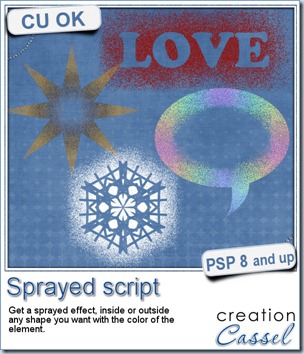
Did you ever use fake snow in the windows to create snowflake or other Christmas decorations? With this script, you will be able to create more than designs with fake snow in a can! Use any shape or even text and have that design either sprayed inside or outside.

You can use this script to create a discrete name, or a date. Make a frame, or a journaling spot. Use a single color or a gradient for a stunning effect. Use the initial shape back with the sprayed design for something even more original.

You can get this script in my store, at Creation Cassel.

If you want a chance to win this script, check out this thread in the DST forum and add your  name AND a specific use you can think of for this script. Be creative. I am sure you can use this in many original ways!

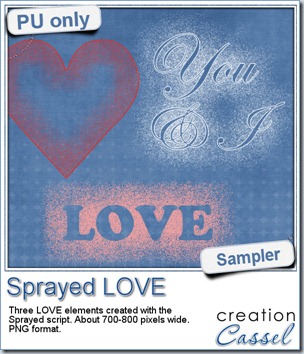
cass-Sprayed-SamplerSince we are close the February, the month when lots of people will either celebrate Valentine Day, or simply take pictures or make layouts about their loved ones, I created these three elements that are love related. They are in PNG format, so just about anyone can use them.
In these elements, you can see how the initial shape (although they were filled), were used to get only a thin outline to be combined with the sprayed area.

You need to be logged in to download this sample. You can either login, or register on the top of this page.

Plastic Pocket Pages

cass-PlasticPocketPages-PL-Set1d

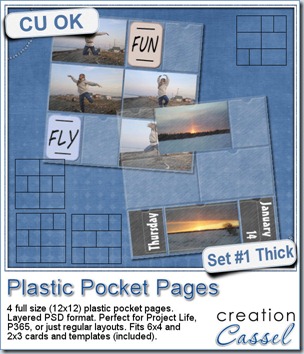
Whether you are into a Project Life mood, or doing a Project 365, or even just trying to add many photos to layouts, these plastic pocket pages can be a very versatile way of presenting your creations.

These 4 pages are FULL size so you can use one of those pages and cover the whole standard layout, or you can resize it down to cover only part of your page or you can crop it to use only one or two rows of pockets.

These pages have that simulated “stitching” between the pockets, and a cutout at the top of each pocket. The plastic is made to look like thick texture.

This set also includes a template for the cards or photos that would fit in the basic pockets. Use that template to create your own journaling cards, to cut decorative papers or trim your photos to size.

You can get this set of 4 pages in my store at Creation Cassel.

As usual, i have also a giveaway for you. Hop over to the DST Happy Place thread HERE and add your name to the thread telling me what you would be using those pages for. Are you into a Project Life group? A P365? Anything else? I will be back on Monday night with the name of a winner.

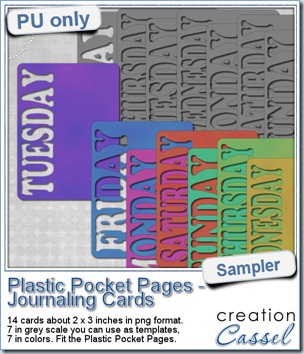
cass-PlasticPocketCards-sampleAs a sampler, i created a set of template cards with the days of the week cut out of the small base card. I also added a set of colored cards too. You can use them just like that or add the date on the card or even some journaling. That is all up to you. These cards are a perfect match to the Plastic Pocket Pages available in the store, but you can also use them on their own if you prefer.
You need to be logged in to download this sample. You can either login, or register on the top of this page.

Remember to show me what you do with those!

New script–Scattered tubes

cass-ScatteredTubes

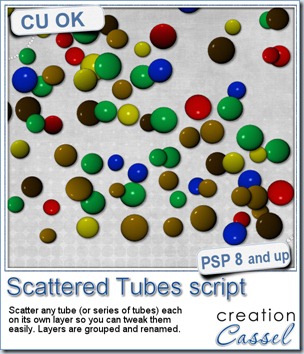
I am sure you have used the picture tubes in Paintshop Pro and loved how easy it is to add 10, 20, 50 flowers just by clicking on your project. Click, one flower, click, one flower, and so on. However, did you ever clicked happily for dozens of times only to realize that a few flowers are too close to the edge, or you ended up with too many pink flowers grouped together and find yourself having to restart from the beginning since all the flowers were on a single layer and you could not move one separately? I have! I always wished the tubes were on individual layers, but to do that, it would become cumbersome and not as quick anymore.

That is where this script comes in. You choose the tube you want to use, and the script will scatter multiple instances of the tube (or from a series of tubes) and add them on individual layers. And to avoid having to work further with 50 layers, they are also grouped so you can collapse the group and have a manageable layer palette where all those 50 layers only look like one, while still letting you move individual tubes, remove some, resize others, rotate a few, and more.

You can grab this time saving script in my store at Creation Cassel.

And as usual, you have a chance to get this script free if you win the RAK in this thread. What kind of tube would you like to scatter yet still have the option to move them around individually or edit them one by one? The winner will be announced on Monday night.

cass-WordAlbum-2012


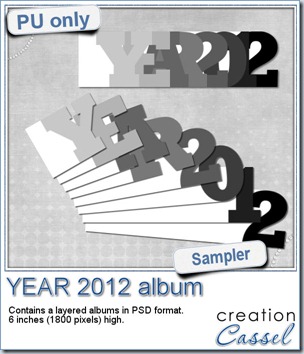
As the new year is here, do you want to make a great conversation starter at home? Gather your 2012 photos and use this word album to place them. Add only photos or some anecdotes too. Use the same pages and flip them so you can get a reverse too. Print them. Collate them. Bind them. It can also be a great gift.


You need to be logged in to download this sample. You can either login, or register on the top of this page.


cass-DoubleToSingle-PS

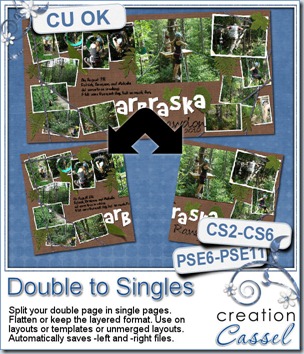
Photoshop and Photoshop Element user, i didn’t forget you. I had a script for PSP a while ago that would automatically split double pages into single pages. Well, after popular demand, i got this script for you too.

This is a SCRIPT but for PS and PSE. It will either split perfectly in the center, OR it will cut the page with an extra 3/8 of an inch. This gives a total of 3/4 inch that you can play with when you print your page in a book so that the center will not eat up some of your page. This amount of overlap is not necessarily a standard “bleed” but a space for you to manoeuvre depending on the printer’s specs.

The fun part about this script is that it cuts the pages but also saves them without you having to type in anything! That is called automation!

You can grab this time-saving script in my store : Creation Cassel.

New Script – Snowflakes

cass-Snowflakes

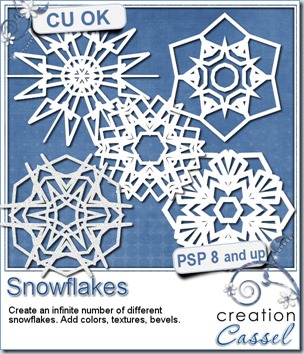
Whether you want to embellish a Christmas photo, or create a winter theme kit, this script will allow you to create an infinite number of 6 points snowflakes. Every design will be different, just like real snowflakes. The random feature incorporated into the script is the key part of the creation of unique snowflakes.

You can create  up to 15 snowflakes in one run of the script. Some snowflakes will be great, others might not suit you. This is totally random.

Once you have a snowflake created, you can change its color, add a texture, or even run it through a filter of your choice.

Each snowflake will be created in white on a black background so you can see better.

Use the same one with different effects, or collect several different ones. Sting them, tie them, cluster them.

You can get this script in my store: Creation Cassel.

There is also a random draw that can allow you to win this script. Check out this thread and add your name to it.

cass-Snowflakes-samples


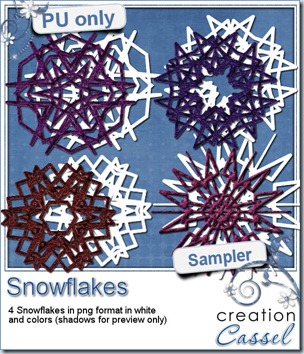
As a sampler, I created 4 snowflakes. You get the basic snowflake shapes in addition to matching snowflakes that have some textures added to them. They are all in PNG format, so you can use them in almost any program.

Use the colored snowflakes as is or you can change the color. Or you can use the basic white flakes and apply your favorite effect. Use Eye Candy or SBP if you want.

You need to be logged in to download this sample. You can either login, or register on the top of this page.


Breaking news

Just letting you know that i will be opening a new store on January 1st. I am excited to have another place to showcase my products and to work alongside other designers. Although i love my own store, it can also be a lonely place at times.

So, keep an eye on this blog, and my newsletter!