What is more refreshing than a delicious ice cream treat during those hot summer months?
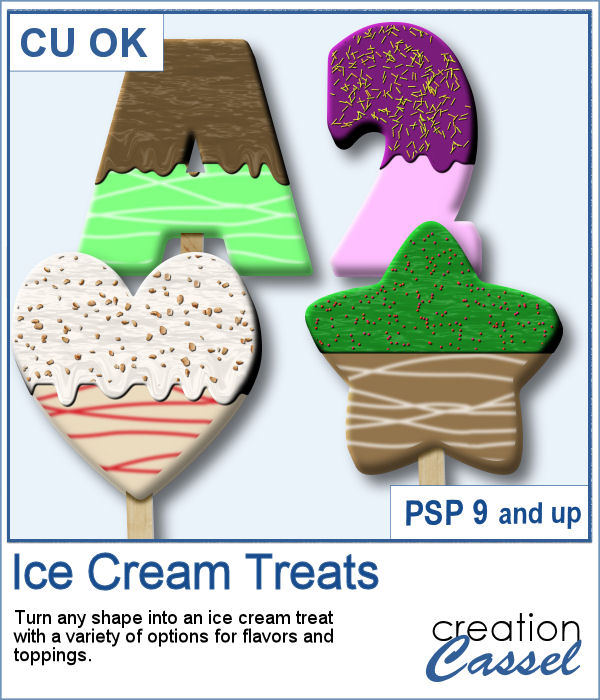
This script will convert any shape into a calorie-free ice cream treat. You can choose any flavor (even if they don't exist). You can add ripples in a different flavor. Then, you choose what coating you want, what texture it will be. You can even have it melting a bit if it is really hot. Then, if you want to be fancier, you can add sprinkles or crushed nuts on top. Hum...
Get it in the store: Ice Cream
In order to win this script, add a comment on this Facebook post telling us what flavor combination you would like to create (remember, add a comment, not just a Like!) The winner will be announced in the newsletter, next week. Not a subscriber yet? Not a problem. You can register here and it is free (and you only get one email per week).
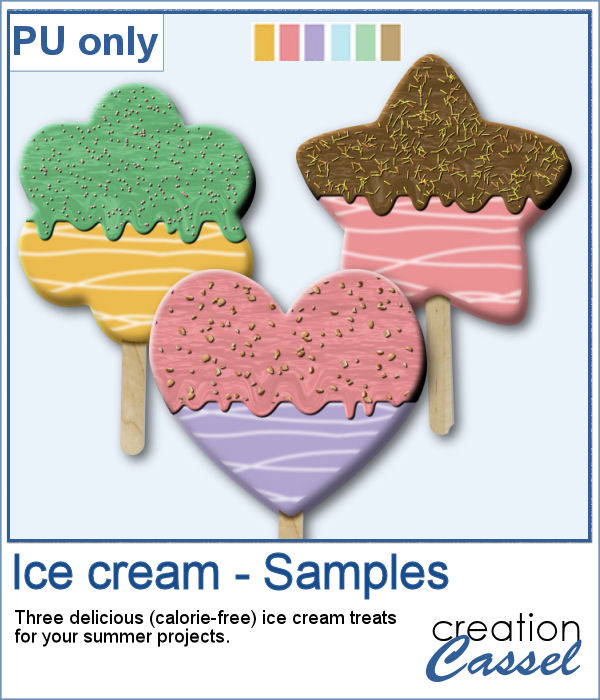
For a sampler, I created three treats for you using the July Blog Train color palette from DigitalScrapbook.
You need to be logged in to download this sample. You can either login, or register on the top of this page.

These chevron patterns can be that additional effect you want in a paper. You can choose to use any color palette, whether it is bright, contrasting, pastel or monochrome.
As a sampler, I ran the script on a full-size paper (3600x3600 px) and chose option 3 for the chevron pattern. I picked the color palette from the July Blog Train at DigitalScrapbook. You get one paper with a white outline and one with a black outline.
Whether you want to create a nautical project or find a way to have a different type of background, you can use these picture tubes. They are completely seamless so you can juxtapose them on top of each other to make a tall net. Then, you can use the Warp Mesh, or the Deformation map to give some movement to the net. Finally, add elements to your page, whether they are beach elements or photos you will attach with clothespins.
For a sampler, I created a full-size 3600x3600 image with a neutral color netting. You can erase some parts, you can use the Warp Brush, or Deformation map to make waves, etc. It is a png format so you can add whatever background you want, or even thread ribbons, vines or other elements through the mesh.
You can now create as many beads as you want to perfectly match your project, and in a short time.
For a sampler, I used the color palette from the June Blog train at DigitalScrapbook.com and created 15 beads. Each bead is 200 pixels in diameter. You can collect other supplies in the Blog Train in
You can now turn any shape into an impression on your project, whether it is supposed to be sand, playdough or cardboard.
For a sampler, I created some fun imprints of sound effects like you would find in comic books. They are about 600-700 pixels in width and in PNG format. You would get a great result by changing the blend mode to Overlay once the elements are on your project. That will make the colors pop.
You can now create your own frame to showcase your favorite photo. No more hoping to find a ready-made frame that has a word suitable for you. You can choose any text you want, and even a specific location or date that is personalized to tell your story.
As a sampler, I created three frames starting from a 1400x1400 pixels blank image. I added the text on top and created an empty section on the bottom. I simply filled that section with various designs to match the top part. Each frame is black, but you can colorize them however you need to fit your project.
If you ever braided ribbons in the past, you know that they could make for a nice long element that can then be used in various shapes. This is the same that you can do with PaintShop Pro and this set of picture tubes.
As a sampler, I just made a basic oval shape and using the VectorTube script, added some green braided ribbon. I added a ribbon bow (which is from Digitalscrapbook.com) and colorized it to match the ribbons (it was light blue initially).
Finally, a new font in the store. This time, it will allow you to use two colors of threads if you want, or simply showcase the layered effect of the stitches with the bevel and shadow.
For a sampler, I created this square frame using a couple of those stitches in light and dark blue. The frame is about 2000x2000 pixels and in PNG format.
How about some climbing vines in the background for your next spring or summer project? These picture tubes will partially cover a wall of your choice, with vines. You can change the step to make it bushier if you prefer.
For a sampler, I created a lattice frame where I added two vines. I created a path with the Pen tool, where I wanted the vines to go and ran the VectorTube script to place all the leaves perfectly on the path. I repeated the process with a green vine and the pink one.
You might have a lot of photos to display and you want them showcased in a different way. How about hanging them all on a line?
As a sampler (since you likely don't care about MY photos), I converted one page with 15 photos into a layered template. Although you cannot move the photos like you would be able to with the actual script, you can still adjust what photo you want to display on each group.