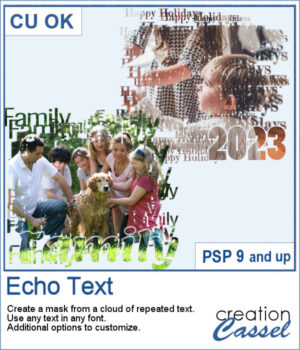
This is the third of the series of edge punches. Just like the punches you would get to cut out the edges of traditional paper products, you can use the Eraser tool to cut out of the edge of your digital element.
Use it on frames, photos, papers, tags, cards, etc. Some of them (not all) are suitable for a cutting machine. Some will be more useful in the digital format only.
Each edge punch has a matching corner punch that can be used alone or with the edge.
Get these brushes in the store: Edge Punches C
In order to win this script, add a comment on this Facebook post telling us if you use similar "punches" to cut out edges (remember, add a comment, not just a Like!) The winner will be announced in the newsletter, next week. Not a subscriber yet? Not a problem. You can register here and it is free (and you only get one email per week).
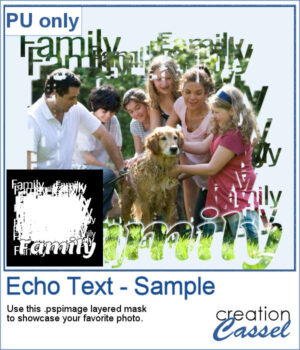
For a sample, I created a template for a greeting card. It is simply in png format so it can be used in any program. If you have a cutting machine, you can cut this card for a unique effect, once you have customized and printed it.
You need to be logged in to download this sample. You can either login, or register on the top of this page.

With this script, you will get some custom masks to showcase sections of your photo. You can either keep a section intact or convert that section to a series of curly lines.
As a sample, I ran the script on a black image, and selected the central area to create the mask. The result is a simple jpg mask that you can use to showcase a panoramic photo, or simply focus on a horizontal section of a non-panoramic photo.
There are so many ways to add a date, a name, a location, or a short phrase to a project. This script will let you choose a main word/date to place in the center, with your choice of font. In addition, you can select the words to add in the top and bottom corners.
As a sampler, I created a set of "blank" datestamps with the days of the week. You can add whatever you want in the center area. Since they are all in greyscale, you can colorize them however you want.
This new script will create some seamless scale patterns with any color palette you want.
As a sample, I created 3 seamless tiles with green shades to go with a possible dinosaur theme. Of course, you can also use those with a garden theme or anything else. There is also a full-size paper with randomized greens. All the elements used the same color palette so they should match if you want to use them together.
Although you can create a painted frame manually, sometimes, you want to save time and work and create a simple yet precise frame that still looks hand drawn. This script will do that for you in just a few seconds.
For samplers, I created two double frames with the script, on a 5x7 photo. Since both layers are left separate, I changed the color of one of the two to create something more interesting. I used the colors from the June blog train at DigitalScrapbook.com.
It can be fun to display photos on a string, and in digital projects, it is just as easy, although it can be tedious to resize, move, rotate and attach all the photos on one image. That is why I coded this script.
As a sampler, I created this layered template where you can display 10 photos of your choice. The template is in .pspimage format and you simply have to put the photos into the individual mask groups.
It might be easy to create a swatch palette in PaintShop Pro, but if you are starting with a large number of colors, it can be tedious. And referring to the same image whenever you are working on a project can also be annoying.
As a sampler, I used the color palettes for the next three blog trains in the DigitalScrapbook.com forum and converted them into palettes you can simply add to your PSP. Two versions of the palettes are available: one for versions 9-X6 (identified with V9 in the name) and one for versions X7 and up (identified with VX7 in the name). Unzip the ones you need for your version and save the files (or the whole folder for versions X7 and up) in the Swatches folder of your PSP. Since they are different for different versions, don't put everything in the same place, if you have earlier and older versions of PSP referring to the same content folder. If needed, simply put them in the default folders, in Documents.
As a sampler, I created a set of white shaggy digits. You can colorize them if you want to match other colors in your project. Each digit is about 500 pixels high.
You can use individual stips of "papers" in different colors to showcase quotes, phrases, or individual lines of a poem but doing that manually is time-consuming and tedious. And adding extra details means that you have to repeat the process for each strip, one by one.
For a sample, I created phrase strips on the Birthday theme, using the color palette for the May blog train at DigitalScrapbook.com. This way, you can go on this thread, and get other goodies that will match.
This script will create a double bow out of a single thin ribbon. Although you can have the same ribbon for all the loops, you can also colorize the inside loops and tails to give the impression of using different ribbons.
For a sample, I used two ribbons from Janet Kemp (you can get them