You can now display your favorite quote or title in a unique way.
The script will create all the individual pieces for the characters or symbols you want, in any font you want. You can choose to type in a word or a phrase, or the whole alphabet. Once the pieces are created, you can also have a board built for you to display your text.
Get this script: Letterpress
To win this product, add a comment on this Facebook post telling us how you would "decorate" a board like this (remember, add a comment, not just a Like!) The winner will be announced in the newsletter, next week. Not a subscriber yet? Not a problem. You can register here and it is free (and you only get one email per week).
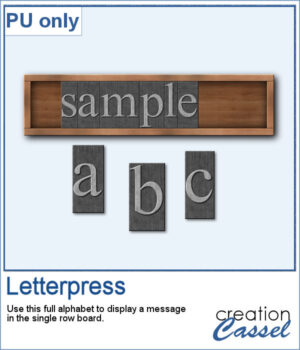 For a sample, I created a whole alphabet in basic font and a single row board for you to display a title of your choice.
You need to be logged in to download this sample. You can either login, or register on the top of this page.