Web
Analytics

New script – Airbrushed Paper

cass-AirbrushedPaper

Here it is. In full size too!

Using the script to create an airbrushed paper is only the beginning of the fun. Once the basic paper is done, you have an unlimited number of options to work with it. You can add blur (gaussian, motion, radial), you can smudge the “paint”, add a wave effect, an artistic effect, or even apply various filter effects. And then, you can use that paper to create elements, ribbons, brads, frames, or any other decorative element. Again, this script only works with Paintshop Pro.

This script is now available in my stores: Creation Cassel and DigiScrap Warehouse.

I also have a draw for you if you want a chance to win this versatile script. Check this thread, and tell me one idea of an effect you could add to the paper once the script is finished.

cass-AirbrushedSet-sample I know, you always look for something to see the product up close. Or, if you are not a PSP user, you want to play with the result, even though you cannot use the script. Well, this week, i created a paper with the script and then, made a few elements for you using that same paper as a pattern. You can get the base paper (with texture), in addition to 2 frames, and two brackets that were also run through the Acrylic script.

You need to be logged in to download this sample. You can either login, or register on the top of this page.


And, if you read the previous post about an upcoming contest, you might consider downloading this freebie (and many other freebies from this blog!). I’ll tell you on Feb 1st!

New script – Squiggles

cass-Squiggles

Do you sometimes want to have a drawing that does not look as neat as usual? A bit of a child like look? or hand drawn doodle like when you are waiting on the phone or in a boring meeting? This script will turn any design, line drawing or shape, and slightly distort it to give you that look. You get several options: you can use the given line drawing only, you can add one to a solid shape, you can choose the thickness of an added outline, you choose the color and the thickness of the outline. And everything is left on a separate layer so you can even recolor each individual outline or add whatever effect you want.  Use it for alphas, basic shapes, hearts, frames, etc. Very versatile!


You can find this script in my stores: Creation Cassel and Digi Scrap Warehouse.


cass-Squiggles-Arrows And here is a little sample made using this script. These arrows were initially drawn by hand, so they are not vector base and probably did look a bit uneven to start with! Each of them is in greyscale (i darkened them so you could see them better on the blue background!) so you can colorize them to match your layout or your kit. Use them as is on your layouts, or use a blend mode to get a different effect. Add noise to simulate a little glitter. Apply whatever effect you want. They are in png format and about 400 pixels wide.

You need to be logged in to download this sample. You can either login, or register on the top of this page.

If you want a chance to win this script, check out the Happy Place thread at the DST forum and simply add your name and answer the little question. A winner will be announced on Monday night.
 

KimericKreations made a wonderful layout using this script. Here it is for you to enjoy. She used her own kit “A la carte” for it. Can you spot the squiggles? They are so beautifully integrated into the layout, i had a hard time finding them, although they are in plain view. Check the description in my store for a closeup of where she used the script (and she used it more than once too!)

cass-Squiggles_01

What is a script anyways? (part 2)

Last week, we saw a few basics about scripts. Let’s continue the list of common questions.


Can scripts work on all PSP versions?

Yes, on all versions of PSP, 8 and above. However, the compatibility of any script with your version will depend greatly on the person who coded them, the type of script and the version it is created with. For example, if someone is recording a script with her PSPX2 and uses the pick tool, that script will NOT work in PSP9, simply because that pick tool does not exist in PSP9 so the script will fail. However, if a recorded script uses only tools that are also present in PSP9, it is more likely to work, although it is not certain either. There are various particularities in just about all the versions that have to be known, understood and taken into consideration by the scripter to create a script compatible with all versions. Unfortunately, too many people have limited knowledge of the scripting language and are not able to render their script compatible with previous versions so if you want to download or buy a script, make sure it is compatible with your particular version.


Some scripts go in the Restricted scripts folder and some go in the Trusted scripts folder. What is the difference?

As stated before, scripts are commands that will be executed for you. Some commands might have an effect on your computer or that cannot be simply undone with a Ctrl-z. Such commands include saving files to your computer, closing a file or using some more advanced Python commands. To keep your computer safe, the only scripts allowed to perform such tasks have to be in the TRUSTED scripts folder. It is a way for the computer to know that you TRUST those scripts to not cause any damage to your computer. So, to be on the safe side of things, always save a script in the RESTRICTED scripts folder, unless specifically asked by the scripter. It is a good habit to take.


My PSP is not in English, will scripts work?

Yes. Scripts are written in Python language and that is English based, even if your PSP is in a different language. Although the language of the coding is English, the message window could be coded in any language the scripter chooses. In my scripts, for example, I have a special code that will give you a French message if you are using a French version of Paintshop, and an English message in all other cases. Since I only know French and English, I could not code messages for other languages.


Hey! Photoshop has scripts too!

Yes, Photoshop has scripts, and they are also a set of commands, but coded in Photoshop’s language so they cannot be read by PSP. The scripts made for Paintshop Pro will not work with Photoshop, simply because PSP and PS use a different language. It is like a recipe written in English cannot be followed by an Inuktitut cook. In the same way, actions written for Photoshop will not work in Paintshop and vice versa.


Where to find good scripts?

Well, glad you asked! Where to find scripts will likely depend on what kind of scripts you want. I have been coding scripts for a few years now. I would not do painting scripts because I have no talent to paint or draw! So, many of my scripts are tool scripts offering many options. Check them out in my store. Almost all of them are compatible with PSP8 and up and I have a few free ones so give them a try and see what they can do for you.

Here are other sources for good photo and tool scripts

http://suzsplace.com/8scripts.htm

http://pixelnook.vapho.com/index_All.html

http://www.dejudicibus.it/psl/

http://www.sheilsoft.com/psp.htm

New script – Storyboarding

cass-Storyboarding

I thought of this script when i saw some great templates that had many many spots for pictures. I felt it was too much work to open, resize, crop, copy, paste, and adjust each photo for each spot. Lucky for me (and for you), i coded a script that does all that, in the blink of an eye. It does not matter if you have 6 photos to place, or 50. It does not matter if they are all square, or round, or all odd shapes. The script work well in all those situations. And i can tell you that it will take only seconds to place them. The longest part will be… to choose the pictures!

You can find that script in my stores: Creation Cassel,

Heather worked with this script and this is her layout. Can you imagine how long it would have taken her to place all the photos on that layout, manually? I count no less than 39 photos! She used Scrapdragon’s kit, Elegance, and a template from [Collages] by Chrissy Williams.

cass-Storyboarding_01


Do you want to see this script in action? Check this short video.

What do you think of a video to show how the scripts work?

FREE Paintshop script – Edge Magic

cass-EdgeMagic

For the New Year, I created a simple yet very effective tool for scrappers and designers. In just a few clicks you can darken or lighten the edge of any element or shape. It gives great results on many situations.

If you have some extracted elements, like flowers, leaves, torn papers or cardboards, or many of those available elements, adding a dark or light edge might give it a whole new look. It will save you time since this process will take only a second, instead of having to use the burn or dodge tool all around the edge.

cass-MagicEdge_01


I also found that if you are using layered element templates, it is perfect to add that little volume effect instead of the flat look of layered papers. Look at this little bird template from Americo. Adding colors only makes it ok. Adding the darker edge almost makes the bird fly! Don’t you think?

It is available exclusively in my store, here.

New script – Fanned Photos

cass-FannedPhoto

This idea came up when i saw one scrap layout using several copies of the same photo in this fanned out arrangement. I thought it was a cool idea, but i could just imagine how long it would take to do all the copies, and rotations, and mostly the perfect alignment of each image to get a great looking result. Well, whenever you want to save time in performing a tedious or precise task, that is when i think of a Paintshop Pro script. So, i started this script to place all those copies in the perfect position, but i added many options. You can decide how many copies you want, the angle of rotation for each copy, where the pivot point will be, if you want the images to rotate clockwise or counterclockwise. But then, you can also choose to have the images gradually smaller, gradually fainter, gradually more black or white. Basically, with all those options, you have hundreds of possibilities to create stunning displays.

You can use this script on photos, that is a given, but you can also use it with scrap elements too. Imagine doing that with a single flower, with a pivot point outside the element, and with gradually smaller copies. It would look like a great accent, don’t you think? How about using it with words too? So many possibilities.

This script is currently available at Creation Cassel

New script – Mosaic Maker

cass-MosaicMaker

Getting to the end of the year, did you gather lots of pictures in the last 12 months? Do you want a way to display many many pictures in one layout but you don’t want to spend toooooo much time resizing, cropping, copying, pasting, aligning, etc.? This script is made for you. You can create a mosaic of many pictures in just a few seconds. You decide how large you want your montage: you can make a whole standard page, a double page, or maybe a smaller area that will contain the pictures, while leaving you some room for journaling, title or other larger photos. Whatever you prefer, this script will let you do it. Then, you can choose how many rows and columns you want (ranging from 4 to 20, meaning you can use up to 400 pictures in a single scrapbooking montage!!). Several other options are available like the shape of the small pictures, and the padding between them. In the end, since all the images are on separate unmerged layers, you can customize the montage as you wish. You can remove some photos, replace them by text, elements, other photos, paper pieces. You can move photos around if you want. The script will place some guidelines, so moving photos and aligning them will be very easy to do.

This Paintshop Pro script is perfect for a year in review, or a simple collage of many photos that you want to use, although they might not need a full page on their own.

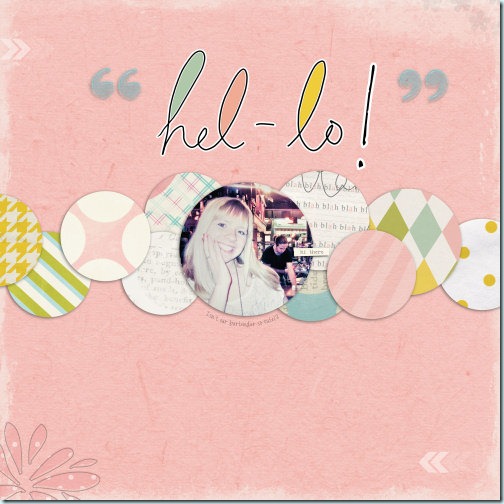
See another layout i made using this script. This time, i chose round photos, and i deleted the ones in the middle to place the larger photo, and some at the bottom for the text/title.

cass-MosaicMaker_01

This script is available in my stores: Creation Cassel and DigiScrap Warehouse.

You can get a chance to win this script by adding your name to the RAK thread at DST. Just tell me what theme would be suited for a collage of many pictures like that, or, what is the maximum number of pictures you have used in one layout. A winner will be picked on Monday night.

cass-Digit-buttons And this week, as a free sample, i figured it would be hard to give you something made with the Mosaic Maker script so i made something using an older script: the Custom Buttom script. I made this set of digits. They would be well suited, with the white and gold, for a holiday layout, to write the date, or maybe for a birthday layout.

You need to be logged in to download this sample. You can either login, or register on the top of this page.


New Script – Cogwheels

cass-cogwheel

This week, my new script will help you create various cogwheels. You will be able to add any color or texture to them once they are done as the script will only create the shape. You will have the options of creating your own, custom design, or ask for a randomly generated wheel. You can have square, triangular or round teeth, and you can have between 15 and 60 of them. Talk about variation! but that is not all. You can create straight “spokes” inside (between 6 and 12), or some decorative cutout. Again, you can let the script generate them, or draw them yourself, using any tool you want. You can make bold designs, or delicate and intricate motifs. How many different wheel patterns can you create? As many as you dare design! Each wheel will measure about 1000 x 1000 pixels, and you can resize it as you wish.


You can get this script for Paintshop Pro in my stores: Creation Cassel .


If you see cogwheels, what does it make you think of? We know that those into the Steampunk style might like those cogwheels, but can you think of other themes where they could be used? If so, just tell me in this thread at the DST forum for a chance to get this script.cass-Cogwheels-cluster


And now, for a sampler. I am not particularly good at clustering, but i tried it. I made this corner cluster for you, using 6 different cogwheels, and some old chain tubes. I am not sure if you will like the cluster, but in case you dont, i am including the individual cogwheels in the zip so you can make your own cluster, or add them separately. If you make another cluster out of them, would you care to show me? I would LOVE to see how you can use them.

You need to be logged in to download this sample. You can either login, or register on the top of this page.


New script – Corduroy texture

cass-Corduroy

Remember those pants you had in corduroy? or maybe some furniture upholstered with corduroy fabric? This script will let you recreate those textures using any color, gradient, pattern, or even photos. Maybe you never saw a corduroy-ed photo, but you can do it with Paintshop Pro and this script now!

This is a simple script that lets you choose the design, and the width of the “wales”. So in the end, you have 12 different options for texture, but since you can apply it to just about anything, the possibilities are endless.

You can find this script in my stores: Creation Cassel and DigiScrapWarehouse.

And for a chance to win this script, go add your name to the RAK thread, here, and tell me of one thing you have that is made of corduroy.

New products – Fancy Text paths and script

cass-FancyTextWrapping    cass-FancyTextPaths

A few weeks ago, i coded a script to write text inside a specific shape, using special types of path and matching script coding. This made up for one missing feature of Paintshop. At that point, you could write text inside a simple shape (like a rectangle, or a circle), or a more fancy shape (like the alphabet shapes, school theme shapes). Then, my script mentor, Suz Shook, told me it would be great if the script could work on non-horizontal or wavy, but that meant a whole lot of different type of coding. But, this became a challenge for me. And this challenge led me to code this script for you. Now, this set includes two products: one script and one set of 12 paths.

The script will let you write out your own text, in your own font. You can use the path to give you an idea of how much space you will be using. Once you have all your text typed, you run the script. Depending on the paths, you can still align left, right or center (not all paths can be center aligned). The text stays as vectors so if you notice a typo, it is still easy to edit. If you want to edit your text, change it, add or remove more than just a letter, you can simply undo the script and rerun it. The path will stay untouched, so you can also reuse it.

The set of paths include various types of curves or angles. Some paths are doubled so you can have a left and right version when applicable (never mirror a path unless you want the text to write from right to left!). One little trick to use these paths (or any other paths): copy the path on your layout and run the script from there. That will save you the headache of copying and pasting the many layers that will be created by the script. In addition, it will make it easier for you to edit the text if needed.

You can find both those products in my stores: Creation Cassel and DigiScrapWarehouse.

This week, i have a RAK at the DST forum where you can with BOTH products as a set. So, go over there, add your name, and tell me if you have ever done text on a layout in this manner, and if you did, how you did it (of course, a link to the layout would be great too).