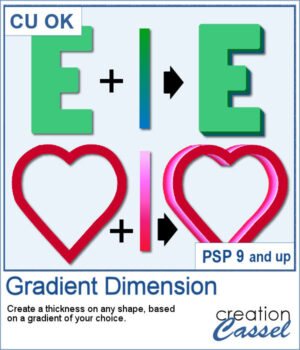
You might be familiar with the Dimension script where one could add an even thickness, in whatever color you wanted. This time around, the thickness would follow a gradient, whether it is already made, or based on two or three colors you will choose.
The script will create up to 100 layers following the chosen gradient, to give a unique effect to any shape.
You can start with a vector or a raster layer. It will work well either way.
Get it in the store: Gradient Dimension
In order to win this script, add a comment on this Facebook post telling us what you would use this script for (remember, add a comment, not just a Like!) The winner will be announced in the newsletter, next week. Not a subscriber yet? Not a problem. You can register here and it is free (and you only get one email per week).
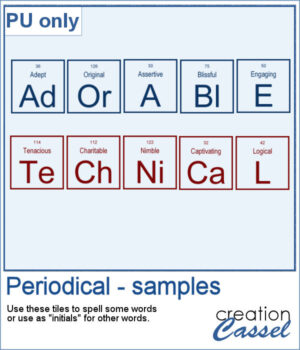
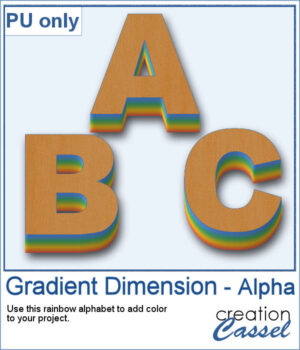
As a sample, I created a full alphabet using a rainbow gradient for the edge. This will be perfect for your spring themed titles and projects.
You need to be logged in to download this sample. You can either login, or register on the top of this page.

I have seen someone wear one of those t-shirts where individual tiles spelled out a meaningful word. I was wondering how to create those tiles for any word a user would want. And I did manage to code a script that will use any word you give to generate individual tiles.
For a sampler, I created the tiles to spell out the words ADORABLE and TECHNICAL. Each tile has a transparent background so you can add your own, and customize them further.
Whether you are doing a "Project 52" or just want to showcase your photos, sometimes, it can be fun to have an overlay to show the week and year of that particular photo.
As a sampler, I created a whole set of raster overlays for you to showcase the year 2023. All the layers are in white, but you know that you can change that easily, right? The format is 6x4, which is fairly standard for printing, but also if you are doing pocket scrapbooking.
You can surely create stacks of wooden characters, but it is quite tedious. You have to duplicate each character, and then rotate and move them one by one, then add some thickness AND if you want to add the proper inside shadows, you have to do that on each individual layer.
For a sampler, I created a set of 10 digits, using cherry wood. Each digit is about 500 pixels high in png format.
This script will let you create a variety of different triangle-patterned papers in any size you want.
For a sampler, I created two papers using Halloween colors and made them into bookmarks that you can print and cut if you want. The files are in PNG format so it can be used by anyone.
If you like the grungy style, this script will help you. It can turn any design, drawing, photo, or any flat element into a wooden item with cracked paint all over.
As a sample, I created a simple alphabet with Halloween colors and ran the script on each of those elements. You get a full alphabet of uppercase, and ten digits to match.
Another script will allow you to create a variety of decorated beads. This time, the beads will be a slightly different shape than the previous scripts. Furthermore, you can create monochrome beads in addition to the duotone ones. Different rotations will be associated with the correct bevel and shadows to give a more realistic effect.
For a sampler, I used the same color palette as for the previous freebies for the Beads Maker 1 and the Beads Maker 2. This way, you will have a total of 45 matching beads to play with and create a variety of elements.
Another way to add a date, a name, a location, or a short phrase in a unique way on your project.
For a sample, I created four seasonal tags and left the rectangle with lines so you could add your own message or customize the tag further. You can distress it, stain it, add a stamp to it, etc. Then, tie it to something with a string or a ring.
There are so many ways to add a date, a name, a location, or a short phrase to a project. This script will let you choose a main word/date to place in the center, with your choice of font. In addition, you can select the words to add in the top and bottom corners.
As a sampler, I created a set of "blank" datestamps with the days of the week. You can add whatever you want in the center area. Since they are all in greyscale, you can colorize them however you want.
It might be easy to create a swatch palette in PaintShop Pro, but if you are starting with a large number of colors, it can be tedious. And referring to the same image whenever you are working on a project can also be annoying.
As a sampler, I used the color palettes for the next three blog trains in the DigitalScrapbook.com forum and converted them into palettes you can simply add to your PSP. Two versions of the palettes are available: one for versions 9-X6 (identified with V9 in the name) and one for versions X7 and up (identified with VX7 in the name). Unzip the ones you need for your version and save the files (or the whole folder for versions X7 and up) in the Swatches folder of your PSP. Since they are different for different versions, don't put everything in the same place, if you have earlier and older versions of PSP referring to the same content folder. If needed, simply put them in the default folders, in Documents.