Web
Analytics

new script – Paper Cutout 2

cass-PaperCutout2

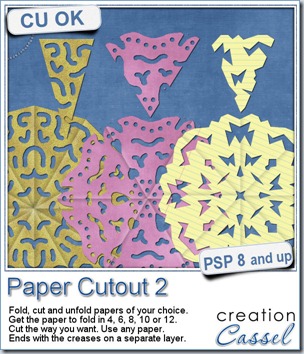
When i was a kid, i used to take papers of different size and fold them to then cut out along the folds. I was making “snowflakes”, even though they were usually not folded in 6. We had that activity in arts and crafts class pretty well every year. I learned that regular writing papers were not square so i always had to cut off a piece to make my craft (what a waste).

Whether you want to use lined paper to simulate those school projects (not done in art classes) or really plain colored construction papers, or using a patterned paper from a kit, there is no limit.

Start with any paper, and run the script It will take care of the not-so-square papers, it will fold it (or pretend) according to what you ask, and you will have the chance to cut out any design you want, with any tool you like. Use the eraser tool or the selection tool. That is up to you.

Cut sections along the “folds” or the outer edge, or snip the center (you surely did that when you made your “snowflakes”). Once you are done, the script will unfold your piece and reveal the whole design (you might be surprised too). And furthermore, it will add creases to your masterpiece exactly where it WAS folded for a more realistic look. The creases are on a separate layer so you can tweak their opacity depending on the color or pattern of your paper.

You can get this script in my store: Creation Cassel.
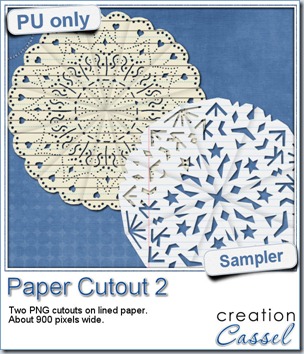
cass-PaperCutout2-sampleAnd if you want a chance to win it, check out this thread, and tell me what theme would work well with this script. I will be back on Monday to announce a winner.


I used a couple of “school” papers to cut some more “snowflakes”. But in fact, they dont look like snowflakes at all. If you are crafty, you can surely create some very intricate designs and turn those “snowflakes” into doilies! These two elements are about 900 pixels wide in png format. They don’t match only “kid” kits!


You need to be logged in to download this sample. You can either login, or register on the top of this page.

News from the Campus
 

scraphappierWe had the draw on Sunday night for a free registration to LOAD213. Andrea was our winner, and she already started her month-long challenge. She said she loved the idea of a challenge as it will give her a little more incentive to scrap. Even more, i asked her to keep us updated on her activities and she already did her first layout, and we are the first of the month! I guess she is right on track!

Did you register for LOAD213? How are you doing with it?


Photo-Graphic with PSP

We will have our monthly live presentation on Sunday (it should be right before the SuperBowl for those of you who are fans). There is still time to register. We will look at how we can turn a regular photo into something else: a watercolor piece, a cartoon, a sketch, and maybe more (time permitting).

Sunday, Feb 3rd, at 5pm Eastern Time zone.

New script – Sprayed

cass-Sprayed

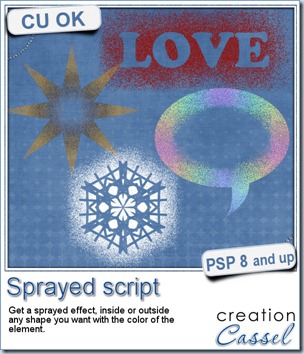
Did you ever use fake snow in the windows to create snowflake or other Christmas decorations? With this script, you will be able to create more than designs with fake snow in a can! Use any shape or even text and have that design either sprayed inside or outside.

You can use this script to create a discrete name, or a date. Make a frame, or a journaling spot. Use a single color or a gradient for a stunning effect. Use the initial shape back with the sprayed design for something even more original.

You can get this script in my store, at Creation Cassel.

If you want a chance to win this script, check out this thread in the DST forum and add your  name AND a specific use you can think of for this script. Be creative. I am sure you can use this in many original ways!

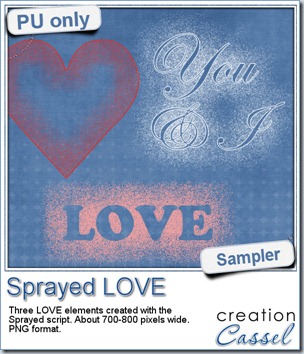
cass-Sprayed-SamplerSince we are close the February, the month when lots of people will either celebrate Valentine Day, or simply take pictures or make layouts about their loved ones, I created these three elements that are love related. They are in PNG format, so just about anyone can use them.
In these elements, you can see how the initial shape (although they were filled), were used to get only a thin outline to be combined with the sprayed area.

You need to be logged in to download this sample. You can either login, or register on the top of this page.

New Script – Multiple Dots

cass-MultipleDots

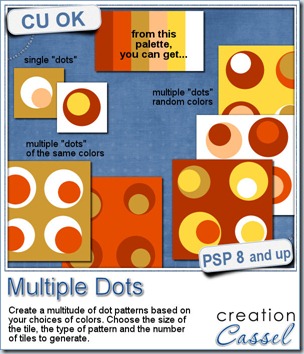
Do you like polkadot patterns, but want to have something more than the single dot? Here is a script that will give you the option to create layered concentric dots in random colors picked from the palette you chose.

You can create a singe dot pattern (with two colors), or a 2 x 2 design where all four dots are using the same colors, or a 2 x 2 design where all the dots are randomly colored. The end result is obviously seamless so you can use the tiles as a pattern in your Paintshop Pro. Use them straight or at a 45 degree angle for a different look.

Each tile ends up with all the dots on separate unmerged layers, so you can also replace one dot by something else, or add a shadow, or a texture to each layer independently.

Use bold or subtle colors to match your kit or your photo. Add an extra design in the middle of the smaller dots.

You can get this script in my store, at Creation Cassel. It is on sale at 25% off until MONDAY NIGHT (this is in response to those who mentioned that due to the time zones, they tend to miss the sale price when it ended on Sunday night while the newsletter was released on Sunday morning).

As usual, there is also a random draw in the forum where you can win this script. Check out this thread, and just add a comment to the thread (i am not asking much this time). I will be back on Monday night with the name of a winner.

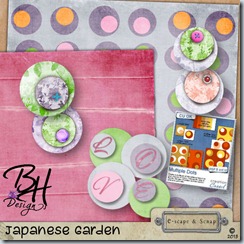
bhdesigns_jggThis week, I didn’t create a freebie for you, but someone else did. I asked Bernadette to test run this script and she got inspired in using this script in a totally different way that i expected! She used it to create a paper; that is the typical use for it, but she also used the dots separately and made a wordart, and some elements too. You can download her freebie mini-kit by clicking on the preview.

Thanks Bernadette.

If you want to look at a matching kit, she has it in her store here.

News in the Campus

Are you familiar with LOAD (Layout A Day)? If you ever participated in the past, you will want to register again, right? If you never participated, it is a great time to start.

scraphappier


The the inspiration and nudge to complete one layout a day for the whole month of February (it only has 28 days!). Whether you are a traditional paper scrapper, or a digital scrapper, you can join in the fun and with the title of SCRAPHAPPIER, what else than fun can you expect?

There is a little contest on the Campus where you can WIN your registration: either you win a registration or you win a refund of your registration if you already paid for it. Since the places are limited and the number of seats is quickly dwindling, you might want to secure yours now.

If you want to register now, go for it: REGISTER NOW.

Then, head over to the Campus and add a comment to the LOAD post. If you participated in previous LOAD events, tell us what you liked about it. If you never participated, tell us why you would like to join. I will draw for a winner on January 27th, 2013. Tell your friends too!


ENTER THE DRAW

Plastic Pocket Pages

cass-PlasticPocketPages-PL-Set1d

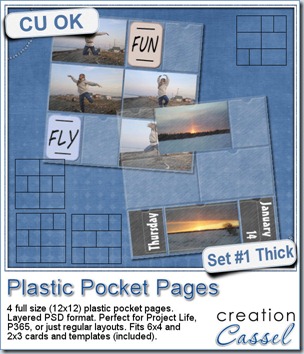
Whether you are into a Project Life mood, or doing a Project 365, or even just trying to add many photos to layouts, these plastic pocket pages can be a very versatile way of presenting your creations.

These 4 pages are FULL size so you can use one of those pages and cover the whole standard layout, or you can resize it down to cover only part of your page or you can crop it to use only one or two rows of pockets.

These pages have that simulated “stitching” between the pockets, and a cutout at the top of each pocket. The plastic is made to look like thick texture.

This set also includes a template for the cards or photos that would fit in the basic pockets. Use that template to create your own journaling cards, to cut decorative papers or trim your photos to size.

You can get this set of 4 pages in my store at Creation Cassel.

As usual, i have also a giveaway for you. Hop over to the DST Happy Place thread HERE and add your name to the thread telling me what you would be using those pages for. Are you into a Project Life group? A P365? Anything else? I will be back on Monday night with the name of a winner.

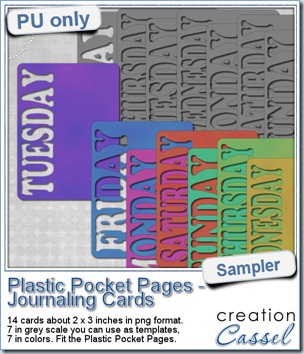
cass-PlasticPocketCards-sampleAs a sampler, i created a set of template cards with the days of the week cut out of the small base card. I also added a set of colored cards too. You can use them just like that or add the date on the card or even some journaling. That is all up to you. These cards are a perfect match to the Plastic Pocket Pages available in the store, but you can also use them on their own if you prefer.
You need to be logged in to download this sample. You can either login, or register on the top of this page.

Remember to show me what you do with those!

New Script – Snowflakes

cass-Snowflakes

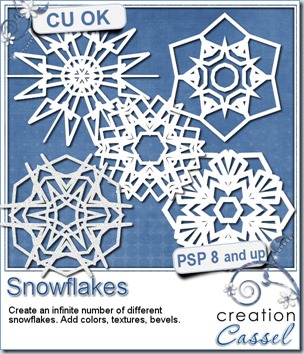
Whether you want to embellish a Christmas photo, or create a winter theme kit, this script will allow you to create an infinite number of 6 points snowflakes. Every design will be different, just like real snowflakes. The random feature incorporated into the script is the key part of the creation of unique snowflakes.

You can create  up to 15 snowflakes in one run of the script. Some snowflakes will be great, others might not suit you. This is totally random.

Once you have a snowflake created, you can change its color, add a texture, or even run it through a filter of your choice.

Each snowflake will be created in white on a black background so you can see better.

Use the same one with different effects, or collect several different ones. Sting them, tie them, cluster them.

You can get this script in my store: Creation Cassel.

There is also a random draw that can allow you to win this script. Check out this thread and add your name to it.

cass-Snowflakes-samples


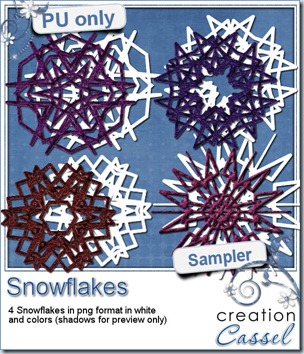
As a sampler, I created 4 snowflakes. You get the basic snowflake shapes in addition to matching snowflakes that have some textures added to them. They are all in PNG format, so you can use them in almost any program.

Use the colored snowflakes as is or you can change the color. Or you can use the basic white flakes and apply your favorite effect. Use Eye Candy or SBP if you want.

You need to be logged in to download this sample. You can either login, or register on the top of this page.


Breaking news

Just letting you know that i will be opening a new store on January 1st. I am excited to have another place to showcase my products and to work alongside other designers. Although i love my own store, it can also be a lonely place at times.

So, keep an eye on this blog, and my newsletter!

Element Separator for Photoshop and Photoshop Element users

cass-ElementSeparator-PS

A while ago, i coded a script for Paintshop Pro to separate elements from a single layer into individual files. I got repeated requests to convert it to be used by Photoshop and Photoshop Element users but that was impossible at the time. Now, it is available.

This is a script, not an action, but works on CS2-CS6 and PSE6-PS11, on PC and Mac.

This tool will separate as many elements as you have on a single layer. They don’t need to be arranged in particular way. They don’t need to fit any template. You don’t have to do any selection when the script runs. Everything is automatic. Simply start the script, click OK on the first message window, and watch. You can even go get yourself a coffee and when you come back, it will all be done. How much easier can it be?

This tool will separate all the elements, turn them into individual files, save them in the same folder the initial image is saved, and will name the individual files based on the initial image filename plus add a number. You can split a layer of 5 elements, or 50. If you have elements with shadows, it will trim each of them correctly and not chew up the shadow.

Here are some comments i got from the testers:

“The biggest benefit seems to be ease of use with just dropping the script into PSE6 and clicking YES to run script on item and poof it does it - my other action I have to 'cut' each letter to it's own layer first, name then run an action to save each layer - your script is WAY easier and faster. Saves a ton of time and I love it.  “

“What impressed me the most is that even with shadowed elements, the separation is perfect while if it is done manually, we might have to do the selection more than once to not cut off the shadows. In addition, it is super fast.”

“I think its great and would be great for doing alphas. Put your fonts/text spread all over a page, select a background paper and clip mask over it then use your script and they will make individual for you.”

Do you want to get it? It is available in my store: Creation Cassel.

In addition, there is a thread in the Happy Place, where you can add your name and get a chance to win this wonderful time-saving tool. Check out this thread.

New script–Merge Group

cass-MergeGroupRename

You probably want to complete your scrapbook project as fast as possible. You probably have more than one page to finish and are running a bit out of time. This new script is just a wonderful time-saving tool to help you achieve your goal of finishing faster and more efficiently.

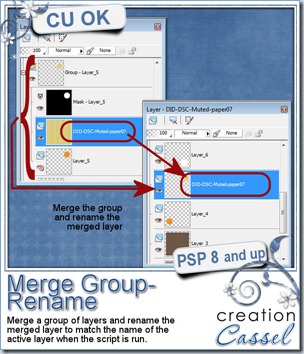
By default, when you merge a group of layers, it will keep the name of the top “layer” but that name is most often, not very meaningful. This script will remember the name of the active layer when you run the script and will rename the merged layer to that name. No fuss. No typing. No copying and pasting.

Without this script, you would require a total of 11 clicks to get the same thing (assuming you are copying and pasting instead of retyping), but with this script, if you bind it and place it in a convenient place, it will require ONE SINGLE click. Talk about saving time! that means that the process will be TEN TIMES faster than the old manual way.

This script can be purchased in my store: Creation Cassel.

This script is a perfect companion to a few others to speed up the scrapping process for any user. You can start by using the free script, Open As Layer – Rename, which will allow you to open one or more papers or elements just the way you would normally do, but it will take care of copying them and pasting them onto your current project in addition to renaming each layer based on the filename of those papers or elements. This allows you to remember what kit this element was from (assuming the initial file is named properly).

Once you have your papers or photos onto your work, if you are using a template, you will want the flexibility of adjusting their placement, rotation, and size without fuss. That is when the Clip To It script becomes another time saver in addition to making the process simpler and non destructive as it will “convert” the template shape into a mask from which you can see how the photo or the paper will look like before “cutting” anything.

Then, once you have your mask group, created by the Clip To It script, and you have adjusted the paper or the photo to your liking, it is time to merge it all in a single layer (if you want) using the Merge Group – Rename script.

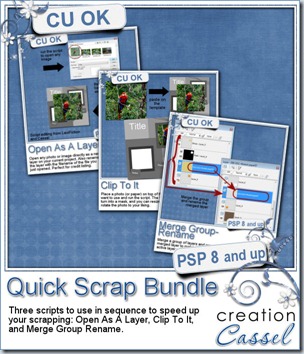
cass-QuickScrapBundleSince those three scripts are so useful in your toolbox to complete your scrapbook project faster, we also have the combo available for you. It is called Quick Scrap Bundle as it will do just that: make you scrap quickly.

This combo will include:

Open as Layer Rename

Clip To It

Merge Group Rename


Do you have plans to finish more projects in the coming year?

Are you rushed to finish those layouts before the end of the year?

Do you have a complete album project in mind and feel overwhelmed by all the work that will take?

These tools will save you a LOT of time, and make the process simpler.

You can also add your name to this thread in the Happy Place so you might win this combo of 3 scripts.


News from the Campus


Did you want more tips on scrapbooking faster? We had a presentation a couple of weeks ago called Scrapbooking on a Deadline where we looked at many tips, tricks and tools to achieve it.

ScrapbookingOnADeadline

The edited recording is currently available for online viewing for FREE.

Check it out here.

New script – Flat Paper Preview

cass-FlatPaperPreview

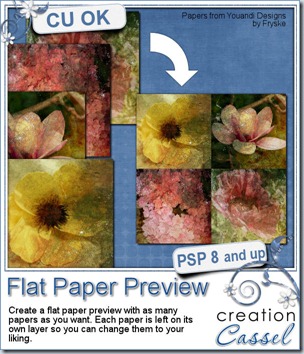
Designers often use a stacked arrangement for their papers in kit previews since most of them are identifiable easily with only a portion of the whole paper, but other designers have papers that are more like photos, scenic backgrounds, paintings, or incorporate some hand made designs that differ from one paper to the other. In those instances, having all the papers stacked up, and showing only an edge would not showcase the beauty of the whole papers. Designers then want to have the papers placed side by side so the viewer can see the whole image.

Creating those previews will require the designer to resize the papers, and align them on previews. With just a few papers, it might not be too long but if one has a dozen papers, or more as in a collab kit, this can become quite tedious.

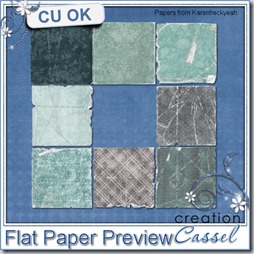
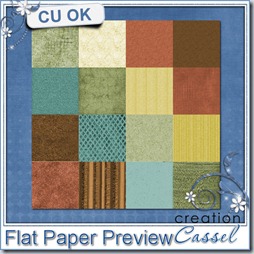
cass-FlatPaperPreview-01cass-FlatPaperPreview-02

The script will do all the calculations, resizing, copying, pasting and aligning the papers. Save a lot of time because YOU dont have to open the papers one by one. YOU dont have to edit the script to find the papers. YOU dont have to bog down your PSP by having 12 full size papers open at the same time. YOU dont have to measure the size needed for the number of papers you want per preview. YOU dont have to align them all to look perfect. The script does all that work for YOU.

You can have the papers in 2x2, 3x3, 4x4, 5x5, or 6x6 arrangement and if you have more papers than will fit in one preview, the script will know and create multiple previews. If you have fewer papers than what can fit in the arrangement you picked, you will have empty spots and you can move the papers around. The script will place guidelines to help you move the papers and keep them aligned perfectly, without any difficulty. Each paper will be on a separate layer AND renamed to match the filename. This will help you identify which paper is which.


This script can also be used to display QP and templates if you have several to showcase!


You can grab this fantastic time-saver script in my store: Creation Cassel

As usual, you have the opportunity to win this script by posting in the Happy Place RAK thread HERE. Tell me if you ever used a side-by-side paper arrangement before. I will be back on Monday night with the name of a winner.


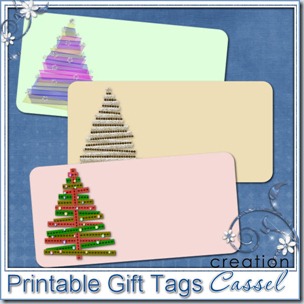
cass-RibbonTree-GiftTagsSince this week script is a tool, i chose to offer you some Christmas Gift tags made using the Ribbon Tag trees submitted by the users of the Ribbon Tag Tree script during our contest last month.
I used two of the trees submitted by Dianne. One was made with organza ribbons (i think she created the organza ribbons from scratch from a tutorial in the Element Creation Tutorials class of the Scrapbook Campus).

The other tree was made with straight rows of tubes: bead tube and garland.

The last tree was made using recolored version of a single extracted ribbon.

Use those tags on presents to put the name of the recipient of your gift, place them at the table with the name of the guests, etc. Each tag is a png image 600x300 pixels.

You need to be logged in to download this sample. You can either login, or register on the top of this page.

New script – Textured Overlay

cass-TexturedOverlay

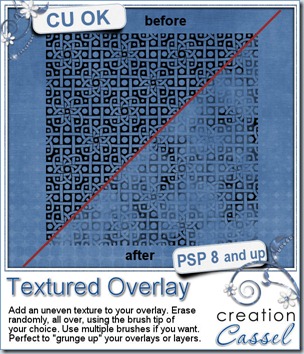
Sometimes, you might have a collection of overlays and want to use them but you dont want all your papers to look exactly the same. One solution? You grunge them a bit. However, it is long to randomly delete areas, change the angle of the eraser tip, change the size, or even change the eraser tip altogether. This script for Paintshop Pro will do all the work for you. What do you have to do? Open the overlay, run the script, pick the eraser tip and decide if you want to erase a little or a lot. That’s it. The script will erase dozens or hundreds of times, randomly, while you just watch.

You can continue running the script as long as you want to remove as much as you want. This is the perfect tool if you want to use a consistent texture across a set of papers without having the exact same look on each of them. Since there is a random feature coded in the script, you will ALWAYS get a different end result even if you start with the same overlay and eraser tip.

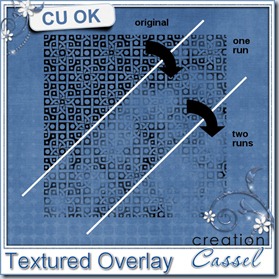
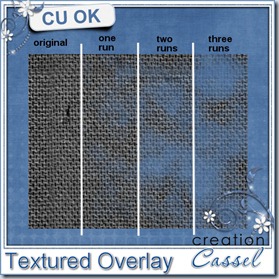
See what other results you can get with multiple runs of the script using the same settings and eraser tip (you can then play with the opacity and the blending to get yet, a different result):

cass-TexturedOverlay1  cass-TexturedOverlay2

You can get this script in my store: Creation Cassel.

As usual, this script is also available to win. Check out this thread in the Happy Place forum and add your name to the thread (remember to answer the question from the first post!). A winner will be announced on Monday night.

cass-TexturedOverlay-sample-Christmas


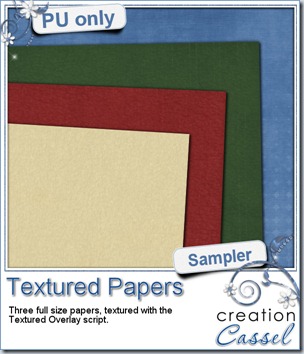
As a free sample, i created these three holiday themed papers using a texture image i scanned and ran that texture layer through the script to get 3 different results. Since i lowered the opacity a lot, the end result is a subtle texture.

They are all 3600 x 3600 pixels so you can use them as background papers for a layout, for a Christmas card, or you can cut them to create holiday gift tags, name tags, frames, etc.

You need to be logged in to download this sample. You can either login, or register on the top of this page.


New font – Petals

cass-Petals

Your program probably has some kind of vector flower shapes. How many? It depends on your program. But with this new font (yes, it is a FONT), you can create so many more designs.

This font includes 50 different petal shapes: some are similar but in different width so they make a great match to use in combination. Since they are fonts, you can use them around a vector circle as they will go just like a “text on path”.

Use any size you want since they are vector and they wont pixelate; you will always have smooth edges no matter how big you create the flowers.

But flowers are not the only thing you can use these for: create frames and borders. Repeat the same shape or alternate two or more. Choose any color or gradient or pattern, or “clip” a paper on them for a really matching element to your project.

That is not all. Do you own a cutting machine? you can create some gorgeous quilled flowers using a straight line of petals, cut them with the machine and then tightly roll them. Look at the fantastic result Connie got with this:

IMG_20121129_195951

In fact, it was Connie who gave me the idea of this petal font. She initially used the Lace Edge font to create some quilled flowers. The number of designs was much more limited for this purpose so when she sent me the first sample, she said “it would be nice if you had other shapes”. And here we are now with a full set of 50 different petal shapes. Of course, not all the shapes are suitable for quilling, but they can be used to create vector flowers.

And But this is not all: since this is a FONT, it is not program specific. This means that, unlike most products in my store, you don’t have to have Paintshop Pro to use this font. You can use just about any graphic program including Photoshop and Photoshop Element. I didn’t try other programs, but i assume they would also work fine.

You can grab this FONT in my store: Creation Cassel.

cass-Petals1-sampleAnd as usual, i have a random draw where you can win this product. Head over to this thread in the DST forum, and tell me what program you are using (since this font works in most of them). I will be back on Monday with the name of a winner.

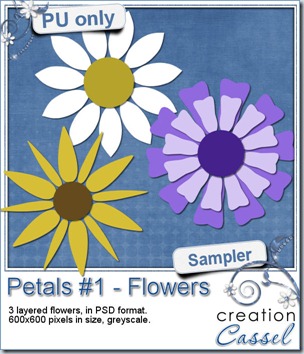
As a way for you to see this font “at work”, i created three layered flowers using it. They are PSD files so you can use them in PSP or PS or PSE.

For the white petals, i used the letter “d”. For the purple petals, i used the letters “u” and “v” on different layers. And for the yellow petals, i used alternatively the “U” and “W”. You can surely create many many more designs.

You need to be logged in to download this sample. You can either login, or register on the top of this page.

Remember to show us what you do with them.