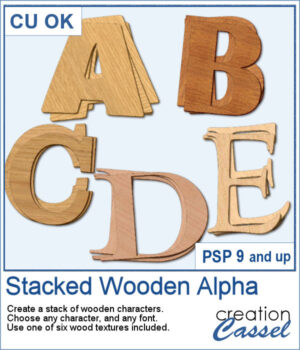
You can surely create stacks of wooden characters, but it is quite tedious. You have to duplicate each character, and then rotate and move them one by one, then add some thickness AND if you want to add the proper inside shadows, you have to do that on each individual layer.
But the script will do that in just a few seconds. Furthermore, it will change the angle of the wood texture for each layer, making your stacks even more random.
Once done, all the layers will be merged so that the inside shadows are not disturbed.
Get it in the store: Stacked Wooden Alpha
In order to win this product, add a comment on this Facebook post telling us how you can use these stacked characters (remember, add a comment, not just a Like!) The winner will be announced in the newsletter, next week. Not a subscriber yet? Not a problem. You can register here and it is free (and you only get one email per week).
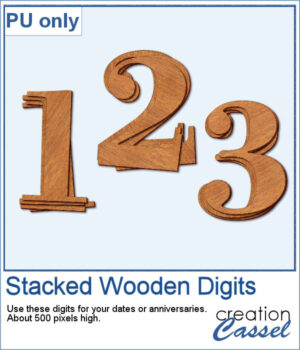
For a sampler, I created a set of 10 digits, using cherry wood. Each digit is about 500 pixels high in png format.
You need to be logged in to download this sample. You can either login, or register on the top of this page.

If you want some variety in your supplies but still want something to match what you currently have, this is another script to create a bow from a straight ribbon.
For a sample, I used some ribbon templates from Marisa Lerin and colored them with some autumn colors. The freebie includes the three bows but also the matching straight ribbon I created for them so you can even use them with other scripts to create other types of bows and knots.
This script will let you create a variety of different triangle-patterned papers in any size you want.
For a sampler, I created two papers using Halloween colors and made them into bookmarks that you can print and cut if you want. The files are in PNG format so it can be used by anyone.
This script will quickly add an inked edge around any element, photo, or shape for you. It will look like a wet/watercolor ink that was added in three runs. The edges will be uneven all over and slightly more opaque on the very edges.
This week, I created a whole alphabet using the Fatty font in orange color with a brown edge. That would be very suitable for fall or Halloween themes.
This set of brushes will allow you to paint or cut intricate designs in the middle of a paper (or a photo). Create cutouts away from the edges and corners.
As a sample, I created a set of greyscale bookmarks with a central cutout. One has the year 2023 cut out of it, while the other is blank for you to add anything else you want. The design can even be cut from actual paper/cardstock using a cutting machine. You can colorize these strips any way you want. Each "bookmark" is 600x3000 pixels long and can also be used as an element on your next project.
Another script will allow you to create a variety of decorated beads. This time, the beads will be a slightly different shape than the previous scripts. Furthermore, you can create monochrome beads in addition to the duotone ones. Different rotations will be associated with the correct bevel and shadows to give a more realistic effect.
For a sampler, I used the same color palette as for the previous freebies for the Beads Maker 1 and the Beads Maker 2. This way, you will have a total of 45 matching beads to play with and create a variety of elements.
Gradients can be really helpful to create unique patterns, but in order to make such a tile, you have to create a new gradient every time. That is tedious and a lot of work since you might not need those gradients afterward.
For a sample, I used the color palette from the DigitalScrapbook July 2023 blog train, and generated 16 different tiles. Each tile is 400x400 pixels in jpg format so you should be able to use them in most graphic programs.
There are so many ways to add a date, a name, a location, or a short phrase to a project. This script will let you choose a main word/date to place in the center, with your choice of font. In addition, you can select the words to add in the top and bottom corners.
As a sampler, I created a set of "blank" datestamps with the days of the week. You can add whatever you want in the center area. Since they are all in greyscale, you can colorize them however you want.
It can be fun to display photos on a string, and in digital projects, it is just as easy, although it can be tedious to resize, move, rotate and attach all the photos on one image. That is why I coded this script.
As a sampler, I created this layered template where you can display 10 photos of your choice. The template is in .pspimage format and you simply have to put the photos into the individual mask groups.
It might be easy to create a swatch palette in PaintShop Pro, but if you are starting with a large number of colors, it can be tedious. And referring to the same image whenever you are working on a project can also be annoying.
As a sampler, I used the color palettes for the next three blog trains in the DigitalScrapbook.com forum and converted them into palettes you can simply add to your PSP. Two versions of the palettes are available: one for versions 9-X6 (identified with V9 in the name) and one for versions X7 and up (identified with VX7 in the name). Unzip the ones you need for your version and save the files (or the whole folder for versions X7 and up) in the Swatches folder of your PSP. Since they are different for different versions, don't put everything in the same place, if you have earlier and older versions of PSP referring to the same content folder. If needed, simply put them in the default folders, in Documents.