Web
Analytics

New script – Glitter Sticker

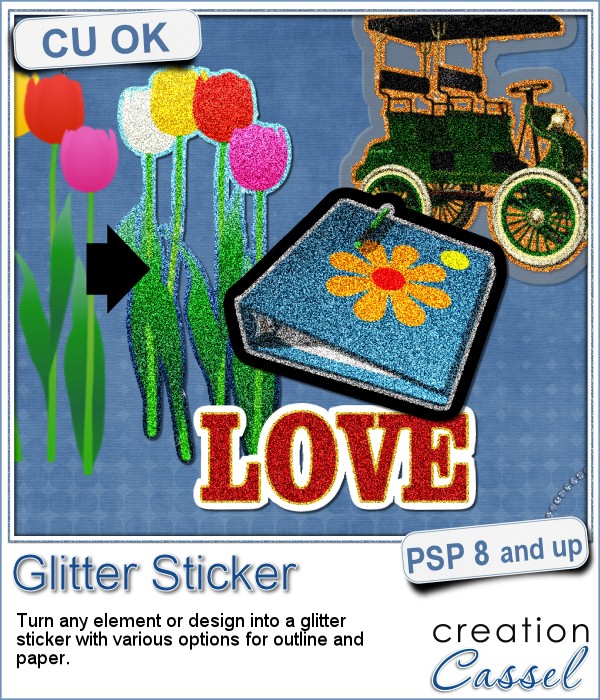
Glitter Sticker script for Paintshop ProStickers are fun, versatile and can be used in many projects. You can now create your own starting with any element, shape or text, and add some pizzazz by converting an ordinary shape or image, into a glittered one, with a glitter outline and paper.

You can use one of the default gold, silver or bronze outline, or choose your own color. Choose a gradient for a really cool effect. Or you can choose to have no outline.

Then, you can have a white paper, a black paper, a translucent plastic, or any other color or pattern as a paper. This could be a great opportunity to use a solid or patterned paper from a kit you like to customize it and make your sticker really part of the project.

Add those stickers to scrapbook pages, to business pages, to cards, to planners, and more.

Get this script in the store: Glitter Sticker.

For a chance to win this script, tell me what kind of outline you would likely use the most: gold, silver, bronze, or something else? I'll announce a winner in next week's newsletter. Not a subscriber yet? Not a problem. You can register here and it is free (and you only get one email per week).
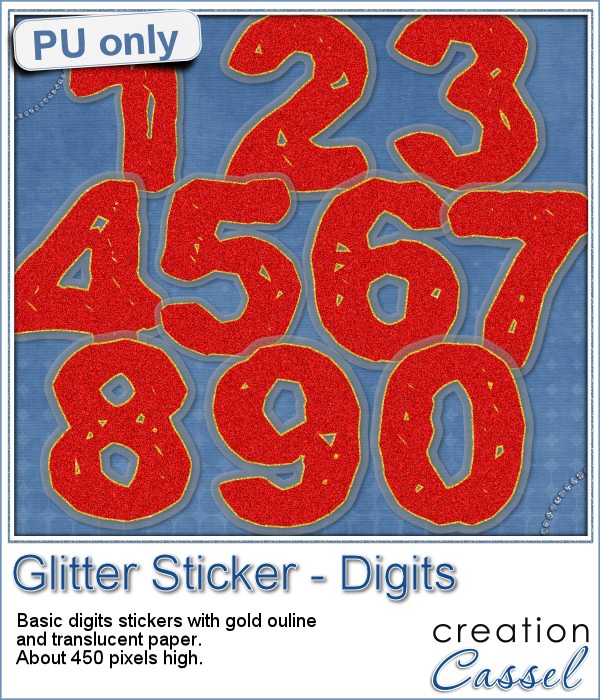
cass-GlitterSticker-DigitsFor this week's sampler, I created a set of digits with gold outline and plastic translucent backing. Each digit is about 450 pixels in height so you can resize it as needed.

Since these digits are in png format, you can use them in most graphic programs.

A full alpha will be available in the newsletter, on Sunday.

This would be perfect to add a date, and with the alpha, you could write glittery titles.

You need to be logged in to download this sample. You can either login, or register on the top of this page.


News from the Campus
BIGshowoff2016-400

Did you enter the draw for our BIG 2016 Show Off?

You still have a few hours to do so, and enter our draw for over $900 in prizes.

What are you waiting for?

Enter ANY project you created using something from the Campus, from the store or from this blog (even the digits you just downloaded above).

Check out the forum to post YOUR project, and look at others that were already posted. You have until Saturday night to enter. You can have as many as 5 entries. Use them all!

Suggestion box

Suggestion-boxDid you ever envy Photoshop users because they have actions that do not have anything similar for Paintshop?

Did you ever see something in a kit or element pack and wish you could do something similar with a script?

Do you find yourself creating some elements manually and wish you could have a script to help you do them faster and more efficiently?

Well, this is the perfect time to make your suggestions. As part of the Digital Scrapbook Day events, you can actually win $$ for suggesting your ideas. Post a description of your "dream tool" in the comments below and i will draw a winner among all the suggestions received until Saturday November 14th (the draw will take place on Sunday morning).

The winner of the draw will get a $25 coupon for my store, but that is not all. If i manage to create a script following your suggestion, you will be allowed to get most beta versions, test it, give feedback  for added options, and you will also get the final script FREE. So what are you waiting for?  If you want to link to a picture, or preview of something you would like to do, it would be great!

One entry per person, but you can list as many ideas as you want! The more ideas you suggest, the more chances you have that i will make one of yours!

Put on your thinking cap and send me your ideas.

Digital Scrapbook Day 2015

DSD2015

DSD is on the first Saturday of November, and it has been the case since 2007. For the occasion, I got several activities going on, for you. Let's have a look at them.


1- Storewide sale

Everything in the store will be discounted by 25%, for Saturday and Sunday. Did you ever fill a wishlist in the store? Now it is time to stock up and get those products you want to get to complete your projects faster or create new kits for your store.

Start shopping!


2- FREE tutorials

TimeIn the Campus, there is a dedicated page where you will see 12 unique tutorials rotate, one by one, each hour. For 48 hours, you will have the possibility to view video tutorials that are normally reserved for enrolled students. The list of the 12 tutorials is this:

Brick wall texture

  • License plate
  • Ghost text
  • Paper clip (2) (not the ordinary ones)
  • Reflection
  • Wired Ribbon
  • Gold Element
  • Coffee stain
  • Folded Edge
  • Accordion
  • Separator tab
  • Flair button

Which ones will you catch? Come back often.

Check out the tutorials


3- Show off contest (with prizes to win)

In order to promote digital scrapbooking using Paintshop Pro, there is a show off contest in the Campus. There are prizes to win too:

  • One copy of Paintshop Pro X8 Ultimate (value: $99.99)
  • Two Master Classes of your choice (value: $39.98)
  • The new 12 Cards for Christmas (value: $9.99)

And what do you have to do? Simple: show off a scrapbook project you made using Paintshop Pro. But, there is a little twist to this: you have to use ANY ONE OF THE FOLLOWING:

  • a technique you learned in the Campus
  • a free element you picked from this blog (there are lots of those)
  • or a product you purchased from the store (or one of mine in the Discovery Center)

Once you have something to show off, you can post it in the Campus forum, while browsing through the other members' submissions. The winner will be picked AT RANDOM, NEXT WEEK, on November 14th (next Saturday). This will give you a chance to pick some freebies from this blog, or view new tutorials in the Campus, or grab a new product in the store, and complete up to THREE projects to enter.

Check the Campus forum


101Tricks-1504- 101 super easy tricks to work faster with Paintshop Pro

On Amazon.com, there is a countdown deal for this Kindle ebook that offers 101 tips. Since it is a countdown deal, it is now $0.99 but tomorrow, it will be up to $1.99 and then, Monday night, it will be back to its regular price of $2.99. Don't delay.

You don't have a Kindle? No problem. You can download the free app to view any Kindle book on your computer (how cool is that?). Although the deal is only available on amazon.com (in the U.S.), since it is a digital download, you are still able to get it: there is no added shipping fees!

That is 101 tips that where shared through years of newsletter, but they are all in one handy document, just for your convenience.

Grab your copy of this book

I would greatly appreciate a review of this book, when you have a chance. I am sure you will learn SOMEthing from it.


So what will you be doing this weekend??


New script – Knot #12

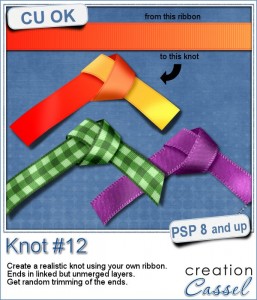
Knot 12 - Paintshop Pro scriptHow you would use knots if you had a traditional ribbon can vary from day to day. You would have options to tie that ribbon in multiple manners, attach different objects, wrap that ribbon around all kinds of things. This is why, in digital scrapbooking, there are so many different knots available.

This script for Paintshop Pro will allow you to "tie" a ribbon into a simple knot, but unlike other scripts where you can only choose the color or pattern and everything looks like it is "flood filled" with that pattern, this script will use your own straight ribbon. This is perfect to have a match if you are using the other ribbon in the project, whether it is left straight, or tied into a different knot or bow created with another script.

Grab this script in the store: Knot #12.

For a chance to win this script, tell me how you would customize a knot for your project otherwise. Do you colorize greyscale ribbons? Do you manually create a knot with your ribbon? Do you use a script that asks you for the color to use? Leave a comment below and i'll announce the winner in the newsletter, next week. Not a subscriber yet? Not a problem. You can register here and it is free (and you only get one email per week).

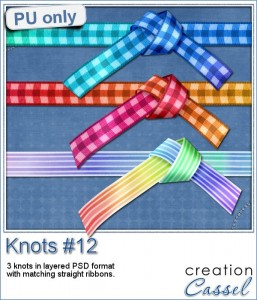
Knot 12 - free samples in PSD formatThis week, i created three straight ribbons (from greyscale ones) and ran the script to end up with three simple knots. Each one is left in unmerged layers so you can put them around any object or insert something in the middle of the knot.

I had fun with colorizing those ribbons with a gradient instead of a solid color. I think that gives a different kind of look to the knot that makes it more interesting (at least, that is what i think).

I also included the straight ribbons so you can use them with other scripts, or as is on your project to match. Or you can insert the straight ribbon directly in the knot too. Why not?

Remember to show off what you used this knot for. What project did you create using it?

You need to be logged in to download this sample. You can either login, or register on the top of this page.


Corel Paintshop Pro Challenge

TextCheck out this week's #CorelChallenge. It is about using text on your project. Well, if you are a scrapbooker, you surely have text on your projects! It could be a fun journaling display, or an unusual title. Or how about a nice Subway art design? We can do so much with Paintshop Pro. Show off what you can do (or just what you have done already).

Post your project on their thread or tag it with #CorelChallenge

Did you see the one i posted on their thread?


News in the Campus

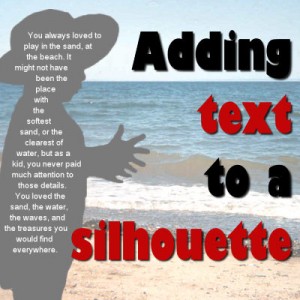
Text-in-silhouetteAs part of the Corel Challenge, i created a text inside a silhouette. I thought it was a great way to use the new text wrapping tool from PSP X8.

I also made a short tutorial on how to create this result. Read it HERE.

New script – Ribbon Banner

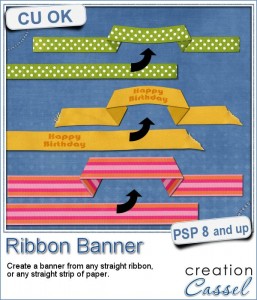
Ribbon Banner script for digital scrapbooking with Paintshop ProYou might have seen those vector banners on various sites, but you wish you could have something using real ribbons, right? Now, you can do that with this script and Paintshop Pro.

Pick any straight ribbon (it could work with a ricrac but it is not as pretty) or a long piece of paper and run the script. Answer the prompts, select the area you want in the center and voilà!

You can use any kind of straight ribbon: lace, translucent, directional, etc. The script is coded to use the whole length of the ribbon so nothing is lost, especially those frayed edges if you have them.

This is even better than using layered templates because it really curves the center piece so you can use patterned designs, text, or stripes and it will follow that curve. In addition, you can have the central part as wide or narrow as you want, and even use a section of the ribbon that is not in the very center.

Grab this fun script in the store: Ribbon Banner.

Banners are often used to announce something and in a layout, it could be a way to label or date it. What would you use it for? Would you add text? If so, what text? Tell me in the comments below and i'll pick someone who will win this script next week. I'll announce it in the newsletter. Not a subscriber yet? Not a problem. You can register here and it is free (and you only get one email per week).

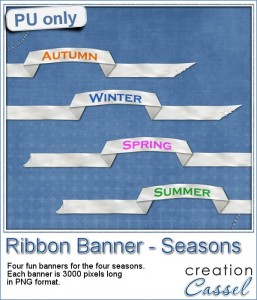
Ribbon banner sampler with the seasonsSince it is harder to add text on a curved ribbon, i figured i might as well create a banner with the text already in for you to use. I could have done a banner for each month of the year, or each day of the week, but i thought it would be interesting to have the four seasons for you to share various photos in a layout.

Each banner is about 3000 pixels wide, so they would nicely fit on top of a layout, almost as a title. Yet, you can size them down, or even trim the ends if you want.

You need to be logged in to download this sample. You can either login, or register on the top of this page.


News in the Campus


WeatherWise-400Have you registered to the live presentation this coming Sunday?

We will play alongside Mother Nature in adding rain and snow to photos.

It is FREE, as usual!

Register now


Corel Paintshop Pro Challenge


Silhouette-300

Do you have a photo with silhouettes? Do you have photos you have edited to create silhouettes? Or do you have other projects (not photos) that use silhouettes, like a card, or a layout?

Submit it to the #CorelChallenge

Let's show the world what we can do with PSP (and not just photography)!

Check out the collage i made for the Create Magic with PSP class. I posted it on that #CorelChallenge thread. Now it is your turn.

And if you want to create your own silhouette, there is a brief tutorial in the Campus HERE.

New script – Word Tag

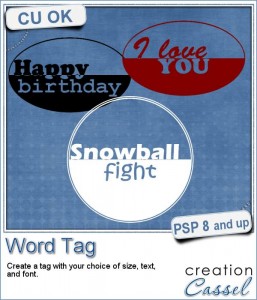
Word tag script for Paintshop ProIf you want to add a fun word tag to your project, you can use this script now. Although i am sure you can do the same manually, it is always nice to have the same result faster and more consistently, especially if you plan on having a set of similar tags.

You can use those tags to add a short phrase like "Happy Birthday" or "Get well soon", but you can also have a date "Christmas 2015" or "August 10, 2014" to commemorate a particular anniversary.

Combine this tag with other elements or effects and you can create a button, a leather tag, or a stamp.

You have the control of the text, but also the fonts and the colors so you can really match your project or your kit.

Get this script in the store: Word Tag.

How would you like a chance to get this script for free (or win another one if you already bought it)? In the comments below, tell me how you would use such tags. Would you combine them with something else to create a new element or a new effect? I'll announce a winner in next week's newsletter. Not a subscriber yet? Not a problem. You can register here and it is free (and you only get one email per week).

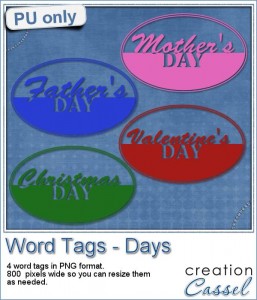
Word Tags Days freebieAs a sample, i created four tags based on common DAYS, that you can use for your projects. You probably have at least one layout for Mother's Day, Father's Day, Valentine's Day or Christmas Day, right?
Add those tags as a way to "date" those layouts. The tags are very large (800 pixels) but that is on purpose: it allows you to size them to what you need. Of course, if i had created them at 300 pixels, you could not have sized them up properly. Better have them too large and size them down, so you don't lose quality.

You need to be logged in to download this sample. You can either login, or register on the top of this page.

And remember to show us how you use those tags too. We have a pinboard where you can pin any of your projects made using these freebies, or anything you purchase from the store. Here is the link:

https://www.pinterest.com/scrapbookcampus/psp-scrapbook-showcase/

You can follow this board but even better, i can give you access to you can PIN on it. Just ask and i'll give you that access.


PSPX7-300


Do you like the scripts and tubes from the Creation Cassel store?

Did you know that if you purchase (or upgrade to) Paintshop Pro X7, you will get an additional bundle of products worth over $70? Yes, that is like getting twice the value you will pay for.

Best of all, did you know that the PSP Creative Effect Bundle is actually a collection of scripts and tubes from the store? Yes it is! As i have teamed up with Corel for the last year, you will get several popular products from the store like Sparkles, Glittered Edges, Custom Playing cards and the Quick Scrap Bundle! Yes, they come FREE with your purchase (or upgrade) of PSP X7.

What are you waiting for? Get your PSPX7+ bundle now!

New script – Scallop Pattern 1

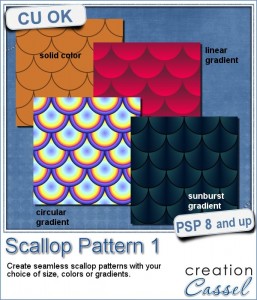
cass-ScallopPattern1You can probably create scallop patterns the loooooooong way and add individual circles, one by one, using a guide to align them perfectly, but that is so tedious.

This Paintshop Pro script will do all the calculations needed to align all the circles and create a seamless tile.

You can choose a solid color with an outline (obviously, without an outline, a solid color scallop won't show much!), or use a gradient. And furthermore, you can use linear, radial or sunburst gradients for very unique effects.

You can get this time saving script in the store: Scallop Pattern 1 script.

Do you want a chance to win this script? Tell me, in the comments below, how you would have made a scallop pattern before using this script (template? manually? other?) I'll pick a winner next week and it will be announced in the newsletter. Not a subscriber yet? Not a problem. You can register here and it is free (and you only get one email per week).

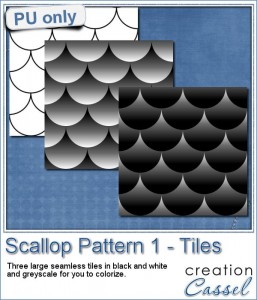
cass-ScallopPattern1-TilesFor a sample, this week, i made 3 different tiles using the script.

For the first tile, i simply used a solid white and a black outline. The script did the rest.

For the second tile, i just used a linear gradient, going from black to white and no outline.

For the third tile, i used the exact same gradient as for the second tile, but i inverted the colors (so it went from black to white instead of white to black)

Isn't that simple?


You need to be logged in to download this sample. You can either login, or register on the top of this page.


News from the Campus

63430_10152743902521281_3068966621549669937_n-400Remember to have a peek at the Creative Christmas Bundle. It is full of supplies, classes and ideas to create something unique this holiday season. It is still on sale for just a couple of days. You get to enjoy all those goodies at 90% off the individual price. That is worth a Black Friday or a Cyber Monday special, isn’t it?

Check out who are the 15 designers who contributed and what they can offer you.

Get help  and Get more help

*******************


12DaysFinally, here is a FREE event you can register into.

The 12 Days of Christmas is a series of daily email giving you 12 different templates for cards and matching envelope, along with inspiration and tutorials from various designers. And yes, it is 100% FREE.

Check it out and register HERE.

Scroll to the bottom and the registration form will popup for you (make sure you don’t have any popup blocker on!)

New scripts – Speed Scrap

cass-SpeedScrap

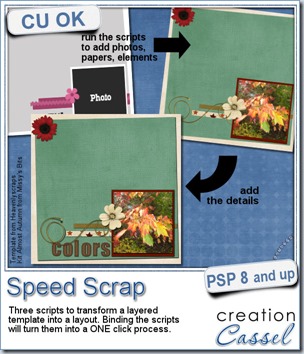
Using templates to create a layout is a way to speed up the process as it helps you with some precise suggestions as to where to put the photos, papers, and elements. Of course, you don’t have to follow everything exactly, but it is a start.

Using those templates still require you to open the photos, copy them, close them, paste them into the new page, resize them, move them to match the location of the shape, then you have to either Clip it (using the Clip to It script), or go through the selection process, and so on. That is a lot of steps that can be automated with these scripts.

There are 3 scripts, for different types of elements in the template. The photo script will never merge the photo to the shape, giving you the option to tweak it and adjust it to your liking. The paper script will give you the option to merge the paper to the shape from the template, if it is within the size of the template (in case it extends outside the edge). Finally, the element script will adjust the size of the element you pick to match the size of the shape in the template, and replace that shape by the element.

There is a video clip in the description, showing how fast you can create the basis of your layout using the three scripts. Of course, you still have to add the shadows, the title, the journaling and any additional detail you want to use to make the layout truly yours.

You can get this set of Speed Scrap scripts, in my store.

cass-AlphaBeads2-Halloween-string-previewDo you want a chance to win this set of scripts? Head over to the DST forum in this thread and add your name while answering the question. I’ll be back next week with the name of a winner.
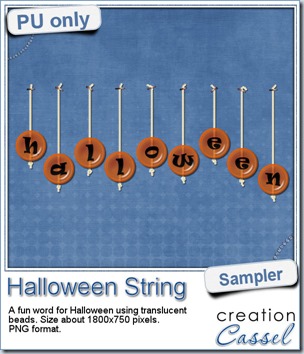
Again, i cannot give you a sample of the script, since it is a tool script, but i can make something that could be used for Halloween layouts. Check this fun wordart. The letters were made using the Alpha-Beads 2 script, and the strings are from the Twisted Rope tubes (i used the white one you can see in the preview).

The whole montage is about 1800 pixels wide and is in PNG format, so everyone can use it.

You need to be logged in to download this sample. You can either login, or register on the top of this page.


News from the Campus

ScrappersDozen-250x250Did you follow the videos in the Campus related to the Scrapper’s Dozen?

The third video is now up, and you can even download something quite useful (and it is free). So go check it out.

Video #3

And while you are around the Campus, check out the blog section where you will see more about the “secret ingredients” and the designers who contributed them.

New script – Crayon Rubbing

cass-CrayonRubbing

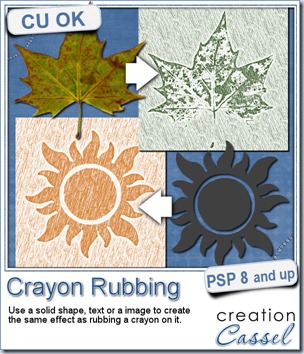
Did you ever rub a crayon or a pencil on a piece of paper with an object underneath just to see the details of the texture appear? What kind of objects do you remember using?

Doing that with Paintshop Pro is now very easy as this script will do all the work for you. Use a solid shape or an image and choose your “crayon” color.

Once the script is done, you get a heavily rubbed shape or design and a lightly rubbed background. You can remove the background altogether (since it is only a separate layer) or you can erase the excess and leave only a little bit. You can also “rub” another area as the script will leave the material with the exact same setting as what it used for the background.

You can grab this Crayon Rubbing script in my store.

cass-CrayonRubbing-sample-timeDo you want a chance to win this script? Just tell me what you would use it in a scrapbook project, in this thread. I’ll be back next week with the name of a winner.
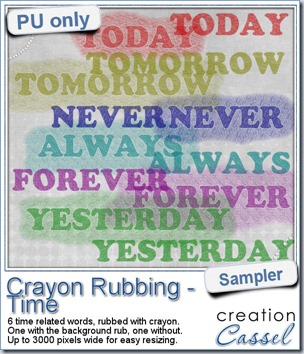
As a sample of this, i created some time-related words for you. You get the same words with and without the background paper. They are in PNG format, so they are useable in most programs. And they are very large (up to 3000 pixels) so you can use them as large title on a layout, or you can resize them down.

Each one has a different color (although you can still colorize them differently if you want) and has a different angle of crayon marks.

You need to be logged in to download this sample. You can either login, or register on the top of this page.

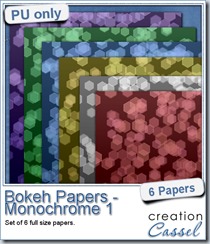
cass-BokehPapers-monochrome1Did you download your free Bokeh papers on myFacebook page? I said that once i reach 400 fans, i would add another set of papers. I am pleased to announce that this milestone has been reached, so, as promised, i will add another set this weekend.

Thanks so much for joining my store page!

And thanks for sharing it!

It is much appreciated.

Keep sending your PSP friends to “like” it.

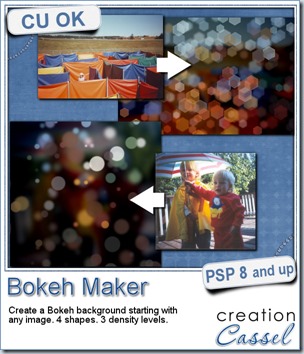
New Script – Bokeh Maker Script

cass-BokehMaker

Did you ever see those fancy photography shots with lights shining out of the darkened and blurred background? Can you do that with your camera? If you can, good for you, but my little point and shoot camera cannot do that, at all. But i still like that look and wanted to see how to do it with Paintshop Pro.

In fact, creating that effect is very easy with PSP, but it is very tedious as each spot has to be done manually, one by one, each time by picking the color from the image. Imagine how many spots one has to create? Well, scripts are just meant to do faster what we COULD do, very slowly, right?

This script will do just that for you. Starting with ANY photo, of ANY size, you will be able to choose between 3 densities of the spots and 4 shapes, and then, let it work on its own. It will create 3 layers with the Bokeh effects, in different blurriness, and one background layer with a copy of your image, very blurred and darkened. All those layers will be left on separate layers so you can tweak them more. You can vary the blurriness more, change the opacity, or even remove one layer if you prefer.

You can really use ANY photo, including the bad ones, since it will be all blurred anyways!

You can grab this fun and creative Bokeh Making script in my store.

And for a chance to win this script, just add your name tothis thread in the DST forum. I’ll be back next week with the name of a winner.

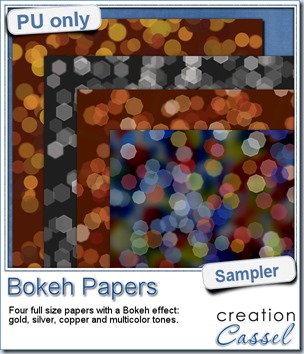
cass-BokehMaker-sample-paperFor this week’s free sampler, i created four full size papers for you. Since i dont really know what type of photos you have to use in a layout, i decided to create three of those papers using just gradients i had in my stash: one for silver, one for gold and one for copper. Once i had a paper made out of those gradients, i just ran the script on it.
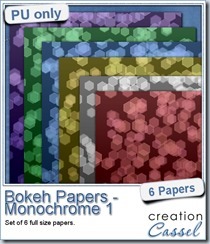
For the fourth paper, i created a base paper using the Airbrush Paper script with 3 primary colors plus white (for good measure), and then ran the Bokeh script on it. Those two scripts work very well if you want to create a Bokeh background paper to match a specific color palette instead of a photo.

Those are full size (3600x3600) and have no texture so you can add your own to match your particular project.

You need to be logged in to download this sample. You can either login, or register on the top of this page.

cass-BokehPapers-monochrome1


And there is another little freebie for you, but this time, it is only for FB fans. Check out the FB fan page and you can grab this set of 6 monochrome Bokeh papers.

Go LIKE thefan page and it will be under the FREEBIE tab.

If you don’t have a FB account, join the newsletter HERE and you will get it too.

Send your friends over and when the page reaches 400 fans, i will add another set of Bokeh papers for all.


News from the Campus

ScrappersDozen-300x300


Did you hear about the most yummy event for digital scrappers?

The recipe will include tutorials, goodies, and of course, scrapbooking!

Do you want to learn more about this event taking place this fall?

Click on HERE to get the updates for this delicious event!