Web
Analytics

New tubes – Leather Braids

Leather Braid picture tubes for Paintshop ProMany elements you can get online, whether they are free or paid for, are made from photographed objects that are then extracted. This has many limitations: you can only use the element in the shape or size you have, you can rarely use a different color (although you MIGHT be able to colorize it) and you cannot customize them to fit your particular needs.

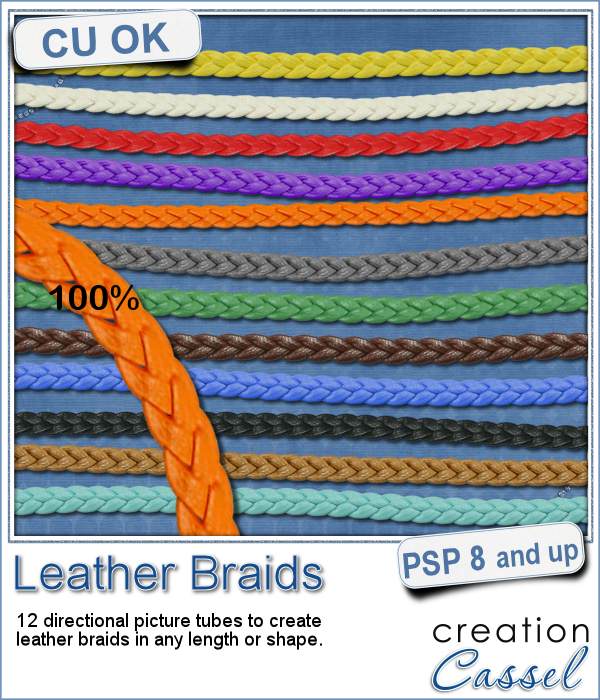
These braids are not single elements, but they are picture tubes to use with Paintshop Pro. Those tubes will create a braid as long as you want, in the shape you want; it will just follow your cursor, as if you were drawing with them.

This set includes 12 different picture tubes, perfectly set to give a continuous braid, as long as you want.

Get those braids in the store: Leather Braids.

Do you want a chance to win those Leather Braid Tubes? Tell me, in the comments below, what element you would create using those braids. I'll announce the winner in the newsletter, next week. Not a subscriber yet? Not a problem. You can register here and it is free (and you only get one email per week).

Leather Braid Frames in PNG format for free

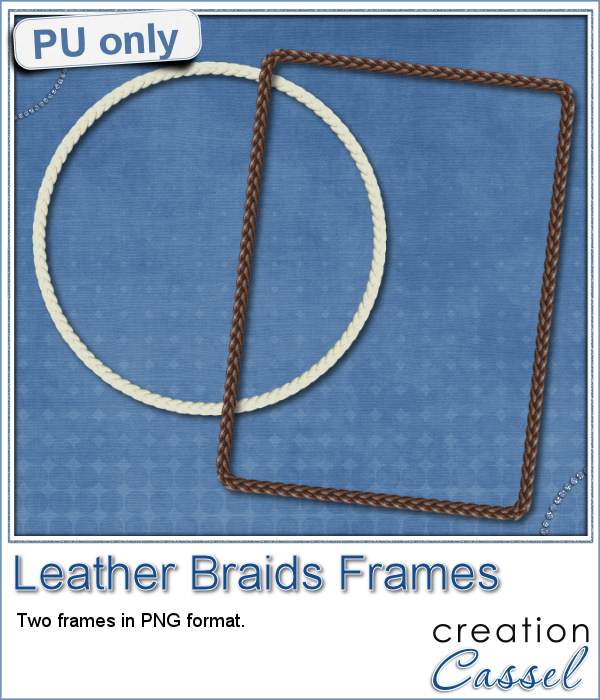
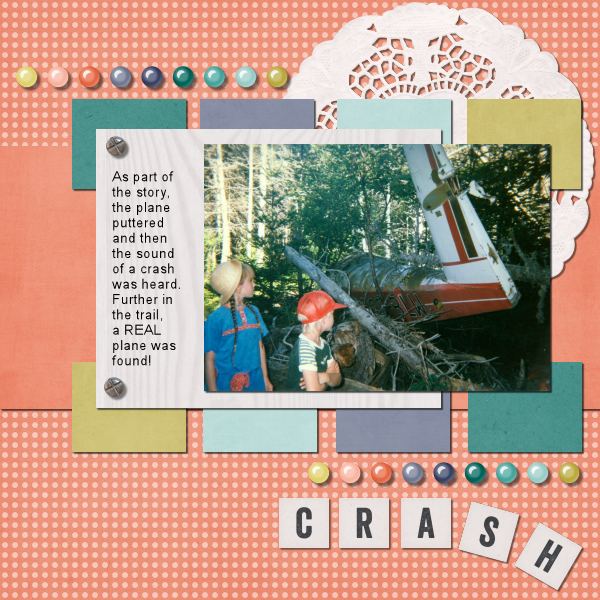
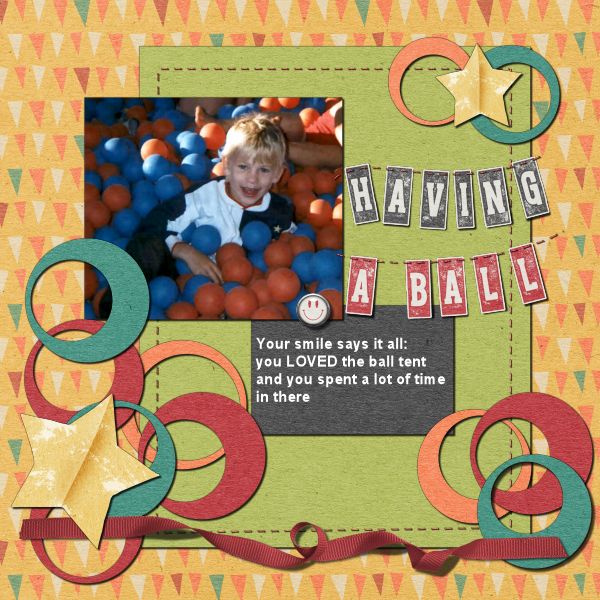
For a sampler, this week, i created two frames: one rectangular that would fit a 5x7 photo and one round that would fit a 4x4 photo.

As you can guess, i didn't draw those shapes freehand! (you would not want to use a frame i drew freehand!) so i used the Vector Tube script from Joe Fromm to place the tube around a vector shape, which makes the placement so even.

Due to the shape of the individual images of the tube, sharp corners can give some unwanted extras. That is what happened with the rectangular frame, so i had to do a little bit of erasing of the "extra" details. If you use a smooth curve, it won't happen to you, but if you have corners or sharp curves, you might need that little extra step to make the whole element looking smooth.

You need to be logged in to download this sample. You can either login, or register on the top of this page.


News from the Campus

After months of waiting, the brand new Basic Scrap Course is now live in the Campus.

This course will walk through from the moment you open your Paintshop Pro for the first time, to the completion of 5 different layouts.

Image16-shadowed  Round-and-Round-shadowed-600 Layout3-shadowed-600 Image2-shadowed-600 Layout5

It includes lessons on

  • how to customize your PSP to suit your workflow,
  • how to add simple and not so simple shadows,
  • how to use scripts to save time,
  • how to create clusters,
  • how to do layering,
  • how to use the guides,
  • how to cut out your own paper elements,
  • how to use picture tubes to create stitching,
  • how to create titles from alpha, alpha sheets or the text tool,
  • and much more.

Perfect for beginner scrapbookers, but also perfect for someone new to Paintshop Pro. No matter your learning style, you will find this course will suit you because you get both video AND written instructions.

Interested?

Check out the more details HERE.

Do you know a friend who is considering scrapbooking with PSP? Send them over and watch them create their first digital pages.

New script – Photo Mosaic

cass-PhotoMosaicIf you have photos and you want to display them in a new and original way, have you tried to make a mosaic?

This can also be a great way to hide the errors on a not-perfect photo, whether it is a color issue, a blurriness issue, etc.

This script will help you turn any photo, of any size, into a mosaic. You can choose the size of each tile. You can choose to have lines between the tiles, how thick and what color. You can also choose whether you want a lot of variations between the tiles or just a little.

And best of all, you can override the script by removing any area that you find are changed too much from the original; the script will place guides, and activate the Selection tool for you and a copy of the original image will be left underneath, so it will be very easy to remove one segment from the "mosaic" layer and just display the image below. That is one way to make sure that the important details are easy to see (like your baby's face, or the birthday cake).

You can get this fun photo script in the store: PhotoMosaic.

Would you like to get this script for free? Just post a comment below about how you think you could use this script and i'll will announce a winner in the newsletter next week. Not a subscriber yet? Not a problem. You can register here and it is free (and you only get one email per week).

cass-PhotoMosaic_Overlay4x6Since this script is run on a photo, and sending you one of my photo probably wont help you, i decided to play around a little. I used a grey based, the size of a 4x6 inch photo. I ran the script on that base, and got a series of tiles in different shades of grey. You can use that as an overlay on top of any of your photos, and adjust the blend mode. Depending on the starting photo you have, different blend modes might work, and others, not.

The file is a psd format as there is a "tile" layer and also a "line" layer in case you want to add some lines (which you can also colorize if you want).

You need to be logged in to download this sample. You can either login, or register on the top of this page.

So, which photo will deserve a mosaic treatment? Don't hesitate to show them. Pin them on Pinterest, on our own board HERE (ask for an invite and you will get it!)

New tubes – LED lights

cass-LEDlightsDuring the holiday season, it is a good time to see some colored lights. However, you can probably use them for any occasion, just like neon lights.

These sets of picture tubes for Paintshop Pro will allow you to simply draw with your cursor and have the  lights follow that path. Write words, make a frame around a photo, enhance the outline of a shape or even letters.

This set includes 10 different colors of lights that you can use to light up your project. Since they are lights, they will give a better result on a darker background.

You can grab this set in the store: LED lights.

Would you like to get these lights for free? Add a comment below and tell me what element or shape you would like to light with those tubes. I'll announce the winner in the newsletter next week. Not a subscriber yet? Not a problem. You can register here and it is free (and you only get one email per week).

cass-LEDlight-arrowsAs a free sample, i made 10 arrows using the 10 colors available in the set. To make them really nice and regular, i didn't draw them by hand, but i used the script called VectorTube on vector shapes.

Those will be great to add a focus onto an element or a photo on your layout. They range in size from 400 to 1000 pixels so there is plenty of room to size them down to fit your own project.

Remember that they are lights so, don't add a shadow to them! If you find them too light, you can always duplicate the layer. This might be needed if the background is not very dark.

You need to be logged in to download this sample. You can either login, or register on the top of this page.

New script – Scallop Pattern 2

cass-ScallopPattern2 You thought that the Scallop Pattern script from last week was a great tool to speed up the process of creating a scallop pattern that used the same "tile" over and over again.

This time, imagine trying to create a scallop pattern but using different colors for the tiles or for the individual rows. This is an even more tedious tasks, since you have more work to do. Now, imagine using using a different color for each individual tile. This is just about impossible to do manually.

Thanks to this new script, Scallop Pattern 2, you have many more options available to you to create totally unique papers.

You can have the tiles alternating in colors, on a single row or alternating by rows. But even more, you can use a gradient and the script will pick the colors from the gradient, and create the tile just at that place, with that color. Now THAT is original!

Grab this script now: Scallop Pattern 2

Do you want a chance to win this script? Add a comment at the bottom, telling me how you would like to experiment with this script. I'll announce the winner on the newsletter, next week. Not a subscriber yet? Not a problem. You can register here and it is free (and you only get one email per week).

cass-ScallopPattern2-TreeFor a little sample, i have this fun Christmas tree paper made out of scallops. In fact, i have to admit that i cheated a bit but i'll show you how to do it.

  • open an image 3600x3600
  • draw a green triangle with a brown rectangle at the base; flatten it
  • run the script and choose the Gradient option
  • when you are asked to choose the gradient, use the Pattern tab instead and pick the tree image you drew; it will appear as one of the patterns, as long as it is open on your workspace
  • the script will use it as if it were a gradient!

Yup, that means that you can use any picture with this script, not only gradients! It might not always yield a fantastic result, but you can surely try and experiment!

You need to be logged in to download this sample. You can either login, or register on the top of this page.


News from the Campus

12DaysJust in case you haven't heard about the 12 Days of Christmas, you still have time to register.

This will send you a daily email with a layered template and a sketch for a card and matching envelope, and a tutorial from a different designer each day, with inspiration to create your own.

New script – Scallop Pattern 1

cass-ScallopPattern1You can probably create scallop patterns the loooooooong way and add individual circles, one by one, using a guide to align them perfectly, but that is so tedious.

This Paintshop Pro script will do all the calculations needed to align all the circles and create a seamless tile.

You can choose a solid color with an outline (obviously, without an outline, a solid color scallop won't show much!), or use a gradient. And furthermore, you can use linear, radial or sunburst gradients for very unique effects.

You can get this time saving script in the store: Scallop Pattern 1 script.

Do you want a chance to win this script? Tell me, in the comments below, how you would have made a scallop pattern before using this script (template? manually? other?) I'll pick a winner next week and it will be announced in the newsletter. Not a subscriber yet? Not a problem. You can register here and it is free (and you only get one email per week).

cass-ScallopPattern1-TilesFor a sample, this week, i made 3 different tiles using the script.

For the first tile, i simply used a solid white and a black outline. The script did the rest.

For the second tile, i just used a linear gradient, going from black to white and no outline.

For the third tile, i used the exact same gradient as for the second tile, but i inverted the colors (so it went from black to white instead of white to black)

Isn't that simple?


You need to be logged in to download this sample. You can either login, or register on the top of this page.


News from the Campus

63430_10152743902521281_3068966621549669937_n-400Remember to have a peek at the Creative Christmas Bundle. It is full of supplies, classes and ideas to create something unique this holiday season. It is still on sale for just a couple of days. You get to enjoy all those goodies at 90% off the individual price. That is worth a Black Friday or a Cyber Monday special, isn’t it?

Check out who are the 15 designers who contributed and what they can offer you.

Get help  and Get more help

*******************


12DaysFinally, here is a FREE event you can register into.

The 12 Days of Christmas is a series of daily email giving you 12 different templates for cards and matching envelope, along with inspiration and tutorials from various designers. And yes, it is 100% FREE.

Check it out and register HERE.

Scroll to the bottom and the registration form will popup for you (make sure you don’t have any popup blocker on!)

New script – Ghost Date

cass-GhostDateYou always need to find something different and original to add a date to a project. This is one of those unusual options.

The Paitnshop Pro script will help you create a date where the actual number will be the focus while the month and the year will overlap and cutout from the number. Even better, you can choose ANY font for each of the elements.

The year, at the bottom, is only optional.

The end result is a single raster layer so you can use it as is, colorize it, use it as a mask and more. It is a great idea to create journaling cards for a “Project Life” or to date photos in a “Project 365”.

In fact, you can also use other words than months. For example, you can use the word MONTH, or WEEK, or GRADE to associate with other kinds of numbers.

Grab this script in the store: Ghost Date.

Do you want to have a chance at getting this script for free? Just add a comment below giving me ideas of how you would use such a script. Who knows? I might just create it for all to share? The winner will be announced in the newsletter, next week. Not a subscriber yet? Not a problem. You can register here and it is free (and you only get one email per week).
cass-GhostDate-2014inReviewFor a sample, this week, i went a bit outside of the box with the script: i didn’t create an actual date.

Instead of a date, i put the year, and instead of the month, i used the word “in review”.

This is a great time to create a layout (even a double size layout) with the highlights of the year, things you want to remember, people you met, places you visited. Then, you can use this element as a title on top, or why not in the middle?

You need to be logged in to download this sample. You can either login, or register on the top of this page.

If you create such a year in review project, remember to show us!

New script – Admission Tickets

cass-AdmissionTickets

You can probably find a few tickets in your stash, maybe from game night theme kits, but what if you don’t want to create a game night theme project? What if you want to use those tickets for a completely different purpose?

This Paintshop Pro script will create a series of admission tickets (or you can create a single one if you prefer) with sequential numbers on each ticket. Or you can add custom text instead, like a date, a name or an event.

Use the center area to include a design, a message, or an image. You get to choose so many options.

No more game night theme for you. Have a series of tickets in Christmas colors for your holiday layout. Or create some pink ones with various heart brushes or design. Or maybe add a single letter on each ticket to spell out the name of a grandchild?

You can get this script in the store: Admission Tickets.

How about a chance to win this script? Add a comment below and tell me how you would use admission tickets in a digital project. I’ll announce the winner in the newsletter next week. Not a subscriber yet? Not a problem. You can register here and it is free (and you only get one email per week).

cass-AdmissionTicket-HalloweenSeries


This week, being close to Halloween, i created a set of 6 tickets attached together. They each have a number, but in a sequence. Unlike traditional tickets, the lines are white on black paper. After all, in digital, we can do things that are not seen in real life!

Each ticket has a little Halloween design on it. It is easy to add a vector shape or a brush stamp on those tickets. Of course, you can use all the tickets together, or you can cut them off.

I am also including a “blank” set of tickets, without the designs in the middle so you can add your own.

You need to be logged in to download this sample. You can either login, or register on the top of this page.


Remember to show us how you use those tickets!

New script – Bow #9

cass-Bow9Do you want to have a bow from your favorite ribbon but that ribbon is only straight? You can do it manually, but it is long and tedious.

This script will work in any version of Paintshop Pro, and will turn any straight ribbon into a layered bow that you can then use in any project, whether it is digital scrapbooking, card-making, or others.

The end result is a layered bow so you can tweak the layers or insert a decorative element in the knot if you want.

And it will not damage the original straight ribbon either so you can still use both in your project.

You can get this script in the store: Bow #9.

If you are to use that script, can you think of something you could insert in the knot? Since it will be left unmerged, that is one great way you can customize the bow. Share your idea in the comments below and i will announce the winner in the newsletter, next week. Not registered yet? Not a problem: register here.

cass-Bow9-Fall01As a sample of this, i created a bow from a simple straight ribbon. It was colorized for fall colors, which is the time of the year in the northern hemisphere.

Not only you get a bow in psd format with the knot on a separate layer, but you also get the straight ribbon so you can create a matching detail. You can attach the bow to the ribbon, in the middle (which shrinking the ribbon), to pretend the bow is part of it.

You need to be logged in to download this sample. You can either login, or register on the top of this page.

New script – Photo-Stamps

cass-PhotoStamps

In the old days, stamps were made of a single image that was only repeated throughout the sheet. Over time, we have seen some stamps that were created from larger images that made up 2, 4 or more stamps.

This script will allow you to turn your favorite photo into a full sheet of stamps. All the perforations will line up perfectly, no matter what the size of the image is. The script will resize and crop the image slightly, to make sure of that.

Once you have your image turned into a stamp sheet, you can easily re-connect adjacent stamps by UNERASING the holes, for a unique effect.

Cut off a stamp or two if you want.

This script is available in the store: Photo-Stamps.

Do you want a chance to win this script? Tell me what photo you could see turned into a stamp sheet. Add a comment below. I’ll announce the winner in the newsletter, next week.
cass-PhotoStamps-LLSAs for a sample, since it is a script that is applied to a photo, i obviously didn’t think you would want to use any of MY photos, would you? However, this script can also be used on a paper or a solid color image. That is what i did, and then, i added the letters to individual stamps. You can use this technique to add a fun and unique title with one letter per stamps.

Of course, although the sheet is intact, you CAN remove or cut off some of the stamps. You have a blank one that you can either add a design to, or cut from the sheet. Even the letters that you want to keep, you can separate them from the whole sheet, while still leaving them close enough to have the words legible.

You need to be logged in to download this sample. You can either login, or register on the top of this page.


Although there are great scripts in the store to create various effects, did you hear about the Filter Forge plugin? They say it is for Photoshop, but it works just as well with Paintshop Pro. Check out the little video that shows how to install it.

ScrapbookCampus-FilterForge-installation-video

Then, once you have it installed (even if only the trial version), you will want to add more filters. They have over 10,000 of them. And they are all free to download once you have Filter Forge installed.

ScrapbookCampus-FilterForge-adding-filters-video

New script – Multi-Fold

cass-Multi-Fold

The main way people will add folds to their paper or paper element is by using overlays. This is a fairly simple method, and once the overlay is blended into the paper, it gives a nice result. However, this is limited by the number of good overlays you have.

Creating folds manually can be easy but time consuming. So here is a script for Paintshop Pro that will help you add folds quickly.

The script can add between 2 and 6 folds, regularly spaced, or irregularly arranged, vertically or horizontally. The folds will be the size of your image but it will be on a separate layer so the image will stay intact.

Run the script repeatedly, and you will always get something at least slightly different even if you are using the same options.

No more recognizable folds on your paper pack!

Get this script in the store: Multi-Fold script.

Do you want a chance to get this script for free? To say goodbye to the same old overlays? Add a comment below about what you think of this script idea. I’ll announce the winner in next week’s newsletter. Register here if you are not already receiving our weekly news.

cass-MultiFold-Overlay01Do you want to see one such overlay? I ran the script on a plain red image, 3600x3600 pixels, choosing 5 folds, irregular and horizontal. I got a single overlay including all 5 folds, and since it was left on a separate layer, i saved that layer as a png file for you to use (especially if you are not a Paintshop Pro user).

Although the script will create the folds over the full surface of the image, you can also use it for elements that are not full size, like frames or tags. In that case, the script will delete all the folds that are not overlapping the element in question. This is also great if you want to add different folds on alphas!

You need to be logged in to download this sample. You can either login, or register on the top of this page.