Web
Analytics

New script – Alpha-Beads #3

Alpha-beads script for Paintshop ProYou now have another option to create beads with the letters, colors and font of your choice with this script.

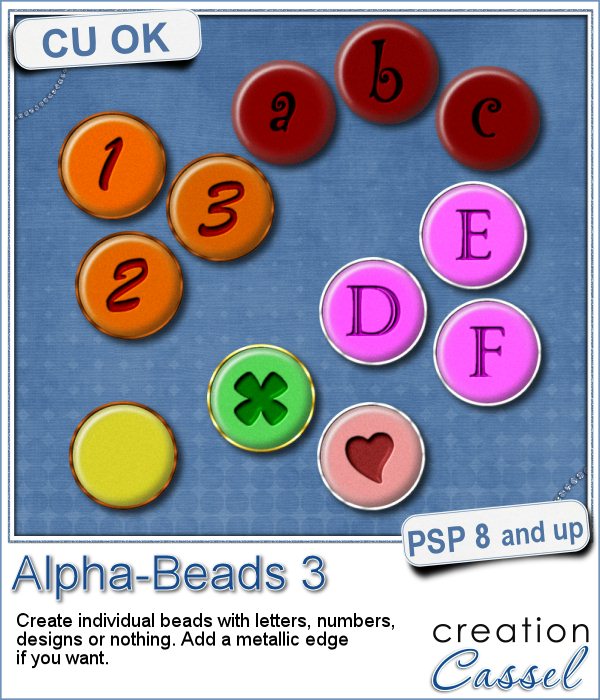
You get individual beads that are about 300 pixels wide, and you have the option of having letters, digits, punctuation marks, and since you can use any character with any font, you even have the possibility to use accented characters that you can't find anywhere else.

You also have the option to add a drawing or a design: use a vector shape, or a hand drawn design if you prefer. And of course, you can also create a blank bead.

There is even an option for an additional metallic ring around the bead for another look.

Get this script in the store: Alpha-Beads 3

What type of beads would you like to create, that maybe you have had a hard time finding already made? Share your comments below. I'll pick out a winner and will announce it in the newsletter next week. Not a subscriber yet? Not a problem. You can register here and it is free (and you only get one email per week).

cass-AlphaBeads3-Yellow-Digits
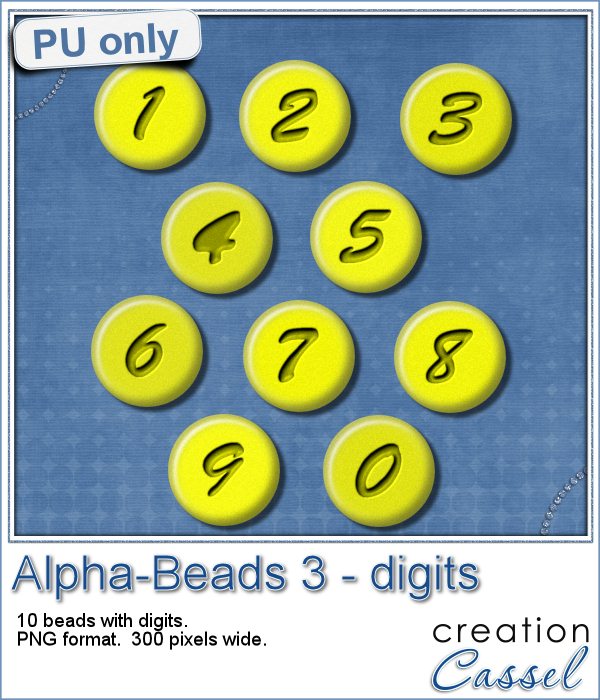
How about a little bit of sunshine with these yellow beads with digits? You can use them to display a date or an anniversary number.

They are plain, without any metallic ring around them so you can still customize them to suit your taste or your project.

What will you "date" with them?

You need to be logged in to download this sample. You can either login, or register on the top of this page.

New script – Datestamp #2

Datestamp script for Paintshop ProDatestamps have been used for years in a way to indicate a particular date on a document, most often an envelope, but in graphic design and scrapbooking, these have become much more than just a way to add a date.

This script will allow you to create a custom datestamp that will really fit your need and your current project. You can choose any text you want, whether it is a date, a location, a name or a phrase. You can choose any font you want, as long as it is accessible by your PSP. You can choose any color, gradient or pattern and you can even add a texture if you want something original. Then, in the center, you can add another short text element, like a year, a name or another word and still use yet a different font.

Just like the old datestamps that had long lines to cover a certain number of postage stamps that would have been on the envelope, you also have the option to add those lines, either straight or wavy, on either side or on both. That makes this script extremely versatile and you can make so many different looking elements!

Grab this script in the store: Datestamp #2

With all the options available, what would you use this script for? What would you write on it? Post a comment below and i will pick a winner next week and will announce it in the newsletter. Not a subscriber yet? Not a problem. You can register here and it is free (and you only get one email per week).

cass-Datestamp2-MonthsHow about a little sample. Of course, i can't put the name of your sister, or the location of your last vacation in a sampler but i can give you a standard date datestamp. If you want to add a fun label to your layout to indicate when the particular event took place, you can use these stamps. They are in greyscale so you can change the color to your liking to match your project.

Each stamp is 500 pixels high so it is easy to size them down if needed too.

You need to be logged in to download this sample. You can either login, or register on the top of this page.

Although those stamps do not have the lines on the side, it would be super easy for you to add them yourself using the Brush tool (or the Pen tool if you prefer to work with vectors). Will you show us what you make with those? How do you use them in your layout?

New script – Sand Writing

Sand writing with Paintshop ProMaybe you have sandy pictures of your last vacation but wished you had a photo where you would have written your name or the date in the sand. With Paintshop Pro, you can now cheat a bit.

This script will let you draw or write anything on a separate layer, on top of a sandy image and will create the typical ridges you would get if you used a stick to write in the sand.

You can write or draw anything and if you prefer to use a preset shape or any shape for that matter, the script will draw the outline in the sand.

Once you have your design "marked" in the sand, it is still left on a separate layer so you can move the design somewhere else on the sand, but best of all, it allows you to tweak the perspective so it will match the angle of the photo, for a more realistic effect.

Use any sandy background, whether it is your own photo or stock photos.

Grab this unique script now: Sand Writing.

And do you want to see how it works? Watch this video i did when using the script:

If you want a chance to win this script, tell me in the comments below, what you would like to write on a sandy photo. I'll be back with the name of a winner in the newsletter, next week. Not a subscriber yet? Not a problem. You can register here and it is free (and you only get one email per week).

Digit writing in the sand with Paintshop ProThis week, as a sample, i created a series of digits and a few other simple designs in sand. Since the drawing matches the sand background, and i can't give you that background, there is a link in the README file where you can download the seamless tile to create a fun sandy image. And it is FREE too.

I drew all the digits and the designs by hand, because it looks much more realistic than the idea of finding text in sand using Arial or Times New Roman! Could you imagine!?

You need to be logged in to download this sample. You can either login, or register on the top of this page.

New script – Eyelet #4

Paintshop Pro script to create eyeletsThere are many designs you can find for eyelets. Some will have an edge, some will have multiple small round holes, others will have flowers and more. In the store we already had 3 other eyelet scripts, and today, we offer you a fourth one.

This design uses a slightly different pattern, with an edge made from little "eyelets", and 6 petal flowers. You can apply the edge only on one edge, or have it symmetrical to create a ribbon.

There are various options where you can choose to have only the outer edge, but you can add one or two rows of flowers and you can add another edge inside. The script is "smart" enough to know where to put that inside edge, based on what other designs you have already picked.

You can choose to apply this Paintshop Pro script to a paper or a ribbon. Both can yield very interesting results.

You can get this delicate script in the store: Eyelet #4.

Do you want a chance to win this script? Tell me, in the comments below, what you would do with the script. What element would you create or where you would add those eyelets. I will announce the winner in the newsletter, next week. Not a subscriber yet? Not a problem. You can register here and it is free (and you only get one email per week).

Free sample of an eyelet edge paper and ribbonFor a sampler, i created a full page "template" that you can colorize.

I started with a 3480 long ribbon (because each pattern is 290 pixels wide and i wanted the ribbon to be symmetrical), and i ran the Mitered Corner Frame script, which made an almost full size frame. With a little tweaking, i adjusted the flowers in the corners, and filled the center with the same solid color as for the base.

You can colorize this greyscale paper to the hue you want to match your project.

You need to be logged in to download this sample. You can either login, or register on the top of this page.

New script – Stamps #3

Stamps #3 script for Paintshop ProYou might like the idea of turning a photo into a single stamp, or a full sheet with the same image repeated over and over again, but why not create a full sheet with different photos? This script can let you use a different photo for each individual stamp or use a few photos repeatedly.

The script offers you the choice of the number of rows and columns and the rest will be done automatically for you, after you open one image from the folder where all the photos are stored.

Furthermore, just like a real stamp, you can add text (like the value or the country) and you can be creative and add a date, a location, or a name. Talk about a fun way to display many photos of a single event or theme.

You can get this script in the store: Stamps #3.

If you prefer to create just a single stamp, you can use the Stamp script, and if you want a full sheet with a single image, you can use the Stamps #2 script.

If you want a chance to win this script, add a comment below telling me what text do you think you would add to a series of stamps like these. I`ll announce the winner in the newsletter, next week. Not a subscriber yet? Not a problem. You can register here and it is free (and you only get one email per week).

Stamps 3 script sample - free stamp sheet templateSince this script uses your own photos, i doubt you would have had any use for a full sheet of my photos! So i figured i could make a layered template with this script. You get a PSD file, and you can clip a photo of your choice to it, or just re-size your photos to fit the space available.

After that, you can manually add the date, value, or other text on each individual stamp. Of course, it will be a bit tedious (something you would not have to worry when using the script), but in the mean time, that is one alternative for you, or if you are using a non-PSP program.

You need to be logged in to download this sample. You can either login, or register on the top of this page.

And remember to post your result in the collective PSP Scrapbook Showcase pinboard.


New script – Knot #10


cass-Knot10Yes, another knot! Considering the fact that you probably don't want all your ribbons and bows and knots to always look the same, you need a wide variety of them. That is why I coded this script.

Unlike other knot scripts you can find online, this one uses YOUR ribbons; you do not have to limit yourself to choosing the color or pattern since you can use actual extracted ribbons. This ensures that the knot will match whatever other element you might be using in your project.

This script is also the first one I coded that uses TWO ribbons. You can use any straight ribbons for this, whether they are opaque, or translucent, solid in color or with patterns or even with a directional pattern.

Another little tool for Paintshop Pro users.

Get this script in the store: Knot#10 (and you can check for other knots while you are there too!)

cass-Knot10-greyscale-sample
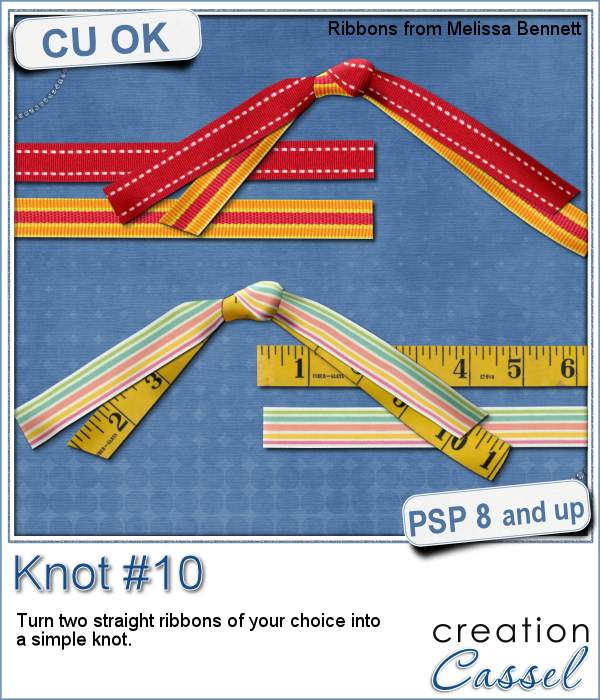
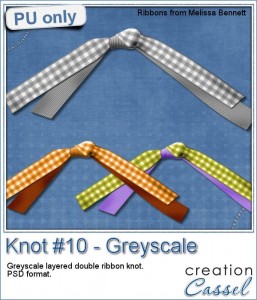
If you want a chance to win this script, tell me, in the comments below, what you would attach with a double knot like this. I'll announce the winner in the newsletter next week. Not a subscriber yet? Not a problem. You can register here and it is free (and you only get one email per week).

As a way for you to see, up close, the knot created by this script, i created a layered knot using greyscale ribbons from Melissa Bennett. The end result is a PSD file (so non-PSP users can open it too).

With the layers being left unmerged, you can colorize each ribbon the way you want, and you can also insert an element in the knot itself. What would you insert?

You need to be logged in to download this sample. You can either login, or register on the top of this page.

New script – Text Overlay

cass-TextOverlayI have seen overlays in stores and on various blogs, but there is so much *I* would like to see on an overlay and i can never find exactly the right thing.

Of course, i can never find an overlay with the name of my kids, or the place where i spent my vacation.

It is easy to create a single little tile with the text and use it as a fill pattern, but that is pretty simplistic and for a pattern, it kind of lacks originality.

This is when Martine said she would like to have a script to create her own overlays using any text she wanted, with any font too.

And now, this Paintshop Pro script is exactly what she was looking for. Not only this script will create a simple pattern using the text, but it will also create 4 more seamless tiles using the same text.

Sure, you can do it manually, but i can tell you that some of those tiles are quite tricky to get aligned perfectly, when you do it manually. That is the beauty of scripts!

Grab this script in the store: Text Overlay.

What text would you want to use to create an overlay? Tell me in the comments below and i will randomly pick a winner to get this script for free. Remember that if you purchase the script, you can still enter: if you win, you will get a future new release! Not a subscriber yet? Not a problem. You can register here and it is free (and you only get one email per week).

cass-TextOverlay-ValentineFor the month of February just at our doorstep, i created 3 overlays for you with a loving theme: Valentine.

I started with the simple sentence "Be my VALENTINE", and i ran the script twice: once, i used the option 2 (alternating) and once with the option 4 (zigzag).

Once i had the seamless tile from the zigzag option, i used it to fill a full size image, and i chose to change the angle to 45 degrees for a fun effect..

For the option 2, i also used the tile to floodfill a full size image.

Then, on a copy of the last image, i added a heart shape mask to make a fun heart frame.

You get all three overlays in this sampler.You need to be logged in to download this sample. You can either login, or register on the top of this page.

What will you create with these overlays, or with the script itself?

Show us your creative inspiration and post on our pinterest board HERE. And if you haven't been invited to post, just ask for an invite. And while you are there, remember to comment on all the fantastic images pinned there!

New script – Starburst Pattern

cass-StarburstPatternIf you like to use starburst patterns on your papers, you either have to make them yourself, or rely on purchased pages, either as overlays or as template to then colorize or customize them to fit your project.

This script will do that for you, in just a few seconds: run the script, select the color, choose how many papers you want to generate (up to 10), and if you want the patterns to have 2 or 3 colors. Then, in literally just a few seconds, the script will generate random patterns based on your selected options and colors.

Every paper will be slightly different even if it has the exact same color as others, because of the random feature integrated in the script. Add textures, overlays, or other effects for a real custom paper for your page or your kit.

Get that Paintshop Pro script in the store: Starburst Pattern script.

Would you like to get this script for free? Tell me what effects you would add to such a paper after being created by the script. I'll announce the winner in the newsletter, next week. Not a subscriber yet? Not a problem. You can register here and it is free (and you only get one email per week).

cass-StarburstPattern-ValentineTo give you a chance to see this pattern, i created 6 papers using a pink palette. The papers can then be used for any upcoming project for Valentine.

Add a texture, add layers and change the blend modes, overlay it on a photo, etc. Be creative!

You need to be logged in to download this sample. You can either login, or register on the top of this page.

New tubes – Leather Braids

Leather Braid picture tubes for Paintshop ProMany elements you can get online, whether they are free or paid for, are made from photographed objects that are then extracted. This has many limitations: you can only use the element in the shape or size you have, you can rarely use a different color (although you MIGHT be able to colorize it) and you cannot customize them to fit your particular needs.

These braids are not single elements, but they are picture tubes to use with Paintshop Pro. Those tubes will create a braid as long as you want, in the shape you want; it will just follow your cursor, as if you were drawing with them.

This set includes 12 different picture tubes, perfectly set to give a continuous braid, as long as you want.

Get those braids in the store: Leather Braids.

Do you want a chance to win those Leather Braid Tubes? Tell me, in the comments below, what element you would create using those braids. I'll announce the winner in the newsletter, next week. Not a subscriber yet? Not a problem. You can register here and it is free (and you only get one email per week).

Leather Braid Frames in PNG format for free

For a sampler, this week, i created two frames: one rectangular that would fit a 5x7 photo and one round that would fit a 4x4 photo.

As you can guess, i didn't draw those shapes freehand! (you would not want to use a frame i drew freehand!) so i used the Vector Tube script from Joe Fromm to place the tube around a vector shape, which makes the placement so even.

Due to the shape of the individual images of the tube, sharp corners can give some unwanted extras. That is what happened with the rectangular frame, so i had to do a little bit of erasing of the "extra" details. If you use a smooth curve, it won't happen to you, but if you have corners or sharp curves, you might need that little extra step to make the whole element looking smooth.

You need to be logged in to download this sample. You can either login, or register on the top of this page.


News from the Campus

After months of waiting, the brand new Basic Scrap Course is now live in the Campus.

This course will walk through from the moment you open your Paintshop Pro for the first time, to the completion of 5 different layouts.

Image16-shadowed  Round-and-Round-shadowed-600 Layout3-shadowed-600 Image2-shadowed-600 Layout5

It includes lessons on

  • how to customize your PSP to suit your workflow,
  • how to add simple and not so simple shadows,
  • how to use scripts to save time,
  • how to create clusters,
  • how to do layering,
  • how to use the guides,
  • how to cut out your own paper elements,
  • how to use picture tubes to create stitching,
  • how to create titles from alpha, alpha sheets or the text tool,
  • and much more.

Perfect for beginner scrapbookers, but also perfect for someone new to Paintshop Pro. No matter your learning style, you will find this course will suit you because you get both video AND written instructions.

Interested?

Check out the more details HERE.

Do you know a friend who is considering scrapbooking with PSP? Send them over and watch them create their first digital pages.

New script – Photo Mosaic

cass-PhotoMosaicIf you have photos and you want to display them in a new and original way, have you tried to make a mosaic?

This can also be a great way to hide the errors on a not-perfect photo, whether it is a color issue, a blurriness issue, etc.

This script will help you turn any photo, of any size, into a mosaic. You can choose the size of each tile. You can choose to have lines between the tiles, how thick and what color. You can also choose whether you want a lot of variations between the tiles or just a little.

And best of all, you can override the script by removing any area that you find are changed too much from the original; the script will place guides, and activate the Selection tool for you and a copy of the original image will be left underneath, so it will be very easy to remove one segment from the "mosaic" layer and just display the image below. That is one way to make sure that the important details are easy to see (like your baby's face, or the birthday cake).

You can get this fun photo script in the store: PhotoMosaic.

Would you like to get this script for free? Just post a comment below about how you think you could use this script and i'll will announce a winner in the newsletter next week. Not a subscriber yet? Not a problem. You can register here and it is free (and you only get one email per week).

cass-PhotoMosaic_Overlay4x6Since this script is run on a photo, and sending you one of my photo probably wont help you, i decided to play around a little. I used a grey based, the size of a 4x6 inch photo. I ran the script on that base, and got a series of tiles in different shades of grey. You can use that as an overlay on top of any of your photos, and adjust the blend mode. Depending on the starting photo you have, different blend modes might work, and others, not.

The file is a psd format as there is a "tile" layer and also a "line" layer in case you want to add some lines (which you can also colorize if you want).

You need to be logged in to download this sample. You can either login, or register on the top of this page.

So, which photo will deserve a mosaic treatment? Don't hesitate to show them. Pin them on Pinterest, on our own board HERE (ask for an invite and you will get it!)