Web
Analytics

New Script – Word Frame 3

cass-WordFrame3

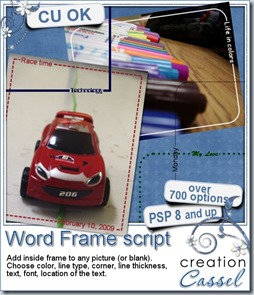
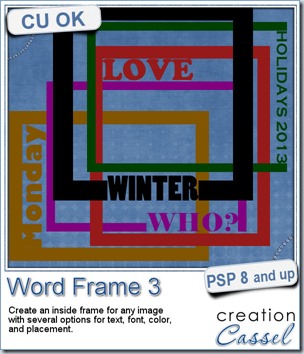
Journaling cards are very popular lately and scrappers are often looking for some original ways to display theirs. Also, sometimes, a single word would be a fantastic caption for a photo, so why not put that caption as part of the frame?

This script will let you create a frame of various thickness around any image (even a blank one) with the text of your choice, the font of your choice and the color of your choice. You also decide on which side of the frame the word will appear, if you want it aligned left, right or center. If the text is too long, the script will even resize it to fit the available space. You can also have the text butt up to the frame or inside a cut section.

In the end, you will have two separate layers, one for the word and one for the frame, so you can add various textures, change colors, or add effects to one or the other (or both).

You can get this script in the store HERE.

Would you like to get this script for free? This is easy. Simply post your name in this thread, and tell me what would be the word(s) you would use in using this script to create a frame.

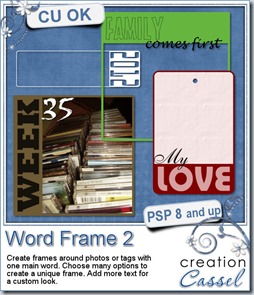
This script is the third one of the series. The Word Frame 1 script would give a discrete line frame inside the image with a multitude of options. The Word Frame 2 script would give a frame where the word would be part of a thicker area. They are both create tools to add a caption to a photo or create a journaling card.
cass-WordFrame  cass-WordFrame2

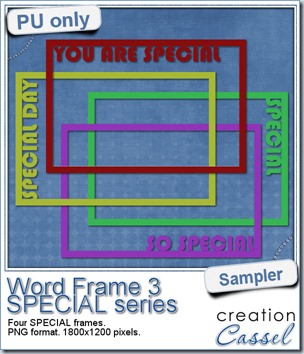
cass-WordFrame3-sample-specialAs a free sample, i created a set of SPECIAL frames that will match a 4x6 inch journaling card. Of course, you can resize them for 2x3 cards too.

They are in png format, so they can be used by most programs.

Each frame is in greyscale, so you can either colorize them, or flood fill them using the Locked Transparency option (you know about that option, right?).


You need to be logged in to download this sample. You can either login, or register on the top of this page.

So, who will be the special person, or what will be the special event you will focus on, with these frames?

New script – Whitener

cass-Whitener

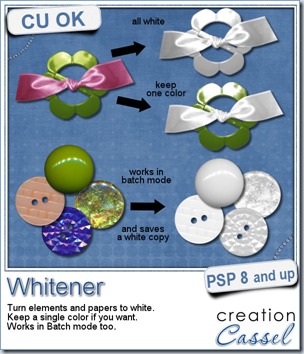
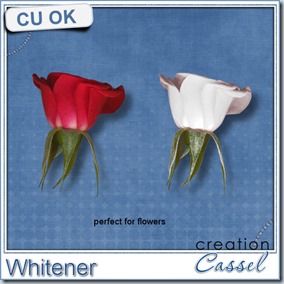
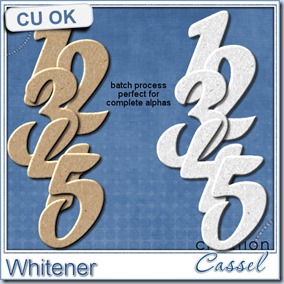
White elements are always useful but not always readily available. You surely have a ton of buttons, ribbons, bows, frames, flowers, and probably in just about all the colors you can imagine, but when you want a white one, you are stumped. You probably like that blue ribbon or the red rose, or the purple button but you wanted them white.

With this script, you can turn just about any element (or even papers) to “shades of whites”. Depending on the starting color, you can even add a manual brightening in the end of the script.

But there is more. This script will play with the brightness of the element with a little randomness to it, meaning that several runs of the script will yield a slightly different white, so all your elements won’t look like you painted them all with the same can of paint!

But that is still not all. You also have the option to keep ONE color intact. In the preview, i kept the green from the buckle and whitened the ribbon. You can also do the same to keep the greenery and whiten the flower. How would you do that?

But again, if you think that is all, you are wrong. The script is coded in a way to allow you to run it in batch mode. This means that you can whiten a whole alpha, or a whole folder full of buttons (hundreds if you want) and the script will save a “white” copy in the same folder while keeping the original intact. You can do that in just a few seconds!

cass-Whitener1  cass-Whitener2

You can grab this great tool here: Whitener script at Creation Cassel.

Do you want a chance to win this script? You can head over to the Happy Place, in this thread and add your name, while telling me how you would, otherwise, turn a red flower to a white one (without removing the greenery).

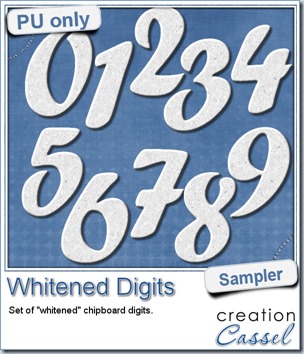
cass-Whitened-sample-DigitsFor the sampler, today, i decided to turn an existing set of digits (the Chipboard digits) and turn them to white. It was simple as i ran the script in batch mode in the digits folder. The script simply saved the individual files with “_White” added to the original filename so there is no risk to overwrite the original files. And since they are saved in the same folder, they are easy to retrieve.
Those would be perfect to add the date of a fun winter event, or a wedding. And of course, you can add various details to them, like little bows, glitters, or hand doodling.


You need to be logged in to download this sample. You can either login, or register on the top of this page.

If you want the original Chipboard digits, you can grab them here.

New script – Puzzle 5×5

cass-Puzzle5x5

Kids and adults love puzzles. There are different stores that can turn a photo into a real 3D puzzle, which can be a fun present for the holiday, don’t you think?

But not everyone needs or wants a real tangible puzzle, however, it is a fun way to display a photo either as a desktop, a scrapbook layout, etc. You can get puzzle overlays that will give the impression of a finished puzzle, but in order to have “loose” pieces, you would still have to cut them out individually. This can be tedious and not very accurate.

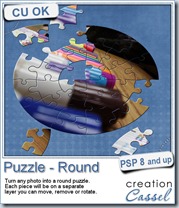
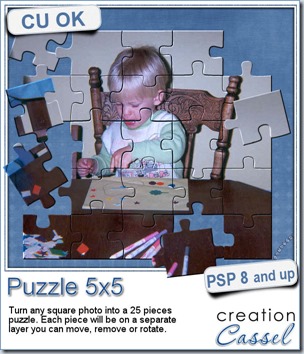
This script for Paintshop Pro, will really turn your photo into a puzzle. Each piece will be on a separate layer so you have all the flexibility needed to move, remove, or rotate any piece you want. This way to display a photo adds a touch of dynamism, don’t you think?

The script will create a 25 pieces puzzle (5x5). It is meant to work on a square photo, but it will work equally well on a rectangular photo, except for the fact that the pieces will be slightly elongated. And it will work on ANY size photo too (although the very small ones might yield some jaggied edges).

You can grab this original Puzzle script in my store: Creation Cassel.

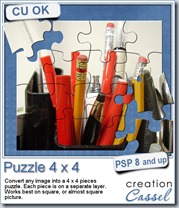
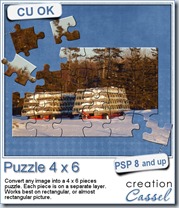
If you want other size, check out the other puzzle scripts:

cass-puzzle4x4  cass-puzzle4x6  cass-Puzzle-Round

If you want a chance to win this script, check outthis thread in the Happy Place and add your name to it. Let me know if you ever converted a photo into a puzzle before, and if so, how.

This week, instead of giving you a sample of the puzzle script, i decided to give you a challenge!

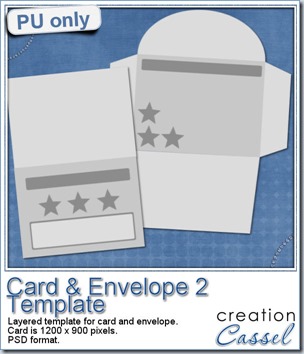
cass-Card&Envelope2-template-previewI am including a set of matching Card and Envelope, in PSD format that you can use to create a variety of holiday cards. The basic template was made using the Card&Envelope script, and then, i just added various elements to decorate the base. Since everything is on a separate layer, you can really be creative. Use any paper you have. Use elements you have. Move things around. Rearrange elements.
You need to be logged in to download this sample. You can either login, or register on the top of this page.

I would LOVE to see cards you will make with this template. Did you watch the Stretch-a-Sketch video? It is available in the Campus, here, for free until it is replaced by the Part 2 (which might mean only a couple of days?). So you better hurry.


News from the Campus

10PSP-scripts-for-holidays-200Are you still looking for last minute ideas for Holiday projects? Check out this article in the Campus.

Whether you want to create a calendar, embellish a card, make a frame, add sparkles to a project or decorate your room with a fun and unique Subway Art, you have many options at your fingertip.

Check it out HERE.

New script – Ribbon Tabs

cass-RibbonTabs

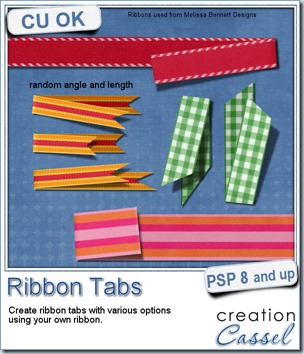
If you buy ribbons, you might get some straight ribbons, and wished you could get a folded version with the correct angle and shading. But you don’t have it. Then, you find some folded ribbons that would be perfect, but… how will you slip the element you want to attach (charm, ring, tag, etc.) between the layers to get a realistic look?

With this Paintshop Pro script, you will be able to use ANY straight ribbon, and get a folded version in unmerged layers so you can insert whatever element you need to. You can also add shadows that are different on both layers (since one layer might be flat on your page and one might be lifted).

You can either create a fold on one end of a long piece, or use that long ribbon and cut a small piece in it. There is also a random function incorporated into the code so that the angle of the fold and the exact length of the piece will always be different, meaning you can get a wide variety of different tabs using the same ribbon and the same options. No more tabs that look exactly like the others. They will all look like you did them by hand, one by one (but we know you used a shortcut!).

You can grab this time saving script in my store:Creation Cassel.

Do you want a chance to win it too? Simple: check out this thread in the DST forum and add your name to the thread. I’ll be back next week with the name of a winner.

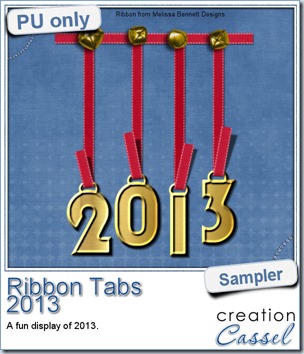
cass-RibbonTabs-sample-2013-previewIn order to show you what this script can do, i created a whole set of digits, attached with folded ribbon tabs made from a single ribbon (from Melissa Bennett) and i ran the script 10 times on that same ribbon, using the same options (create a tab with the full length, keeping the end straight, and facing the bottom).
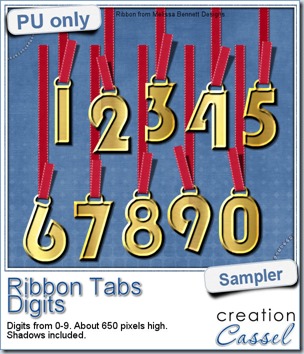
Each digit was done manually using a basic font, a gold fill and a bevel. Then, they were individually inserted between the two layers of the folded ribbon. Finally, i arranged the digits to create a 2013 decoration. I added some bells, from the Picture Tubes that came with my PSP (I am not sure which version!).

The whole decoration is about 650 pixels high, so it would not overwhelm any layout. This might be a great way to date your Christmas layout from this year, or to conclude a P365 for this year.

You need to be logged in to download this sample. You can either login, or register on the top of this page.

cass-RibbonTabs-sample-DigitsBut that’s not all. If you want the complete set of digits, subscribe to my newsletter and you will get it in the Sunday release (December 1st, 2013). If you see this post a little late, wait for the next release and work your way back through the past issues!

You have not yet subscribed? You can still do so (and of course, it is free!)


Subscribe to the Newsletter


Now, how about some SALE!

BlackFriday2013-CreationCasselFor Black Friday, EVERYTHING in my store is 40% off. Yes, EVERYTHING. If you are familiar with my business, you know that i do not have many sales in the store, so you better take advantage of this offer.

Since some are shopping on Black Friday, others on Cyber Monday and yet others will shop in between, everything will be left on sale until Monday night.

Go shopping!

New path – Holiday theme

cass-PathsHolidays

Paintshop Pro might not (yet) have the option to wrap text inside a specific shape, like a text editor program would do. Normally, you would have to struggle with separating the lines yourself with a [return], add some spaces or play with the kerning. That would work but you can achieve similar result faster using the Text Wrapping script, which works with paths.

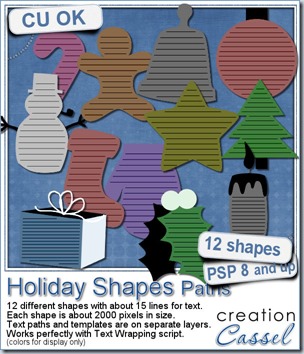
This set of paths include 12 different holiday themed shapes. You get the path and the shape on different layers, so you can use the path for your text, and you can use the shape to possibly cut out the paper to show the text, or to replace it by a paper from a kit, or simply as a guide for other creative uses. Or you can use the shape totally separate from the path too since your text can just be printed on the background paper if you prefer.

You get pretty large shapes so you can resize everything down if you need it. Although these paths work perfectly with the Text Wrapping script, you can also add text manually by following the detailed instructions included.

You can get these fun Holiday Shapes paths in my store.

You can also win this set by adding your name to the Happy Place thread here, and tell me how you would create text inside a shape with your PSP. I’ll be back next week with the name of a winner.

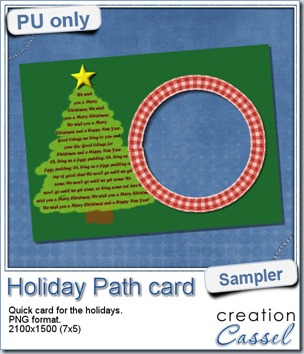
cass-HolidayPathCard-sample1b-previewAs a sample for you to see the result of these paths, i created a simple holiday card. I used the tree path and copied the lyrics from “We wish you a Merry Christmas”, and ran the Text Wrapping script on it. I decided not to use the template, but instead, doodled with the brush tool, on a layer below to create a tree shape. The ribbon frame was created using the Circular Element script on a long and straight ribbon.

This card is a standard 7x5 format so you can get it printed just about anywhere. It is a png format so you can just add a photo for the occasion.

You need to be logged in to download this sample. You can either login, or register on the top of this page.


New script – Bar Code

cass-Barcode

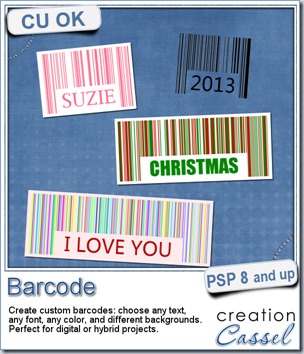
Bar codes have become almost a boring fact of life whenever you go shopping since every single item has one of those. It is meant for faster checkout by allowing a machine to read the information instead of a cashier. But that “boring” design can be simulated and made much more interesting when used in conjunction with legible text, and fun colors.

This is exactly what this Paintshop Pro script will do. You can pick ANY text, in ANY font, in ANY color and then decide to replicate the traditional black design, or add fun colors. That is the perfect way to match your label to your current project or kit.

You can also choose to have a common white paper background or another color, or even have no paper at all, so you can apply the “label” onto any background as if it were stamped directly onto it without a paper support.

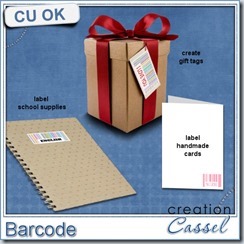
cass-Barcode-extraYou can use any text so that leaves you with so many options: names, locations, dates, phrases. Do you want even more ways to use those labels by modifying them? Check out the newsletter for that additional tip.

Do you know you can use those labels as printables? Check out what you can do (i am giving you three ideas, can you think of more?)

You can get this fun Bar code script in my store.

You have a chance to win this fun script by sharing some of your great ideas. Hop over to this thread, and tell me of ways to use this script in a printable format. What would you use those labels for?


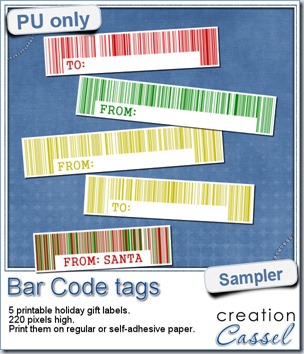
cass-Barcode-sample-ChristmasObviously, i would not be able to create a sampler with the name of your kids, or the school subjects for you to stick them on their notebook, but we all know that Christmas is coming (yeah, i am serious!) and whether you are celebrating Christmas or not, it would likely be a time for gift exchanging, even if it is only between colleagues at the office or the little newspaper carrier, so i thought of creating some holiday season labels with this script.

You can get these 5 labels and print them out. Because they have some blank spots, you can handwrite the name of the recipient or the giver, and put them on presents for the holiday season.

They are pretty simple, but you surely don’t want to overpower the present you would offer, do you?

You need to be logged in to download this sample. You can either login, or register on the top of this page.

News from the Campus

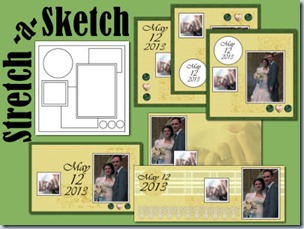
Did you see that the free video of the November presentation is already up in the Campus?

StretchaSketch-400

You can watch it for free, as long as you are logged in (registration to the Campus is totally free). So head over to watch it.

See how you can turn a flat sketch into a layered template.

See how you can use a single sketch and create a variety of layouts.

See how you can turn a square scrapbook layout into a card or a Facebook cover image.

Check it NOW

New tubes – Braided Trims

cass-BraidedTrim

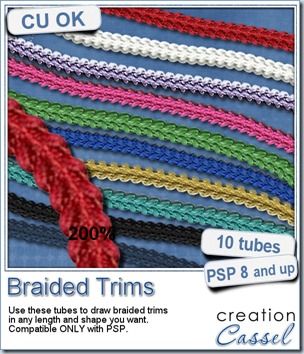
This week, you can get this set of picture tubes created to generate some fun decorative trims. You can draw with them as you want, create any number of interesting edges in any length or shape.

If you like the other directional tubes from the store, you will love these ones too.

You can use the VectorTube script to place those trims along a vector path for a very precise placement around frames, alphas, or decorative designs.

You get 10 different tubes in different colors. If you want to tweak the colors afterward, you can still colorize them.

These are obviously only working in Paintshop Pro (sorry Adobe users).

You can grab this set of Braided Trims tubes in my store.

If you want a chance to win this set, you can add your name to this thread in the DST forum and tell me what version of PSP you are using. I’ll be back next week with the name of a winner.

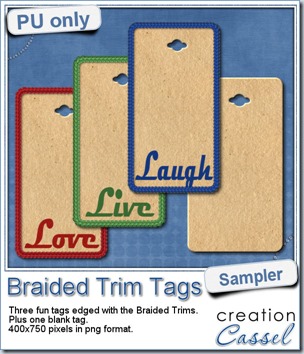
cass-BraidedTrim-sampler-tagsAs a way for you to see more closely what those tubes look like in a real project, i created those fun tags. I started with a vector shape (a rectangle with rounded corners) and used the VectorTube script to place the trims along that path. I then replaced the center of the tag (that was a vector layer) by a brown paper texture i had in my supplies. I cut out the hole on top and added some words using the Magneto font.
Each tag is about 400 x 750 pixels so you have ample room to add your own journaling, date, or just use them plain. Add a string or a ribbon to attach them or just to add a decorative touch to it.

You also get a blank tag in case you want to customize it more to your project.

You need to be logged in to download this sample. You can either login, or register on the top of this page.

New script – Custom Kit Buttons

cass-CustomKitButtons

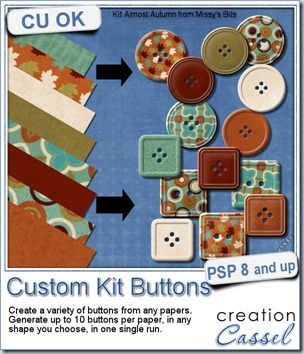
A kit is not complete without buttons, right? Creating buttons within a specific palette is fairly easy (there is even a script for it called theButton Machine), but creating individual buttons out of papers for a perfectly matching result is a little more tedious. So i bring you the Custom Kit Buttons script.

This script will allow you to use any vector shape (round, oval, square, rectangle, octagon, etc.) and then choose all the papers you want to use (at once!) and it will create a variety of buttons from those choices of yours.

A single run of the script can yield many similar buttons, but since they are “cut out” from different spots on the papers, you might get some slight variations for each. You can keep them all, or just keep a few and delete the rest.

This script is perfect to help you complete your kit, to complete a layout, or even to create clusters with buttons that will all be matching.

Grab this time saving tool in my store HERE.

Do you want a chance to win this script for free? Hop over the DST Happy Place thread and add your name to it. I’ll be back next week with the name of a winner.

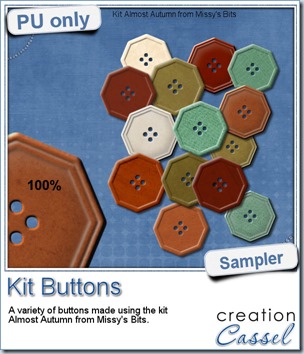
cass-CustomKitButtons-sampler-AlmostAutumnThis week, i used Missy’s kit called Almost Autumn to create a set of 14 octagonal buttons. Then, i tweaked them to add a slight variation in size, brightness and contrast, just to make sure they were not all exactly identical. What do you think of that?
I really could have used any shape but i thought that round or square buttons were a little too “ordinary” and common so i picked a different shape.

What shape would you like buttons to be?

You need to be logged in to download this sample. You can either login, or register on the top of this page.

What about the kit i used? You can find it here: Almost Autumn.

Can you imagine all the scripts you can use with a single kit to expand the possibilities? You can create cutout shapes, tapes, buttons, additional papers, and more.


News from the Campus

ScrappersDozen-250x250The Scrapper’s Dozen event is underway. We had some fantastic results and the comments are great. Here are some comments we got:

“I want to share my 2 linoleum pattern...TYSM Carole for this amazing tut!!!! “ – Mariscraps about the Linoleum pattern tutorial

“Great fun with a simple but very effective process.” – Marlene about the Linoleum Pattern tutorial.“

“I tried the tip you had in the e-mail and then made a frame with my doily.” – Linda about the Doilies tutorial

“[Here are] My Doily sample and the Doily frame (Fantasy Forest elements) - very simple techniques again but very effective. Also very time wasting as you try lots of different effects but who cares, we're having fun!” – Marlene about the Doilies tutorial

Although the first week is over, you can still register and get all the free kits provided by our contributing designers AND get all the 12 tutorials including those released this week. You can surely catch up. Each tutorial is less than 10 minutes and as you can see from the comments, those tutorials are easy, effective and fun!

REGISTER NOW

New scripts – Speed Scrap

cass-SpeedScrap

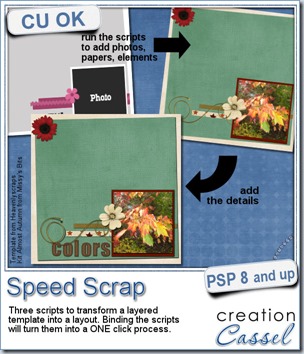
Using templates to create a layout is a way to speed up the process as it helps you with some precise suggestions as to where to put the photos, papers, and elements. Of course, you don’t have to follow everything exactly, but it is a start.

Using those templates still require you to open the photos, copy them, close them, paste them into the new page, resize them, move them to match the location of the shape, then you have to either Clip it (using the Clip to It script), or go through the selection process, and so on. That is a lot of steps that can be automated with these scripts.

There are 3 scripts, for different types of elements in the template. The photo script will never merge the photo to the shape, giving you the option to tweak it and adjust it to your liking. The paper script will give you the option to merge the paper to the shape from the template, if it is within the size of the template (in case it extends outside the edge). Finally, the element script will adjust the size of the element you pick to match the size of the shape in the template, and replace that shape by the element.

There is a video clip in the description, showing how fast you can create the basis of your layout using the three scripts. Of course, you still have to add the shadows, the title, the journaling and any additional detail you want to use to make the layout truly yours.

You can get this set of Speed Scrap scripts, in my store.

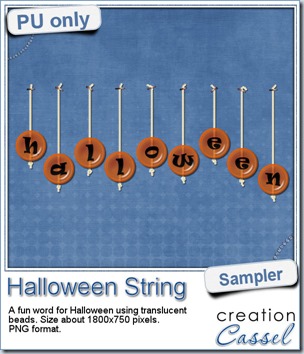
cass-AlphaBeads2-Halloween-string-previewDo you want a chance to win this set of scripts? Head over to the DST forum in this thread and add your name while answering the question. I’ll be back next week with the name of a winner.
Again, i cannot give you a sample of the script, since it is a tool script, but i can make something that could be used for Halloween layouts. Check this fun wordart. The letters were made using the Alpha-Beads 2 script, and the strings are from the Twisted Rope tubes (i used the white one you can see in the preview).

The whole montage is about 1800 pixels wide and is in PNG format, so everyone can use it.

You need to be logged in to download this sample. You can either login, or register on the top of this page.


News from the Campus

ScrappersDozen-250x250Did you follow the videos in the Campus related to the Scrapper’s Dozen?

The third video is now up, and you can even download something quite useful (and it is free). So go check it out.

Video #3

And while you are around the Campus, check out the blog section where you will see more about the “secret ingredients” and the designers who contributed them.

New Paths – Halloween theme

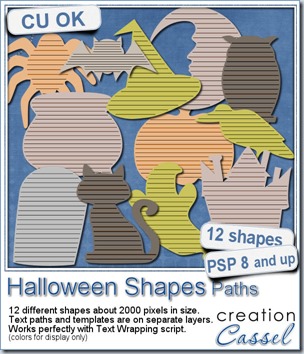
cass-Path-Halloween

Do you have some photos or anecdotes to share about Halloween time? These are great to add some journaling or stories while keeping inside a Halloween theme shape.

Since Paintshop Pro does not have an integrated text wrapping feature, you can use those paths to manually add text (just like Text on path) and adjust the spacing and kerning, or you can use the Text Wrapping script that will automatically adjust those for you, to have your text along those paths and inside the shapes.

The paths and the shapes are on separate layers so you can use one without the other, or even use the templates to create something completely different, like a frame, a cutout, or just a decorative element.

You can grab this “scary” set of Halloween paths in my store.

Do you want a chance to win those paths? Add your name in the Happy Place thread HERE while answering the simple question. I’ll be back next week to announce a winner.

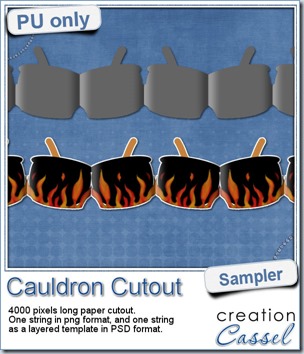
cass-PaperCutout-sample-cauldronThis week, to make sure that everyone (using Paintshop Pro or not) could use my product, I opted to create a paper cutout using a cauldron image, which was turned into a sticker (with a little white edge). Then, i ran thePaper Cutout script and it generated the long string of colored cauldrons, but also a separate template in unmerged layers. Both the png string of cauldrons and the layered template in PSD format are included in the zip.

Each string (the png and the psd ones) are 4000 pixels long so they are long enough to reach both sides of a full size layout.

You need to be logged in to download this sample. You can either login, or register on the top of this page.


News from the Campus


ScrappersDozen-250x250You know about the Scrapper’s Dozen event, right?

Did you watch the first video where i shared a trick to organize your digital kits?

This week, i am sharing another trick to help you save money, by reusing kits that have colors you are not too sure about. Maybe they are too bright for your project, or they are too washed out to add life to your layout.

Be sure to watch that video, and add your name to the mailing list for the event.

Watch Now