Web
Analytics

New script – Lined Border

cass-LinedBorder

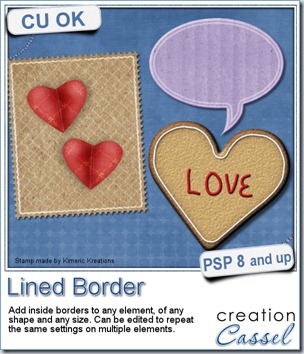
A lined border around the edge or slightly inside the edge of an element can add a touch of definition or elegance. It is fairly easy to do manually if you have only one or two to do, but if you are in love with borders, or if you want to create an outline on several elements of your layout or kit, you will want to get this script to speed up the process and let you play around more.

This script for Paintshop Pro allows you to add a variety of outlines, with different thickness, with different spacing from the edge, with sharp or rounded corners, in single and double too.

Each line is added based on the size of the element, so you dont have to calculate anything. But of course, if you need a precise measure, you can always use the custom value.

Even better, if you plan on using this script on a series of elements, like an alpha, or a set of tags, cards, strips, and more, you can edit the script itself and run it while skipping most of the dialogue windows. That makes the whole process so much faster.

Each line is left on a separate layer, so you can play with the end result even more. Add a bevel and shadow and you can turn that outline into icing on a cookie. Change the blend mode and you get a subtle outline on an element. Run the script several times on the same shape with different settings and move the outlines slightly off center for a dynamic look. The sky is the limit.

You can get this script in my store: Creation Cassel.

As usual, there is a random draw in the DST forum where you can add your name, tell me what elements you could use this script with and i will pick a winner on Monday night. Check out this thread now and post. Even if you already bought the script, you can still win! And if you already bought it, tell us how you like it and even better, show us something you did. We always love to see how creatively different people can use the same script.
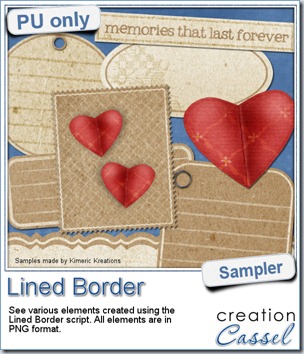
cass-LinedBorder-samplesThis script was a suggestion from Kimeric Kreations. Kim often uses borders on her elements. It adds a great finishing touch and sometimes, that border is barely visible, yet it is there! Since she was the one who suggested this script idea, she also was the first one to “play” with it. She ended up creating several fun elements using various options of the script and customized the end result for a great look.

This set of samples includes various elements and trust me, they ALL have a lined border (even the hearts!). All the elements are in PNG format and range in size from 400 pixels (for the heart) to a 3600 pixels wide border.

You need to be logged in to download this sample. You can either login, or register on the top of this page.

Thanks Kim for this great freebie.

(shh… this freebie will match a future kit from Kimeric Kreations. Keep an eye on her store in the next weeks).

new script – Paper Cutout 2

cass-PaperCutout2

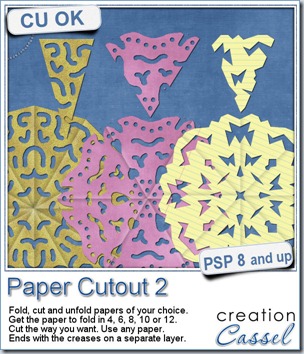
When i was a kid, i used to take papers of different size and fold them to then cut out along the folds. I was making “snowflakes”, even though they were usually not folded in 6. We had that activity in arts and crafts class pretty well every year. I learned that regular writing papers were not square so i always had to cut off a piece to make my craft (what a waste).

Whether you want to use lined paper to simulate those school projects (not done in art classes) or really plain colored construction papers, or using a patterned paper from a kit, there is no limit.

Start with any paper, and run the script It will take care of the not-so-square papers, it will fold it (or pretend) according to what you ask, and you will have the chance to cut out any design you want, with any tool you like. Use the eraser tool or the selection tool. That is up to you.

Cut sections along the “folds” or the outer edge, or snip the center (you surely did that when you made your “snowflakes”). Once you are done, the script will unfold your piece and reveal the whole design (you might be surprised too). And furthermore, it will add creases to your masterpiece exactly where it WAS folded for a more realistic look. The creases are on a separate layer so you can tweak their opacity depending on the color or pattern of your paper.

You can get this script in my store: Creation Cassel.

cass-PaperCutout2-sampleAnd if you want a chance to win it, check out this thread, and tell me what theme would work well with this script. I will be back on Monday to announce a winner.
 

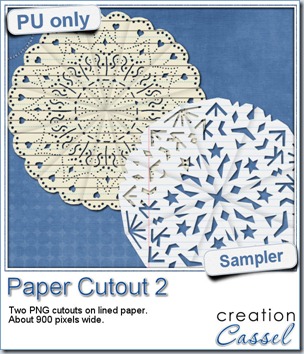
I used a couple of “school” papers to cut some more “snowflakes”. But in fact, they dont look like snowflakes at all. If you are crafty, you can surely create some very intricate designs and turn those “snowflakes” into doilies! These two elements are about 900 pixels wide in png format. They don’t match only “kid” kits!


You need to be logged in to download this sample. You can either login, or register on the top of this page.

News from the Campus


scraphappierWe had the draw on Sunday night for a free registration to LOAD213. Andrea was our winner, and she already started her month-long challenge. She said she loved the idea of a challenge as it will give her a little more incentive to scrap. Even more, i asked her to keep us updated on her activities and she already did her first layout, and we are the first of the month! I guess she is right on track!

Did you register for LOAD213? How are you doing with it?


Photo-Graphic with PSP

We will have our monthly live presentation on Sunday (it should be right before the SuperBowl for those of you who are fans). There is still time to register. We will look at how we can turn a regular photo into something else: a watercolor piece, a cartoon, a sketch, and maybe more (time permitting).

Sunday, Feb 3rd, at 5pm Eastern Time zone.

New script – Sprayed

cass-Sprayed

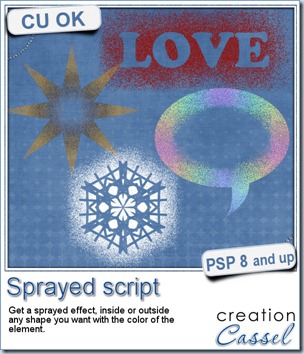
Did you ever use fake snow in the windows to create snowflake or other Christmas decorations? With this script, you will be able to create more than designs with fake snow in a can! Use any shape or even text and have that design either sprayed inside or outside.

You can use this script to create a discrete name, or a date. Make a frame, or a journaling spot. Use a single color or a gradient for a stunning effect. Use the initial shape back with the sprayed design for something even more original.

You can get this script in my store, at Creation Cassel.

If you want a chance to win this script, check out this thread in the DST forum and add your  name AND a specific use you can think of for this script. Be creative. I am sure you can use this in many original ways!

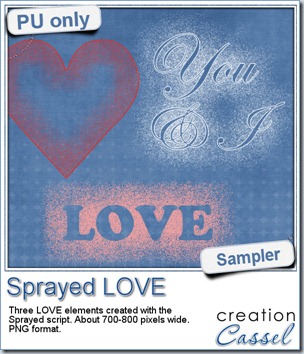
cass-Sprayed-SamplerSince we are close the February, the month when lots of people will either celebrate Valentine Day, or simply take pictures or make layouts about their loved ones, I created these three elements that are love related. They are in PNG format, so just about anyone can use them.
In these elements, you can see how the initial shape (although they were filled), were used to get only a thin outline to be combined with the sprayed area.

You need to be logged in to download this sample. You can either login, or register on the top of this page.

New Script – Multiple Dots

cass-MultipleDots

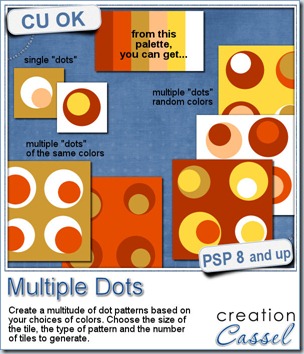
Do you like polkadot patterns, but want to have something more than the single dot? Here is a script that will give you the option to create layered concentric dots in random colors picked from the palette you chose.

You can create a singe dot pattern (with two colors), or a 2 x 2 design where all four dots are using the same colors, or a 2 x 2 design where all the dots are randomly colored. The end result is obviously seamless so you can use the tiles as a pattern in your Paintshop Pro. Use them straight or at a 45 degree angle for a different look.

Each tile ends up with all the dots on separate unmerged layers, so you can also replace one dot by something else, or add a shadow, or a texture to each layer independently.

Use bold or subtle colors to match your kit or your photo. Add an extra design in the middle of the smaller dots.

You can get this script in my store, at Creation Cassel. It is on sale at 25% off until MONDAY NIGHT (this is in response to those who mentioned that due to the time zones, they tend to miss the sale price when it ended on Sunday night while the newsletter was released on Sunday morning).

As usual, there is also a random draw in the forum where you can win this script. Check out this thread, and just add a comment to the thread (i am not asking much this time). I will be back on Monday night with the name of a winner.

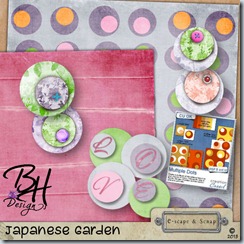
bhdesigns_jggThis week, I didn’t create a freebie for you, but someone else did. I asked Bernadette to test run this script and she got inspired in using this script in a totally different way that i expected! She used it to create a paper; that is the typical use for it, but she also used the dots separately and made a wordart, and some elements too. You can download her freebie mini-kit by clicking on the preview.

Thanks Bernadette.

If you want to look at a matching kit, she has it in her store here.

News in the Campus

Are you familiar with LOAD (Layout A Day)? If you ever participated in the past, you will want to register again, right? If you never participated, it is a great time to start.

scraphappier


The the inspiration and nudge to complete one layout a day for the whole month of February (it only has 28 days!). Whether you are a traditional paper scrapper, or a digital scrapper, you can join in the fun and with the title of SCRAPHAPPIER, what else than fun can you expect?

There is a little contest on the Campus where you can WIN your registration: either you win a registration or you win a refund of your registration if you already paid for it. Since the places are limited and the number of seats is quickly dwindling, you might want to secure yours now.

If you want to register now, go for it: REGISTER NOW.

Then, head over to the Campus and add a comment to the LOAD post. If you participated in previous LOAD events, tell us what you liked about it. If you never participated, tell us why you would like to join. I will draw for a winner on January 27th, 2013. Tell your friends too!


ENTER THE DRAW

New script–Scattered tubes

cass-ScatteredTubes

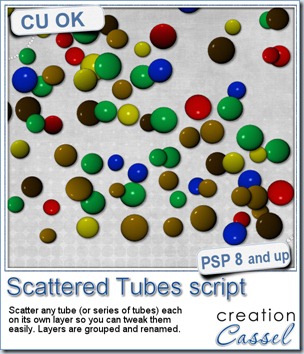
I am sure you have used the picture tubes in Paintshop Pro and loved how easy it is to add 10, 20, 50 flowers just by clicking on your project. Click, one flower, click, one flower, and so on. However, did you ever clicked happily for dozens of times only to realize that a few flowers are too close to the edge, or you ended up with too many pink flowers grouped together and find yourself having to restart from the beginning since all the flowers were on a single layer and you could not move one separately? I have! I always wished the tubes were on individual layers, but to do that, it would become cumbersome and not as quick anymore.

That is where this script comes in. You choose the tube you want to use, and the script will scatter multiple instances of the tube (or from a series of tubes) and add them on individual layers. And to avoid having to work further with 50 layers, they are also grouped so you can collapse the group and have a manageable layer palette where all those 50 layers only look like one, while still letting you move individual tubes, remove some, resize others, rotate a few, and more.

You can grab this time saving script in my store at Creation Cassel.

And as usual, you have a chance to get this script free if you win the RAK in this thread. What kind of tube would you like to scatter yet still have the option to move them around individually or edit them one by one? The winner will be announced on Monday night.

cass-WordAlbum-2012


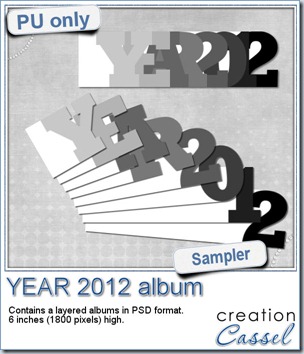
As the new year is here, do you want to make a great conversation starter at home? Gather your 2012 photos and use this word album to place them. Add only photos or some anecdotes too. Use the same pages and flip them so you can get a reverse too. Print them. Collate them. Bind them. It can also be a great gift.


You need to be logged in to download this sample. You can either login, or register on the top of this page.


cass-DoubleToSingle-PS

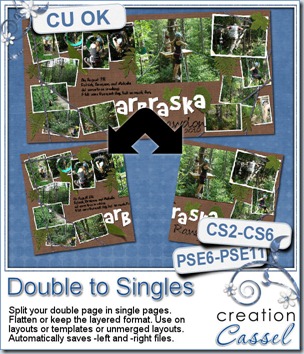
Photoshop and Photoshop Element user, i didn’t forget you. I had a script for PSP a while ago that would automatically split double pages into single pages. Well, after popular demand, i got this script for you too.

This is a SCRIPT but for PS and PSE. It will either split perfectly in the center, OR it will cut the page with an extra 3/8 of an inch. This gives a total of 3/4 inch that you can play with when you print your page in a book so that the center will not eat up some of your page. This amount of overlap is not necessarily a standard “bleed” but a space for you to manoeuvre depending on the printer’s specs.

The fun part about this script is that it cuts the pages but also saves them without you having to type in anything! That is called automation!

You can grab this time-saving script in my store : Creation Cassel.

New Script – Snowflakes

cass-Snowflakes

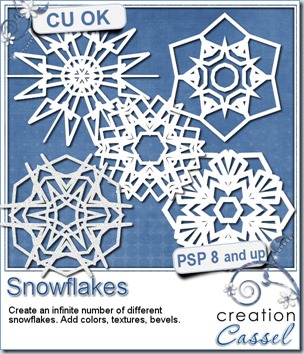
Whether you want to embellish a Christmas photo, or create a winter theme kit, this script will allow you to create an infinite number of 6 points snowflakes. Every design will be different, just like real snowflakes. The random feature incorporated into the script is the key part of the creation of unique snowflakes.

You can create  up to 15 snowflakes in one run of the script. Some snowflakes will be great, others might not suit you. This is totally random.

Once you have a snowflake created, you can change its color, add a texture, or even run it through a filter of your choice.

Each snowflake will be created in white on a black background so you can see better.

Use the same one with different effects, or collect several different ones. Sting them, tie them, cluster them.

You can get this script in my store: Creation Cassel.

There is also a random draw that can allow you to win this script. Check out this thread and add your name to it.

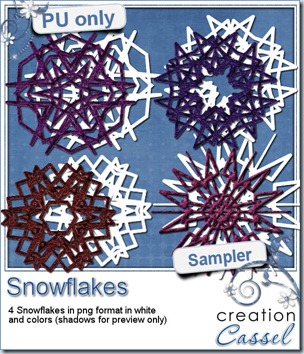
cass-Snowflakes-samples


As a sampler, I created 4 snowflakes. You get the basic snowflake shapes in addition to matching snowflakes that have some textures added to them. They are all in PNG format, so you can use them in almost any program.

Use the colored snowflakes as is or you can change the color. Or you can use the basic white flakes and apply your favorite effect. Use Eye Candy or SBP if you want.

You need to be logged in to download this sample. You can either login, or register on the top of this page.


Breaking news

Just letting you know that i will be opening a new store on January 1st. I am excited to have another place to showcase my products and to work alongside other designers. Although i love my own store, it can also be a lonely place at times.

So, keep an eye on this blog, and my newsletter!

New script – Flat Paper Preview

cass-FlatPaperPreview

Designers often use a stacked arrangement for their papers in kit previews since most of them are identifiable easily with only a portion of the whole paper, but other designers have papers that are more like photos, scenic backgrounds, paintings, or incorporate some hand made designs that differ from one paper to the other. In those instances, having all the papers stacked up, and showing only an edge would not showcase the beauty of the whole papers. Designers then want to have the papers placed side by side so the viewer can see the whole image.

Creating those previews will require the designer to resize the papers, and align them on previews. With just a few papers, it might not be too long but if one has a dozen papers, or more as in a collab kit, this can become quite tedious.

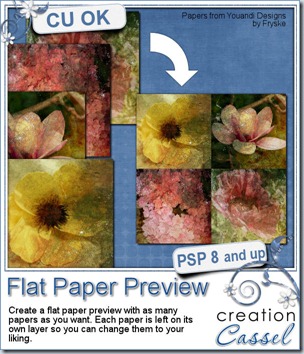
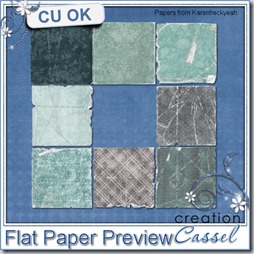
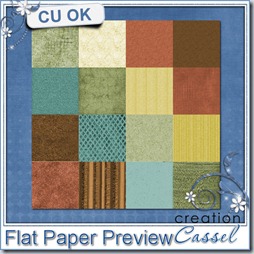
cass-FlatPaperPreview-01cass-FlatPaperPreview-02

The script will do all the calculations, resizing, copying, pasting and aligning the papers. Save a lot of time because YOU dont have to open the papers one by one. YOU dont have to edit the script to find the papers. YOU dont have to bog down your PSP by having 12 full size papers open at the same time. YOU dont have to measure the size needed for the number of papers you want per preview. YOU dont have to align them all to look perfect. The script does all that work for YOU.

You can have the papers in 2x2, 3x3, 4x4, 5x5, or 6x6 arrangement and if you have more papers than will fit in one preview, the script will know and create multiple previews. If you have fewer papers than what can fit in the arrangement you picked, you will have empty spots and you can move the papers around. The script will place guidelines to help you move the papers and keep them aligned perfectly, without any difficulty. Each paper will be on a separate layer AND renamed to match the filename. This will help you identify which paper is which.


This script can also be used to display QP and templates if you have several to showcase!


You can grab this fantastic time-saver script in my store: Creation Cassel

As usual, you have the opportunity to win this script by posting in the Happy Place RAK thread HERE. Tell me if you ever used a side-by-side paper arrangement before. I will be back on Monday night with the name of a winner.


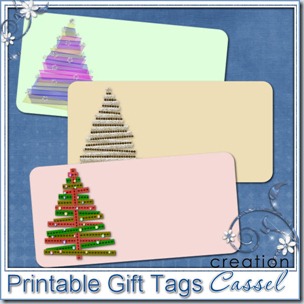
cass-RibbonTree-GiftTagsSince this week script is a tool, i chose to offer you some Christmas Gift tags made using the Ribbon Tag trees submitted by the users of the Ribbon Tag Tree script during our contest last month.
I used two of the trees submitted by Dianne. One was made with organza ribbons (i think she created the organza ribbons from scratch from a tutorial in the Element Creation Tutorials class of the Scrapbook Campus).

The other tree was made with straight rows of tubes: bead tube and garland.

The last tree was made using recolored version of a single extracted ribbon.

Use those tags on presents to put the name of the recipient of your gift, place them at the table with the name of the guests, etc. Each tag is a png image 600x300 pixels.

You need to be logged in to download this sample. You can either login, or register on the top of this page.

New script – Textured Overlay

cass-TexturedOverlay

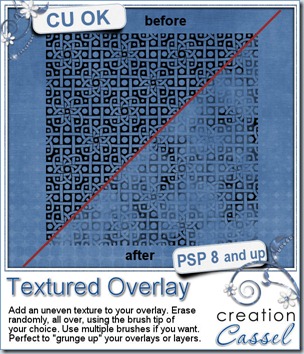
Sometimes, you might have a collection of overlays and want to use them but you dont want all your papers to look exactly the same. One solution? You grunge them a bit. However, it is long to randomly delete areas, change the angle of the eraser tip, change the size, or even change the eraser tip altogether. This script for Paintshop Pro will do all the work for you. What do you have to do? Open the overlay, run the script, pick the eraser tip and decide if you want to erase a little or a lot. That’s it. The script will erase dozens or hundreds of times, randomly, while you just watch.

You can continue running the script as long as you want to remove as much as you want. This is the perfect tool if you want to use a consistent texture across a set of papers without having the exact same look on each of them. Since there is a random feature coded in the script, you will ALWAYS get a different end result even if you start with the same overlay and eraser tip.

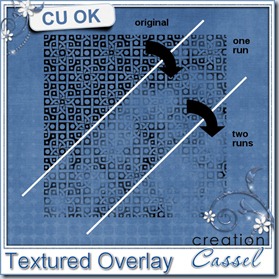
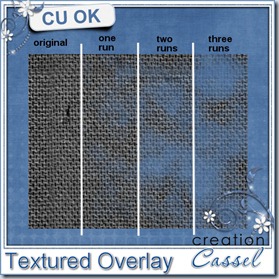
See what other results you can get with multiple runs of the script using the same settings and eraser tip (you can then play with the opacity and the blending to get yet, a different result):

cass-TexturedOverlay1  cass-TexturedOverlay2

You can get this script in my store: Creation Cassel.

As usual, this script is also available to win. Check out this thread in the Happy Place forum and add your name to the thread (remember to answer the question from the first post!). A winner will be announced on Monday night.

cass-TexturedOverlay-sample-Christmas


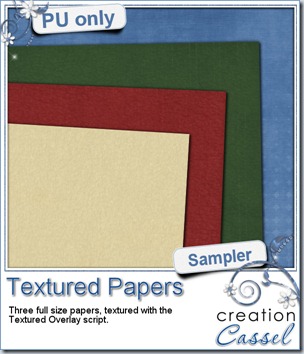
As a free sample, i created these three holiday themed papers using a texture image i scanned and ran that texture layer through the script to get 3 different results. Since i lowered the opacity a lot, the end result is a subtle texture.

They are all 3600 x 3600 pixels so you can use them as background papers for a layout, for a Christmas card, or you can cut them to create holiday gift tags, name tags, frames, etc.

You need to be logged in to download this sample. You can either login, or register on the top of this page.


New script – Kidnap Alpha

cass-KidnapAlpha

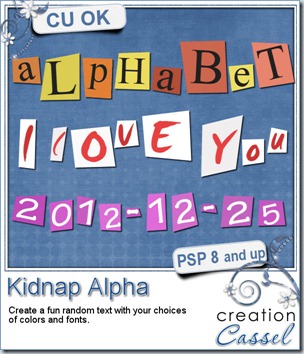
If you think that creating something very regular and even is long and tedious, try to create something that is totally random! It is not any faster, i can tell you. This script will allow our Paintshop Pro users to create totally random pieces of papers with various characters on them to write messages, titles, etc.

This script relies heavily on the random function to shuffle all the choices you decide: you can choose up to 6 colors, gradients or patterns for the papers; you can choose up to 6 colors for the text; you can choose any number of fonts; then you type in the text you want (or the whole alphabet). From there, the script will shuffle the data AND will also (if you want) randomly change the case for each letter. And even the shape of each piece will be randomized. Notice how the “2” appears 4 times in the preview, yet it has 4 different shapes/sizes/paper shades. You can even run the script multiple times with the same choices and get a wide range of results.

You can get this script in my store: Creation Cassel.

Do you want a chance to win this script? I am sure you do! You can simply add your name to this thread in the Happy Place, and tell me what kind of project could use that kind of alpha. I will be back on Monday night with the name of a winner.

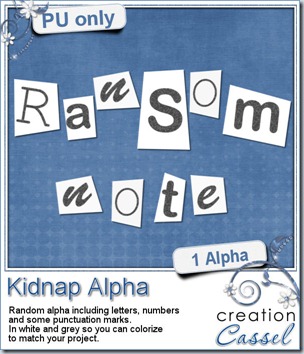
cass-KidnapAlpha-sample-whiteDo you want to play with some of those letters? I created a random alpha for you using this script. I used 3 different fonts and the text is in grey so you can colorize the pieces to match your project. The set includes 26 letters, 10 digits and a few punctuation marks. There is no uppercase/lowercase since they are randomized anyways.
Will you show me what you do with this alpha? I might just share it in the newsletters.

You need to be logged in to download this sample. You can either login, or register on the top of this page.


New script – Ribbon Tag Tree

cass-RibbonTagTree

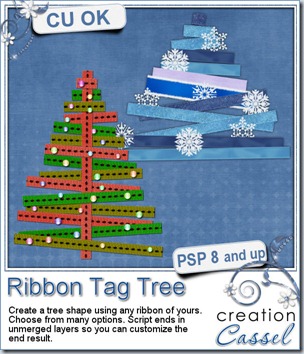
I always loved those stylized trees, mostly seen around the Holiday time, but in other situations too. Using ribbons, it is fun to create those trees, but it is tedious to do. You can probably create such a design in any graphic program, but to make the process faster, you can now use a script for Paintshop Pro.

Unlike many other scripts, this one uses actual ribbons that you provide, instead of just choosing a color or a gradient. You surely have some straight ribbons in your stash, extracted ribbons, colorized ribbons, etc.

You can use a single ribbon, or several. You can have the script use the ribbons in sequence, or choose which one to use at random. Use thin ribbons, thick ones, lace ones, edged ones, translucent ones, etc.

You can have the ends cut straight or at an angle. You can have all the pieces perfectly horizontal, slightly rotated or more wildly rotated.

Everything ends in unmerged layers so you can still tweak the result, add decorations, adjust some pieces, change the colors, replace some pieces, weave other elements between them, etc. The possibilities are endless. Beware : this is addictive!

You can get this script in my store: Creation Cassel.

There is also a draw coming up on Monday night and you can win this script (even if you already purchased it). Just check out this thread, and name a creative way you can think of customizing the end result from this script.

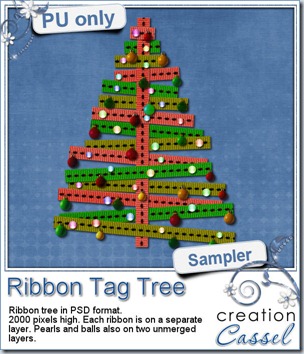
cass-RibbonTagTree-sample1I created this tree using 3 copies of the same ribbon that i colorized 3 times. I added beads that came with one of my PSP versions, and the ornaments are also tubes from PSP. All the ribbon pieces are on separate layers. All the beads are on one layer, and the ornaments on another layer, so you can remove the beads or the balls, or both and use the other parts to your liking. There is a slight drop shadow on each piece, but it is small enough that you can add your own, make some branches rise (or drop), you can insert other decorative elements between the branches, etc. This tree is in PSD format, so most of you can use it.

Will you show me how you are using this element? Maybe make a Holiday card?

You need to be logged in to download this sample. You can either login, or register on the top of this page.

If you like this script, or this freebie, and if you think someone else might like it, don’t hesitate to tweet about it, or share on FB. PSP users are always on the lookout for great products, aren’t they?