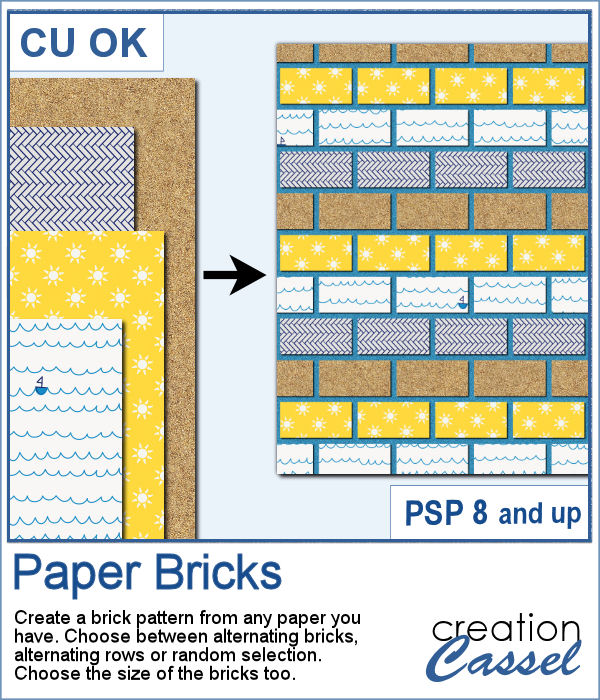
If you want to combine a set of papers into a new design, you can create this brick wall pattern. But doing it manually, is absolutely tedious and difficult. Which is a good thing there is a script for that.
With this script, you can use as many papers as you want, whether they are solid, textured or patterned. And since each brick is created from a different area of the papers every time, you will always get a different result, with every run of the script.
Get it in the store: Paper Bricks
In order to win this script, add a comment on this Facebook post telling us how you would customize a brick wall (remember, add a comment, not just a Like!) The winner will be announced in the newsletter, next week. Not a subscriber yet? Not a problem. You can register here and it is free (and you only get one email per week).
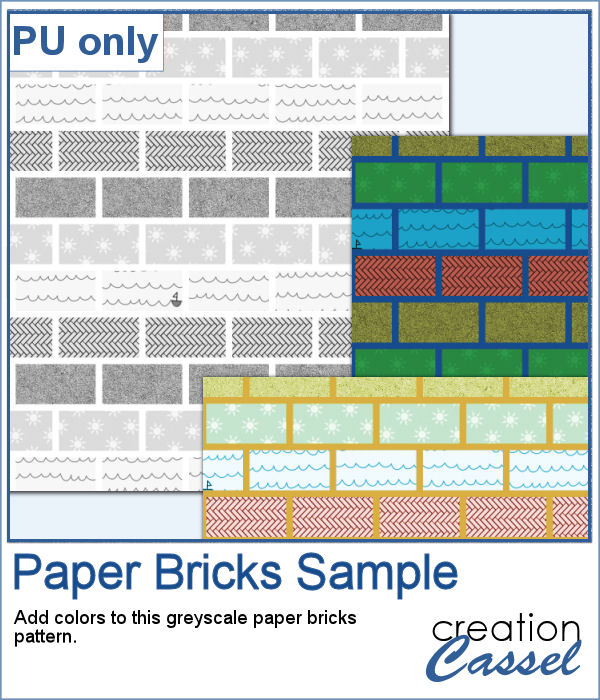
For a sampler, I am offering you a greyscale version of the pattern in the preview. There is no background so you can use any color or paper for it. To colorize the bricks, you can either use the Colorize command over the whole image, or over a selection of some bricks or rows. But if you want to be fancier, you can duplicate this layer, lock the transparency and paint over some bricks, and then change the Blend mode.
You need to be logged in to download this sample. You can either login, or register on the top of this page.

Placing photos in a perfect circle is an interesting way to display them, but it can be very tedious to take care of resizing each photo to the correct dimension for their number, then spacing them, aligning them and rotating them perfectly to form that circle.
As a sample, I ran the script with 8 photos and simply replaced the photos with grey squares (you don`t need to have my photos, do you?). Everything is left in unmerged layers so you can change the color of the borders if you want. You can insert your photos inside the mask groups. You can add various papers or elements to decorate the page.
Bows come in so many shapes and sizes. In your stash, you will never have too many bows! This is another one in our series of bows that you can create for your own projects.
For a sample, I created three organza ribbons and three bows with them. I also combined the individual loops from each bow, to make a three-color bow. That is something you can also do with the bows generated from this script since all the layers are left unmerged so you can replace or move them.
This is the third script in the "Decorated eggs" series. New designs but the same options. The eggs created with this script will perfectly match those from the others in the series as they will have similar options, the same final dimensions, etc.
Here are another dozen eggs that you can use in your next Easter project. They are the same size as the previous dozens so you can have three dozens for the same price.
Another way to add a special message, a date, a name, or a location is through the use of a datestamp. Those can be a simple and discrete way to add some information on a project without the traditional look of labels or journaling.
For a sampler, I created a total of 16 greyscale datestamps related to various school grades (from pre-K to University). Since they are greyscale, you can colorize them however you want to match your project.
If you have some paper-related projects and you need a fun and unique title, why not use a series of layered outline cutouts? Although this might be a bit tedious to do manually, you are in luck as this script can do that for you in no time.
As a sampler, I used the fading color option starting with dark green. This would be perfect for any St-Pat project, but it could also be used for titles for a birthday or a papercraft event.
Graduation is a special milestone in anyone's life and you can commemorate it with a tassel in the colors of the school and the year attached to it.
As a sampler, I created a greyscale tassel with a gold ring. You can colorize the tassel however you want, and you can use one of the eight "year tags" included.
Have you ever wondered if you could create your own coins with a favorite quote or design? Now, you can do just that with this script.
As a sampler, I created a set of coins for birthdays. With individual digits, you can write happy birthday wishes for anyone turning 1 or 101! Each coin is quite large so you can resize them to fit your project.
Watercolor can be a great way to showcase a landscape, a location or anything else, but like any tangible medium, it could be messy.
As a sample, I created a simple page that uses the same mask as on the main preview. Of course, you would have to add the watercolor effect on the image to get the colors you want but this mask will give that look on the edges without any work.
You can now decorate any element or even any photo with these lit lights picture tubes. You can embellish wreaths, trees, tags, but you can also add those to a photo of a house. Make it a night scene and those lights will really pop.
For a sample, today, I created these large digits from the Spruce picture tubes and added some rainbow lights. Each digit is quite large, which allows you to resize them to suit your need.