Web
Analytics

New Tubes – Spiral Binding

cass-SpiralBinding1

This week, I am proposing you a brand new set of tubes for PaintShop Pro. These tubes allow you to create any kind of spiral bound books. They are detailed extractions of actual plastic spiral bindings in different colors (not colorized), and then cut specifically to be placed perfectly along the edge of a book. This week, you can get 4 complete sets of bindings: white, black, red and gold. You also get a tube for side binding, and a tube for central binding. Since shading a spiral binding is a little tricky, you get one set shadowed, and one set unshadowed. And what is a spiral binding without matching holes? That is why you also get a hole template tube, for side binding and for central binding. Basically, you get everything you need to place a custom binding on your work. To make sure that your spiral is perfectly straight, just click on the start, hold the SHIFT key, and click at the end of the line, guiding yourself on the ruler to be sure you are getting a vertical alignment and not angled. These tubes should be very useful in your digiscrap layout, to create some interesting layers, maybe for journaling, maybe to display some pictures!

You can find this set of spiral binding tubes in either one of my stores: Creation Cassel and DigiScrapWarehouse.

If you want a chance to win this set of tubes, you can check this thread in the Happy Place of the DST forum. Tell me which one of the four colors you prefer and i will announce a winner on Monday. If you are not a Paintshop Pro user, obviously, you cannot use those tubes as is, but i will let you participate anyways; if you win, i will create a png image of spirals for you to use.

cass-SpiralBinding-notebook

I am sure you are just waiting for the free sample of the week too! So here it is. I created this notebook using the black plastic spirals. It is approximately 3”x5” and in PNG format so anyone can use it. Maybe you can write a little love note on it?

You need to be logged in to download this sample. You can either login, or register on the top of this page.

 

New script – Twister

cass-Twister

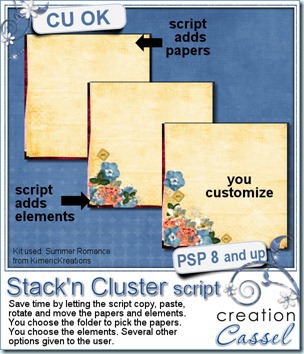
Do you sometimes find a template and would like to give it a funky look? Or have the various letters in a title placed not exactly even? Then you are in luck. This script for Paintshop Pro will let you do just that. You will be able to look at any template and add a “funky” version to your digital scrapbooking supplies.

If you want to keep some layers untouched, you simply have to hide that layer and the script will skip it. You get to choose if you want a little bit of rotation or more, and if you want a little distortion or more.

You can find this script in my stores: Creation Cassel and DigiScapWarehouse.

And if you want a chance to win this script, check this thread at the DST forum. Tell me if you ever used a “funky” looking template or if you would like to use one some day. I will come back on Monday to announce the winner.

cass-Twisted-calendar And as a sample of what this script can do, you can grab this free layered template. It is a funky looking template for the month of April. All the boxes are still there (some are hidden so you can use the template for other months). The boxes on the top row, that would be used for the days initial, are linked together so you can move them separately from the others, and all the 35 other boxes are also linked so you can move the whole set of boxes somewhere else on the page.

You need to be logged in to download this sample. You can either login, or register on the top of this page.
 

New script – Noted

cass-Noted

This script for PaintShop Pro will let you create fun journaling tags for just about any occasion, layout or kit. You choose the size and the base color, and run the script. That is it. Oh, wait. You have options. You can choose the colors of the lines, and the number of lines you want to show. In the end, you have unmerged layers so you can remove the outline if you want, remove some lines, change the color of some, etc. You can also create tags to print. Great for hybrid use.


You can get this script at either one of my stores: Creation Cassel, DigiScrapWarehouse.


And as usual, if you want to have a chance to win this script, hop over the DST forum in this thread and tell me what is the oddest shape tag you ever used.


cass-Noted-tags What about a free sample of what this script can do? Here are three fun tags you can use in your layouts or kits (remember that you cannot use these AS IS, commercially, but you can if you modify them). What do you think?

You need to be logged in to download this sample. You can either login, or register on the top of this page.
 

New script – Worn Edge

cass-WornEdge

The idea for this script is an old one. In fact, i had a similar script in a grab bag about 2 years ago, but this time it is much more advanced, and has more options. It also works with Paintshop Pro 8 now.

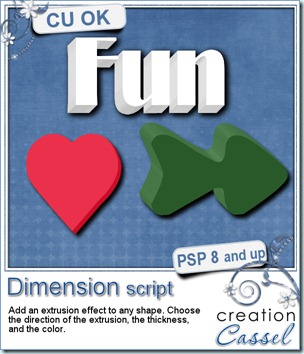
This script will “chew up” all around the edges of any element or shape you want. You can have a little wear, or more. Then, you can decide if you want to add a light, dark, colored or no border all around. This is already giving a lot of flexibility to match any kit or layout. But wait, you can also choose to have a thin, medium or thick edge, so that is even better!

You can get this script in my stores: Creation Cassel and DigiScrapWarehouse.

Would you like a chance to win this script? Check out this thread in the DST forum and just go add your name. A winner will be announced on Monday night.

cass-WornEdge-sample

How about a little sample of what this script can do? You can get these free tags in png format for you to use in kits or layouts.

You need to be logged in to download this sample. You can either login, or register on the top of this page.
Now, are you anxious to hear about the February promotion winners? The draw has been made, and was recorded. The official announcement will be made tomorrow, in the newsletter, and then, i will post on this blog. But of course, if you are more curious, and want to know the result the earliest you can, just make sure you are subscribed to my newsletter. If not, you can still subscribe here.


And the CHAT? Did you remember our monthly chat? It will be held tomorrow at 3pm ET in the DST chatroom. (that makes if for around noon on the west coast, and evening for Europe) Tomorrow’s topic: Brushes. See you there!

New script – Rubber Band

cass-RubberBand

Rubber bands are one of those kinds of “fasteners” that can be very versatile. This script will let you create some with an almost infinite number of ways. Not only can you choose any color, but you can create them from 1000 to 4000 pixels long, from 20 to 100 pixel wide, and choose between 2 and 15 twists. In addition, you can have regular or slightly irregular twists, making this script perfect to get a different result every time.


What can you use rubber bands for? Maybe to wrap around a frame? To attach some flowers? maybe hold a charm or other pendant?


You can get this script in my stores: Creation Cassel and DigiScrapWarehouse.


And if you want a chance to win this script, go to the DST forum, here, and add your name to the thread.


cass-RubberBand-samples How about a little sampler? You can get those two twisted rubber bands for free, and you can use them as you want. You can color them, or use them as is. Double them, triple them around a frame or other element.

You need to be logged in to download this sample. You can either login, or register on the top of this page.
And remember, you just have a few days left to enter the big February Promotion.

New script – Element Stacker

cass-ElementStacker

You might know of the Element Separator script that can separate multiple elements from a single sheet into individual files. This script is somewhat similar, but instead of giving you many individual files to work with, it will separate each element into its own layer. That means that you can have 10, 15, 20 elements but all separated at the same time. And what advantages are there to individual layers? First of all, it is faster to copy and paste since you don’t have to make a selection around your element. But there is another trick that can save you a lot of time too. It is simply a drag and drop. You can see a little video explaining it in the product description.

This tool can be great for designers who want to offer three formats for their alpha: single sheets, individual files, and layered file. And for scrappers, this tool will help make their scrapper at least a bit faster.

cass-StackedAlphaYou can get this script in my stores: Creation Cassel, and DigiScrapWarehouse.

You can also add your name to the RAK thread here for a chance to win this script.

And to show you what you can do with a layered alphabet, i am giving you one that i made using my daughter’s handwriting when she was young. It is in greyscale so you can easily customize it to your layout. Each letter is on a separate layer, so you can copy and paste or drag and drop to use them. Your choice!

You need to be logged in to download this sample. You can either login, or register on the top of this page.
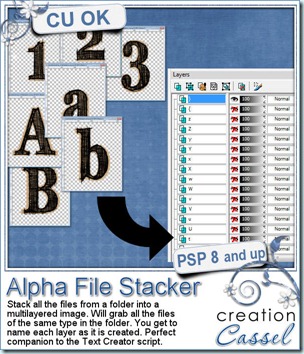
 

You can surely use this alpha to create a layout to enter the big February contest. Remember? You still have 10 days to enter! Check the details here.

New script – Stamped Paper

cass-StampedPaper

You can now create any size paper with any brushtip that you have. You choose any color palette (from 2 to 6 colors), the size, and the settings. You can opt to have all the “prints” in the same angle (like for text) or various random rotations. You can have all the “prints” using exactly the same settings that you set, or let the script vary the size, the saturation, etc. Try using this script with a texture brush to create your own textured overlay. Since the script uses a random feature, you will never get the same result twice. Run the script once, or continue to add more layers. In the end, use any layer you want, and delete the others. Apply effects to individual layers if you want. Change the blend mode for more possibilities.

The “stamped” layers will be added on a separate layer, so your initial image will be untouched. That means you can even run the script directly on your layout as you work!

You can get it in my stores: Creation Cassel and DigiScrapWarehouse.cass-StampedPaper-samples

And if you want a chance to win this script, hop over the DST forum and add your name to the RAK thread there.

And how about a few papers made with this script? I got a little pack of 3 papers for you, that were made with this script. You can see the end result of one run using the brushtip always at the same angle, and two with varied settings, including the angle of rotation.

You need to be logged in to download this sample. You can either login, or register on the top of this page.
And remember, you can use this FREE paper to create a layout and enter the February Promotion contest.

New product – Zippers tubes set #3

cass-ZipperSet3

Yes, another set of Zipper tubes for Paintshop Pro. I had 2 plastic and 2 metal zippers scanned and i extracted the teeth and the pulls. Just like for the other 2 sets, they are tubes that can be used along any path, or “hand drawn” in any shape you want. The pull bases are layered PSD format so you can insert different types of pull, change the color, etc.


You can find this set in my stores: Creation Cassel and DigiScrapWarehouse.


And if you want a chance to win this set, just check out this thread and add your name to it.


cass-Zipper3-sample

And now, is your free sample for this product. It is a PSD layered template. The pull, the zipper teeth and the “fabric” are on separate layers so you can change them or add other decorations to the pull. Just click on the image to start the direct download.


Remember that you can use ANY of my products for your third entry to the big February contest, including any FREE products from this blog.

New script – Airbrushed Paper

cass-AirbrushedPaper

Here it is. In full size too!

Using the script to create an airbrushed paper is only the beginning of the fun. Once the basic paper is done, you have an unlimited number of options to work with it. You can add blur (gaussian, motion, radial), you can smudge the “paint”, add a wave effect, an artistic effect, or even apply various filter effects. And then, you can use that paper to create elements, ribbons, brads, frames, or any other decorative element. Again, this script only works with Paintshop Pro.

This script is now available in my stores: Creation Cassel and DigiScrap Warehouse.

I also have a draw for you if you want a chance to win this versatile script. Check this thread, and tell me one idea of an effect you could add to the paper once the script is finished.

cass-AirbrushedSet-sample I know, you always look for something to see the product up close. Or, if you are not a PSP user, you want to play with the result, even though you cannot use the script. Well, this week, i created a paper with the script and then, made a few elements for you using that same paper as a pattern. You can get the base paper (with texture), in addition to 2 frames, and two brackets that were also run through the Acrylic script.

You need to be logged in to download this sample. You can either login, or register on the top of this page.


And, if you read the previous post about an upcoming contest, you might consider downloading this freebie (and many other freebies from this blog!). I’ll tell you on Feb 1st!

New tubes – Zippers Set #2

cass-ZipperSet2

Did you get the first set of zippers that was released a few months ago? Here is another set.  It was kind of fun to get my husband to scan the big winter coats. At first, he thought i was a bit weird to ask for those, but in the end, i managed to get some neat zipper teeth and pulls. Since they are tubes, you can place them wherever you want, along any vector path, and they will always be perfectly spaced. The pulls are layered so you can insert any other decorative element if you want.

You get 4 sets, and each set includes: one tube for left teeth, one tube for right teeth, one tube for closed teeth, one pull, and one layered pull base. They can only work in Painthshop Pro.

You can find those in my stores: Creation Cassel and DigiScrap Warehouse.

cass-zipper2-sample Do you want to play with the zippers? Check out this free sample i have for you. It is almost a template, using a zipper to frame two photos. This is 3600 x 3600 pixels layered PSD template with the zipper already placed and shadowed for you. Use both inserts to place photos, journaling or both.

You need to be logged in to download this sample. You can either login, or register on the top of this page.

Can you think of other kinds of tubes you would use in a kit or a layout? Just suggest it!