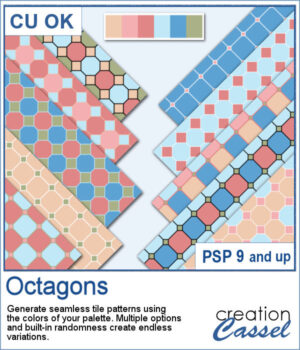
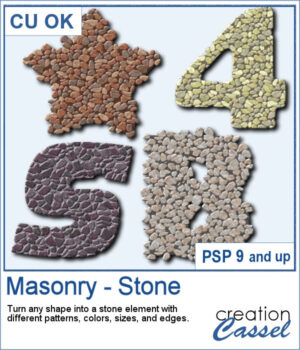
You can turn any shape into a masonry element, whether you want to have a fairly neat edge or give a more rustic look with full stones but more randomly placed on the edges. There are 5 different patterns with 3 different colors each. Furthermore, you can choose to have small, medium, or large stones.
One great feature of this script is that you can select different settings for each run, but if you need to create a series of matching elements, you can edit the script to set those preferences and it will run without asking you all those questions.
Get this script: Masonry-Stone
Want a chance to get this script for free? Head over to this Facebook post and tell us: What kind of shape or title would you turn into a masonry element? A date? A house number? Maybe a word like “HOME” or “STRONG”? (Remember — only comments count. Likes and shares are appreciated, but won’t count as entries.) A winner will be announced in next week’s newsletter. If you’re not on the list yet, you can join right here. It’s free, and we only email once a week!
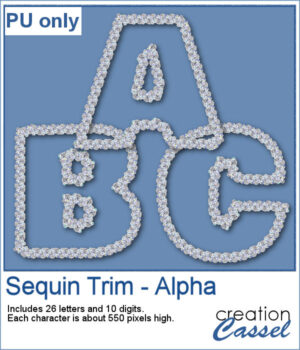
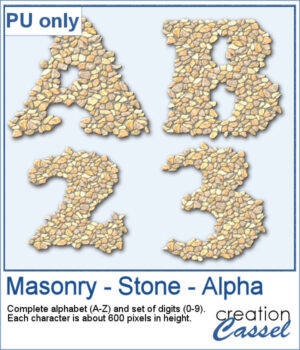
For a sampler, I edited the script to select the same settings for all the characters in a full alphabet and a set of digits. Each character is about 600 pixels high in PNG format so you can use them in any program.
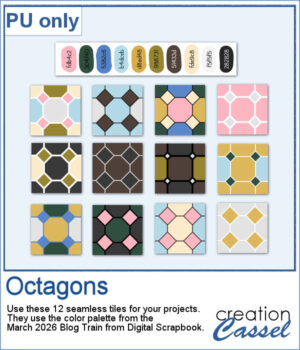
You need to be logged in to download this sample. Please log in or register using the links at the top of this page.

If you enjoyed the Sequin Trims for PaintShop Pro, they are now available for Affinity too!
Using these trims, I created three frames on a closed path. They were exported as PNG files so you can use them in just about any program to showcase photos, or even some journaling or other text.
Add a bit of sparkle to your projects with this new set of Sequin Trims for PaintShop Pro.
To give you a taste of this set, you can download a free Sequin Trim Alpha in a versatile silver finish.
Add a personal touch to your projects with the new Text Clip script for PaintShop Pro. Create custom paperclips in different shapes, colors, and styles, and add your own text to label, decorate, or highlight any element on your page. Whether you want something bold, subtle, or playful, these clips are as versatile as your creativity.
I created a set of clips with the script. I used the same shape, and the same font for consistency. You can also see that the text is slightly textured. Each clip is almost 400 pixels high, in png format.
Turn any photo into a mosaic of repeated shapes instead of simple squares. Choose from a variety of shapes or even create your own for a completely custom result. Each piece keeps the color of the original image, while the shape pattern defines the overall look.
To give you a taste of what you can create, here is a set of mosaic flower elements made with this script. These flowers come with transparent backgrounds, so you can use them on any project and combine them with your favorite papers or textures.
Add realistic fringe details to your projects with these image brushes for Affinity. Draw soft, vertical strands along any edge and customize the look with spacing and color variations.
For a sample, I had fun drawing fringes on top of a set of digits in Affinity. You get a complete set (0 to 9) plus a hyphen, in layered psd format. Since it is in greyscale, you can colorize the fringe to your liking in any program that will open psd files.
If you want to add a softer, more organic finish to your projects, the Fringes 3 picture tubes will do just that. It offers uneven, curly strands that follow any edge, giving a textured look similar to unravelled yarn or worn fabric. With 12 realistic colors that match existing thread and wool tubes, it’s easy to add movement and depth to your designs.
This week’s freebie is a curly fringe element created with the grey Fringes 3 tubes. Since it is grey, you can easily recolor it to match any project. The top border is made from the Wool picture tube. Use it as a border, along an edge, or as a decorative accent to add texture and movement.
Do you want a different shape for your frames? You can turn any ribbon or strip into an angled frame with the Octagonal Frame script for PaintShop Pro. You can use opaque or translucent ribbons, lace, or even wood planks (as long as the edges are straight). With adjustable corner cuts, you can easily create a range of geometric styles with various sizes too.
I created two frames starting with wooden images. Once done, I added some fine details around the edges. An inner bevel is added to the final result.
The Text Slats script for PaintShop Pro lets you create overlapping text effects that reveal your photo inside each letter. With customizable stroke, shadows, and overlap, you can easily highlight the most interesting parts of your image. Use the result directly on your photo or reuse the slats in other projects for unique designs.
For a sampler, I created some slats without any background so you could use it on any photo of your choice. I did have to do some manual work to remove the "fill". This is not part of the typical run of the script.
The Octagons script for PaintShop Pro lets you generate seamless geometric tiles using the colors from your own palette. Each tile combines octagon shapes with small diamond connectors to create bold, repeating patterns perfect for scrapbook backgrounds and digital papers. The script randomly varies the grout thickness, diamond size, and color arrangements, so every run produces a fresh set of coordinated designs.
For a free sample, I used the 10-color palette from the March 2026 Blog Train from Digital Scrapbook and generated 12 different seamless tiles. You can use any of them along with that palette to expand your stash.