Web
Analytics

Plastic Pocket Pages

cass-PlasticPocketPages-PL-Set1d

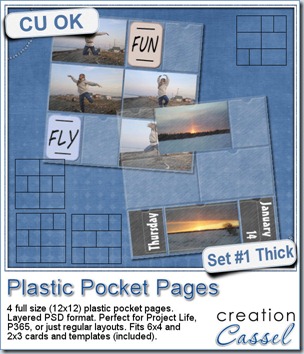
Whether you are into a Project Life mood, or doing a Project 365, or even just trying to add many photos to layouts, these plastic pocket pages can be a very versatile way of presenting your creations.

These 4 pages are FULL size so you can use one of those pages and cover the whole standard layout, or you can resize it down to cover only part of your page or you can crop it to use only one or two rows of pockets.

These pages have that simulated “stitching” between the pockets, and a cutout at the top of each pocket. The plastic is made to look like thick texture.

This set also includes a template for the cards or photos that would fit in the basic pockets. Use that template to create your own journaling cards, to cut decorative papers or trim your photos to size.

You can get this set of 4 pages in my store at Creation Cassel.

As usual, i have also a giveaway for you. Hop over to the DST Happy Place thread HERE and add your name to the thread telling me what you would be using those pages for. Are you into a Project Life group? A P365? Anything else? I will be back on Monday night with the name of a winner.

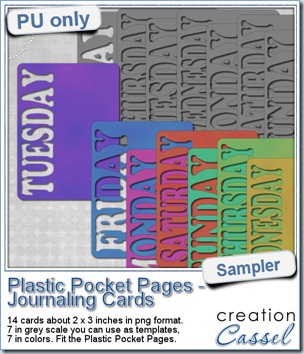
cass-PlasticPocketCards-sampleAs a sampler, i created a set of template cards with the days of the week cut out of the small base card. I also added a set of colored cards too. You can use them just like that or add the date on the card or even some journaling. That is all up to you. These cards are a perfect match to the Plastic Pocket Pages available in the store, but you can also use them on their own if you prefer.
You need to be logged in to download this sample. You can either login, or register on the top of this page.

Remember to show me what you do with those!

New Script – Snowflakes

cass-Snowflakes

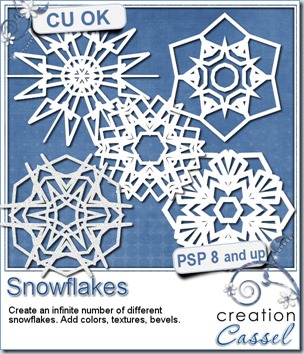
Whether you want to embellish a Christmas photo, or create a winter theme kit, this script will allow you to create an infinite number of 6 points snowflakes. Every design will be different, just like real snowflakes. The random feature incorporated into the script is the key part of the creation of unique snowflakes.

You can create  up to 15 snowflakes in one run of the script. Some snowflakes will be great, others might not suit you. This is totally random.

Once you have a snowflake created, you can change its color, add a texture, or even run it through a filter of your choice.

Each snowflake will be created in white on a black background so you can see better.

Use the same one with different effects, or collect several different ones. Sting them, tie them, cluster them.

You can get this script in my store: Creation Cassel.

There is also a random draw that can allow you to win this script. Check out this thread and add your name to it.

cass-Snowflakes-samples


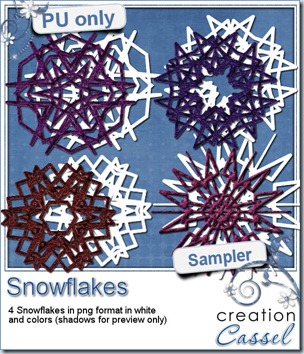
As a sampler, I created 4 snowflakes. You get the basic snowflake shapes in addition to matching snowflakes that have some textures added to them. They are all in PNG format, so you can use them in almost any program.

Use the colored snowflakes as is or you can change the color. Or you can use the basic white flakes and apply your favorite effect. Use Eye Candy or SBP if you want.

You need to be logged in to download this sample. You can either login, or register on the top of this page.


Breaking news

Just letting you know that i will be opening a new store on January 1st. I am excited to have another place to showcase my products and to work alongside other designers. Although i love my own store, it can also be a lonely place at times.

So, keep an eye on this blog, and my newsletter!

New script–Merge Group

cass-MergeGroupRename

You probably want to complete your scrapbook project as fast as possible. You probably have more than one page to finish and are running a bit out of time. This new script is just a wonderful time-saving tool to help you achieve your goal of finishing faster and more efficiently.

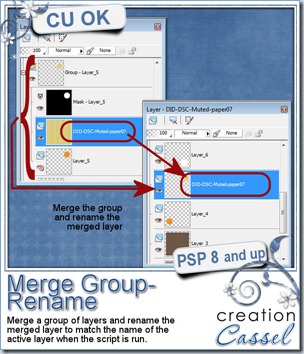
By default, when you merge a group of layers, it will keep the name of the top “layer” but that name is most often, not very meaningful. This script will remember the name of the active layer when you run the script and will rename the merged layer to that name. No fuss. No typing. No copying and pasting.

Without this script, you would require a total of 11 clicks to get the same thing (assuming you are copying and pasting instead of retyping), but with this script, if you bind it and place it in a convenient place, it will require ONE SINGLE click. Talk about saving time! that means that the process will be TEN TIMES faster than the old manual way.

This script can be purchased in my store: Creation Cassel.

This script is a perfect companion to a few others to speed up the scrapping process for any user. You can start by using the free script, Open As Layer – Rename, which will allow you to open one or more papers or elements just the way you would normally do, but it will take care of copying them and pasting them onto your current project in addition to renaming each layer based on the filename of those papers or elements. This allows you to remember what kit this element was from (assuming the initial file is named properly).

Once you have your papers or photos onto your work, if you are using a template, you will want the flexibility of adjusting their placement, rotation, and size without fuss. That is when the Clip To It script becomes another time saver in addition to making the process simpler and non destructive as it will “convert” the template shape into a mask from which you can see how the photo or the paper will look like before “cutting” anything.

Then, once you have your mask group, created by the Clip To It script, and you have adjusted the paper or the photo to your liking, it is time to merge it all in a single layer (if you want) using the Merge Group – Rename script.

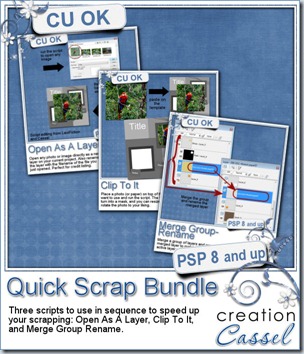
cass-QuickScrapBundleSince those three scripts are so useful in your toolbox to complete your scrapbook project faster, we also have the combo available for you. It is called Quick Scrap Bundle as it will do just that: make you scrap quickly.

This combo will include:

Open as Layer Rename

Clip To It

Merge Group Rename


Do you have plans to finish more projects in the coming year?

Are you rushed to finish those layouts before the end of the year?

Do you have a complete album project in mind and feel overwhelmed by all the work that will take?

These tools will save you a LOT of time, and make the process simpler.

You can also add your name to this thread in the Happy Place so you might win this combo of 3 scripts.


News from the Campus


Did you want more tips on scrapbooking faster? We had a presentation a couple of weeks ago called Scrapbooking on a Deadline where we looked at many tips, tricks and tools to achieve it.

ScrapbookingOnADeadline

The edited recording is currently available for online viewing for FREE.

Check it out here.

New script – Flat Paper Preview

cass-FlatPaperPreview

Designers often use a stacked arrangement for their papers in kit previews since most of them are identifiable easily with only a portion of the whole paper, but other designers have papers that are more like photos, scenic backgrounds, paintings, or incorporate some hand made designs that differ from one paper to the other. In those instances, having all the papers stacked up, and showing only an edge would not showcase the beauty of the whole papers. Designers then want to have the papers placed side by side so the viewer can see the whole image.

Creating those previews will require the designer to resize the papers, and align them on previews. With just a few papers, it might not be too long but if one has a dozen papers, or more as in a collab kit, this can become quite tedious.

cass-FlatPaperPreview-01cass-FlatPaperPreview-02

The script will do all the calculations, resizing, copying, pasting and aligning the papers. Save a lot of time because YOU dont have to open the papers one by one. YOU dont have to edit the script to find the papers. YOU dont have to bog down your PSP by having 12 full size papers open at the same time. YOU dont have to measure the size needed for the number of papers you want per preview. YOU dont have to align them all to look perfect. The script does all that work for YOU.

You can have the papers in 2x2, 3x3, 4x4, 5x5, or 6x6 arrangement and if you have more papers than will fit in one preview, the script will know and create multiple previews. If you have fewer papers than what can fit in the arrangement you picked, you will have empty spots and you can move the papers around. The script will place guidelines to help you move the papers and keep them aligned perfectly, without any difficulty. Each paper will be on a separate layer AND renamed to match the filename. This will help you identify which paper is which.


This script can also be used to display QP and templates if you have several to showcase!


You can grab this fantastic time-saver script in my store: Creation Cassel

As usual, you have the opportunity to win this script by posting in the Happy Place RAK thread HERE. Tell me if you ever used a side-by-side paper arrangement before. I will be back on Monday night with the name of a winner.


cass-RibbonTree-GiftTagsSince this week script is a tool, i chose to offer you some Christmas Gift tags made using the Ribbon Tag trees submitted by the users of the Ribbon Tag Tree script during our contest last month.

I used two of the trees submitted by Dianne. One was made with organza ribbons (i think she created the organza ribbons from scratch from a tutorial in the Element Creation Tutorials class of the Scrapbook Campus).

The other tree was made with straight rows of tubes: bead tube and garland.

The last tree was made using recolored version of a single extracted ribbon.

Use those tags on presents to put the name of the recipient of your gift, place them at the table with the name of the guests, etc. Each tag is a png image 600x300 pixels.

You need to be logged in to download this sample. You can either login, or register on the top of this page.

New script – Textured Overlay

cass-TexturedOverlay

Sometimes, you might have a collection of overlays and want to use them but you dont want all your papers to look exactly the same. One solution? You grunge them a bit. However, it is long to randomly delete areas, change the angle of the eraser tip, change the size, or even change the eraser tip altogether. This script for Paintshop Pro will do all the work for you. What do you have to do? Open the overlay, run the script, pick the eraser tip and decide if you want to erase a little or a lot. That’s it. The script will erase dozens or hundreds of times, randomly, while you just watch.

You can continue running the script as long as you want to remove as much as you want. This is the perfect tool if you want to use a consistent texture across a set of papers without having the exact same look on each of them. Since there is a random feature coded in the script, you will ALWAYS get a different end result even if you start with the same overlay and eraser tip.

See what other results you can get with multiple runs of the script using the same settings and eraser tip (you can then play with the opacity and the blending to get yet, a different result):

cass-TexturedOverlay1  cass-TexturedOverlay2

You can get this script in my store: Creation Cassel.

As usual, this script is also available to win. Check out this thread in the Happy Place forum and add your name to the thread (remember to answer the question from the first post!). A winner will be announced on Monday night.

cass-TexturedOverlay-sample-Christmas


As a free sample, i created these three holiday themed papers using a texture image i scanned and ran that texture layer through the script to get 3 different results. Since i lowered the opacity a lot, the end result is a subtle texture.

They are all 3600 x 3600 pixels so you can use them as background papers for a layout, for a Christmas card, or you can cut them to create holiday gift tags, name tags, frames, etc.

You need to be logged in to download this sample. You can either login, or register on the top of this page.


New font – Petals

cass-Petals

Your program probably has some kind of vector flower shapes. How many? It depends on your program. But with this new font (yes, it is a FONT), you can create so many more designs.

This font includes 50 different petal shapes: some are similar but in different width so they make a great match to use in combination. Since they are fonts, you can use them around a vector circle as they will go just like a “text on path”.

Use any size you want since they are vector and they wont pixelate; you will always have smooth edges no matter how big you create the flowers.

But flowers are not the only thing you can use these for: create frames and borders. Repeat the same shape or alternate two or more. Choose any color or gradient or pattern, or “clip” a paper on them for a really matching element to your project.

That is not all. Do you own a cutting machine? you can create some gorgeous quilled flowers using a straight line of petals, cut them with the machine and then tightly roll them. Look at the fantastic result Connie got with this:

IMG_20121129_195951

In fact, it was Connie who gave me the idea of this petal font. She initially used the Lace Edge font to create some quilled flowers. The number of designs was much more limited for this purpose so when she sent me the first sample, she said “it would be nice if you had other shapes”. And here we are now with a full set of 50 different petal shapes. Of course, not all the shapes are suitable for quilling, but they can be used to create vector flowers.

And But this is not all: since this is a FONT, it is not program specific. This means that, unlike most products in my store, you don’t have to have Paintshop Pro to use this font. You can use just about any graphic program including Photoshop and Photoshop Element. I didn’t try other programs, but i assume they would also work fine.

You can grab this FONT in my store: Creation Cassel.

cass-Petals1-sampleAnd as usual, i have a random draw where you can win this product. Head over to this thread in the DST forum, and tell me what program you are using (since this font works in most of them). I will be back on Monday with the name of a winner.

As a way for you to see this font “at work”, i created three layered flowers using it. They are PSD files so you can use them in PSP or PS or PSE.

For the white petals, i used the letter “d”. For the purple petals, i used the letters “u” and “v” on different layers. And for the yellow petals, i used alternatively the “U” and “W”. You can surely create many many more designs.

You need to be logged in to download this sample. You can either login, or register on the top of this page.

Remember to show us what you do with them.

New script – Kidnap Alpha

cass-KidnapAlpha

If you think that creating something very regular and even is long and tedious, try to create something that is totally random! It is not any faster, i can tell you. This script will allow our Paintshop Pro users to create totally random pieces of papers with various characters on them to write messages, titles, etc.

This script relies heavily on the random function to shuffle all the choices you decide: you can choose up to 6 colors, gradients or patterns for the papers; you can choose up to 6 colors for the text; you can choose any number of fonts; then you type in the text you want (or the whole alphabet). From there, the script will shuffle the data AND will also (if you want) randomly change the case for each letter. And even the shape of each piece will be randomized. Notice how the “2” appears 4 times in the preview, yet it has 4 different shapes/sizes/paper shades. You can even run the script multiple times with the same choices and get a wide range of results.

You can get this script in my store: Creation Cassel.

Do you want a chance to win this script? I am sure you do! You can simply add your name to this thread in the Happy Place, and tell me what kind of project could use that kind of alpha. I will be back on Monday night with the name of a winner.

cass-KidnapAlpha-sample-whiteDo you want to play with some of those letters? I created a random alpha for you using this script. I used 3 different fonts and the text is in grey so you can colorize the pieces to match your project. The set includes 26 letters, 10 digits and a few punctuation marks. There is no uppercase/lowercase since they are randomized anyways.

Will you show me what you do with this alpha? I might just share it in the newsletters.

You need to be logged in to download this sample. You can either login, or register on the top of this page.


New script – Ribbon Tag Tree

cass-RibbonTagTree

I always loved those stylized trees, mostly seen around the Holiday time, but in other situations too. Using ribbons, it is fun to create those trees, but it is tedious to do. You can probably create such a design in any graphic program, but to make the process faster, you can now use a script for Paintshop Pro.

Unlike many other scripts, this one uses actual ribbons that you provide, instead of just choosing a color or a gradient. You surely have some straight ribbons in your stash, extracted ribbons, colorized ribbons, etc.

You can use a single ribbon, or several. You can have the script use the ribbons in sequence, or choose which one to use at random. Use thin ribbons, thick ones, lace ones, edged ones, translucent ones, etc.

You can have the ends cut straight or at an angle. You can have all the pieces perfectly horizontal, slightly rotated or more wildly rotated.

Everything ends in unmerged layers so you can still tweak the result, add decorations, adjust some pieces, change the colors, replace some pieces, weave other elements between them, etc. The possibilities are endless. Beware : this is addictive!

You can get this script in my store: Creation Cassel.

There is also a draw coming up on Monday night and you can win this script (even if you already purchased it). Just check out this thread, and name a creative way you can think of customizing the end result from this script.

cass-RibbonTagTree-sample1I created this tree using 3 copies of the same ribbon that i colorized 3 times. I added beads that came with one of my PSP versions, and the ornaments are also tubes from PSP. All the ribbon pieces are on separate layers. All the beads are on one layer, and the ornaments on another layer, so you can remove the beads or the balls, or both and use the other parts to your liking. There is a slight drop shadow on each piece, but it is small enough that you can add your own, make some branches rise (or drop), you can insert other decorative elements between the branches, etc. This tree is in PSD format, so most of you can use it.

Will you show me how you are using this element? Maybe make a Holiday card?

You need to be logged in to download this sample. You can either login, or register on the top of this page.

If you like this script, or this freebie, and if you think someone else might like it, don’t hesitate to tweet about it, or share on FB. PSP users are always on the lookout for great products, aren’t they?

New script–Button machine

cass-ButtonMachine

Buttons are standard fasteners in many layouts and digital scrapbooking kits. Finding the right color to match a kit or a photo is sometimes a challenge. This script will allow you to create multiple buttons with the color, gradient or pattern of your choice.

When you have a single button and you want to rotate it to make the whole project less “cookie-cut”, you might run into the problem of the bevel and shading no longer matching. With this script, the holes will be randomly rotated but the bevels will always be aligned in the exact same direction.

In addition to generating buttons in 4 different models, the script will also add a slight variation in brightness and contrast and add more unevenness with some shaded spots. This means that even with the same starting color, and the same button model, the buttons will be slightly different.

The script will allow you to generate up to 15 buttons in one run. You can also choose what size you want it in the end. The script works with a starting size of 500 pixels in diameter for better quality, and then you can choose to have each button resized as small as 100 pixels.

You can get this fun button making script in my store at Creation Cassel.

For a chance to win this script, you can go and add your name to the DST thread in the Happy Place, HERE and i will be drawing for a winner on Monday night.

cass-ButtonMachine-sample-Christmas

This week, i created a set of 20 buttons (you never have too many buttons, right?) in holiday colors. You can use them as is, or add some personal touches, like glitters. You can use them in a holiday themed layout, but you can surely use them in many other types of layouts. Green goes well with the outdoors, red goes well with Valentine day, yellow goes well with any sunny outside photo and the white would be the most versatile color to use on anything.

You need to be logged in to download this sample. You can either login, or register on the top of this page.


New script–Houndstooth and Herringbone

cass-Houndstooth&Herringbone

These designs are fun to use but a pain to make. To do that manually is tedious. Using a template might work but you still have to pick the colors and fill and such.

This script for Paintshop Pro will let you start with the color palette you want (you can choose from 3 to 6 colors). The script will add white and black as default colors too. Then, you choose a few options if you wanted to create the herringbone pattern (there is no option for the houndstooth one) and decide how many tiles you want. That’s it!

The script will randomly mix and match the colors to generate the tiles. Of course, some color combinations might not suit you, or might be odd. That is ok. You just delete those tiles, and keep any other that you like. Remember that if you start with only 4 colors, you will have a possibility of 1200+ different tiles, and if you start with the maximum of 6 colors, you can get over 4000 possible combinations! You will not be bored!

It is so easy to use!

You can get this time-saving script in my store: Creation Cassel.

Do you want to get this script for free? Enter the draw in the DST Happy Place thread HERE. It is really simple, just as simple as using the script! Tell me if you would first use the houndstooth or the herringbone pattern and i’ll be back on Monday night with the name of a winner.


cass-Houndstooth&Herringbone-sampleFor a freebie, this week, i created a set of seamless tiles based on a little earthy palette that should be fairly neutral (i am even including the palette complete with the hex # for each color). You will find 15 different tiles: 3 for the houndstooth pattern and 12 herringbone patterns. Use them in any program whether it is Paintshop Pro or Photoshop or Photoshop Element, or any other graphic program that can take outside “patterns” in jpg format. Use them to floodfill elements, create papers, etc.

You need to be logged in to download this sample. You can either login, or register on the top of this page.


Happy Digital Scrapbook Day!


Whether you are a scrapbook fan or just like to do edit your photos, or make cards, or even just play with your Paintshop Pro, you will love to know that everything in the store is 40% off for today AND tomorrow (November 3rd and 4th).

40% off

November 3-4, 2012

You better take advantage of this as it is a pretty rare occurrence. There aren’t many big sales like that in the store.

Even if you are not a Paintshop Pro user, you can still take advantage of this super sale to grab one of my very special fonts. Those fonts to create stitches, or edges, of banners, or even hinges can be used with other programs, wither you are using PSE, CS, or even GIMP. Can you use outside fonts? Then check out the FONTS section.

And if you don’t have PSP and would still want to take advantage of all the great scripts and tubes from the store, you might still want to look at purchasing your copy of Paintshop Pro. It would be a great addition to your “toolbox”. And you can always try it for 30 days and see how powerful it can be.

Get your copy of PSP.