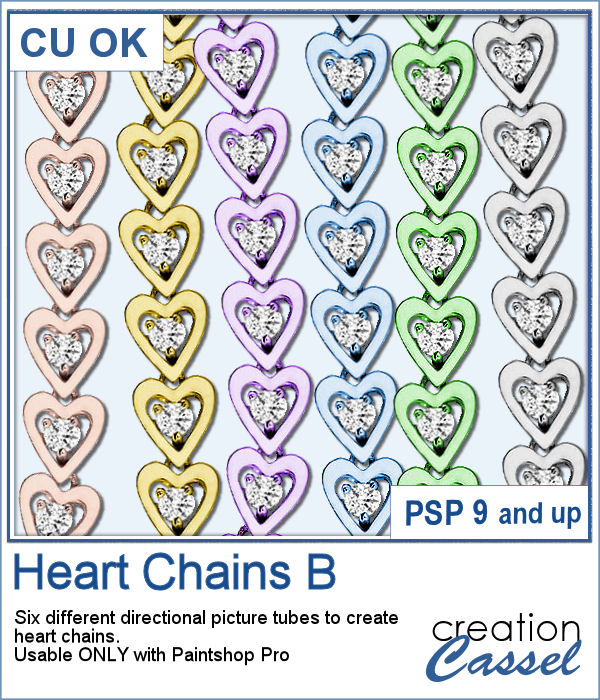
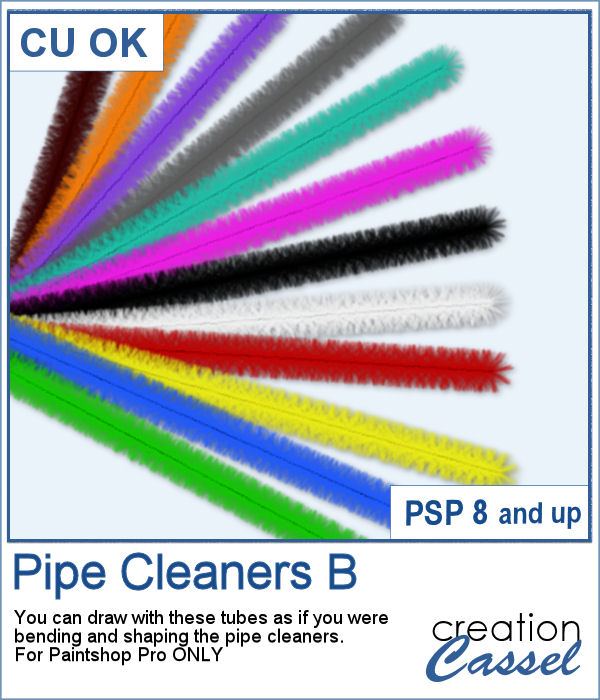
Web
Analytics

New script – Custom Photo Cards

cass-CustomPhotoCard

Our Custom Playing Cards were a real popular script a few months ago and after seeing some flashcards, i figured that it might be interesting to have photo cards with a word or phrase instead of a single card value.

These cards are a little bit more customizable as you can choose to have square or rectangular cards, and you can choose the card color, the text color, the font and obviously the text itself. And finally, as expected, you can have the photo you want too.

What could you do with those cards? I can imagine having school photos of your child, from kindergarten to graduation, with the grade listed on each card. Or how about having one card made for each member of the family? Or why not use those cards for your Project 365 or 52 to add a date on each photo? Or even just a short description.

You can grab this script in the store. It is the Custom Photo Card script.

But you can also get this script for free. Post your name in this thread in the DST Happy Place section for a chance. I’ll be pick a winner next week.

cass-CustomPhotoCards-DaysWhat would you think of having a card for each day of the week? I created these layered template cards with the days of the week. You can use the Speed Scrap Scripts, or the Clip to it to replace the template with your photo. Or you can also do it manually, if you prefer.

If you want this set of cards, just click HERE. (if the link is not active, just login or register on the top of the page)

You need to be logged in to download this sample. You can either login, or register on the top of this page.

What will you do with those cards? Maybe create a 2 page spread to show photos of your week-long vacation? Whatever you do, just post a link to it so we can admire your masterpiece.

New script – Punched Confetti

cass-PunchedConfetti

Did you ever spill all those little pieces of paper from a three-hole puncher? Those nasty little pieces are a dream for kids and crafters. But what about digital artists?

To cut out little circles out of papers can be ok if you are only doing a few, but if you want to recreate the look of a bunch of them randomly spilled (or skilfully arranged!), that will take you forever and a day.

This is a script that will do everything for you and will turn those tiny bits of papers into a tube (check out this article for more information on what can be done with Picture tubes in PSP) . This will then allow you to “spill” those pieces wherever you want, on a project.

You can embellish your pages by adding confetti as an accent in a corner, have some gold and silver confetti for a celebration project, create a border of confetti or add to a flower cluster. You can use a little confetti or a lot.

And this script will not ask you to choose a color; that would be cheating! It will ask you for PAPERS. That is what confetti are from, right? And the pieces will come from randomly selected sections of the papers, they can be rotated and even sized slightly differently if you want (but that is optional). You can work with a single paper, or a series of papers. You can just create a paper with a gradient too, if you want the colors from that gradient (or you can create a gradient from the color palette you are working on).

See other examples of confetti created with a single patterned paper and a gradient paper.

cass-PunchedConfetti-01 cass-PunchedConfetti-02

There is so much you could do. Grab this time saving script now: Punched Confetti.

And for a chance to win this script, head over to the DST forum in THIS THREAD and tell me what you would do with those confetti. I’ll be back next week with the name of a winner, which will be announced in the newsletter.

cass-PunchedConfetti-Blue-White-RedDo you want to see those confetti up close (and personal)?

Here is a set of 3 confetti spills in simple blue, white and red colors. They can be used to embellish a celebration layout (the 4th of July is around the corner and so is the 14th of July). But you can also use them for any other type of layout. Those simple colors can also go very well with a kid themed layout.

They are proportionally spilled based on a 3600x3600 pixels layout, which means that the tallest one is close to the 3600 pixels height.


You need to be logged in to download this sample. You can either login, or register on the top of this page.

What will you do with these? Show us your masterpiece.

Pockets to scrap with – a free sampler

cass-PocketScrap-sample01

What do you think of Pocket Scrapping? Do you think it is only for “traditional paper scrappers”? How about giving it a try?

Here is a 3000x3000 page, made with 6 individual pockets, and matching card templates.

You can replace any card by a paper (or clip a paper or a photo to it), or remove it and place an element in the pocket instead, or you can remove the plastic layers to create a simple blocking look on your page, with room around it for other details you might want to add.

Interested in giving it a try? This is a PSD layered file so most graphic programs can use it.


You need to be logged in to download this sample. You can either login, or register on the top of this page.

And remember to show us what you make with it.

P.S. this is a BIG file to download.

New script – Pocket Scrap

cass-PocketScrap

Pocket scrapping has become popular with tangible paper scrapping as a way to quickly set up a page with pre-cut cards where you could add notes, journaling, titles, and pockets where you could simply insert photos.

Digital scrapping can already be quick (although it could also be slower depending on your style) but the pocket look could be an interesting one for you. If you like that look, you still have to find those digital plastic pockets and overall, the number of different pages is fairly limited, but with this script, you can create a wide variety of pages, with many different number of pockets and also different shape, format and arrangement.

Furthermore, the script will also create card template for each of those pockets, no matter the size or format. How is that for a help to create your own pocket scrapping?

But that is not all. If you like the idea to have nice cards (instead of the basic grey ones), you can open your favorite papers and let the script create cards using random papers of the perfect size and place them in the correct pockets too. And since everything is left on unmerged, you can change any card for a photo, or remove it completely to place your concert ticket instead.

You can get this Pocket Scrap script in the store.

You don’t necessarily have to stick with plastic pocket; use the script to do some color blocking (and tweaking any block to your liking) to add various text and journaling, or replacing any card by photos.

cass-PocketScrap-01 cass-PocketScrap-02

What will you create with this script?

New script – Photo-Masks

cass-PhotoMasks

A while ago, as i was looking through galleries, i noticed that some scrappers are using masks to add a fun edge around their photos. That gave me the idea to try making a mask for my own photo, but i had a hard time figuring something “different” and i wished i had a way to randomize my effects.

Randomization is a great function that can be coded into scripts, so i thought a script was going to help me. And it did.

This script will use several regular effects in Paintshop Pro and combine them to create unique edges around photo AND has the additional function to create the mask in a black and white image so that the exact same effect could be obtained with another photo if needed.

Initially, this script was only working on a regular full size image, but i know that some interesting masks are not rectangular, but round, elliptic or in any other shape. In addition, the focus is not always in the center so this script allows you to make a selection where you want the focus to be, if it is not in the center.

See other examples of photo edges and matching masks can be generated with this script.

cass-PhotoMasks-01  cass-PhotoMasks-02

Isn’t that interesting that you will get the mask based on the photo edge instead of the other way around?

Go grab this unique script in the store: Photo-Masks. It will be on sale until Tuesday, June 17th.

Do you want a chance to win this script? Check out this thread in the DST forum and add your name to the thread, while answering the question in the opening post. I’ll be back next week with the name of a winner.

New Script – Alpha-Tokens

cass-Alpha-Tokens

Wooden or plastic tokens are a fun variation on tags to place letters or numbers. Having them cut out of the token is another fun change.

Although one can probably easily create a cutout from any shape or material token, it quickly becomes tedious to create several for a whole alphabet or a date with 8 digits.

This PSP Script will let you create a whole alpha, with any font you want, on any type of token you want, round or square, with or without a decorative edge.

You can also create blanks (if you want to add a painted effect) or others with designs on them, like preset shapes or hand drawn ones.

Although you can, in theory, use any font, some of them might not give a great result. This is the case if you have a font that is excessively tall or wide. The script will try to resize the height or the width, but if the other measurement is a lot more important, the resizing will not yield a suitable result.

You can grab this fun script in the store: Alpha-Tokens script.

New script – Twisted Text

cass-TwistedText

Although we often like to have regularly placed and perfectly aligned text, on some occasions we really want something funky and irregular. Do you know how to place each letter individually to create a funky text?

One method will require you to type one letter at the time, and rotate it and move it. Then repeat for the second letter, and the third. It is not hard, but it is definitely time consuming especially if you have more than just a handful of letters.

The other method is to type your text, normally, and then go with Objects > Convert Text to Curves > As Character Shapes. This will separate individual characters and convert them to shapes. Although they would remain as vector objects, they lose their Text properties: you can no longer change the font.

Finally, the third method is using this PSP script. In fact, the script will use the first method for you but much much faster. You can choose any text (any length), any font, any color (or even a gradient or a pattern), you choose how much rotation and displacement you want, and if you want to have the colors (in case you picked more than one) to appear in sequence (like in the alphabet in the preview) or in random order (like in the “Suzanne” of the preview).

Each letter is left, at the end, as individual vector objects, and still as text so you can, if you want, change the font for one or some letters/characters. You can also change the colors if you want or rearrange the letters. In fact, you can just use the randomly rotated letters and place them all around your layout if you prefer; no need to keep them in line either!

Grab this time saving script and have fun with Twisted Text.

If you want to learn how to create that kind of effect, manually (hopefully for only a handful of letters) and other fun text tricks, check out the Texting Again Master Class in the Scrapbook Campus.

Multi-Photo Frame – Sampler

cass-MultiPhotoFrame-3x1

What would you do with a multi-photo frame? Here is one such frame created with the Multi-Photo Frame PSP script. Each photo placeholder is 600x800 pixels, which would match a 3x4 inch photo (just resized).

All the layers are left unmerged (including the shadows), so if you prefer to combine two adjacent photos into a larger one, you can do it on another layer, and remove the initial two.

How about removing the middle placeholder and have the photo under the white mat? Yes, you can do it as there is a hole hidden under that placeholder, complete with its shadow too!

This frame is in PSD format, so even non-PSP users can play with it.

You need to be logged in to download this sample. You can either login, or register on the top of this page.

(if the link is not active, just login or register on the top of the page).

What will you do with this? Show us. You can either post in the comments below, or on the FB page HERE, or pin on our Pinterest PSP Scrapbook Pages board.

(if you don’t have “permission” to pin on that board, just ask for an invite)

New script – Multi-Photo Frame

cass-MultiPhotoFrame

In many situations, one would like to have multiple photos in a single frame. Maybe you want to have all 12 school pictures of your child, or one photo for each of your 3 kids, or a calendar of 30 photos for a month. Whatever the purpose of a multi-photo frame, it is fairly easy to do, BUT it is  tedious.

To get a perfectly aligned set of photos, you need to use guides, many guides, especially if you also want to have the spacing even.

This PSP script will take the aligning, and measuring task off your hands. Simply start with a single image in the size you want the photo placeholders to be, choose how many rows and how many photos per row, the spacing and the size of the mat and watch it do all the work for you. Go grab a coffee and it will be done when you come back.

The script will create everything on separate layers, including the shadows. And if you don’t want the photos to be on top of the white section, no problem. That white section is actually a mat with matching holes so if you remove the photo placeholders, you will still get a multi-photo frame, where you can slip a photo or many photos underneath (and that mat also has a drop shadow!).

One additional detail you MIGHT have noticed: this is CU4CU, meaning you CAN create templates for CU purpose.

Grab this time saving script: Multi-photo frame script.

You can change the spacing and the size of the outer mat to get completely different frames, even if you are using the same placeholder size. And since everything is on a separate layer, you can always tweak the result, remove some placeholders, replace others for a completely new look.

cass-MultiPhotoFrame-1 cass-MultiPhotoFrame-2

What would you use such a frame for? Tell me in this thread, and you will get a chance to win this script.

New script – Worn overlay

cass-WornOverlay

I have looked through my stash of overlays and although i have a pretty good number of them, i always feel like i don’t have the one i want. I have lots of standard size and shape ones, but they are a bit awkward to use on a different shape element, especially if the edges are worn too.

So this script for Paintshop Pro was created. It will use any shape you have, any size. This means that you can have a photo in an odd format, you can have a frame, you can even have individual letters for an alpha and the script will create something exactly for that shape.

And with the random feature, every run will give you something different, even for the same starting element. Isn’t that fun? That means that if the script gives you a particular overlay and you don’t like it, simply undo it, and run it again, and you will get something else. Repeat until you have something you like. It is so fast, that you can run the script 10 times in the time it would take you to create a single overlay, manually.

Grab this script in my store: Worn Overlay script.

See a couple of examples of other results, one with a photo and one with a simple arrow to be use in a project.

cass-WornOverlay2 cass-WornOverlay3

cass-WornOverlay-tagLet’s have a closer look at what this script can create. I started with a simple tag shape, in grey. I left it in vector format as the script knows what to do with it (meaning, if it is a vector, it converts it to a raster to continue). I ran the script 4 times on the same image. Since the image was less than 1000x1000 pixels, it worked on a resized version of the image (because the effect, done on a smaller image is not as good). However, the script is smart enough to resize the overlay once it is created so it will match the starting element.

On 3 runs, i asked to have an obviously worn border, so you can see the white edge. On the last run, i chose not to have an obvious border. It still adds a faint edge in some spots, but it is definitely not as obvious as the other three!

All four overlays AND the base tags are included in the zip file, so you can use the tag shape as a template and just layer the overlay. Then, it is up to you how you want to “merge” them. Depending on the color or pattern of the tag, you can darken the overlays and make them black, or you can use a blend mode. Also, since they all fit on the same shape, you can even layer more than one overlay for an even more tattered look!

You need to be logged in to download this sample. You can either login, or register on the top of this page.

(if the link is not active, just login or register on the top of the page).

The download link will only be available for a limited time.