Web
Analytics

New script – Folded Edge

cass-FoldedEdge

Creating a folded edge on papers, photos or mats can add a definite 3D effect, but it is not always easy to do.

If you are using templates, with each folded piece on a separate layer, you can probably get away with using a plain type of paper, however, as soon as you want to use a patterned paper, or something directional, the templates will not give a realistic result.

Creating the folds manually is one way to get the correct angles on the patterns, but it is quite tedious to match the angles whether you are using the Pick tool or the Rotate function. But, yes, it can be done.

However, using this script will make the whole process much faster and more accurate.

You can use a single paper, and have it fold on itself with both sides being identical or you can pretend you have a two-sided paper, by using two different papers layered on top of each other before you run the script.

The folds will also be custom made. You will choose how many folds you will have, where they will be and how deep they will be because you will place the dots where you want, and the script will execute the commands based on those dots. You can have as many dots as you want, anywhere you want, for a custom look.

You can get this Folded Edge script in the store.

See how this script works:

FoldedEdge


Do you want a chance to win this script? Check out this thread. Tell me how you would create a folded edge if you didn’t have the script. I’ll be back next week with the name of a winner.

See what can be done with a photo and a slightly patterned paper as the “backing”:

FoldedEdge-Photo

What i did was open a large photo, and added a greyish paper on the layer below. I ran the script on one edge (the top one) first. Then, because it made for a lot of layers and because i was fairly happy with the default shadowing, i hid the photo and paper layers and merged the visible layers. That gave me one layer for all the top folds.

Then, i moved the photo and paper layers on top of the layer palette and ran the script for the right edge. Again, i merged all the little pieces for the right edge making sure i didn’t merge the ones from the top. This allowed me to erase the little bit that extended beyond the right edge (the script didn’t know i had run it on another edge before).

Then, i repeated the same thing for the other two edges. Finally, i just moved the photo below all the folded edge layers.

What do you think?

New script – Ribbon Tag Corners

cass-RibbonTagCorners

In traditional paper scrapbooking, what would you do with small bits and pieces of ribbons? I am sure you can think of many things you could do. In fact, i saw someone create fun little corners with ribbons and i figured it would be interesting to have a script to randomly select ribbons, cut pieces and a arrange them more or less like a corner and add a fastener.

I know, it is easy to cut two pieces of ribbons, and layer them together. But it is so much more fun to have the option to have 10 of them created in one run, all different and simply pick our favorite.

With this script, you can choose to have as many starting ribbons as you want, and you can create up to 10 corners at once. You also have 3 fastener options: brads, eyelets or staples. For the brads and eyelets, you can choose the color or pattern you want so it is easy to have something that matches the actual ribbons you are using, or you can have a metallic pattern for them too. If you choose staples, there are some staples that come from Rachael’s Scraps, included in the script. Or you can also choose to have no fastener added by the script so you can add your own, like a button, a gem, stitching, or any other element you have in your stash.

You can grab this fun Ribbon Tag Corners script in my store.

You have a chance to win this script for free by adding your name to this thread in the forum. I’ll be back next week with the name of a winner.

cass-RibbonCornerAs a sample of what you can do with this script, i have this one. I started with 3 ribbons from Rachael’s and generated 5 corners. I only picked one to work with.

First, i chose the eyelet as a fastener and used a gold pattern instead of a solid color. I think it turned out pretty good.

I added shadows on separate layers for the ribbons and using the Warp Brush, i tweaked the shadows on the ends of the ribbons to give the impression that they were lifted.

For the eyelet, i thought it would be cool to imagine that the ribbons were thick and the eyelet was very tight so i selected a circle almost as large as the eyelet itself, inverted the selection and then, on the top ribbon, i added a wide inner bevel. That is what gives that impression that the ribbon is “indented” by the eyelet. Isn’t that a cool effect?

You need to be logged in to download this sample. You can either login, or register on the top of this page.

New brushes – Corner punches A and B

cass-CornerPunchesA cass-CornerPunchesB

Last week, i released a set of brushes to be used like corner punches are used in the traditional paper crafting world. Those brushes are really brush tips that can be used with the Eraser tool to punch out the design but they can also be used with the Brush tool to add a corner “stamp” to the projects.

These brushes were so well received that i thought of making a second set, using mostly circles (the first ones were using mostly squares). They work exactly in the same way.

Each set includes 12 different designs, in two sizes: 500 pixels if you are using PSPX and older and a 999 pixels if you are using a newer PSP version. Of course, you can always size them down when you use them to match your particular project. Add a rotation and you can punch all four corners.

(and there is also a set for PS and PSE users!).

You can get those sets here:Set A and Set B.

There is still another thread in the DST forum where you can add your name and have a chance to win this Set B. Check out this thread, and tell me what graphic program you are using. I’ll be back next week with the name of a winner.

Are you unsure how to install brushes in PSP? No worries. I uploaded a short video tutorial just for you. You might also want to subscribe to this new channel so you can see the newest videos i will upload as i do.

cass-Ready-to-Use


If you are not yet subscribed to the newsletter, get on that list now! It is free to register and you get advanced notice of sales, and exclusive tips and tricks to make you more efficient with your PSP.

Register NOW

New script – Stitched Edges 2

cass-StitchedEdges2

If you love the look of stitching around the edge of elements, letters and shapes, you will LOVE this script. It is using a simple tube to create the stitching, and another tube for the holes.

Using any vector shape, you will just run a free script (that you’ll have to download separately) and follow the steps. The script integrates various options, like the width of the edge, the puffiness, the texture of the element and even the color of the stitching as it will colorize it for you. However, in the end, you will have unmerged layers, so you can tweak the color further, or add other details to the element, like shading, stains, or other printing.

Use preset shapes or draw your own. It is also great to create alpha in a (almost) single operation.

The zip file includes the thread and hole tubes that you can also use separately, in other projects.

You can grab this Stitched Edges 2 script in my store.

If you want a chance to win this script, check out this thread in the Happy Place and tell me what element you can think would really use some stitching around. I’ll be back next week with the name of a winner.

cass-StitchedEdge2-sample-WhiteDigitsFor this week, i decided to play with the idea of creating a whole alpha in one run with this script. I started with the digits (as there were fewer elements in the end). On a large image, i typed in the digits in white. I had to adjust the kerning to make sure the letters would not touch each other when the edge was added. Then, i ran the script. Everything went smoothly from there. I added the texture that came with the Clothes Label script to give a more “fabric” texture to those puffy digits.

Once the whole set of 10 digits was done, sewn and puffed, i just used the Alpha Sheet Separator script to cut out, and save all the individual files. That took less than one minute!


You need to be logged in to download this sample. You can either login, or register on the top of this page.
With the speed and ease of doing this set of digits, i could not help myself than repeat the process with the full alpha! And you can get it in the newsletter. If you have not yet subscribed, fill out the form on the left.


News from the Campus

TubesWithDirection-400This month, the live presentation will be about directional tubes. Do you know about those? Do you know what they are? Did you ever use them? Although you might know that Picture tubes are unique to Paintshop Pro, you will love to learn that the directional tubes are so much more powerful!

Join us this Sunday, March 2nd, at 5pm Eastern Time.

RegisterNow-01-200

New script – Custom Playing Cards

cass-CustomPlayingCardYou can be an Ace, or a King or a Queen all you want with this fun script. Although you could, conceivably have a separate template for all 52 cards of a deck, this script will just do the cards you want without the need to search for the correct template.

You can have four of a kind, or a full house, or a royal flush in hand.

Just pick the value and the suit for the card and the script will create it. Then, open the photo you want to display and the script will take care of resizing it, and will create a mask for you so you can actually SEE what it looks like as you can move, resize or rotate your image in that “space”. If the image is higher than the card, the script will resize it. If your image is in a landscape format, you will get the option to either keep the full height of the image or to use two halves of the central space.

You can get this fun script and create your own Custom Playing Cards in the store.

For a chance to win this script, check outthis thread in the DST forum and add your name to the thread. Also, remember to give me an idea on how you could use this script for something OTHER than a game theme project.

cass-CustomPlayingCard-sample-AcesFor this week, i decided to give you a template for 4 aces. I am sure you can enjoy havnig 4 aces up your sleeve, right?

Each card is full size, meaning 900 x 1300 pixels and has a separate layer for the center image. Since it is saved in a PSD format, you don’t have to have Paintshop Pro to use it.

What will you display with those cards? Four loves of your life? Four places you have visited? Four children or siblings? Maybe four seasons of the same location? Or four funny faces you have of yourself (or someone else)?

You can use one card or all four too.


You need to be logged in to download this sample. You can either login, or register on the top of this page.
New script – Custom Directional Tube

cass-CustomDirectionalTube

Do you know about directional tubes in Paintshop Pro? They are such convenient tools that can work for you in creating unique elements. Unlike “ordinary” tubes, the directional ones will allow you to place a simple tube either following the cursor move, like a line of footsteps, arrows, etc., or in a regular sequence where each individual image would be selected and placed one after the other in the same exact order, to make a repeatable pattern or picked randomly among the numerous images created.

Although it is easy to create your own directional tube, it can be time consuming, especially when you create over 100 images.

This script will do all the tedious work for you, while allowing you much flexibility in the creation of your tube. You can have a series of as few as 9 individual images or as many as 400.

Start with any small image (it would take a lot of resources if you are using a large image to start with, especially if you want a lot of rotated images), answer a few prompts and watch it. You can add an overall bevel or shadow to all the images after they are rotated so it would be all consistent when applied.

You can get this time saving script in my store: Custom Directional Tube.

Do you want to create your own tubes too? Check out the Happy Place thread where you can add your name for a chance to win this script.

cass-CustomDirectionalTube-sample-cardsAs a sampler, i created some simple journaling cards. I simply used the little footsteps directional tube that i created for the preview above and drew a straight line with it. I could have made a curved line that would have shown the rotated steps, but i really felt it was taking too much space on the cards.

You can use those cards for baby milestones, but also for any new step you might be taking in your life, for documenting personal journeys, places you visited, and more.

Each card is 3x4 inch so they would fit in regular pocket page projects if you want.

They are also large enough for you to cut them into tags if you prefer.

You get 5 basic colors.


You need to be logged in to download this sample. You can either login, or register on the top of this page.
New tubes — Seed Beads 2

cass-SeedBeads-Opaque

This week, i am bringing you some more beads, but this time, they are opaque, and in a softer palette.

You get those bead spills at your fingertip as you can just draw with your mouse and the beads will be spilled along that path. No need to click dozens or hundreds of times to have that many beads on your project.

You get 5 colors: ivory, rose, plum, emerald and aqua. And you get two sets for each: one to spray the beads all around and one to have regular strings of beads. And you also get one set of multicolored bead spray.

Do you want more colors? Keep an eye on the store as more are coming.

You can grab this set of Opaque Seed Beads picture tubes in my store. Sorry PS users, but this is unique to PSP!

cass-SeedBeads2-SampleAs a free sample, this week, i decided to use these tubes in a different way than last week.

I opted to create a locket. How did i do it? Simple:

- i created a vector heart shape and used a gold tile as an outline and no fill. That outline was then converted to a raster and added a bevel.

- with a copy of the same vector shape, i set it for a solid fill and no outline. Once i converted it to a raster, i ran the Colored Acrylic script to give that particular “glass” look (even if i used only the plain one without any color).

- on separate layers, i sprayed pink and read seed beads. I reduced the step value so the beads would be closers, and i used several layers of beads so i could add a drop shadow on each layer.

- i deleted any extra bead that ended up outside the locket.

- finally, i added a chain with the Gold Chains directional tube.


You need to be logged in to download this sample. You can either login, or register on the top of this page.
New Picture Tubes – Seed Beads 1

cass-SeedBeads1-SilverLined

Seed beads are a common supplies in many craft projects. Scrapbooking is one of those crafts where you can see those beads, but you can now do the same thing with digital scrapbooking: you can add strings of seed beads or a random spray of those tiny decorative elements.

With Paintshop Pro, you can place those picture tubes easily with the draw of a mouse. Use the directional tubes to create strings of beads in any of the 5 colors, any length you want, in any shape you want. You can place them in straight lines, curved lines or totally freehand shapes.

You also have 6 sets of tubes that will randomly place one of the 100 slightly different beads more or less along the path you will draw with the cursor. Five sets are monochrome (green, red, blue, gold and crystal) and one set includes all the colors for a truly random effect.

You can get this set of 11 picture tubes of silver lined seed beads in my store: Creation Cassel.

Do you want all those tubes too? You can enter the draw to get this set for free, by adding your name to the RAK thread here. What would you do with those randomly placed beads?

cass-SeedBeads1-SampleFor a free sample, i created a couple of simple decorations. I placed the beads along a vector path using the VectorTube script for the flowers, and added a single “bead” in the center which was part of the Chain Beads tubes set. A little touch of colorization to match them a bit better. Then, the stems were just freehand drawn using also the string version of the green seed beads.

Finally, a little bit of multicolored beads were spilled around each element.

You get two decorative flower stems and 3 individual flowers that you can use separately.


You need to be logged in to download this sample. You can either login, or register on the top of this page.
Did you notice that it says Seed Beads 1 for this product? This means i have plans for several more types of beads tubes. Do you have any suggestion for other beads you would like to see in a picture tube format like this one? Tell me by either commenting below or by sending me an email  with a specific bead name or even an image.


News in the Campus

Tomorrow is a big day for many American and Canadian football fans (and their families). Tomorrow is also the day for our next live presentation, on Photo-Graphics with PSP – Part 3.

Join us for this presentation BEFORE the Superbowl (if you are a fan of football) or just for this ordinary Groundhog day.

RegisterNow-01-200


In the mean time, remember that the video of last month’s presentation is still available to watch (free if you are logged in).


CreateMagicWithPSP

New script – Plaid 2

cass-Plaid2

No more wasting time picking colors, drawing lines, and repeating the process to only get a single plaid pattern.

This script will turn your Paintshop Pro into a plaid pattern generator (and a time saver at the same time). Start with the color palette you want to use, run the script, pick the colors, pick some options like the size of the pattern and the texture, and let the script do the work.

You can see the script randomly picking the colors (it is fun to watch), and then turning all those dots into a fun and unique plaid. With the randomness coded in the script, you will NEVER get the same pattern twice.

You can generate any number of patterns. Keep asking for more as long as you want. Keep the ones you like, discard the others. Since all the tiles would use the same basic color palette, you are sure they will all match together, and with other elements and papers from your kit, or your page.

Grab this time saving script in my store under the name of Plaid 2.

Of you prefer to create a plaid based on an actual picture, so you can match those colors, you can always use the Plaid 1 script.

Do you want this script for free? Head over to the Happy Place, in this thread and add your name to it. How long do you think it would take you to create 10 different plaid patterns using the same color palette?

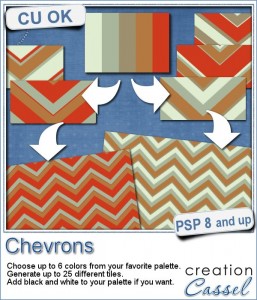
cass-Plaid2-sample-SweetFebThis week, as a sampler of what can be done with this script, i decided to give you a little teaser too. The February 2014 DST Blog Train will use a palette that includes red, brown, beige and blue. Although i am not participating in the Blog Train, i decided to create 10 tiles that are based on the color palette. Once you get all the pieces from the blog train, you can combine them with these tiles and create something even more fun.

Each tile is 250 x 250 pixels and they are obviously seamless. Use them straight or at a 45 degree angle for even more fun effects.

Some are darker, some are lighter, so have more red, some have less. But you cannot deny that they all match together so imagine how they will look with the papers and elements from the blog train!


You need to be logged in to download this sample. You can either login, or register on the top of this page.


What do you want in 2014?

The script created this week was suggested by Carolyn who liked the original plaid script but wanted to use her own colors, and more colors than the Stripes 2 would also allow. She suggested this script in the January contest.

What is YOUR suggestion?

You only have a few days left to add your suggestions of scripts, fonts, or tubes for me to create and put in the store. Remember that if you suggest something, and i end up working on it, not only you get to test it, give your input, and ask for various options to be integrated, but you also get it FREE, and before everyone else too!

ADD your suggestion TODAY

It could be an action you saw for Photoshop and you would like the same thing in PSP

It could be an existing script that you would like to have more options, or different effets.

It could be a photo effect you saw in a layout in a gallery and would like to replicate it.

It could be a way to apply some designs to certain surface.

It could be a way to create objects but with your own settings and colors.

It could be a script to create objects but with some randomness to them.

It could be a font that you only dreamed of and does not exist yet.

It could be a tube to draw various types of elements that are nearly impossible by hand.

Com’on, what do you want to see in the store, in 2014?

ADD your suggestion TODAY

Do like Carolyn did!

New Script – Worn & Glow

cass-WornGlow

Everyone likes a little distressed look on some project once in a while. The proof is that there are lots of filters one can purchase to create that look. With this script in Paintshop Pro, you can create a distressed look on any line drawing with just a few clicks. You get to choose if you want a little bit of distress, or a lot or something in-between. In addition, since there is a random feature integrated inside the code, you will get a slightly different distressed pattern for every run.

Many years ago, i bought a kind of a gel pen (probably among the first kinds) and the ink seemed to include some “oil” that would seep out of the ink giving a colored glow around where i would draw. Kind of a neat effect that i added to this script, as an option.

So you can get the distressed look with or without a colored glow around and if you want the glow, you also pick the color.

Although the script works best with line drawing, you can definitely apply it to a photo or another element like a drawn embellishment.

Don’t waste your time trying to use the eraser tool all over your design, grab this time saving Worn & Glow script.

Do you want a chance to win this script? I am sure you do! Simply answer the simple question in the Happy Place thread HERE and one winner will be picked next week.

cass-Worn&Glow-sample-DaysWhat would you want to get this week, as a sampler? I thought you might be tired of alphas (although that was my first idea when i was thinking of a sample), so i created some labels. Whether you are doing a project 365 or not, sometimes, you might want to add the days of the week to your layout. That is why i created those day tags. I just used the distressed part of the script and didn’t add any glow. I am also including a blank tag so you can add a date or something else (even unrelated to the days of the week).

Each tag is about 750 pixels wide so they are large enough to be used in full size layout, but they are also easy to size down if you want them more discrete on your project.

You can use them on chore charts, calendar, to-do lists, etc.


You need to be logged in to download this sample. You can either login, or register on the top of this page.

cass-AlphaTags2-Lowercase

Did you grab the set of digits as a free sampler last week? You can still go get it in the post right below this one. And there is the matching LOWERCASE alpha that was available in the newsletter last week. Did you get it? This week, the matching UPPERCASE alpha will be linked, FREE, in the newsletter.

Subscribe to the store newsletter HERE to get it (and you can always go back one issue to grab the matching lowercase alpha too… shhh).


How about a coupon for the store? Are you interested? Give me your suggestions for future products in the store (scripts, fonts, tubes, etc.) in THIS BLOGPOST. I got several emails with suggestions, but if you post them in the comments of that blog post, those suggestions will count as entries for the random draw. That means, the more suggestions you give, the more entries you get. Who doesn’t like a coupon for a free product?

And while you are there, click on the FB Like button so you can share with your friends. They might have good ideas too. And remember, if they add suggestions, it means there will be more coupons drawn, which will increase your chance to win too!