Web
Analytics

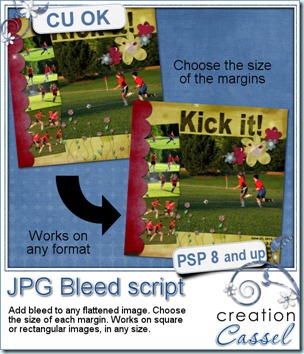
New script – JPG Bleed

cass-JPGBleed

If you ever wanted to print your layouts either for individual pages or in a photo book, you needed to know how to add some “extra” margin around your design. Have you ever wondered why printers will ask you to add some margin, just to trim them after? To put it simply, it is too hard to be perfectly exact when trimming the paper, and if the cutter is just a few pixels short of the edge, you will get a tiny unsightly white line along that border. Having the paper or the design wider where the printer can cut in, will make sure that there is no such white line. But what if you dont add such a margin (called “bleed”)? The risk is that it will trim INSIDE your margin and you MIGHT loose some details if they are on the edge (like fine borders, journaling, etc.).

All that to tell you why it is important to have a bleed around your pages before you send to print. But what if you did your whole layout, and forgot to add the bleed? If you still have the layered file, it should be fairly easy to enlarge the background paper while leaving the more meaningful details intact. But what if you do not have those layered formats, for whatever reason? This script will take any jpg image and add a margin around it, in matching colors. You even have the option to choose different margin for each side so that you can match the specifications required by any printing service.

Someone mentioned that she had made paper scrap pages and photographed them. Of course, this will give only a flattened image, with no margin. This script would be perfect for her, dont you think?

This script is available in my stores: Creation Cassel and Do It Digi.

If you want a chance to win this script, just go add your name to the RAK thread at DST and tell me why you need this script. I will draw for a winner Monday night.

New Script – Text Wrapping

cass-TextWrapping

Do you sometimes, wish you could place text within a shape and have the text automatically wrap to the next line? You know that PSP does not have that feature. So, do you find yourself having to add spaces here and there to make the text somewhat fit the shape or the space you want to use? This script will now do it for you. Use one of the multiline shaped paths included (others will be made available soon), enter your text, and run the script. You can modify the size of the shape if you want and the text will fit that size/shape. If you want to add another paragraph, just go ahead. (be sure to read the instructions before using this script for better results and no frustration!).

Available at my stores: Creation Cassel, and Do It Digi.

And if you want a chance to win this script, go add your name to the RAK thread at DST. I will draw for one winner on Monday night.

New Script – Contact Sheet

cass-ContactSheet

This script falls in the category of TOOLS. If you are a digiscrapper, you might want to be able to have a visual catalogue of the content of your kits. If you are a designer, maybe you want to provide such a catalogue to your customer. If you are a fan of photography, maybe you want to have some thumbnails of all the cat photos, the vacation photos, etc.

You have several options to choose from but you can include: full path of the folder, frames around the images, shadows, filename. And the script will create (and number) as many pages as needed to display all the graphic files in the folder. It will generate a preview of files with these extensions: jpg, png, psd, psp, pspimage, tiff, wmf.

This script is available in my stores (always on sale until Sunday night): Creation Cassel, Do It Digi.

If you want a chance to win this script, check out this thread at the DST forum and add your name. A winner will be picked Monday night.

New script – Bundle Preview

cass-BundlePreview

Do you create bundles, or make previews with several smaller previews for collab kits? This script will save you a lot of time. Simply start the script, open the individual images you want to include in the preview, and continue the script. It will automatically count, resize and arrange the images to cover most of the space available. You can get the images rotated or not too.

Use this script to display individual previews in a bundle, quick pages, layouts, or even papers or photos in a layout. The script ends with unmerged layers so if you want to rearrange some images, you still can.

Available at Creation Cassel and Do It Digi.

And if you want a chance to win this script, go to this thread and post your name along with an answer to the question from the first post.

new Script – Kit Previews Maker

cass-KitPreviewsMaker

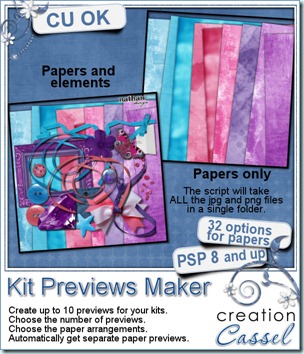
If you are a designer, you have to make previews. Whether your kits are small or large. If you are a store owner, you might organize some collab kits that end you containing a lot of papers and elements. For each preview that you make you have to open the paper files, resize them, copy them, close them, paste them into your preview, play around to distribute them more or less evenly depending on how many papers you have for that preview, rotate them if you wish, and add a shadow. And that is for ONLY the papers in the preview! Now, onto the elements, and of course, you have even more elements to place on your preview. So, the same routine, or opening, resizing, copying, pasting, closing, moving. Are you out of breath already? How long does it take you to make a preview for your kit? Twenty minutes? thirty? And that is if you have a regular size kit. Now, if you have a mega kit to organize, and you have too much stuff to put in a single preview, then you have to repeat the process twice, three times, four times, five times. OK, now that you know how long you take to make your previews the “old fashion way”, let’s see what this script can do for you.

Hum… everything that i listed above, the script will do. Yes. It will check in your folder (yes it will go look in the folder so you don’t have to open tons of files), separate all the papers and the other stuff (normally they would be elements, right?), count your papers and elements. Why is it counting? Simply to check with you how many previews you need if it finds more than 20 papers for example. Of course you can still want everything in one preview. You have that option, but you can also have more than one. Then, the script will split the papers into how many previews you want, place the papers in the first preview, rotate them randomly (yet with the setting you want so if you don’t want any rotation, the papers will be straight), spread them more or less evenly depending on how many papers will be in that preview. It can also add some basic shadows if you want. At this point, the script will let you have one previews with only the papers and will start another one to add all the elements it found in the folder and repeat the process of opening, resizing, copying and pasting the elements on top of the papers.

Now, if you wanted more than one preview, the same thing will be repeated. The fun thing with this script is that, once you answered the few questions at the start, you can go, have yourself a coffee, go check your emails, and when you come back, all the previews are done. You simply have to rearrange the elements where you want them (yeah, the script does not have very fancy taste as far as disposing elements in a preview!).cass-KitPreviewsMaker_01

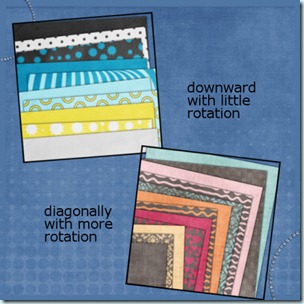
Do you find that left to right placement of the papers is boring? The script gives you other options, like right to left, upward, downward and diagonally (from any of the 4 corners). This should help you get very dynamic and not-so-boring previews from one project to the next. See other ways that papers can be placed.

This script is available at Creation Cassel and Do It Digi.

As usual, you have a chance to win this script. This time, check out this thread in the DST forum and you have to guess how long this script took to place everything in a kit of 54 papers and 174 elements into 3 previews on my computer. The closest guess will win the script.

Thanks to Nathan’s Designs for allowing me to use his products to illustrate the result of this script.

color decoder – new script

cass-colordecoderDo you sometimes work on a kit and have to find the matching values of some colors to create or modify another one? Do you provide color palettes to a group of designers or scrappers for tasks or challenges? This script will analyse your color palette and generate either the Red-Green-Blue values, or the Hue-Saturation-Lightness values or simply the Hexadecimal code for each color. Use up to 10 colors with this script.

The file comes with 6 templates you can use to create your color palette. The script will also work with your own color palettes as long as (1) the colors are in a single row/colum and (2) the palette doesn't have any background color.

This script has been tested with versions 8, 9, 10, 11 and 12.


Available here:  Creation Cassel, Do It Digi, Scrapping Whispers

Preview Making bundle

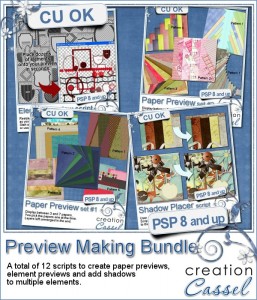
cass-preview-making-bundleDesigners, I have created, over time, several scripts to help you make your previews. I decided to bundle TWELVE scripts for you.

- 5 scripts to place 3 to 7 papers in various dispositions

-5 scripts to place 8 to 16 papers

- 1 script to put all the elements

- 1 script to add the drop shadows to each individual element/paper on your preview.

THAT is a time saver. Heather has used the Paper Preview Set #2 and said it took her 4 minutes to do something that usually took her one hour. Talk about saving time. And the element placer can also reduce your time on that task by 90%.

The time you saved from doing previews is time spared to design. Wouldn't you rather design than make previews??? This bundle is only available at Creation Cassel and Do It Digi.

TWELVE scripts in a bundle, that is a deal!

Element preview maker – new script

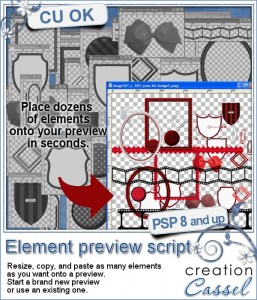
cass-element-previewIf you are a designer and you create kit, i bet you spend a lot of time making your previews. Am I right? Making a kit preview involves a lot of repetitive work and since you are often working with large files (especially if you have 3600x3600 papers) the program gets slow or might even freeze, while you loose all your work since your last save (IF you saved). Adding elements to a previous can be tedious: you have to open the file, resize the image, copy it, paste it in your preview, go back to the image and close it making sure you dont save it by accident. Then, when you have all your elements in the preview, you end up with lots of layers dont you? And how long can this process take? 30 minutes? an hour? 3 hours? Obviously, it depends if you have a mini-kit or a mega-collab kit.

This script will cut your preview making time to a fraction. It will do everything with your element files that you usually do by hand. It will do it automatically, with light-speed. I am not kidding. Heather placed 52 elements in one preview and it took one minute. ONE MINUTE ! ! and Diosa did the same with 71 elements using her own preview to start with and it took 85 seconds. Can you do that by hand? I know i can't! You can get this script in my store.

Do you want to win it? Yes, i have a draw coming up either Sunday or Monday for this script. Add your name to the thread here and cross your fingers.

parallel lines – new script

cass-parallel-lines

This script will certain help you to quickly create base patterns for papers. You can make full size papers (3600x3600) or smaller size (1000x1000). Create zigzags, scallops or waves, of draw your own shape. Choose the colors you want the script to use (from 1 to 6). Choose the thickness of the lines, or let them go randomly. Choose if you want randomly picked colors, or regularly placed. Many other variations and options are yours to decide.

The possibilities are endless, and with the randomized function included in the script, even with the same settings, you can get different looks.

This script is available at Creation Cassel, Do It Digi, Scrapping Whispers.

If you want a chance to win this script, check out this thread at DST and add your name.

Quality Check Utility – New script

cass-quality-check-scriptWith all the focus on quality control of products in the store, this script can be a real time saver and maybe a business saver too.

This little program will not turn a bad product into a good one (i wish) but it will help with the Quality Control. In fact, it will perform several tasks for you:

1- it will check for any excess space around a png element. If there is some, it will trim it.

2- it will check for the resolution of all the png and jpg files. If the resolution is under 300 dpi, it will correct it for you.

3- it will check for gif files. Knowing that some customers are annoyed with extra blinkies that add files and weight, store owners might want to check if they are included or not. The script will not do anything to the files, but will at least let you know.

4- it will generate a QualityCheck.txt file for you that will be a report of all the files checked, whether they were ok or if they needed changes. This report can be useful to document the feedback you will give the designers. It will give you how much trimming was needed, or what was the incorrect initial resolution. That might help troubleshoot some recurring problems with some elements.

You can use this script on a single image, open in PSP, or you can use the batch process mode to check a whole folder at once.

This script is available at Creation Cassel,

One store owner tested this script, and here is what she said:

Excellent tool for all digital scrapbooking store owners, quality check team and even designers. In a few minutes you can have all checked and sure about is under the quality standards! Brilliant! Marta Pavluk , designer and store owner