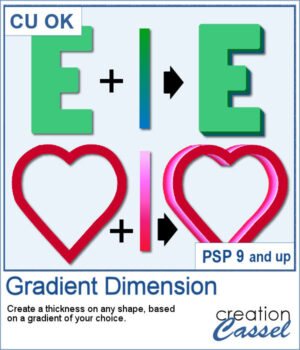
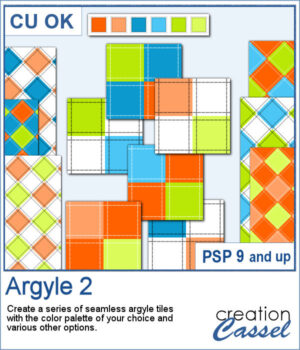
It is always interesting to use an actual photo and use it to create background papers since they will perfectly match.
This script will use random sections of the photo and create seamless tiles with a zigzag pattern. You can use those tiles in any scale you want to fill any larger canvas. You can generate up to 20 tiles in one run. Keep the tiles you like and discard the others.
Get this script in the store: Photo Zigzag
To win this script, add a comment on this Facebook post telling us if you use zigzag patterns, sometimes (remember, add a comment, not just a Like!) The winner will be announced in the newsletter, next week. Not a subscriber yet? Not a problem. You can register here and it is free (and you only get one email per week).
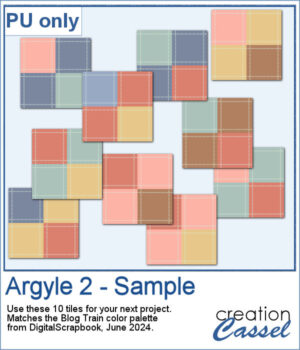
As a sampler, I used this St-Patrick photo to generate 6 seamless tiles. All the tiles are 400 pixels wide but of different lengths. They all show some greens but also the white and orange from the Irish flag. This is perfect for you St-Patrick projects. If you find the colors too bright, you can blur them or desaturate them to suit your projects.
You need to be logged in to download this sample. You can either login, or register on the top of this page.

This set of brushes will allow you to paint or cut intricate designs in the middle of a paper (or a photo). Create cutouts away from the edges and corners.
As a sample, I created a set of greyscale bookmarks with a central cutout and one with cutouts on the ends. One has a heart shape punched out, while the others are blank for you to add anything else you want. The design can even be cut from actual paper/cardstock using a cutting machine. You can colorize these strips any way you want. Each "bookmark" is 600x3000 pixels long and can also be used as an element on your next project.
If you want to convert a part of your photo into a "technical" pencil sketch drawing, this script will help you with it. You can use any image and any section to convert.
o, sketch, As a sample, I used pictures of isolated flower clusters and ran the script. I added a separate frame and removed the "technical" drawings as they didn't seem to fit with the theme. Each card is 4x6 and has enough space for you to write a sentiment, a quote, or a message.
You can now add some painted frames around any photo, element, or even just a selection. This means that you can even work directly on your work in progress.
As a sample, I created two frames for 4x6-inch photos. I left the layers unmerged so you can use the Lock Transparency to change the colors of the different layers.
Whether you are doing a "Project 52" or just want to showcase your photos, sometimes, it can be fun to have an overlay to show the week and year of that particular photo.
As a sampler, I created a whole set of raster overlays for you to showcase the year 2023. All the layers are in white, but you know that you can change that easily, right? The format is 6x4, which is fairly standard for printing, but also if you are doing pocket scrapbooking.
This set now includes 15 additional designs to create your own Christmas ornaments with your choice of colors and color combinations. This will allow you to create up to a dozen Christmas balls in one run.
As a sampler, I ran the script using a red background for the balls and a single red color for the design. You get 6 different designs to use in your holiday projects.
Whatever theme you are using for your next graphic project, you might want to add some light to it. I mean, literally. With this script, you will be able to turn any vector object into a lit lightbulb, with your choice of color.
For a sampler, I created a simple set of digits for you to add any date you want. I used basic colors so they will be as versatile as possible. Each one is in png format so you can add them onto any background. They are in png format so you can use them with most graphic programs and they have some transparency so you will be able to see through them.
You can surely create stacks of wooden characters, but it is quite tedious. You have to duplicate each character, and then rotate and move them one by one, then add some thickness AND if you want to add the proper inside shadows, you have to do that on each individual layer.
For a sampler, I created a set of 10 digits, using cherry wood. Each digit is about 500 pixels high in png format.
If you want some variety in your supplies but still want something to match what you currently have, this is another script to create a bow from a straight ribbon.
For a sample, I used some ribbon templates from Marisa Lerin and colored them with some autumn colors. The freebie includes the three bows but also the matching straight ribbon I created for them so you can even use them with other scripts to create other types of bows and knots.
This script will let you create a variety of different triangle-patterned papers in any size you want.
For a sampler, I created two papers using Halloween colors and made them into bookmarks that you can print and cut if you want. The files are in PNG format so it can be used by anyone.