How would you like to quickly create a monogram with a single letter and a name or several initials or even numbers to create a date for a particular event or simply to keep track of your pages?
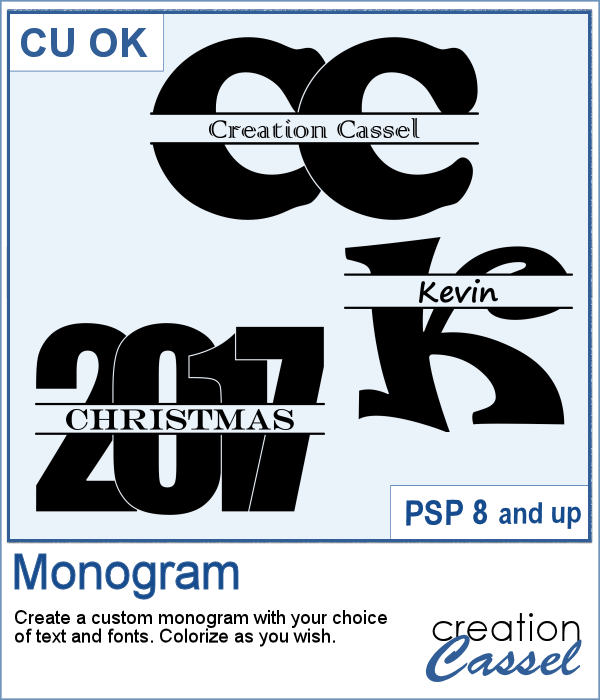
This script will help you do just that, using ANY font you want for the initials and the text and you choose the text too.
Very simple to use and you get quick results.
Get it in the store: Monogram.
In order to win this script, add a comment on this Facebook post telling us what you would write with this script (remember, add a comment, not just a Like!) The winner will be announced in the newsletter, next week. Not a subscriber yet? Not a problem. You can register here and it is free (and you only get one email per week).
As a sample, I asked on the Facebook page and I quickly got 4 suggestions of single words that I turned into monograms. They are fairly large (900 pixels high) so you can use them in various projects and size them down if needed.
You need to be logged in to download this sample. You can either login, or register on the top of this page.

You can now turn any vector shape or text into a sandy texture with some dispersion of the sand. You can choose a real sand color or a totally different color, for a fantasist appearance. You can even try to use a gradient for a fun effect.
For a sample, I ran the script on single digits using the font Blackadder ITC, which is a font where the characters are kind of crooked and uneven, which I felt was a good match with a sand texture. You get all the digits so you can add a year or a date on your project.
Yes, you can always check out the images in your Windows Explorer to view all the patterns you have but if you want a printed library, you would need a lot of work to create it. However, this script will create one for you, in just a few seconds. Choosing one pattern, the script will find all the other patterns in the same folder, and display them on a standard 8.5x11 sheet of paper, along with the name of the particular pattern and the name of the folder. This is perfect for you to then print out and keep in a binder.
For a freebie, this week, I created a fun frame made of sand, that you can use on top of your "beachy" photos. If you want more sand, you can always duplicate this image and add an Antique Mosaic effect to it.
You can easily create an impression of a rubber stamp using a color and a texture, but how about creating the actual rubber stamp, complete with the ink and maybe even the mess too?
As a free sample, I created a few elements to celebrate Canada Day (if you don't know yet, I am Canadian). I created those three rubber stamps in addition to a "stamped" version of the design.
Those iron fences might be fun to use, but they are probably always the wrong length for your project. This set of tubes allows you to draw them as long as you want and at any angle (like on hills or down stairs).
Since it is graduation time now, for many parts of the world (it is the last day of school here), why not add a great message for anyone reaching graduation?
By popular demand, another set of punches have been made and this time, on the summer theme. You get 12 designs, with corner punches and edge punches. In addition, the individual shapes are also available.
As a free sample, this week, I created two templates for 5x8 and 8x5 photos with some wave edge along the top. Use it to showcase your favorite summer, water, beach or just fun photo.
You might want to create some kind of extrusion around the edges of your element and play with various thickness, height, and colors. Add those edges around shapes or text for a very unique effect.
To play around, I used some text to run the script on. I used gold, silver and bronze patterns for the edge and the inside and outside colors to give the metallic effect of the edges.
Aside from the typical deck of cards we use to play poker, bridge, or others, do you ever play games that involve a different kind of cards, like Magics, ?
This week, I created a simple set of four cards for you. They are in .pspimage format which includes the mask to insert your photo without having to cut it or adjust it in any way. Simply put your photo above the layer named "Photo here", and adjust the placement using the Pick tool (or the Raster Deform tool if you are using an older version of PSP).
Everyone likes ribbons, bows and knots. They can be very versatile, especially if they match. Finding the correct match is not always easy, but with this script, you can use any straight ribbon and get a simple knot to add to your project.
To show you what those knots look like, close up, I used three ribbons from a kit,
Every project can use ribbons and creating custom ribbons with the specific colors of a photo or a kit can be tedious. This script, which is an extension of the Ribbon Factory script, will create such ribbons using two colors of your chosen palette with a variety of patterns and other settings.
As a sampler, this week, I used the same color palette as I used last time to create those fun spring confetti and generated a dozen of ribbons, 200 pixels thick.