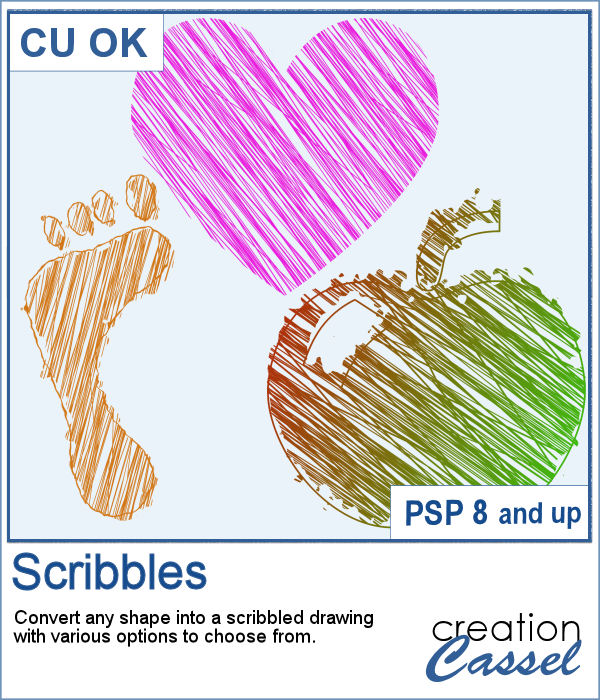
Whether it is for a kid project, a school-related project or just for the fun of it, you can now create scribbled drawings out of any shape or letter, whether you drew it with a brush, a preset shape or the text tool.
There are many options you can choose from to make this element unique and customized to your vision of the final project. With the single script, you can create many different effects, and why not add several layers of scribbles?
You can create text, numbers, regular shapes, or irregular ones.
Get this script in the store: Scribbles
In order to win this script, add a comment on this Facebook post telling us what you would like to turn into a scribble (remember, add a comment, not just a Like!) The winner will be announced in the newsletter, next week. Not a subscriber yet? Not a problem. You can register here and it is free (and you only get one email per week).
As school is either starting or going to start soon, I created a full alphabet using this script. I picked four basic colors for a really bright effect. Remember that if you want those to be considered scribbles, you should not add shadows. However, if you want to pretend the lines are strings or wires, then you can add some. Don't go crazy with the shadows though; you don't want your element to feel like they are floating.
You need to be logged in to download this sample. You can either login, or register on the top of this page.

Whether you want to add a date, a mention of an event or a location as if you were traveling around the world, this triangular datestamp will allow you to add a personal touch to your project.
As a sampler, I created 12 stamps with the months of 2018 and that you can personalize as there is still space to either add a date, a design, or anything else you might want to add (or you can leave it blank too).
Creating a patchwork pattern might be fairly easy with selections, one after the other but some designs would be very tedious to create in a seamless pattern especially if it is not a design that fits inside a square or rectangle. However, with the calculations available in a script, you can actually create that seamless pattern from any design.
As a sample, I thought you might like to have some of the tiles used in the preview. They were done using various wood texture images. One tile is 1000x1000 and the other is 1200x1200 pixels. Since they are both seamless, you can use them on a larger image. You can also rotate the pattern at 45 degrees for an interesting effect.
Those iron fences might be fun to use, but they are probably always the wrong length for your project. This set of tubes allows you to draw them as long as you want and at any angle (like on hills or down stairs).
Since it is graduation time now, for many parts of the world (it is the last day of school here), why not add a great message for anyone reaching graduation?
By popular demand, another set of punches have been made and this time, on the summer theme. You get 12 designs, with corner punches and edge punches. In addition, the individual shapes are also available.
As a free sample, this week, I created two templates for 5x8 and 8x5 photos with some wave edge along the top. Use it to showcase your favorite summer, water, beach or just fun photo.
You might want to create some kind of extrusion around the edges of your element and play with various thickness, height, and colors. Add those edges around shapes or text for a very unique effect.
To play around, I used some text to run the script on. I used gold, silver and bronze patterns for the edge and the inside and outside colors to give the metallic effect of the edges.
Aside from the typical deck of cards we use to play poker, bridge, or others, do you ever play games that involve a different kind of cards, like Magics, ?
This week, I created a simple set of four cards for you. They are in .pspimage format which includes the mask to insert your photo without having to cut it or adjust it in any way. Simply put your photo above the layer named "Photo here", and adjust the placement using the Pick tool (or the Raster Deform tool if you are using an older version of PSP).
Everyone likes ribbons, bows and knots. They can be very versatile, especially if they match. Finding the correct match is not always easy, but with this script, you can use any straight ribbon and get a simple knot to add to your project.
To show you what those knots look like, close up, I used three ribbons from a kit,
Adjustment layers are applied to all the layers below them, in the Layers Palette. But what if you want to adjust only one element, on one single layer? You can still do it, if you add that layer into a group that will include that specific layer you want to modify. It takes a few clicks, but with these scripts, a group will automatically be created and the adjustment layer will be inserted. Just fewer clicks than doing it manually.
As a sampler for this week, obviously, I can't give you anything done with that script, since it is a tool, but since the Plush Texture script was quite popular, I decided to create a fun plush teddy bear.
Natively, you cannot view your brushes from Paintshop Pro when you look in Windows Explorer, so if you want to see what you have on hand, you have to go through PSP itself, and pull down the list of brushes from the Brush tool settings.
As a free sample, this week, I made a fun frame using star confetti made with basic colors. The whole frame is 3600x3600 pixels so you can use a single photo on your project. If you want to use it smaller, you can add a solid color border on the edges so you would not see the cut off confetti.