Although paperclips can be common on various projects, they can also be boring. How about customizing your paperclip with a name, a date, a place or another message to make your project unique.
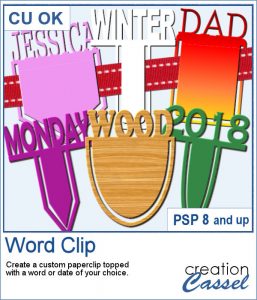
This script allows you to use any word you want, with any font and any color, gradient or pattern. Furthermore, you can have a thin or wide clip with 3 different shapes of clip. You can create an unlimited number of clips for any occasion.
Get it in the store: Word Clip
In order to win this script, add a comment on this Facebook post telling us what series of words you would use to top those paperclips (remember, add a comment, not just a Like!) The winner will be announced in the newsletter, next week. Not a subscriber yet? Not a problem. You can register here and it is free (and you only get one email per week).
How about some simple clips to help date your photos?
I created a series of 7 clips with the days of the week for you.
You need to be logged in to download this sample. You can either login, or register on the top of this page.
Use the Interlacing technique to make sure you easily overlap your paperclip on the support you want to use.

This week, the script will let you create a puzzle from any element or design you want, whether they are letters, numbers, drawings, photos or shapes. Whatever you want on the puzzle, you can draw or paste.
This week, I created a full alphabet that you can use with any child theme project. You can even use the letters from the puzzle to spell out the name of someone (if they need more than one of the letters, add them in writing, so it is just like you would do in real life, missing one letter).
This script will allow you to create a custom-made wooden puzzle with any text you want. You can add a really unique look by choosing any font, and also any color, gradient, pattern or combination of those.
This is that time of year with the holidays coming up, and this sample puzzle will spell the word Christmas using a funky font. The whole puzzle is in .pspimage format, so you can move the individual pieces around. Furthermore, all the layers are grouped so you can copy and paste the whole puzzle onto another project. You can ungroup all the layers OR simply rearrange the pieces you want to move, above the group so they will display their thickness correctly.
Do you sometimes want to use an accordion fold on an image or a roadmap? It is a fun way to display an image but it can be quite tedious to complete accurately. You need to measure, cut, skew, and align each piece correctly. In addition, there is also a matter of light and dark on each piece to make them consistent with the light source.
Since this script is applied directly to a photo that is yours, you likely would not care for a sample from my photos. So I decided to create a few straight ribbons in Halloween colors, and run them through the Knot #13 script. You now have 3 straight ribbons and 3 matching knots to embellish your own Halloween themed projects. What will it be?
If you want a custom fence, you can do it with individual posts and boards you can measure and layer. It might not be too hard, but takes a while to build. What if you can create one in just a few seconds?
Running this script with a simple wood texture image, I created this fence that is in separate layers for you to tweak it.
There are various ways to add a date, but did you ever think of writing it on a button? Why not? They are perfect in size to add small text like a date and with this script, you can customize it with the color, gradient, pattern, text, font or even other designs.
For this week, I created a set of 13 buttons that you can use with those school pictures that you just took, or had for years, whether they are yours or your children's or grandchildren's.
Whether it is for a kid project, a school-related project or just for the fun of it, you can now create scribbled drawings out of any shape or letter, whether you drew it with a brush, a preset shape or the text tool.
As school is either starting or going to start soon, I created a full alphabet using this script. I picked four basic colors for a really bright effect. Remember that if you want those to be considered scribbles, you should not add shadows. However, if you want to pretend the lines are strings or wires, then you can add some. Don't go crazy with the shadows though; you don't want your element to feel like they are floating.
You can easily create an impression of a rubber stamp using a color and a texture, but how about creating the actual rubber stamp, complete with the ink and maybe even the mess too?
As a free sample, I created a few elements to celebrate Canada Day (if you don't know yet, I am Canadian). I created those three rubber stamps in addition to a "stamped" version of the design.
Those iron fences might be fun to use, but they are probably always the wrong length for your project. This set of tubes allows you to draw them as long as you want and at any angle (like on hills or down stairs).
Since it is graduation time now, for many parts of the world (it is the last day of school here), why not add a great message for anyone reaching graduation?
By popular demand, another set of punches have been made and this time, on the summer theme. You get 12 designs, with corner punches and edge punches. In addition, the individual shapes are also available.
As a free sample, this week, I created two templates for 5x8 and 8x5 photos with some wave edge along the top. Use it to showcase your favorite summer, water, beach or just fun photo.