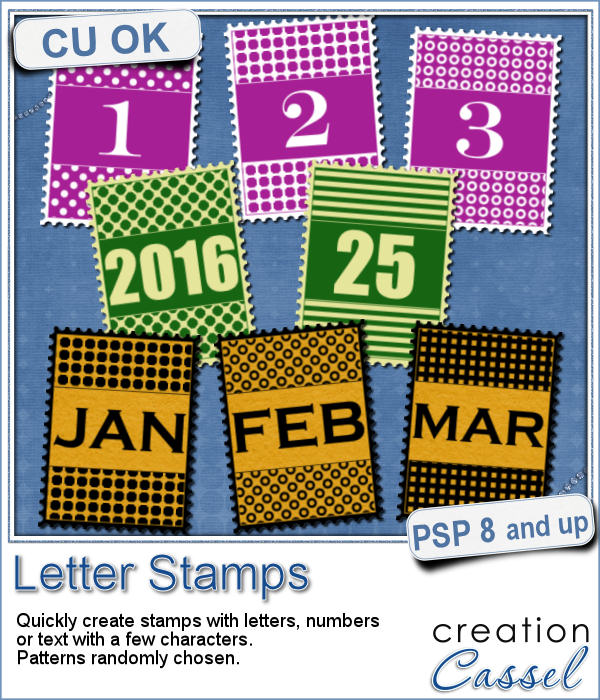
You can now create a fun title or text using individual stamps that will display letters, digits, abbreviations or words.
You can create your own sets to match your kit (as a designer) or generate only the letters/digits/words that you need for your particular project. Choose the color and the fonts that suits your project or your palette.
The random patterns picked by the script will make a fun series of stamps.
You can create stamps for single letters or digits or use them for text elements that have more than one character.
Get this script in the store: Letter Stamps
What would you write with this script? Would you rather create individual alphabets or add words instead? Tell me in the comments below and i'll pick a winner to be announced next week in the newsletter. Not a subscriber yet? Not a problem. You can register here and it is free (and you only get one email per week).
How about a way to date all the photos and pages you will be doing in December?
You can use these stamps for each date from December 1 to 31, 2016.
You get all the dates from 1 to 31, the month of December and the 2016 year. Whether you create a single layout that needs a date, or a series of 31 pages, you have everything needed to date them.
You need to be logged in to download this sample. You can either login, or register on the top of this page.

Have you ever wished to see your name in big neon letters on a marquis? Now, you can get exactly what you wished for.
As a sampler, this week, I created a few elements on the Halloween theme. I just found some shapes, and chose to create a simple outline.
This script will be fun for anyone who has a cooking theme project: now you can write and draw with flour. Well, not real flour but you can turn your design into flower looking elements.
As a sampler, this week, I created a complete alphabet for you. It includes all the 26 letters, and some punctuation elements.
A lot of scrapbookers and designers love to create and use clusters, but the task is often daunting because of numerous repetitive tasks that seem to drain their creativity. So, why not have a script to give them a jumpstart?
As a samplers, this week, I used a kit from Hat of Bunny, Baby Mine. I ran the script to create a corner cluster for the bottom right corner.
Although they might be getting less and less popular in real life, photobooth are still often associated with fairs, and fun places. Back in the days, you could get a set of 4 black and white photos in those booth. Over time, they became more modern and started offering color photos. Those strips of photos still bring back memories to many people.
As a free sample, I am offering you the frame that was created when I ran the script for the four pictures of my daughter and her friend. It is 660x1950 pixels, which is about the size of a real photobooth strip of photos. Add your own photos to it and place the result in your next scrapbook project.
Making clusters can be a great way to expand a kit you want to sell, or a way to use a kit you just purchased.
This week, with Heather T's permission, i am giving you the exact strip cluster that I made using this script.
Creating a geometric pattern can be easy if you have only one shape, but it can become tedious if you have multiple similar shapes, using different colors. Until now, you either had to do them by hand, or rely on layered templates, which only offer a limited number of color arrangement.
Although Easter is over for most people, the colors associated with Easter are still very appropriate for spring, so whether you want to showcase your Easter photos, or spring photos, these colors should be quite suitable.
Did you register to our live class, tomorrow? There is still time to do so.
Linda asked me recently if i could create a script that would generate a painted background from an image. Of course, one can always use the Brush Strokes effect in Paintshop Pro, but sometimes, we only want an abstract background based on the colors of a particular image we like. It can obviously be hard to find a perfect match unless we create it ourselves.
This week, i picked a few very colorful images on Morguefiles and turned 3 of them into full size papers. Do you have a fun, happy project you want to showcase? You can use those background papers as a base for showcasing your photos. You can also use those papers in other ways (or use them with other scripts!).
Can you create your own sticker out of any image you have? Sure you can. Use any png image (even if you extracted Uncle Jim from a photo) to turn them into custom stickers. And also, have a peek how you can make that sticker look like it is curling up a bit.
Creating designs for seamless tiles is not that hard, but creating many using the same palette without redoing the same one twice is a little be more challenging.
For a sample, i created 8 tiles in the green colors (for St-Patrick month). Each tile is 250x250 pixels and can be scaled up or down as a pattern. You can add a rotation. You can combine two tiles. You can duplicate a single tile and flip/mirror it to create a different pattern.
What do you know about Adjustment Layers in PSP?
A few years ago, I came up with a script that would create uneven pieces of papers around individual letters. Those were perfect to simulate the look of ransom notes or such and it was called Kidnap Alpha.
This week, I created a basic alpha using this script. The base paper is grey and the letters are either black or dark grey. All the edges are torn.