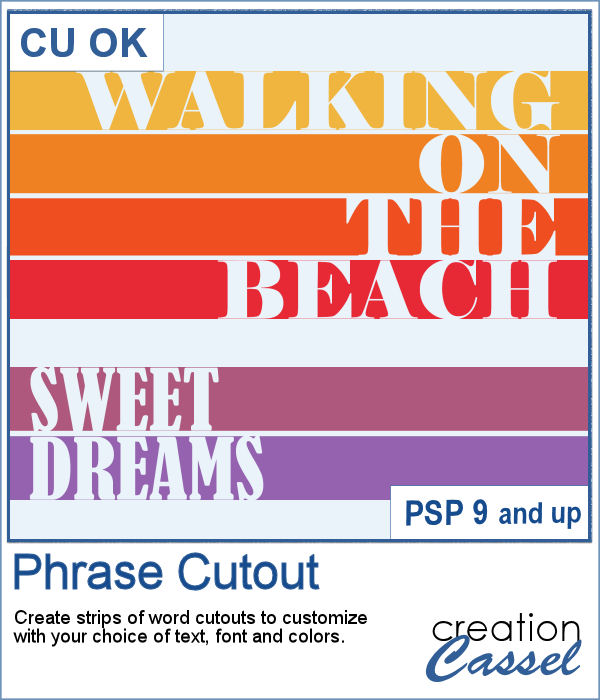
Sometimes, you might want to showcase a word or a phrase in a unique way. Using a cutout is one of those original ways to add a title, a phrase, a greeting, etc.
This script will do all the repetitive tasks for you in just a few seconds. You have total control over what font you want to use, what word or phrase you want to write and what size you want your strips to be. The script takes care of the rest.
Although the strips will be black, you have the option to change their colors as you wish.
Get this script in the store: Phrase Cutout
In order to win this script, add a comment on this Facebook post telling us what is the first phrase you would like to write with this script (remember, add a comment, not just a Like!) The winner will be announced in the newsletter, next week. Not a subscriber yet? Not a problem. You can register here and it is free (and you only get one email per week).
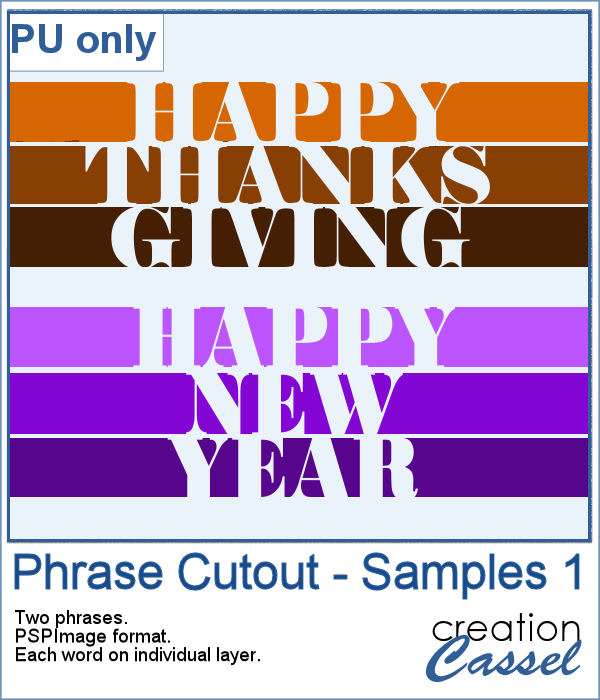
As a sample of what can be done with this script, I wrote two common phrases that you might want to use in the next few weeks. The strips are black (the colors are for the preview only) and about 300 pixels high and 4800 pixels long so you can place them in various ways on your project.
These files are in .pspimage format, so can ONLY be opened in Paintshop Pro.
You need to be logged in to download this sample. You can either login, or register on the top of this page.

Creating paper trees might be a simple task but it still takes a bit of time when you have to open a paper, make a selection, copy it, paste it to another image and then, create another piece, slightly smaller and repeating the process piece by piece.
To offer you a sample of what can be done with this script, I created 3 layered paper trees made from the kit
If you need to have some butterflies on a project, you might be able to extract photos of realistic ones, but maybe you would prefer to have some that perfectly match your kit, or your project.
For a sample, I ran the script using the Birthday kit from Marisa Lerin, and tweaked the resulting butterflies to give them some 3D looks, in addition to changing the color of the body and adding an inner bevel.
Did you have a peek at the Layered Flowers script from last week? You could create a set of layered circles, but this week, you can create a set of layered papers cut into various shapes with points. Although you can decide how many points each shape will have, the script will randomly create those shapes to give you a unique result every time.
For a sample of this script, I used papers from the bundle
If you had some traditional papers, you might want to cut out some circles and layer them to create a "flower" in the color of your kit or project. Doing that is tedious with paper, but also very tedious with digital ones.
For a sampler, I ran the script with a few papers from a kit, Happy Birthday, from Marisa Lerin. You can get the whole kit for free, HERE.
Scallops can be a fun design but other than getting a simple template that is a single color, you are limited in the options available. This script will allow you to create a variety of scallop outline patterns that will be either seamless or a full sheet of the size of your choice. Using that outline, you can add a background of any color, or even using a gradient.
Since this is October, you might plan either a Halloween party or expect to take some Halloween pictures. This set of two seamless scallop tile will be perfect to create your paper or background. Since they are in .png format, you can add a custom color behind it.
Do you need the look of burnt edges around a particular element but other than doing it yourself, it seems really hard to find the right shape, or the right font or the right size for your own element?
As a sample, this week, I created a few paper pieces that were run through the script. I created those shapes simply with the freehand selection tool to give them a random shape right from the start. Of course, the script would burn the edges but I wanted something a little different.
How would you like to get a fun, unique label to use as a title or tag on your project? If you are looking for some ready-made ones, it might be hard to find the perfect one, with the text you want, or the size you want.
As a sample of what can be done with this script, I created 4 labels with the seasons for you to use. They are 600 pixels in height so you can size them down if needed. If you have a cutting machine, you can also use it to embellish your paper projects.
Do you sometimes find some interesting masks, but they are the wrong shape or the wrong orientation?
As a sampler, I am giving you the mask created for the preview. It is square and has some delicate flower designs on the edges, both inside and outside of the basic shape. This should allow you to showcase your photo with little interference from the cutouts.
This is the second set of tubes to create crochet lace edges on any element you create. This set includes 5 more picture tubes that you can use simply while drawing with your cursor.
As a sampler, this week, I created an oval lace frame using one of the tubes in this set. It is left in greyscale so you can colorise it as you wish. You can use it to frame a picture but also a quote or a particular element you might have scanned and extracted, like a memorabilia.