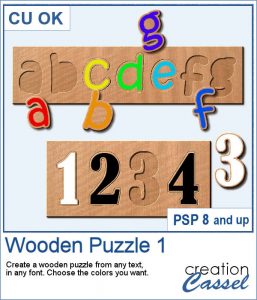
This script will allow you to create a custom-made wooden puzzle with any text you want. You can add a really unique look by choosing any font, and also any color, gradient, pattern or combination of those.
The end result will be on separate layers so you will be able to move each individual piece outside of the puzzle.
Get this script in the store: Wooden Puzzle 1
In order to win this script, add a comment on this Facebook post telling us what text you would use with this script (remember, add a comment, not just a Like!) The winner will be announced in the newsletter, next week. Not a subscriber yet? Not a problem. You can register here and it is free (and you only get one email per week).
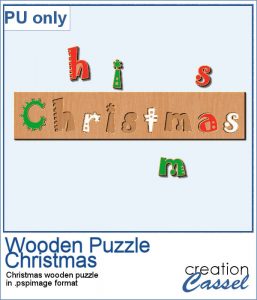
This is that time of year with the holidays coming up, and this sample puzzle will spell the word Christmas using a funky font. The whole puzzle is in .pspimage format, so you can move the individual pieces around. Furthermore, all the layers are grouped so you can copy and paste the whole puzzle onto another project. You can ungroup all the layers OR simply rearrange the pieces you want to move, above the group so they will display their thickness correctly.
You need to be logged in to download this sample. You can either login, or register on the top of this page.

Instead of starting with a fixed photo shape and ending up with an odd sized frame, how about starting with the final frame size and working your way back to the size of the individual images.
Since everyone loves to display their own photos, I am offering you the layered template in .pspimage version of the frame showcased in the preview. Each photo spot is part of a mask group so that you just have to copy and paste your photo inside that group for it to show through. No need to select, or delete anything.
Do you sometimes want to use an accordion fold on an image or a roadmap? It is a fun way to display an image but it can be quite tedious to complete accurately. You need to measure, cut, skew, and align each piece correctly. In addition, there is also a matter of light and dark on each piece to make them consistent with the light source.
Since this script is applied directly to a photo that is yours, you likely would not care for a sample from my photos. So I decided to create a few straight ribbons in Halloween colors, and run them through the Knot #13 script. You now have 3 straight ribbons and 3 matching knots to embellish your own Halloween themed projects. What will it be?
Placing photos in a fanned display is not very difficult, but it can be tedious, especially if you have many photos. That is where this script comes in. It will automate every step, from opening the images, resizing them, copying and pasting them, rotating them correctly and aligning them precisely. In addition, the script can also add a white border and/or a drop shadow to each of the photos in the same run.
For a sampler, I was a bit unsure what to give you. Well, I used the display from the preview and I made a layered template for you. It is in .pspimage format and has mask groups so you can simply place the photos inside those groups and only the area within the frame will show through, even if your photo is larger than that "hole". That means you have no cutting or trimming to do with your photos.
If you want a custom fence, you can do it with individual posts and boards you can measure and layer. It might not be too hard, but takes a while to build. What if you can create one in just a few seconds?
Running this script with a simple wood texture image, I created this fence that is in separate layers for you to tweak it.
How about creating a fun and unique etched element in the shape and color of your choice. This script will allow you to do just that to create alphabets, titles, shapes even frames starting with a simple black and white image.
Using the script, I created a set of 13 arrows from 4 different shapes. Because of the 3D effect applied to the elements, it is not possible (or recommended) to rotate them more than just a little without messing up the light and shadows from the elements themselves. That is why, each shape has been run the script in different orientations. These arrows will be a great way to add focus to an element of your project.
There are various ways to add a date, but did you ever think of writing it on a button? Why not? They are perfect in size to add small text like a date and with this script, you can customize it with the color, gradient, pattern, text, font or even other designs.
For this week, I created a set of 13 buttons that you can use with those school pictures that you just took, or had for years, whether they are yours or your children's or grandchildren's.
If you want to create your own labels, it might not be too difficult, but how about creating it faster than if you did them manually?
As a sampler, I created a set of labels based on a simple diamond shape. The paper is a light yellow and the accents are made of gold patterns.
Whether it is for a kid project, a school-related project or just for the fun of it, you can now create scribbled drawings out of any shape or letter, whether you drew it with a brush, a preset shape or the text tool.
As school is either starting or going to start soon, I created a full alphabet using this script. I picked four basic colors for a really bright effect. Remember that if you want those to be considered scribbles, you should not add shadows. However, if you want to pretend the lines are strings or wires, then you can add some. Don't go crazy with the shadows though; you don't want your element to feel like they are floating.
Whether you want to add a date, a mention of an event or a location as if you were traveling around the world, this triangular datestamp will allow you to add a personal touch to your project.
As a sampler, I created 12 stamps with the months of 2018 and that you can personalize as there is still space to either add a date, a design, or anything else you might want to add (or you can leave it blank too).