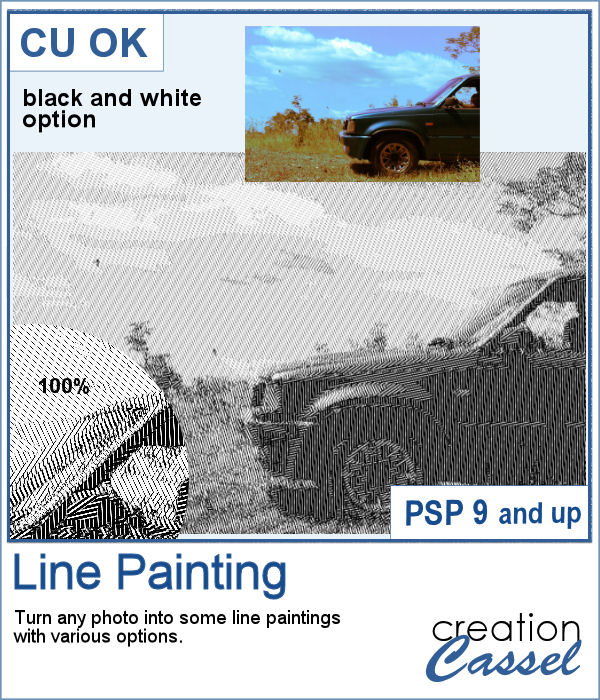
When I was in school, I remember one art class where we had to use straight lines of different thicknesses to replicate a simple image. I was not very good at that, but I would have loved to have this script, which does it in just a few seconds.
Starting with any image, the script will reduce the number of colors and change it to greyscale to determine the brightness of each section and then fill those sections with straight lines in different thicknesses. In the end, you get various options to finish the project. You can use those line paintings to display photos that have odd colors, or not in focus, or just as a background for your page.
Get it in the store: Line Painting
In order to win these tubes, add a comment on this Facebook post telling us if you have ever done line painting in school (remember, add a comment, not just a Like!) The winner will be announced in the newsletter, next week. Not a subscriber yet? Not a problem. You can register here and it is free (and you only get one email per week).
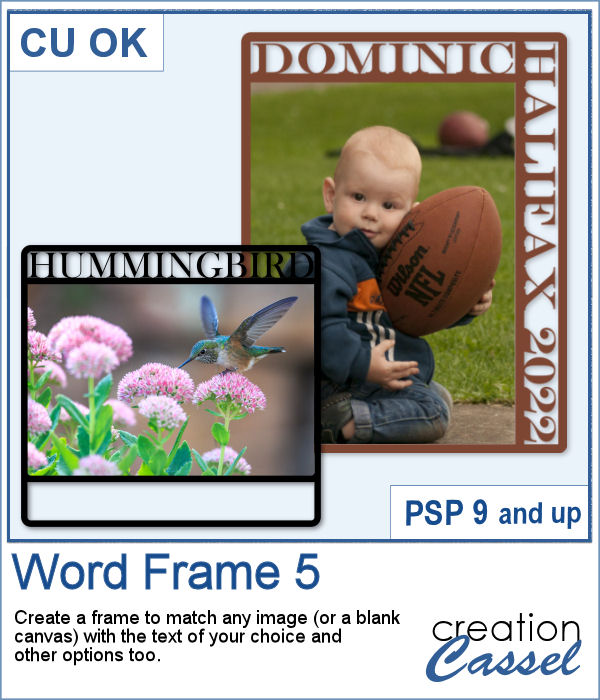
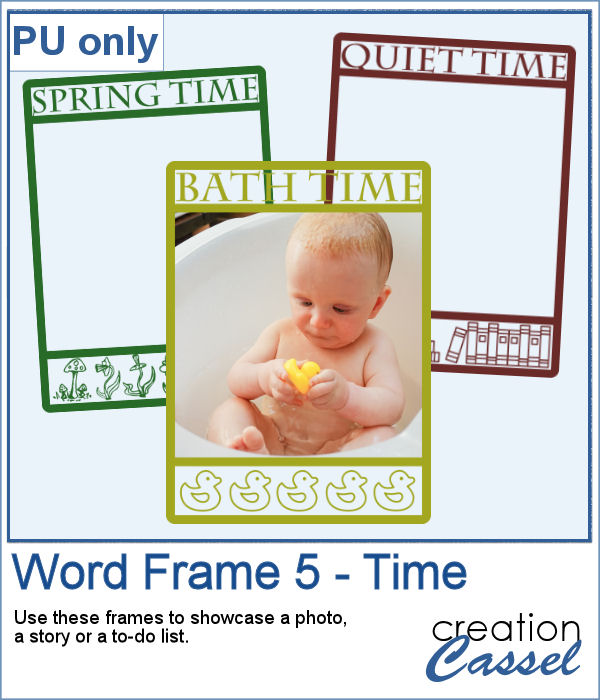
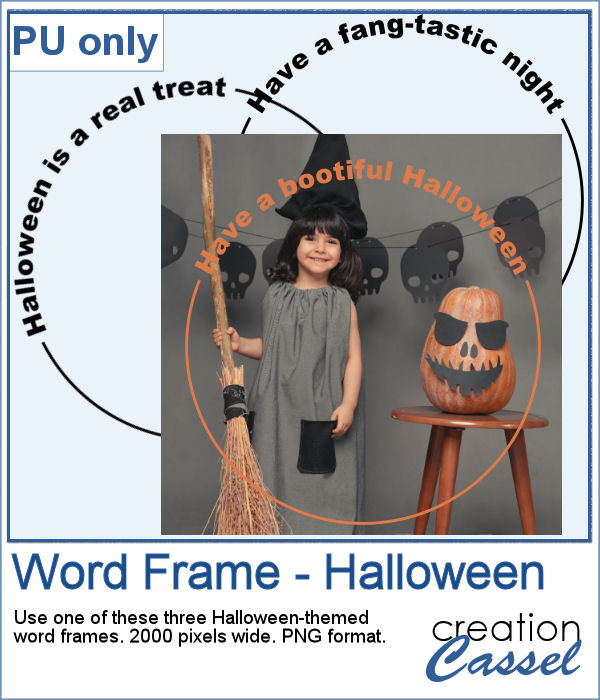
As a sampler, this week, I created some simple word frames for Halloween. You can colorize those frames to suit your project or your photo.
You need to be logged in to download this sample. You can either login, or register on the top of this page.

You can now create your own frame to showcase your favorite photo. No more hoping to find a ready-made frame that has a word suitable for you. You can choose any text you want, and even a specific location or date that is personalized to tell your story.
As a sampler, I created three frames starting from a 1400x1400 pixels blank image. I added the text on top and created an empty section on the bottom. I simply filled that section with various designs to match the top part. Each frame is black, but you can colorize them however you need to fit your project.
If you want to combine a set of papers into a new design, you can create this brick wall pattern. But doing it manually, is absolutely tedious and difficult. Which is a good thing there is a script for that.
For a sampler, I am offering you a greyscale version of the pattern in the preview. There is no background so you can use any color or paper for it. To colorize the bricks, you can either use the Colorize command over the whole image, or over a selection of some bricks or rows. But if you want to be fancier, you can duplicate this layer, lock the transparency and paint over some bricks, and then change the Blend mode.
Placing photos in a perfect circle is an interesting way to display them, but it can be very tedious to take care of resizing each photo to the correct dimension for their number, then spacing them, aligning them and rotating them perfectly to form that circle.
As a sample, I ran the script with 8 photos and simply replaced the photos with grey squares (you don`t need to have my photos, do you?). Everything is left in unmerged layers so you can change the color of the borders if you want. You can insert your photos inside the mask groups. You can add various papers or elements to decorate the page.
Some designs might be quite tedious to create, and even more challenging when you want some variety, in thickness and colors.
As a sampler, I used a simple color palette of pinks and blues, I chose 8 tiles that you can use for your own papers. Add a similar color as a background and it will make some "lines" disappear, creating a completely different look. Have fun with these tiles in PNG format.
This is the third in a series of Christmas ornaments that you can run to generate elements that will be perfectly matching your project, your photos, or your color palette.
I ran the script to create a series of red and white ornaments, and I had six of them packaged for you.
Diamond shapes will convey an impression of dynamism so using diamond-shaped slats to showcase your photos will give them a new angle.
For a sampler, I created this layered template for you to showcase your photo in the middle. The template is 3600 pixels wide and in pspimage format for PaintShop Pro users.
If you want to create new patterned papers, you can draw them yourself or use a readymade template. However, while using this script, you can create many more seamless tiles, using a single color palette of your choice. This will speed up the process.
As a sampler, you can get these 10 seamless designs showcasing soft spring colors.
More crochet laces for you to decorate your projects. Create them in any length you need, and colorize them in any color you want to match your project.
For this freebie, I used a long lace and ran the
If you like to use templates to speed your scrapbooking process, using ready-made templates have some draw-backs and could require additional steps to make them as flexible as you need. And to manipulate them one by one, manually, although it is easy, can be tedious.
This week, since the product added in the store is a tool, I chose to create another template like last week, with slats, but this time, you can showcase your little ghosts or goblins from last Halloween.