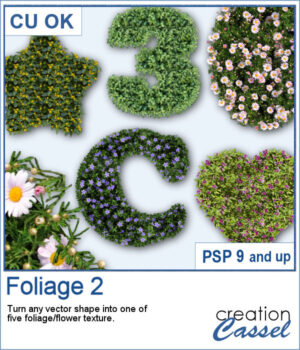
You can draw any design in one of the 20 picture tubes of icing. You can hand draw any design or use one of the included four preset shapes as paths. Or you can use your own vector work to create a custom path, and then use the VectorTube script to add the icing evenly.
Create frames, highlights, shapes, or even text.
Get these tubes in the store: Decorative Icing 3
In order to win this script, add a comment on this Facebook post telling us if you have ever played with the other Decorative Icing picture tubes (remember, add a comment, not just a Like!) The winner will be announced in the newsletter, next week. Not a subscriber yet? Not a problem. You can register here and it is free (and you only get one email per week).
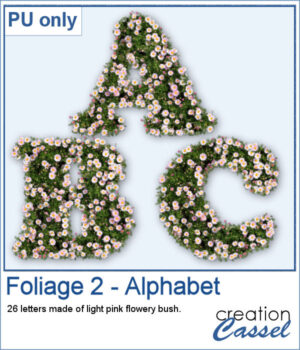
For a sample, I created two phrases (with separate words) that you can use for any summer project. Arrange the words as you want, since they are individual files in PNG format. No shadow is included so you can add your own.
You need to be logged in to download this sample. You can either login, or register on the top of this page.


As a sampler, I created a set of white shaggy digits. You can colorize them if you want to match other colors in your project. Each digit is about 500 pixels high.
You can create gold and silver chains with various picture tubes available in the store, and now, you can add colored pearls to your jewelry box.
For a sampler, I created a set of digits using the red pearls. Each digit is about 550 pixels high, so you can resize them as needed.
Sometimes, a random skyline is what you need for a background, but how do you make one without using the same one over and over again? This set of picture tubes will randomly place different elements for you and you can colorize them however you want, or leave them black.
For a sampler, I created a multi-level city skyline in greyscale. You can simply colorize it to suit your project and then, use it in the background. Adjust the opacity if you want it faint and discrete.
I released the first set of gold chain picture tubes over 10 years ago and they were VERY popular especially since those were totally new among the PSP tools. Today, I created another series of gold chains picture tubes. Those are mostly double-links chains.
As a sampler, I created a vector shape with wavy edges and ran the VectorTube script to place the gold chains neatly along that edge. For the double frame, I used the same method to create two "matching" shapes and then used the interlacing technique to give the frame that twisted appearance.
To create a nautical project, using netting is a common element. Recently, we had some netting picture tubes that you could use to embellish your project. This time around, the netting is variegated, giving the whole project a different look.
As a sampler, I created a wood frame (using a script) and added three layers of netting. I distorted them irregularly, and deleted what was extending outside of the frame. I then added some seashells from the 2019 picture tubes.
Whether you want to create a nautical project or find a way to have a different type of background, you can use these picture tubes. They are completely seamless so you can juxtapose them on top of each other to make a tall net. Then, you can use the Warp Mesh, or the Deformation map to give some movement to the net. Finally, add elements to your page, whether they are beach elements or photos you will attach with clothespins.
For a sampler, I created a full-size 3600x3600 image with a neutral color netting. You can erase some parts, you can use the Warp Brush, or Deformation map to make waves, etc. It is a png format so you can add whatever background you want, or even thread ribbons, vines or other elements through the mesh.
If you ever braided ribbons in the past, you know that they could make for a nice long element that can then be used in various shapes. This is the same that you can do with PaintShop Pro and this set of picture tubes.
As a sampler, I just made a basic oval shape and using the VectorTube script, added some green braided ribbon. I added a ribbon bow (which is from Digitalscrapbook.com) and colorized it to match the ribbons (it was light blue initially).
How about some climbing vines in the background for your next spring or summer project? These picture tubes will partially cover a wall of your choice, with vines. You can change the step to make it bushier if you prefer.
For a sampler, I created a lattice frame where I added two vines. I created a path with the Pen tool, where I wanted the vines to go and ran the VectorTube script to place all the leaves perfectly on the path. I repeated the process with a green vine and the pink one.