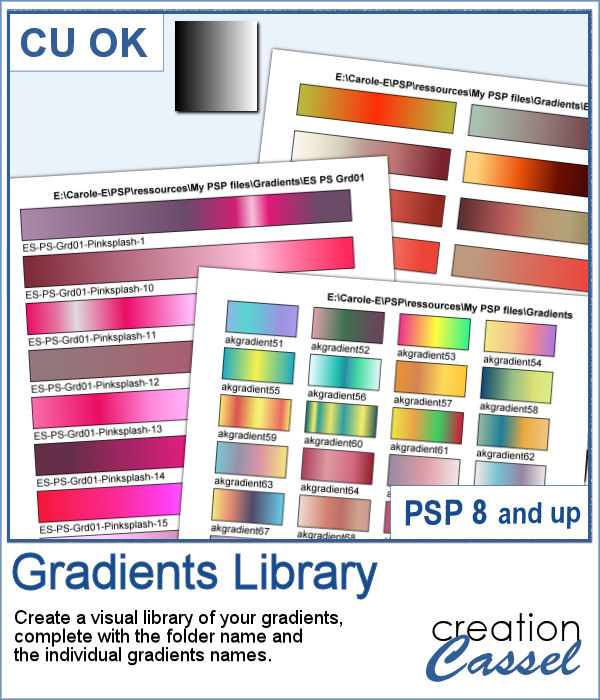
If you want to view your gradients, looking at the little thumbnails in the Materials Palette is not the best way. But if you want, you can now make a larger image that you can even print, to display all the gradients in a specific folder. Make sure you read the instructions because you will have to edit your script before running it.
Get this script in the store: Gradients Library.
In order to win this script, add a comment on this Facebook post telling us if you tend to collect gradients over time (remember, add a comment, not just a Like!) The winner will be announced in the newsletter, next week. Not a subscriber yet? Not a problem. You can register here and it is free (and you only get one email per week).
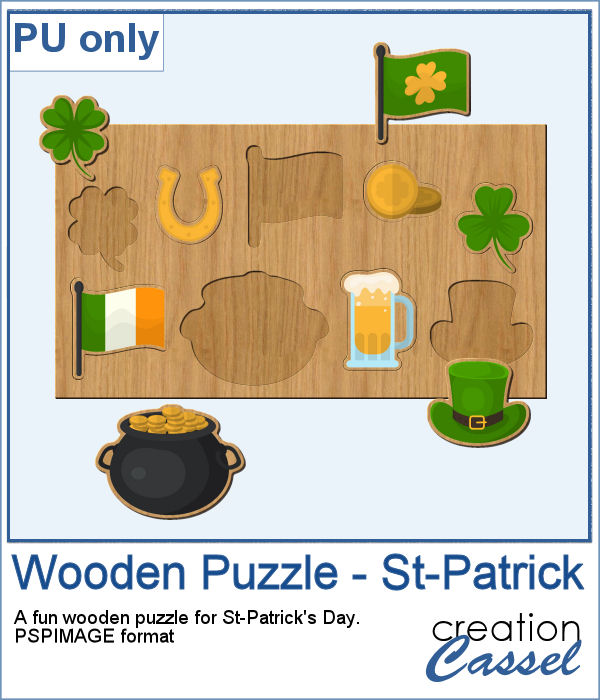
As a sample, with summer coming, with the warmer weather, I thought you might like a set of fresh popsicles. This is made from the Wooden Puzzle 2 script, and all the pieces are grouped together, allowing you to move the whole set onto your next project. Once that is done, you can ungroup the pieces and move them around, individually.
You need to be logged in to download this sample. You can either login, or register on the top of this page.

Creating a gradient might be simple but creating a specific one to replicate an effect you see on an image might be tricky.
As a sample, I created two gradients from photos of sunsets. They look different with different color schemes but can both create a nice background for your next project.
With this script, you can take dozens or hundreds of photos and create a single image mosaic. You choose the "target" image to become a mosaic, and the folder where all the images are saved and the script will take all those images and create that mosaic. You can choose as many images as you want.
Since it is just a couple of days to St-Patrick's Day, I created a fun wooden puzzle with some St-Pat elements. The puzzle is left in unmerged layers so you can use the pieces separately if you want, and they are also grouped so you can copy and paste the whole puzzle onto another project of yours.
It is a festive time, and sweets are everywhere. How about creating some delicious licorice to decorate your cakes, cookies or scrapbook pages? Although we are used to seeing traditional green, red or black licorice, with the magic of PaintShop Pro, you now have 12 different colors, and even more, if you want to adjust the given colors or colorize the grey one.
For the freebie, this week, I created another alphabet using 5 of the licorice tubes. This alphabet also includes 10 digits so you can include some dates.
Although paperclips can be common on various projects, they can also be boring. How about customizing your paperclip with a name, a date, a place or another message to make your project unique.
How about some simple clips to help date your photos?
Nobody ever has too many ribbons, bows and knots in a toolbox. This script allows you to create a layered knot from any straight ribbon. Whether you have an opaque ribbon or a translucent one, or even a lacy one. Whether your design is simple or even directional, and the script will align the elements correctly. Although you need a ribbon that is 18 times its thickness to get the full effect (with directional design mostly), you can have great alignment of the design.
As a sampler, I am offering you the same knots as in the preview. I edited the files so that the whole knot is one layer and the back loop is on a separate layer. That should allow you to insert something in that loop.
If you want a custom fence, you can do it with individual posts and boards you can measure and layer. It might not be too hard, but takes a while to build. What if you can create one in just a few seconds?
Running this script with a simple wood texture image, I created this fence that is in separate layers for you to tweak it.
Whether it is for a kid project, a school-related project or just for the fun of it, you can now create scribbled drawings out of any shape or letter, whether you drew it with a brush, a preset shape or the text tool.
As school is either starting or going to start soon, I created a full alphabet using this script. I picked four basic colors for a really bright effect. Remember that if you want those to be considered scribbles, you should not add shadows. However, if you want to pretend the lines are strings or wires, then you can add some. Don't go crazy with the shadows though; you don't want your element to feel like they are floating.
Creating a patchwork pattern might be fairly easy with selections, one after the other but some designs would be very tedious to create in a seamless pattern especially if it is not a design that fits inside a square or rectangle. However, with the calculations available in a script, you can actually create that seamless pattern from any design.
As a sample, I thought you might like to have some of the tiles used in the preview. They were done using various wood texture images. One tile is 1000x1000 and the other is 1200x1200 pixels. Since they are both seamless, you can use them on a larger image. You can also rotate the pattern at 45 degrees for an interesting effect.
Threading your favorite ribbon manually around a frame is very tedious and hard to do precisely, but this script will allow you to do it using any straight ribbon you already have.
For a sampler, I simply am offering one layered template made with the lace ribbon in the preview. Everything is left on unmerged layers so you can use the template and modify it as you want. You can punch a whole in the center, or clip some fancy papers on it, or replace it by your favorite photo, like in the preview.