Whenever you are creating a kit or a layout, you might want to include or use some matching ribbons. Unfortunately, not all kits have them. If you are creating your own kits, then you will want to add such matching ribbons, but in the end, you tend to use the same type of ribbons, while you would prefer some variety.
You can use the Ribbon Factory script to create ribbons based on the color palette, but if you want to match some patterns used in the papers, you will need this script.
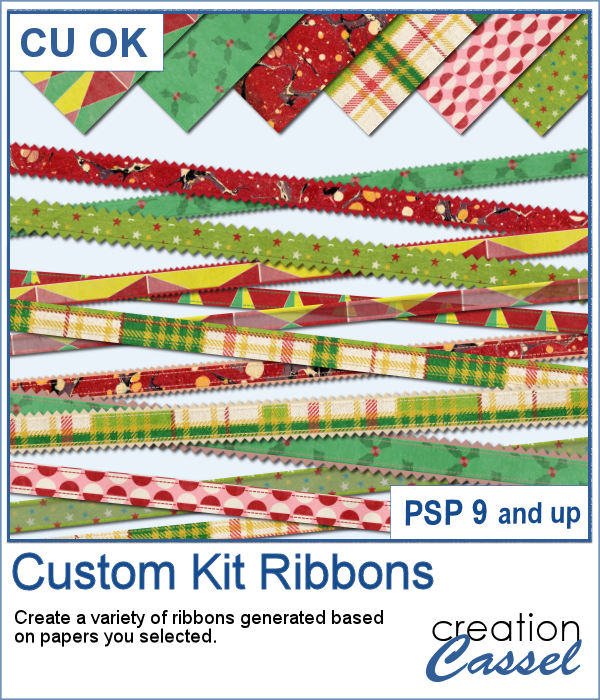
You can generate up to 50 ribbons per run, and although you pick the thickness of the ribbons and the papers to use as a base, the rest will be randomly decided by the script, so you will get a bunch of different ribbons. Keep the ones you like, discard the others.
Get this script: Custom Kit Ribbons
In order to win this script, add a comment on this Facebook post telling us what do you tend to use ribbons for (remember, add a comment, not just a Like!) The winner will be announced in the newsletter, next week. Not a subscriber yet? Not a problem. You can register here and it is free (and you only get one email per week).
As a sample, I am including 12 of the many ribbons that were generated in making the preview for the script. Using 6 papers from a kit from Janet Scott. You can find that paper kit HERE.
Each ribbon is 3600 pixels long and obviously match those papers.
You need to be logged in to download this sample. You can either login, or register on the top of this page.

Did you get some pictures of your last Valentine Day with your valentine?
For a sample, I created a heart shape frame using a preset shape, and ran the VectorTube script to place the little hearts all along the shape. With a little shadow added, you have a fun frame. The shadow is only added to the chain, so you can add your own shadow to the whole frame if you want.
You can never have too many bows to embellish your projects. And since you can now create them from your own ribbons, you will have a perfectly matching element to attach to the ribbons.
For a sampler, I created 3 basic ribbons with a Valentine Day theme and ran the script. So you will get 3 straight ribbons (that you can run other scripts on) and 3 matching bows.
The Crochet Lace edges have been so popular in the past that I am back again with another set. These are extracted photos that needed to be edited to make them really seamless.
As a sample, I wanted to show you how the two directional lace tubes can be used to create circular elements.
You might have those lights, at home, to decorate your windows or your tree, but now, you can do the same with your digital projects (and no electric cost).
As a sample, I create another swag for the Holidays, made exclusively of tubes from PSP or from the store. You might recognize the light strings from last year (none of the light is burnt!).
Last week, I released some new corner punches and they were a hit! But not only that, I got some inspiration from Sue, who suggested some more punches for Christmas next year. But I didn't wait until next year! I started working on those immediately.

As a sample, I created a fun frame for you using one of the corner brushes. Since the brush was not making an exact circle, I added some parts to make it into a real circle. Then, using the locked transparency, I painted all the elements separately. It is not hard, but a bit tedious. Then, I simply added some colored edges inside the frame. The whole frame is about 3200 pixels wide so you can size it down as needed.
It might be simple to create a black and white photo with Paintshop Pro, and it is also easy to colorize that photo with one color, but how about using TWO colors? So, instead of light red and dark red, you would want yellow and red, or blue and purple, or blue and brown, or whatever color combinations you want to make a unique image?
As a freebie, this week, I obviously could not give you a sample of the script since it is applicable only on your photos, so I thought you might want to showcase some photos in a holiday frame so I created one wooden frame using the
Creating paper trees might be a simple task but it still takes a bit of time when you have to open a paper, make a selection, copy it, paste it to another image and then, create another piece, slightly smaller and repeating the process piece by piece.
To offer you a sample of what can be done with this script, I created 3 layered paper trees made from the kit
Did you have a peek at the Layered Flowers script from last week? You could create a set of layered circles, but this week, you can create a set of layered papers cut into various shapes with points. Although you can decide how many points each shape will have, the script will randomly create those shapes to give you a unique result every time.
For a sample of this script, I used papers from the bundle
If you had some traditional papers, you might want to cut out some circles and layer them to create a "flower" in the color of your kit or project. Doing that is tedious with paper, but also very tedious with digital ones.
For a sampler, I ran the script with a few papers from a kit, Happy Birthday, from Marisa Lerin. You can get the whole kit for free, HERE.