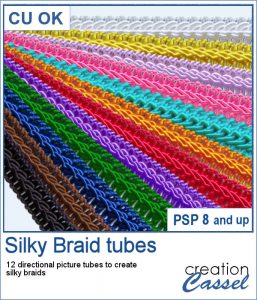
Directional tubes are perfect to create decorative elements in any length and shapes. These are no exception. They are extracted from silky braids and tweaked to be directional and as seamless as possible. You get 12 different colors of silky braids to use in various ways, to create straight trims and frames.
You can use your cursor to make freehand designs or use the VectorTube script to create very regular shapes too.
Get it in the store: Silky Braids
In order to win this script, add a comment on this Facebook post telling us what you what tends to be your favorite color for trims (remember, add a comment, not just a Like!) The winner will be announced in the newsletter, next week. Not a subscriber yet? Not a problem. You can register here and it is free (and you only get one email per week).
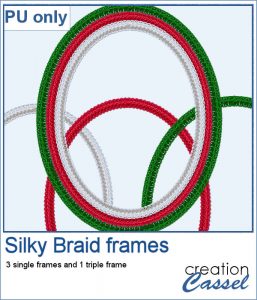
For a sample, this week, I created a triple frame but also included the individual frames so you can use them separately. I simply started with a vector ellipse and ran the VectorTube script. I changed the size of the ellipse every time to have different size of frames without resizing the frames (or the trims) themselves.
You need to be logged in to download this sample. You can either login, or register on the top of this page.

Instead of starting with a fixed photo shape and ending up with an odd sized frame, how about starting with the final frame size and working your way back to the size of the individual images.
Since everyone loves to display their own photos, I am offering you the layered template in .pspimage version of the frame showcased in the preview. Each photo spot is part of a mask group so that you just have to copy and paste your photo inside that group for it to show through. No need to select, or delete anything.
Nobody ever has too many ribbons, bows and knots in a toolbox. This script allows you to create a layered knot from any straight ribbon. Whether you have an opaque ribbon or a translucent one, or even a lacy one. Whether your design is simple or even directional, and the script will align the elements correctly. Although you need a ribbon that is 18 times its thickness to get the full effect (with directional design mostly), you can have great alignment of the design.
As a sampler, I am offering you the same knots as in the preview. I edited the files so that the whole knot is one layer and the back loop is on a separate layer. That should allow you to insert something in that loop.
You can draw a fun twisted cord any length or any shape you want, using this set of picture tubes. You get 12 different colors that you can combine with any theme or color palette you have. Of course, you can also tweak the colors to get something more muted, or pastel if that is what you need.
As a sampler, you can get ahead of everyone with these fun Halloween tags, decorated with the twisted cords and cute little black cats. You get 5 tags with combinations of black and orange cords.
If you want to create your own labels, it might not be too difficult, but how about creating it faster than if you did them manually?
As a sampler, I created a set of labels based on a simple diamond shape. The paper is a light yellow and the accents are made of gold patterns.
Whether you want to add a date, a mention of an event or a location as if you were traveling around the world, this triangular datestamp will allow you to add a personal touch to your project.
As a sampler, I created 12 stamps with the months of 2018 and that you can personalize as there is still space to either add a date, a design, or anything else you might want to add (or you can leave it blank too).
How would you like to quickly create a monogram with a single letter and a name or several initials or even numbers to create a date for a particular event or simply to keep track of your pages?
As a sample, I asked on the Facebook page and I quickly got 4 suggestions of single words that I turned into monograms. They are fairly large (900 pixels high) so you can use them in various projects and size them down if needed.
You can now turn any vector shape or text into a sandy texture with some dispersion of the sand. You can choose a real sand color or a totally different color, for a fantasist appearance. You can even try to use a gradient for a fun effect.
For a sample, I ran the script on single digits using the font Blackadder ITC, which is a font where the characters are kind of crooked and uneven, which I felt was a good match with a sand texture. You get all the digits so you can add a year or a date on your project.
Creating a patchwork pattern might be fairly easy with selections, one after the other but some designs would be very tedious to create in a seamless pattern especially if it is not a design that fits inside a square or rectangle. However, with the calculations available in a script, you can actually create that seamless pattern from any design.
As a sample, I thought you might like to have some of the tiles used in the preview. They were done using various wood texture images. One tile is 1000x1000 and the other is 1200x1200 pixels. Since they are both seamless, you can use them on a larger image. You can also rotate the pattern at 45 degrees for an interesting effect.
Yes, you can always check out the images in your Windows Explorer to view all the patterns you have but if you want a printed library, you would need a lot of work to create it. However, this script will create one for you, in just a few seconds. Choosing one pattern, the script will find all the other patterns in the same folder, and display them on a standard 8.5x11 sheet of paper, along with the name of the particular pattern and the name of the folder. This is perfect for you to then print out and keep in a binder.
For a freebie, this week, I created a fun frame made of sand, that you can use on top of your "beachy" photos. If you want more sand, you can always duplicate this image and add an Antique Mosaic effect to it.