Web
Analytics

New script – Ribbon Tag Corners

cass-RibbonTagCorners

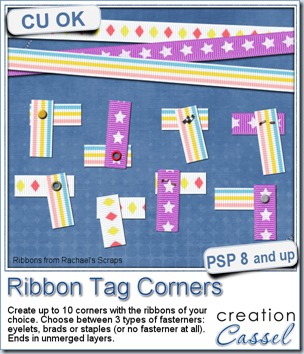
In traditional paper scrapbooking, what would you do with small bits and pieces of ribbons? I am sure you can think of many things you could do. In fact, i saw someone create fun little corners with ribbons and i figured it would be interesting to have a script to randomly select ribbons, cut pieces and a arrange them more or less like a corner and add a fastener.

I know, it is easy to cut two pieces of ribbons, and layer them together. But it is so much more fun to have the option to have 10 of them created in one run, all different and simply pick our favorite.

With this script, you can choose to have as many starting ribbons as you want, and you can create up to 10 corners at once. You also have 3 fastener options: brads, eyelets or staples. For the brads and eyelets, you can choose the color or pattern you want so it is easy to have something that matches the actual ribbons you are using, or you can have a metallic pattern for them too. If you choose staples, there are some staples that come from Rachael’s Scraps, included in the script. Or you can also choose to have no fastener added by the script so you can add your own, like a button, a gem, stitching, or any other element you have in your stash.

You can grab this fun Ribbon Tag Corners script in my store.

You have a chance to win this script for free by adding your name to this thread in the forum. I’ll be back next week with the name of a winner.

cass-RibbonCornerAs a sample of what you can do with this script, i have this one. I started with 3 ribbons from Rachael’s and generated 5 corners. I only picked one to work with.

First, i chose the eyelet as a fastener and used a gold pattern instead of a solid color. I think it turned out pretty good.

I added shadows on separate layers for the ribbons and using the Warp Brush, i tweaked the shadows on the ends of the ribbons to give the impression that they were lifted.

For the eyelet, i thought it would be cool to imagine that the ribbons were thick and the eyelet was very tight so i selected a circle almost as large as the eyelet itself, inverted the selection and then, on the top ribbon, i added a wide inner bevel. That is what gives that impression that the ribbon is “indented” by the eyelet. Isn’t that a cool effect?

You need to be logged in to download this sample. You can either login, or register on the top of this page.

New brushes – Corner punches A and B

cass-CornerPunchesA cass-CornerPunchesB

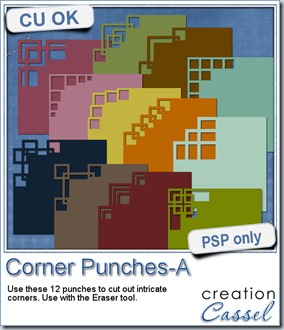
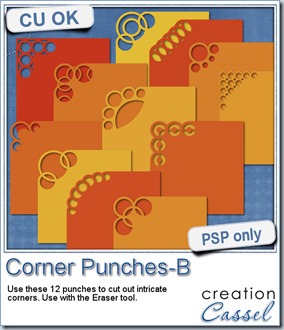
Last week, i released a set of brushes to be used like corner punches are used in the traditional paper crafting world. Those brushes are really brush tips that can be used with the Eraser tool to punch out the design but they can also be used with the Brush tool to add a corner “stamp” to the projects.

These brushes were so well received that i thought of making a second set, using mostly circles (the first ones were using mostly squares). They work exactly in the same way.

Each set includes 12 different designs, in two sizes: 500 pixels if you are using PSPX and older and a 999 pixels if you are using a newer PSP version. Of course, you can always size them down when you use them to match your particular project. Add a rotation and you can punch all four corners.

(and there is also a set for PS and PSE users!).

You can get those sets here:Set A and Set B.

There is still another thread in the DST forum where you can add your name and have a chance to win this Set B. Check out this thread, and tell me what graphic program you are using. I’ll be back next week with the name of a winner.

Are you unsure how to install brushes in PSP? No worries. I uploaded a short video tutorial just for you. You might also want to subscribe to this new channel so you can see the newest videos i will upload as i do.

cass-Ready-to-Use


If you are not yet subscribed to the newsletter, get on that list now! It is free to register and you get advanced notice of sales, and exclusive tips and tricks to make you more efficient with your PSP.

Register NOW

iNSD one week later

LateISBD

Did you enjoy a lot of good sales last week? Did you grab a lot of freebies? Do you want to create wonderful layouts with those newly acquired supplies, but want to make it a little bit more “yours”? Are you still missing some elements and want to create them?

This is perfect.

In the Scrapbook Campus, we have a special “late iNSD promotion”, where you can save $30 on the 6 months membership to the Element Creation Tutorials section.

Your registration will grant you immediate access to 40+ tutorials. Which tutorials are they? Check this list:


Paper Creation

  • Plaid (1)
  • Plaid (2)
  • Polka-dot
  • Gingham
  • Eyelet Fabric

Paper Use

  • Folded corner
  • Decorative Border
  • Decorative Border (2)

Tags and Journaling

  • Bar Code
  • Ticket
  • Leather Tag

Frames

  • Ribbon Frame
  • Postage Stamp

Text and Titles

  • Dymo tape
  • Wet Paint

Fasteners

  • Zipper
  • Scotch Tape
  • Wax Seal
  • Elastic
  • Bobby Pins

Photo Use

  • Simple Photo Border
  • Irregular Photo Border
  • Curved Photo
  • Folded Photo
  • Aged Photo

Edges

  • Frayed Edge
  • Worn Edge

Ribbons and Bows

  • Twill
  • RicRac
  • Bows
  • Nylon Strap
  • Tulle Lace

Textures

  • Sand
  • Denim
  • Felt
  • Quilting
  • Knitting
  • Wrinkled
  • Worn Edge

Miscellaneous

  • Metallic Elements
  • Braid
  • Sticker
  • Wool
  • Glitters
  • Feather

And there is one new tutorial EVERY WEEK!


This promotion is ONLY FOR 2 DAYS.

May 12th-13th ONLY

RegisterNow-01-200

What is a script anyways? (part 2)

Last week, we saw a few basics about scripts. Let’s continue the list of common questions.


Can scripts work on all PSP versions?

Yes, on all versions of PSP, 8 and above. However, the compatibility of any script with your version will depend greatly on the person who coded them, the type of script and the version it is created with. For example, if someone is recording a script with her PSPX2 and uses the pick tool, that script will NOT work in PSP9, simply because that pick tool does not exist in PSP9 so the script will fail. However, if a recorded script uses only tools that are also present in PSP9, it is more likely to work, although it is not certain either. There are various particularities in just about all the versions that have to be known, understood and taken into consideration by the scripter to create a script compatible with all versions. Unfortunately, too many people have limited knowledge of the scripting language and are not able to render their script compatible with previous versions so if you want to download or buy a script, make sure it is compatible with your particular version.


Some scripts go in the Restricted scripts folder and some go in the Trusted scripts folder. What is the difference?

As stated before, scripts are commands that will be executed for you. Some commands might have an effect on your computer or that cannot be simply undone with a Ctrl-z. Such commands include saving files to your computer, closing a file or using some more advanced Python commands. To keep your computer safe, the only scripts allowed to perform such tasks have to be in the TRUSTED scripts folder. It is a way for the computer to know that you TRUST those scripts to not cause any damage to your computer. So, to be on the safe side of things, always save a script in the RESTRICTED scripts folder, unless specifically asked by the scripter. It is a good habit to take.


My PSP is not in English, will scripts work?

Yes. Scripts are written in Python language and that is English based, even if your PSP is in a different language. Although the language of the coding is English, the message window could be coded in any language the scripter chooses. In my scripts, for example, I have a special code that will give you a French message if you are using a French version of Paintshop, and an English message in all other cases. Since I only know French and English, I could not code messages for other languages.


Hey! Photoshop has scripts too!

Yes, Photoshop has scripts, and they are also a set of commands, but coded in Photoshop’s language so they cannot be read by PSP. The scripts made for Paintshop Pro will not work with Photoshop, simply because PSP and PS use a different language. It is like a recipe written in English cannot be followed by an Inuktitut cook. In the same way, actions written for Photoshop will not work in Paintshop and vice versa.


Where to find good scripts?

Well, glad you asked! Where to find scripts will likely depend on what kind of scripts you want. I have been coding scripts for a few years now. I would not do painting scripts because I have no talent to paint or draw! So, many of my scripts are tool scripts offering many options. Check them out in my store. Almost all of them are compatible with PSP8 and up and I have a few free ones so give them a try and see what they can do for you.

Here are other sources for good photo and tool scripts

http://suzsplace.com/8scripts.htm

http://pixelnook.vapho.com/index_All.html

http://www.dejudicibus.it/psl/

http://www.sheilsoft.com/psp.htm

What is a SCRIPT anyways?

Following the series of articles on Tubes, i got a few comments and requests about other particular features of Paintshop Pro. So, here is the first part of a 2 part series on Scripts.


What are scripts anyways?

Scripts are a new feature introduced to Paintshop Pro by Jasc with the version 8. Scripts are a set of commands that are pre-recorded and executed on demand. Paintshop Pro comes with several basic scripts already loaded, but you can find more on the net that you can buy or download and install on your computer.


What can a script do?

A script can do just about anything you would do manually with your program. It can choose a color, floodfill, write text, draw shapes, make a selection, add a shadow, apply any effect that you would do yourself.


Why use a script?

The advantages of a script can be the speed of execution, and the precision. For example, a script can add a drop shadow to 50 separate layers in less than 30 seconds, while the same steps done manually might take a several minutes. Another advantage is the precision. If you need to create a selection very precisely or place guidelines “to the pixel”, the script can do it in the blink of an eye without any hesitation and very accurately.


Are all scripts the same?

Not really. There are different “types” of scripts. There are recorded scripts and coded scripts. Those are not “official” definitions, but a way for you to understand some major differences. There are element creating scripts, painting scripts, photo scripts and tool scripts.


What is the difference between a recorded script and a coded script?

With the arrival of scripts, in version 8, also came the ability to record them. For example, if you need to convert a photo to sepia, and then add 40% noise, you would be able to record those steps, save the sequence as a script and reuse it later in one click instead of several. Some snippets can be added to give the user the option to choose a color or such, but the user input is usually pretty limited.

On the other hand, when you use Paintshop Pro yourself, you can see what you are working on, you can see where to click to floodfill, you can see if the photo is horizontal or vertical and you can adjust your actions accordingly. A recorded script cannot do that because it just repeats the same steps over and over again. For example, if you record a script that draws a line along the edge of a 1000x1000 pixels paper, it will only work on papers of the exact same size. If you try to run it on a 3600x3600 pixels paper, the recorded script will not see the difference and will draw along the path you gave it initially. So, in order to have a script work with different images, formats, and sizes, additional commands need to be added and those commands cannot be simply recorded. Functions, loops, mathematical calculations, string manipulations and many more can be used. They require editing the code itself so a good knowledge of coding language is mandatory. Of course, coded scripts can do much more advanced tasks and mostly, can incorporate user input and work with it.

… to be continued next week

Do you have additional questions, about scripts or about PSP? just email me or post a comment. I might just address your point in the next segment.

What is a tube anyways?

The word “tube” is pretty specific to Paintshop Pro. We can hear PSPers use this word and even some derivatives, like “tubing”, which has nothing to do with going down the river on an inflated tube! All in all a tube is a bit like a sticker that you place with a click of the mouse. That is an '”easy” description and does not cover the full potential of this tool.

Tubes can be used in three main ways: 1- as single image to place as often as you want  2- as a series of images that can be placed in randomly  3- a series of images placed directionally. Let’s see them all in a bit more detail.

1- Tubes that are single images

These kinds of images are doing exactly the same thing as if you had a png image, with a transparent background and you placed various copies of it on your work. It can be a star, an angel, a handprint, a toy locomotive, a flower, etc. There is no limit to what can be used as a single image. If you can extract it, you can use it as a tube. Here is an example of several repetitions of a single image tube.500

Image54

One thing you can do with tubes that is a bit different than with regular single images is that you can set the step and have the single image repeated and placed evenly along the way, either in a straight line, or when you draw freehand, like this:

Image56

and you can also overlap them if you set a smaller step:

Image57


2a- Tubes as series of images placed randomly

Another characteristic of tubes is the possibility of having several of them together. Some of them can have all different images and get placed, one by one, randomly on each click. Jasc and Corel have included several such tubes with the program. They are often grouped by types, since it makes more sense to have several autumn leaves, or pink buttons, or grass blades when you place them. Here is an example of randomly picked images (each item is placed where i click but they are randomly picked):

Image55

The randomness of this type of tube, combined with the adjustable step lets you create elements like this garland (available in my store):

Image58


2b- Tubes as series of images placed in a continuous manner

The previous uses of tubes are pretty simple and could be done with any set of png images, however, the “tube” tool has more potential when the images are created to be used in a continuous manner. In this case, they tend to create something very different. The individual images are often just part of something and their continuous placement will create something. As an example, here is a rope tube (very versatile tool!). Each of the

Image59

The top rope is the “finished” product with the default settings of a step of 1. On the bottom, i changed the step to 35 so you can see how each individual image is slightly different from the previous one so their sequential placement will create something else. Isn’t that neat? That is one of the most powerful characteristics of the PSP tubes.


3- Tubes as directional images

Well, this type of tube is my favorite and is, in my opinion, THE most powerful feature of the tubes. How good they will look depends on how many different pictures you have. The tool will place the images according to the angle of movement of the mouse. And the tube file will include many different images, oriented differently. One image will be oriented straight up, the next one will be angled at 5 degree, and the next one at 10 degree and so on. This will allow the pictures to seemingly follow the expected direction for it. Here is an example of a directional tube used:

Image53

And that is how all my directional tubes are created to make ropes, chains, tire tracks and zipper teeth!

So, if you didn’t know what tubes were all about, this must help you a bit. If you are a PSP user, play with them. As you can see, tubes are much much more than just transparent png images with a different name! Tubes are fun to use, and so versatile, especially since the tool comes directly with your PSP, and no need to purchase an outside plugin or such.

Have fun with them!!!

DigiScrap Campus – New lessons

set2-600

Since March, we have opened the DigiScrap Campus to give classes to scrappers and designers. Right now, only the classes for scrappers is available. The whole program will be of 12 units covering all the bases for using Paintshop Pro and scrapping pages.

This program can be good for new scrappers, now to PSP scrappers, or even for some who are already using PSP to scrap but feel they would like a refresher in addition to great new tips.

Each unit has 3 lessons so each set has 9 lessons. The lessons are in video format with a pdf handout. The first set of lessons addressed (1) layers and shadows, (2) alphas and fasteners (3) color tools and selection tools. Then, this second set covers (1) brush tool (2) text tool (3) ribbon/papers/shadow tricks.

Set 1 (Units 1-2-3) is available here.

Set 2 (Units 4-5-6) is available here.

You can also purchase the bundle (Units 1 to 6) for a saving of 20% off the cost of the two sets purchased separately.

Also, if you are CTing for a store or a designer, you might want to consider this course to help get the most out of your PSP. Designers, if your CT members are using PSP, you might want to encourage them to take this program too!