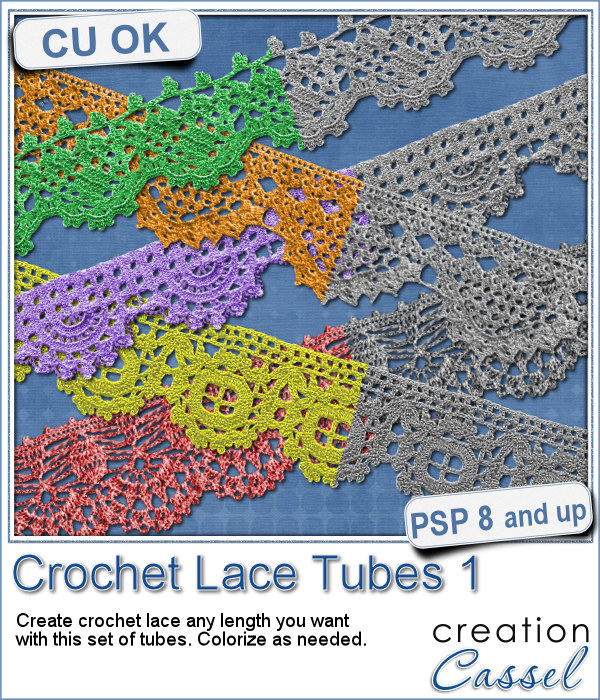
If you want to get the edges of a photo to be torn, it is fairly easy to do manually since the edges are straight. You can also find some standard size templates for those photos (like in the freebies below). However, if you want to have a torn edge around an element of a different shape, it can be a tedious task to do manually.
This script will use ANY shape and add a torn edge around it. You can also choose the color of the paper that will show on those edges. Even though it will often be white, you can pick ANY color. You can even be creative and use a gradient. Why not?
You can get this script in the store: Torn Edge 2
Do you want this script for free? Add a comment on this Facebook post (remember, add a comment, not just a Like!) The winner will be announced in the newsletter, next week. Not a subscriber yet? Not a problem. You can register here and it is free (and you only get one email per week).
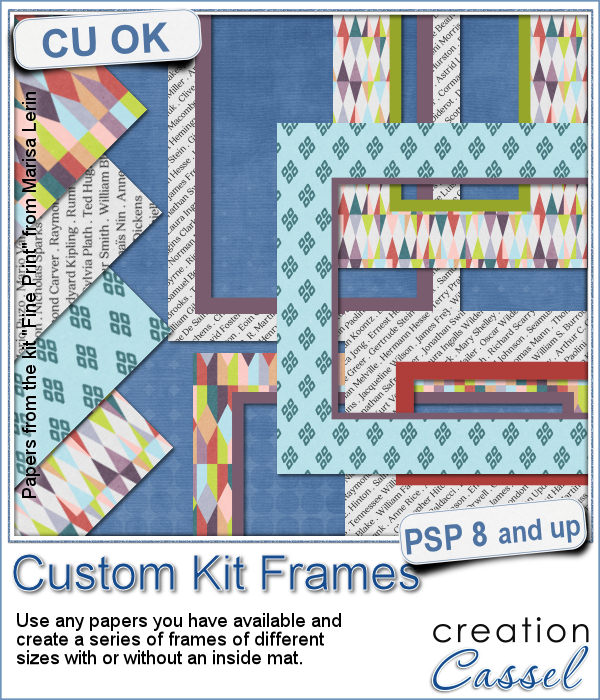
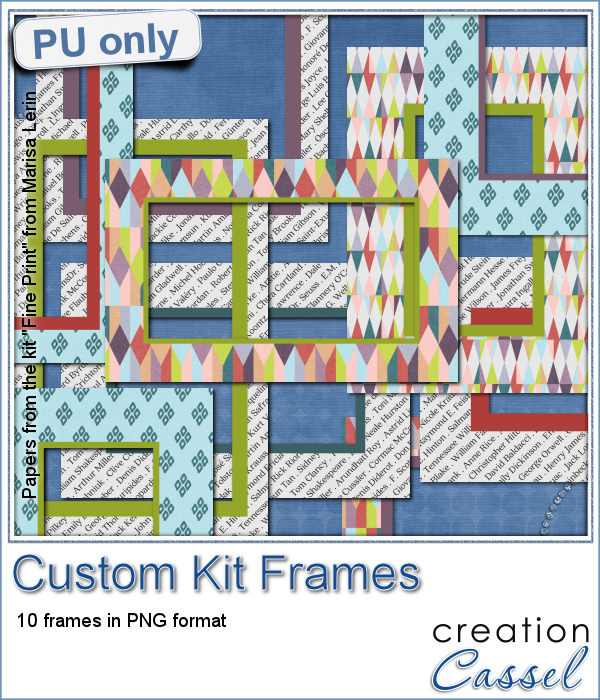
As a free sampler, i could have created a set of digits or an alphabet, but i thought of making a series of templates that you can use for your photos or your journaling cards. I created 4 templates with fairly standard sizes. Once the script was completed, i extracted the edges to add them as a new layer. That can now allow you to replace the grey layer by your own photo or card or paper.
There is no shadow, so you can also rotate them to be vertical if you prefer.
You need to be logged in to download this sample. You can either login, or register on the top of this page.

You have often seen bronzed busts or bronzed baby shoes. Those are "luxurious" elements. You can now add the same rich look to any element for your projects.
This week, I thought of making an alphabet but i thought that the bronze texture inspired me to create elements with the 12 zodiac signs. I used a font to create those designs (you didn't think i drew them myself, did you?)
Do you like the look of a nice "official" seal to put on your project but can't find one in the color you want? Or would you like to find one that has the name of your child, or the name of the city you visited, or the specific date of your last vacation?
Since February is coming, and so is Valentine Day, I decided to create a few seals that you could use either on scrapbook pages about your loved one or on custom card or design you might create for him/her.
If you have used the Word Cutout script, you know that it would only use the edge of the photo. However, sometimes, the edge holds some meaningful parts of the image and you would like to cut the words out of another location.
Using a black image, 4000x3000 pixels, i ran the script 3 times to add the individual words of "Live", "Love" and "Laugh". To make them even, i used guides before running the script, so my selections were always the same height. Neat trick!
Although it might be easy to create a simple puzzle with 20 or 30 pieces, it is a whole different story when you want to have hundreds of pieces.
Since this script is to be applied to your own photo, i thought i could create a little something using last week's script, the Painted Cardboard.
What do you like about incorporating ripped pieces of papers in a digital project? The rustic look? Maybe. But how do you go around getting those for your layout other than scanning them?
As a sample, i created 3 frames using this script. All three were made starting with a different gradient instead of a solid color. They are about 6 inches in the longest side so you should be able to get a photo in them.
Now, you can use your Paintshop Pro to add a fun line of puffy paint around an edge of a shape or a letter.
As a sampler of what you can get with this script, I created a set of digits in "white". You can easily fill them in with the color of your choice for a different look.
Sometimes, for the holidays, you need a little delicate touch. These charms are just what you need.
For the sample, this week, I created a double swag with the white snowflakes.
Adding holiday decorations is always fun, and even better when you do it digitally.
This week, for a sampler, I used several products from the store to create a decorated wooden window. I used the Wooden Window script, the Christmas lights and the Christmas strings.
How about adding some Christmas lights to your project?
As a sampler, I created several oval frames using 5 monochrome sets and one multicolored set.