If you like chocolate, here is your chance to get a sweet treat for your next graphic project. Whether you like white chocolate, milk chocolate or dark chocolate, you are in luck!
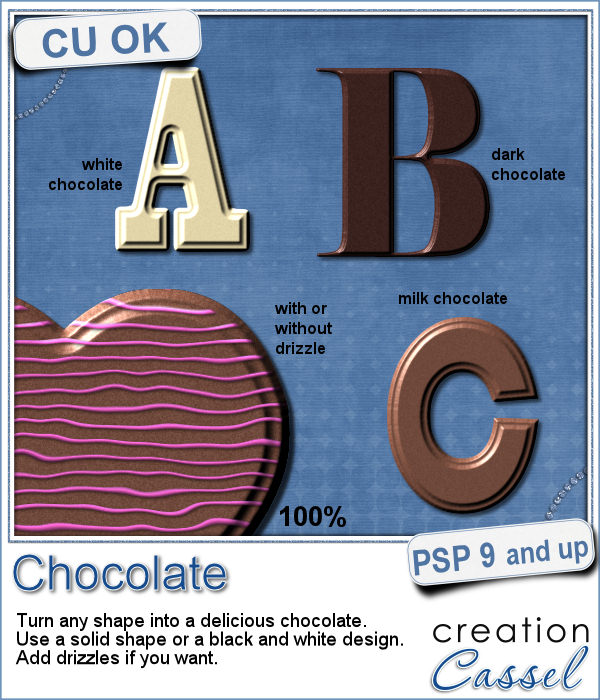
Now, with a script, you can turn any shape into a solid piece of chocolate. If you want to be fancier, you can use a black and white design and get an embossed chocolate piece.
And to add to the joy of the taste buds, you can add a decorative drizzle of chocolate of any color.
Get this script in the store: Chocolate.
In order to win this script, add a comment on this Facebook post telling us what is your favorite type of chocolate (remember, add a comment, not just a Like!) The winner will be announced in the newsletter, next week. Not a subscriber yet? Not a problem. You can register here and it is free (and you only get one email per week).
For a sample of this script, I used a few summer themed elements and ran the script with a milk chocolate flavor.
You need to be logged in to download this sample. You can either login, or register on the top of this page.

Although bottle caps might be a little thick for a traditional paper layout, you can layer as many as you can in a digital layout! But you don't have to use a boring, plain or typical bottle caps since you can now create them with a touch of your favorite papers, from any kit.

If you want some precious metal elements, you can create them with this script. It will take just about any shape and outline it in gold, silver or bronze, and then, will fill it with crystal in the color you choose (you can even pick a gradient for a great effect too).
As a sampler, I created this cute flower. The freebie includes the flower with the stem and leaves but also the flower alone.
Do you want to rely on the ready-made clips you can find with set colors, or design or create your own that you can customize with any color, gradient or pattern, any text, font or design that would perfectly match your kit, your layout or your graphic project?
For a sample of this script, I created a set of digits in a nice aqua color for the summer that is coming up (at least for the Northern Hemisphere). You can now write the date of your next vacation or family gathering.
It can be fun to convert a simple clipart into a beaded element to add to a themed layout. You can do that with this script which will convert ANY image into a set of beads, all fused together.
For a little taste of summer (at least for the Northern Hemisphere), I made these 4 adorable critters in beads art for you. Each of them is about 1000 pixels in size so you can easily size them down to suit your layout.
How would you like a nice juicy burger on your next graphic project page? What if you could have that hamburger in any shape you want, whether it is a square, a star or even a letter?
As a sampler, I created some fun digits that you can use to date your next barbecue pictures.
Are you always looking for original ways to add a date or other elements like a name or a location or even a special sentiment? This datestamp will be perfect for that unique look.
As a sampler, i created 7 simple datestamps, each with a day of the week. It is up to you if you want to add a date in the center, or a photo, or anything else.
This script will let you write name, titles, quotes or dates as if you were playing slot machines. It could also resemble those clock displays that rotate. Whatever effect you want to get, you can create it with this script.
As a sampler, I created 4 displays with the years 2015-2018. It might be a great way to date your layouts that you made in the last few years, or to date what you dream to accomplish next year.
If you want to create a rustic design, either as a background or an element, chicken wires might give you just that look.
As a sampler, i created this frame (using the Wooden Frame script) and added some wires behind it. I thought that you could possibly add some clothespins and attach various photos or objects, but you could also have a photo placed behind, or even cut the wires and make it even more "rustic".
Although you might like to have an even frame make of straight ribbons, sometimes, you might want something a little less "clean", and if you worked with sticky tape, scotch tape, washi tape and such, you know that you MIGHT, occasionally have some unevenness to them.
To let you "play" with this frame, i created another one using the same tape as in the initial preview. I tweaked the shadows on the ends and included those shadows in the download. Each piece of tape is left on a separate layer (with its own shadow) so you can adjust the size of the frame. It has been made for a 7x5 photo, but if you want to use it on a smaller picture, you can just move the pieces inward.