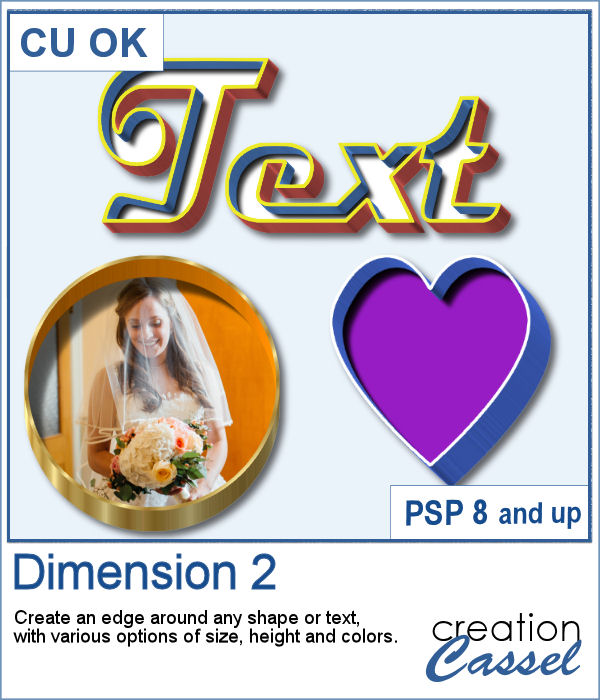
The Crochet Lace edges have been so popular in the past that I am back again with another set. These are extracted photos that needed to be edited to make them really seamless.
This time, however, not only you get tubes to be placed in a straight line, but you also will have 2 individual tubes that are directional, so you can place them around a circular shape, or along a curved path.
Grab this set of tubes: Crochet Lace Edge 3
(do you want more? Let me know and I will work on other laces!)
In order to win these tubes, add a comment on this Facebook post telling us where you would use these twine ropes on your next project (remember, add a comment, not just a Like!) The winner will be announced in the newsletter, next week. Not a subscriber yet? Not a problem. You can register here and it is free (and you only get one email per week).
As a sample, I wanted to show you how the two directional lace tubes can be used to create circular elements.
I used both tubes to create a simple frame that you can combine with other elements like beads, sequins, papers, etc.
You need to be logged in to download this sample. You can either login, or register on the top of this page.

You might have those lights, at home, to decorate your windows or your tree, but now, you can do the same with your digital projects (and no electric cost).
As a sample, I create another swag for the Holidays, made exclusively of tubes from PSP or from the store. You might recognize the light strings from last year (none of the light is burnt!).
In traditional paper scrapbooking, there are tools that allow the user to punch the corners into intricate shapes. They are great if you want to use the same size for all the projects you do. In digital scrapbooking (or card making), you now can use similar "punches" simply by using the eraser tool and those fancy "corner punches" shapes. This is the fourth set of those brushes.
As a sample, this week, I created this fun frame (and matching template so you can use it with other colors/papers/effects).
Although it is easy enough to purchase extracted flower petals, it is tedious to place them where you want, and even more if you want to scatter them randomly.
For a sample of these tubes, I created two frames made of petals. Each frame is almost 3600 pixels wide, so you can resize it as you need it.
If you need to have some butterflies on a project, you might be able to extract photos of realistic ones, but maybe you would prefer to have some that perfectly match your kit, or your project.
For a sample, I ran the script using the Birthday kit from Marisa Lerin, and tweaked the resulting butterflies to give them some 3D looks, in addition to changing the color of the body and adding an inner bevel.
Did you have a peek at the Layered Flowers script from last week? You could create a set of layered circles, but this week, you can create a set of layered papers cut into various shapes with points. Although you can decide how many points each shape will have, the script will randomly create those shapes to give you a unique result every time.
For a sample of this script, I used papers from the bundle
If you had some traditional papers, you might want to cut out some circles and layer them to create a "flower" in the color of your kit or project. Doing that is tedious with paper, but also very tedious with digital ones.
For a sampler, I ran the script with a few papers from a kit, Happy Birthday, from Marisa Lerin. You can get the whole kit for free, HERE.
Scallops can be a fun design but other than getting a simple template that is a single color, you are limited in the options available. This script will allow you to create a variety of scallop outline patterns that will be either seamless or a full sheet of the size of your choice. Using that outline, you can add a background of any color, or even using a gradient.
Since this is October, you might plan either a Halloween party or expect to take some Halloween pictures. This set of two seamless scallop tile will be perfect to create your paper or background. Since they are in .png format, you can add a custom color behind it.
Do you need the look of burnt edges around a particular element but other than doing it yourself, it seems really hard to find the right shape, or the right font or the right size for your own element?
As a sample, this week, I created a few paper pieces that were run through the script. I created those shapes simply with the freehand selection tool to give them a random shape right from the start. Of course, the script would burn the edges but I wanted something a little different.
How would you like to get a fun, unique label to use as a title or tag on your project? If you are looking for some ready-made ones, it might be hard to find the perfect one, with the text you want, or the size you want.
As a sample of what can be done with this script, I created 4 labels with the seasons for you to use. They are 600 pixels in height so you can size them down if needed. If you have a cutting machine, you can also use it to embellish your paper projects.