If you want to create a rustic design, either as a background or an element, chicken wires might give you just that look.
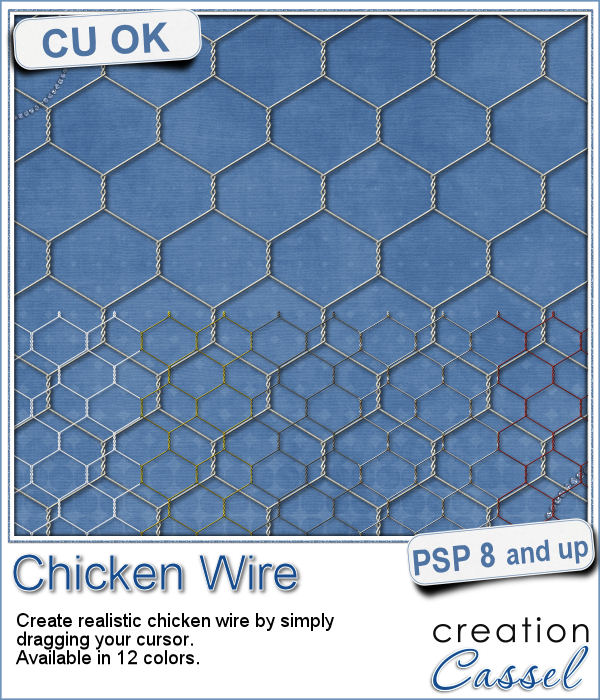
You can use ready-made chicken wire pictures or vector designs, but here is a great tube that you can shape however you want, with just a draw of your cursor. Make it straight or not so straight, depending on what you want.
You get 12 different "colors" of wires with this set, so you can be even more creative than with regular ordinary wire.
Get this set in the store: Chicken Wire tubes.
In order to win this set of tubes, add a comment on this Facebook post telling us of one creative way you can think to use chicken wires in a digital project (remember, add a comment, not just a Like!) The winner will be announced in the newsletter, next week. Not a subscriber yet? Not a problem. You can register here and it is free (and you only get one email per week).
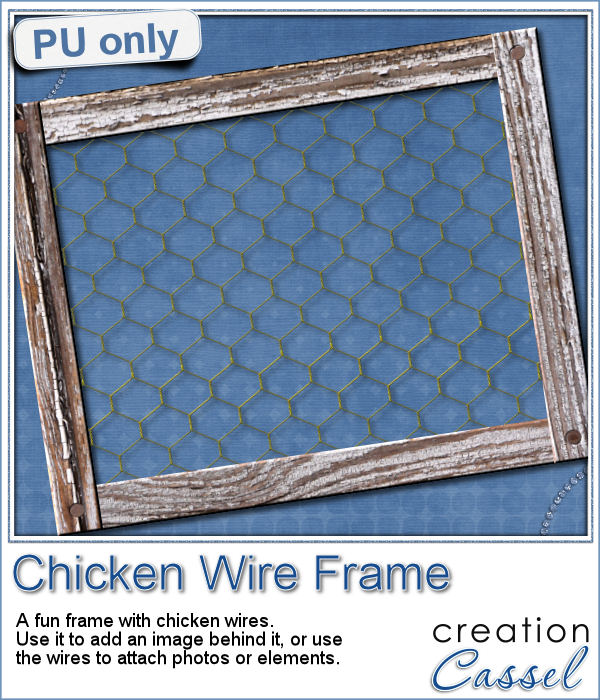
As a sampler, i created this frame (using the Wooden Frame script) and added some wires behind it. I thought that you could possibly add some clothespins and attach various photos or objects, but you could also have a photo placed behind, or even cut the wires and make it even more "rustic".
It is a png format so it could be used in various graphic programs.
You need to be logged in to download this sample. You can either login, or register on the top of this page.

Do you like to use ribbons in your projects? Straight ribbons are easy to find, right? Not always. In fact, it is possible to get some greyscale ribbons and colorize them to match your project, but some colors are quite hard to get right (like the yellows). In addition, the ribbons you get would always be the exact same kind, with the same size, same shape, same light/dark areas, etc.
I went a little crazy with the freebie, this week. I found a fun color palette that seemed nice for a spring theme (sorry for our Aussie friends who are heading toward winter, but spring will be back in 6 months!).
Although you might like to have an even frame make of straight ribbons, sometimes, you might want something a little less "clean", and if you worked with sticky tape, scotch tape, washi tape and such, you know that you MIGHT, occasionally have some unevenness to them.
To let you "play" with this frame, i created another one using the same tape as in the initial preview. I tweaked the shadows on the ends and included those shadows in the download. Each piece of tape is left on a separate layer (with its own shadow) so you can adjust the size of the frame. It has been made for a 7x5 photo, but if you want to use it on a smaller picture, you can just move the pieces inward.
Have you ever tried to make a seamless honeycomb pattern? It is a bit challenging because you can't create a square tile that will be seamless. It has to be rectangular, and with the various color combinations, the rectangle can't always be the same size. That is a headache, and that is probably many people wanting a honeycomb pattern had to rely on pre-made templates. But that is still limiting, don't you think?

As a sample of what this script can do, I started with a palette of 3 spring colors: yellow, pink and purple, and generated four fun patterns for you. They are full size papers so you can cut them out, use them as frames, or just as a background for your next spring theme project.
Using slats to showcase a photo makes for a fun and unique effect. However, creating slats manually is tedious, especially if you want them even or following a particular outline.
As a way for you to play around with slats (in case you never tried before), I made a large template (about 3000 pixels wide). It is in png format so you can probably use it in most graphic programs.
Do you want to add a fun edge around your element? Brushes might be one option but you can't combine brush strokes. However, with a font, you can alternate characters as you want to create unique designs.
Do you want a closer look at these edges? I created 2 mats edged with some characters from this font. One is a rounded square and one is a circle. You can colorize those mats, or if you lock the transparency, you can "paint" on them, even with a paper!
If you like jewelry, you will love this script to create gold or silver elements.
As a free sample, I created some "tags" illustrating some common life events (first day of school, first car, graduation, new baby, new house, trip/retirement) that you can use for your various projects.
Slats are a fun way to display images as if we had multiple frames, but if you want to add a word or phrase, it makes for an even more custom display.
As a free sample, i converted the slats used in the preview into a template. You can use it for your own photo. Make it sideways if you prefer. Cut the slats if you have a wider image that is not as high. Be creative!
Do you like the look of a nice "official" seal to put on your project but can't find one in the color you want? Or would you like to find one that has the name of your child, or the name of the city you visited, or the specific date of your last vacation?
Since February is coming, and so is Valentine Day, I decided to create a few seals that you could use either on scrapbook pages about your loved one or on custom card or design you might create for him/her.
If you have used the Word Cutout script, you know that it would only use the edge of the photo. However, sometimes, the edge holds some meaningful parts of the image and you would like to cut the words out of another location.
Using a black image, 4000x3000 pixels, i ran the script 3 times to add the individual words of "Live", "Love" and "Laugh". To make them even, i used guides before running the script, so my selections were always the same height. Neat trick!